An EXCLUSIVE Interview with April Orenski herself, Enisha Brewster.

You know her from Forward Unto Dawn, the Halo miniseries that premiered in October, 2012. She played the leader and senior cadet of Hastati squad, April Orenski. It is my pleasure to bring you a HaloFanForLife.com exclusive interview with Enisha Brewster.
(If you represent another website, please only link back to this article, do not copy/paste in whole or part. Professional courtesy, please. This is my exclusive.)

And now, on with the interview:

Enisha Brewster headshotHFFL: Hello Enisha, thanks for agreeing to do this interview with me.
Enisha Brewster (EB): My pleasure.

HFFL: According to your IMDB profile, you’ve been acting for 3-4 years now. Is that the case?
EB: I’ve been acting since I was 10, but I began my film and television career just 3 years ago.

HFFL: Is there anyone in particular that motivated you to go into acting?
EB: The first person to put a script into my hands was a sweet woman named Reba Kendrid in Houston, Texas. I was hooked from that day forward. A couple peers in college motivated me to pursue a career in acting well before I’d made that decision for myself. And a casting director in Atlanta encouraged me to consider a career in TV and film before I’d even given it a thought. I am ever grateful to each of them.

HFFL: Who in your life, famous or not, is an inspiration to you, and why?
EB: I am inspired by humanitarians like Kerry Washington, and great women like Phylicia Rashad, and great artists like Geoffrey Wright. My family inspire me every day of my life. 
HFFL: Family can definitely inspire!

HFFL: You played “April Orenski” in the Forward Unto Dawn mini-series. Have you done mini-series in the past? If so, which ones? Were any sci-fi related?
EB: Forward Unto Dawn was my first mini-series and my first sci-fi project ever.

HFFL: Forward Unto Dawn was shot in Canada. Was that your first time acting in a production outside of the United States?
EB: Yes. We shot Forward Unto Dawn in Vancouver, a lovely city with even lovelier people.

HFFL: With Forward Unto Dawn being a hit, are you aware of your now lifelong association with Halo? Would you like to reprise your role as Orenski if offered that opportunity?
EB: That never ceases to excite me! I would be happy to reprise my role as April Orenski given the opportunity!

HFFL: Where/What would you like to see Orenski become?
EB: A loaded question 🙂 I have some ideas, but I’m going to defer to the creative geniuses at Microsoft on this one.
HFFL: I have some ideas as well. Admiral Orenski!

HFFL: You recently were nominated for an EMMY for your role as Orenski. How and when did you find this out and what was your reaction? (By the way, congrats and I truly hope you win!)
EB: The official nominations will be announced on July 18th, 2013. It would be a huge honor to be nominated. At this stage I have been submitted to be considered for an Emmy Nomination–which itself is a huge deal!

HFFL: Are you at all like Orenski? If so, how, and if not, what separates you from her?
EB: I think April Orenski and I both have a strong sense of duty, commitment, and responsibility to the things and people we hold in high regard, but April is far more stern and way less empathetic then I am. She is military. As much of a tomboy as I once was (and still am in some sense), I love a little beauty, a little glitz, a touch of glam every once in a while.

HFFL: Are/Were you a fan of Halo? Did you know of Halo before your work on FUD?
EB: Honestly, I wasn’t very familiar with Halo before being cast. I had to get the scoop from my brothers. I didn’t start to understand how huge an opportunity and franchise Halo is until I heard their excitement. 

HFFL: Are you a Gamer? If so, have you played any of the Halo games? Before your work on FUD?
EB: No, I can’t say that I am a gamer. But I have a sneaking suspicion that will change very soon.
HFFL: Well, I hope you do get into gaming and feel free to add me as a friend on XBOX when you do. My Gamertag is: HaloFanForLife1

HFFL: Did you have any surreal moments on the set? If so, please expound upon this. For example, seeing Master Chief for the first time.
EB: Seeing MC for the first time was indeed a surreal moment! Daniel Cudmore, who embodies him in Forward Unto Dawn, is himself a tall man with a great presence. Seeing Daniel in full armor as Master Chief for the first time was like meeting a superhero. My heart started racing and my eyes must have been a mile wide.

HFFL: What projects do you have up and coming?
EB: I can be seen in the 12th and 13th episode of Perception this season, back in uniform and barking orders! The episodes air in September on TNT.

HFFL: Thanks again for your time Enisha. It continues to be my honor to talk with you. I wish you all the best in your future acting career. Should you win the EMMY, don’t forget we little folk who are pulling for you!
EB: Thank you, Sal!!

You can find news of Enisha at her official website: enishabrewster.com
As well you can follow her on twitter at: @EnishaBrewster

-Sal

The making of Halo 4: Forward Unto Dawn CG pre-visualization.

The following article was sent to me by the writer himself: (As per requested, I’m removing the bulk of the article and replacing it with a synopsis of the article. To read the whole article, please go to the source link.)

The making of Halo 4: Forward Unto Dawn
By Ian Failes (Synopsis/Paraphrased)

Microsoft’s experimental Halo live-action miniseries Halo 4: Forward Unto Dawn has received over 50 million views since airing online last year. The five ‘webisodes’, produced by 343 Industries and directed by Stewart Hendler, were shown on MachinimaPrime’s YouTube channel and are now available on DVD/Blu-ray.

Sniper fire

In one sequence from the series, Master Chief Petty Officer John-117 assists the United Nations Space Command in fending off a sniper attack. The attack was filmed at the Simon Fraser University Library, a location, like others in Forward Unto Dawn, that Arc measured and photographed extensively.

Shootout_previs

In some locations, such as the forest seen in the later episodes, photogrammetry proved difficult with the complicated tree surrounds.

Production filmed the sniper attach based on detailed storyboards and previs.

“The rule of thumb was that the good guy’s weapons were treated as if they were typical gun powder weapons, the bad guys were more sci-fi looking.”

Shootout_final

A military advisor on set also proved extremely helpful. He referred to Master Chief as a ‘weapons platform’ and suggested that Chief wouldn’t fire indiscriminately. …those subtleties really make a difference.”

Not so welcoming wagon

Arc’s environment work included shots of a space elevator, and its destruction by Covenant vessels in one of the eps. Interior shots for the elevator were made of greenscreen hallway plates and CG geometry, with exteriors rendered as matte paintings and set extensions. …when the elevator actually fell apart we turned the piece off in animation and effects took over to trigger the crumbling.

elevator

Delete the Elite

One of the creatures brought to life by Arc for Dawn are Elites, Covenant warrior aliens.

elite

Hunting the Hunter

Even more imposing creatures were the fierce Hunters in a fight against Master Chief. On set, an 11 foot pole stood in for the Hunter to provide camera and actor eyelines.

hunter

Rendering Master Chief

In only a few shots, Arc was required to create a CG Master Chief. A live action practical suit built by Legacy Effects was used for most shots.

…capturing the majority of that material in camera goes towards the believability of the digital work…

chief

End Copy/Paste.

Wow, that was a cool article. I love to see how things are made. Thanks again to the writer of the article for the link, Ian Failes.

-Sal

McFarlane Forward unto Dawn Master Chief VS Hunter resin statue!

I want to thank readers “Will” and “James” for offering pics of their respective statues. Turns out, I didn’t need them after all…I was surprised beyond belief to receive one. The detail on how I received this will remain a secret (let the conspiracies begin…lol). Point is, I got this from UPS the other day and WOW is it a beauty!

Without further ado, here are the pics!

See, what did I tell you? Just AWESOME. Detailing is amazing, paint applications is superb. The heft of the piece is apparent. Given the VERY limited nature of this piece, I’m EXTREMELY happy to have one.

This is sure to be a Holy Grail of Halo. There are already people selling these on eBay for upwards of $700 and people are buying them for that much. WOW… I’m NEVER going to sell mine. If I had to sell off my collection, this would be one of two pieces I would forever keep.

I give this an emphatic 10 out of 10 medals. Even with the slight issue of two of the spikes, it’s still nearly perfect and for that it deserves a review score reflecting that. (Oh, I forgot to note that the two top front spikes aren’t as securely fastened as the others since they do not have metal pins to keep them in place like the other spikes do.)

-Sal

Forward unto Dawn Graphic Novels now in PDF format!

I have been asked by several readers about creating an easier download for the Forward Unto Dawn graphic novels. I’ve had it ready for awhile and was going to post this over the weekend. However, something came up that accelerated those plans.

So without further ado, here are each Forward Unto Dawn graphic novels in PDF form, AND if you want them ALL in one PDF, click and save the last link. Right click and save as always.

Forward Unto Dawn Graphic Novel 1
Forward Unto Dawn Graphic Novel 2
Forward Unto Dawn Graphic Novel 3
Forward Unto Dawn Graphic Novel 4
Forward Unto Dawn Graphic Novel 5
Forward Unto Dawn Graphic Novel 1-5

I would ask you not to repost these, but rather link back to my blog. Should you repost, please give me credit as: Designed by Sal Salerno of halofanforlife.com

Enjoy folks and look for the Forward Unto Dawn graphic novels in PDF form in just a few short minutes as well!

-Sal

Mega Bloks Forward Unto Dawn set: Part 6 Stickers, Final Assembly and extra parts, OH MY.

SO now we come to the end of my now 6-part review of this awesome set. I really encourage everyone out there who wants a piece of Halo history to get this set. Yes, it’s $250 and YES, it’s SO worth it.

So here we go with the final round of pics:

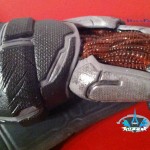
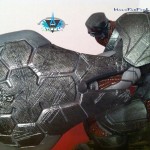
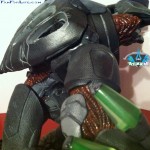
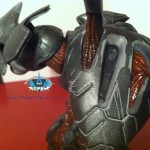
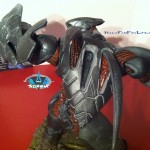
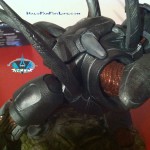
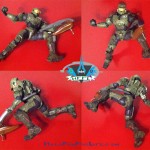
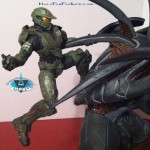
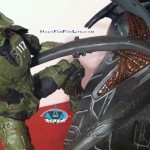
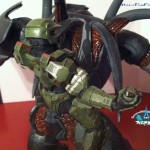
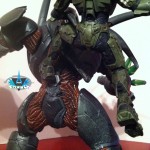
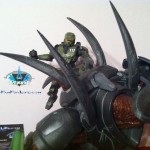
Besides the Master Chief minifig, we also get a Blue Storm Elite (only previously available as red in the Halo 4 Warthog set), a UNSC officer – FIRST time available (the arms and legs are the same as the technician), and of course the technician which was only available previously in the Countdown (or Sabre) set. The BR shown is included as well and is meant for Master Chief. The blok with the number on it is there for the batch/lot number in case of a recall.

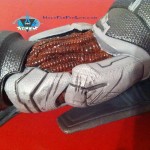
I really like these extra minifigs. I would love to have a few extras of the elite. It goes without saying that having a small army of technicians would be awesome and a few extra officers would be great too. Unless they are released in future sets though, I’ll have to be satisfied with the ones I do have.

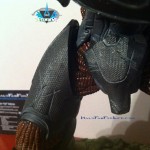
Here is the wing UNSC sticker. Now on the box it’s shown close to this position, while in the directions is very close to the front of the wings (in the pic that would be to the left of the wing). I happen to like it near middle as that’s closer to what it was on the original ship from Halo 3. However you choose to place this is your decision, so don’t let anyone detract you form your desired placement.

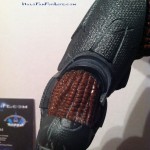
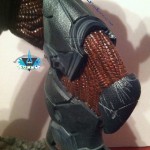
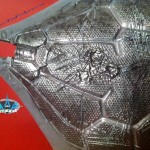
Here we see some stickers near the mid section of the ship.  MEGA was kind enough to cut the sticker on the left so that when the ship is put together it fits with the other portion of the sticker from the front half.

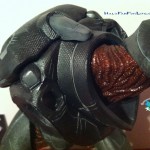
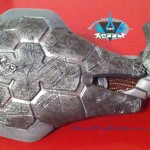
Some of the stickers at the front section of the ship. They add a nice touch to the ship without being obtrusive or overpowering to the rest of the model.

So now we come to the part where we see how the ship is fit together from it’s two main halves.

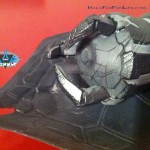
First you lift off the two roof panels by the midsection from both halves. As well, you’ll need to remove the hoses or they’ll get in the way of the ship being assembled.

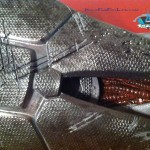
Here you can see where it appears that several pieces will slot into the other half of the ship. Notably the smooth tiles near the middle of the pic actually do slot into holes that are part of the construction of the front section. As well there are two pegs that click into other holes to help keep the ship together. A very well done and thought out design by MEGA.

Here’s another view closer up of those holes and pegs that come together.

Here’s where the ship comes together. You can also see the sticker that was neatly cut by MEGA and how it comes together as well.

Note in the pic above the 1X8 plates that have been added. These too help in the connection of the halves. Surprisingly that’s all that is need. Those two, plus the pegs previously seen. Of course I wouldn’t go trying to pry them apart or carelessly carrying the ship around. But for the purposes of display those are all you need to keep the ship together.

Fit the roof panels back on. By the way, I suggest taking them all off then start with the front one and work you way toward the back. It can be a tight fit with those middle two, especially with stickers applied at the front of the back half.

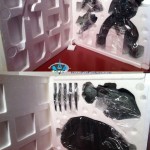
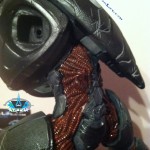
In the previous three pics I left the roof hatches deliberately open so you can see just how dark it is in there even with the hatches open.

Now for the finished result! (Be sure to click the pic for the larger version!)

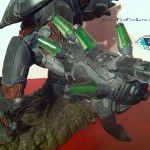
Isn’t she a beaut! I have to say I am SO impressed with this build. MEGA really knocked it out of the park here. So many added pieces to the sides give it great character. The main structure of the model is VERY sturdy. The minifigs are welcomed extras as are the MANY gun accessories. This is one impressive building block model.

Here are some stats I got during the build:
Build time: 5 hours sorting pieces ; 10 hours building. Not too bad for a model of this piece count.
Size: over three feet long, including the front antennae.
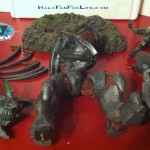
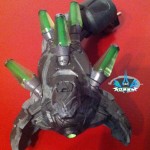
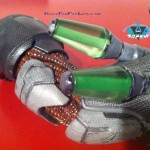
Weapons and accessories: 14 guns 1 radio back pack.
4 Minifigs

If you want any other stats on the model, just shoot me a reply below or e-mail me at [email protected].

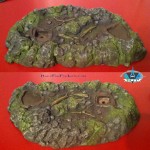
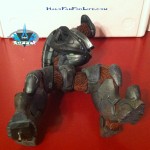
As always, MEGA allows for extra pieces in their models. This set was no different. In fact the allowed for so many extra pieces that I was able to build something I think was cool…

Above are the leftover pieces I had.

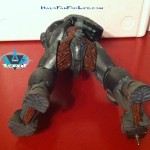
So I went ahead and built a mini Forward Unto Dawn with them!

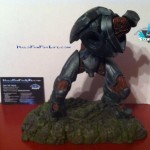
And finally below the mini model with the full sized one!

So that’s it. The Forward Unto Dawn from Halo 4. It’s a masterful piece and any Halo fan should be proud to own it.

It’s exclusive to Toys R Us for $250. Now before I go, I need to give a shout out to Toys R Us. When I first pre-ordered this back in July, I pre-ordered at the “Buy One Get One Half Off” price. I made sure to note that I wasn’t going to be charged on the credit card for the transaction until this shipped. However, I was charged which ended up making me default on other transaction for a total of $210 in fees. While the initial charge form TRU was put back into the account, the damage had been done from those fees. This is partly documented on the blog during that time.

What was good was that I was put in contact with one of their corporate customer service persons. He fixed this by calling up a local store that had it in stock. From there I just need to go pick it up. So in essence I got this for $40+tax less than retail. Also, he is to send me a gift card for $125 (half the amount for the second ship I would have got). I’m still waiting on the gift card and will let you all know when I get that. In fact you folks will benefit from it as I plan to buy Halo stuff with that gift card for prizes for contests on the blog.

Suffice to say that I’m glad the TRU made good on their end so far and hope they complete what we agreed upon as it will benefit the blog members too.

Back to the set for a final thought. This is the FIRST in MEGA Bloks “Signature” series. We can only hope that they release at least one new Halo signature series ship a year. I’m hoping for the UNSC Infinity next. Then possibly a Covenant ship. The price is up there, but again, for what you get, it is SO worth it. I’m COMPLETELY satisfied with the set!

THANKS MEGA!
-Sal

Mega Bloks Forward Unto Dawn set: Part 4 front section

As promised here is the next section in the Mega Bloks Forward Unto Dawn signature series model. This section took about 2 and a half hours to complete. I was missing just one piece, though thankfully not integral to the build. Technically it’s three pieces those as the two others I had were 2X1 slopes of the higher angle rather than the smaller angle as shown in the directions (these two will be pointed out in the next article). Aside from this, the build has gone on flawlessly and thankfully for the rest of the build there were not other issues as well.

Now, on to the pics!


The lower prong of the front section is started. Note the repetition here as in previous sections. It really helps in the strength/stability of the model.

The lower prong’s base shape is essentially complete. Now for underside.

I really like how Mega used reverse slope pieces here. And nice BIG ones too. Again stability.

And now for some greeblies and walls topside!

Yet more greeblies and the walls of the armory start to really take shape.

The armory panels to be inserted. 3 SMGs, 3 Magnums, 5 Assault rifles, 3 Frag Grenades, a Radio backpack, and finally the sticky detonator round out what you see here. Also included are a Covenant Plasma Rifle for the Elite and a grey BR for Master Chief.

A couple of views of the armory. Really nice job here on Mega’s part. Good bit of weapons. I do wish the had more detail, like the Sticky Detonator. But really, these guns will just stay in their lockers anyway, so I’m fine with them being black. It likely helped to keep costs down too.

The top prong is built similarly to the bottom one. Note the long bloks extending form the right. These will be placed on the walls of the armory to position the prong and add stability.

Okay, now here is where Mega could have chosen to cheap out, but they DIDN’T! Kudos to them for adding greeblies to the bottom side of the top prong. As seen in the next pic, it really adds character to the empty space between the prongs. Here is where I was missing one part. Look to the top middle just right. There is a 2X1 plate in the two semi curved sections. Now look at the bottom. It’s not there. That was one of the parts missing. Again, not essential, though I’ll be asking Mega for that part.

If you can see it, there is a clear 2×2 blok near the front of the prongs that ties them together. It adds stability, while not interfering with the look.

Here’s the top side assembly of the top prong. Note on the right side of the pic is where a soon to be built removable section of the roof will be housed.

The front shot shows were some neat attachments will be placed….in the NEXT part of the build!

Now, does this look a bit boxy at this point? Sure, but that does NOT tell the full tale. Come back and see the next part where I build the roof and side panels. Those really flesh out this portion of the ship and make it go from being boxy to being smexy!

-Sal

Mega Bloks Forward Unto Dawn set. Part 3 Aft Roof

Okay, so Thanksgiving slowed me down a bit on this project as I was away for a couple of days. Now that I’m back, I’m all over the project. In fact I’m literally over with the project. It’s finished! Originally I had planned on 4 parts for this project, but I think I’m going to stretch it to 5 or 6 parts now that I see the amount of photos and description this model needs.

So here is the third part. The Aft Roof.

Above shows various panels built to be attached to the side of the aft part of the ship. Some really cool parts here. I especially like the ones with the clear blue panels.

Here are those same panels attached. They REALLY help to flesh out the sides of the ship.

Now we have the wing assemblies. These really show the camo effect of the bloks. I actually wish this would have been with solid color bloks than camo effect. No need for camo in space, imo.

The wings attached.

This is the start of the top part of the aft portion of the ship. It includes what will be the “bridge” of the ship. All those “arms” you see at the bottom will have roof panels snapped into them.

The bridge assembly further along. I like the way MEGA used their curved parts and wasn’t afraid to have them built inverted. Nice touch actually!

Here are the panels I mentioned. Easy to build. They are mirrored from side to side. I actually built these at the same time instead of one side at a time. I just mirrored the panel I built to make the other side’s panel. Very easy to do.

They’re now attached to the finished bridge section. This already looks like a spaceship itself…

Here it is placed on top of the ship. What’s cool is how it attaches. It’s NOT permanent. And that’s a good thing. It makes it easy to get to the inside of the ship at any time.

The next spine section. This one is in front of the bridge spine section.

The panels for that spine and attached. I like the little gun mounts. However, be careful as the hooks that attach to the sloped bloks aren’t tight, so you can easily knock them off if you’re not careful.

Added to the ship and a cool front view showing the ship in perspective.

And from the rear. Hmm, I’m thinking I may have to put some fiber optics in this ship. It would make it look VERY cool, especially in the dark.

And here it is from the top. Just look at all that great detail!

Okay, so at this point you COULD actually stop. It just depends on if you want to have the WHOLE ship or just the part that is in Halo 4. The only thing you’d need to do now is add the stickers.

But I can’t do that. I have to complete the ship. So on to part 4 where you’ll see the front section of the ship come together.

-Sal

Mega Bloks Forward Unto Dawn set. Part 1: Unboxing and sorting.

Normally when I do a review for a Mega Bloks set, it’s all in one article. However, given the size of this set and the time it’s going to take to get it built, I thought I’d go a different route for this one. For the next several days until I get the set completed, I’m going to be posting articles detailing the build process of the amazing set.

Up first is the unbloxing (yes I meant to do that, LOL) and the sorting of all the pieces.

This box is massive. Note the handle on top of it. It’s needed believe me!

A shot of what’s on the back of the box.

As you can see from above, when you first open the box you are greeted to some very nice interior artwork as well as the THICK instruction manual.

When you lift out the manual these 4 shoesized boxes are underneath waiting to be taken out.

See, I told you the instruction manual is thick!

On the back of the manual you have this fantastic compilation artwork of recent sets. It’s almost identical to the larger poster that was given away at FanFest in Toronto earlier this year.

The above three pics show three of the boxes contents. LOTS and LOTS of bloks!

And finally for this part are the sorted pieces. I had to photoshop two photos together to get these all in one shot.

As you can see I like to be a bit organized. I stack the same pieces together 10 high with leftovers in a smaller stack. Also, note the orange tabs on the parts list. I do this with very large sets like this.  What I do is catalog the parts against the parts list to make sure I have the amount is specifies. By putting a tab down on the part it lets me know it’s been cataloged. There are two more pages of parts and I did this with those as well.

Already I’ve spent 5 hours on this and that was all just in the unboxing and sorting…

I’m loving it though!

Stay tuned for follow up articles showing the build in progress!

-Sal

Forward Unto Dawn (unofficial) Graphic Novel: Episode 5

Friday a week ago I brought to you my 14-part review of the fourth episode of “Forward Unto Dawn.”

Now I present the last of the episode graphic novels, episode 5. There will be a six novel. That will be in December though. It will have the extras as seen on the DVD/BR as well as some other goodies from the series.

Feel free to download these as they are FREE. If you repost this anywhere, PLEASE give me credit as: Designed by Sal Salerno of HaloFanForLife.com
And please link back to my original post here.

This has been a fun endeavor for me. I’ve enjoyed making the graphic novels and I hope you’ve found some entertainment from them as well. Through this process, I’ve learned a bit about making graphic novels, picked up a couple of new tricks in Photoshop, and had some fantastic feedback from you good folks as well as cast and crew of the actual production of Forward Unto Dawn. My SINCEREST Thank You to all!

Now to the graphic novel. Click on the first page. When the new window loads up, click the image to get to the next page, etc…

My Forward Unto Dawn episode 4 graphic novel on HaloWaypoint.com!

Fan-made Halo 4: Forward Unto Dawn Graphic Novel: Part 4

Woot, featured right on the homepage! Thanks VERY much to BS Angel for posting this as well as the first 3. Would you believe I’m not done with episode 5 yet? See there was a little something that happened earlier in the week that kind of took my time away from finishing the graphic novel. I’ll give you ONE guess what that is…

So, to make sure I finish this, I’ll be working on episode 5’s graphic novel today and have that available on the blog.

Thanks to all that have said good things about the graphic novels. I’ve enjoyed doing them and will complete the series today. Then it’s on to Spartan Ops the graphic novel. I just wish we had theater for Spartan Ops as I’d LOVE to be able to include gameplay pics in the graphic novels.

-Sal


Forward Unto Dawn: Master Chief Vs Hunter Gallery

For those that missed out on ordering this statue (it’s sold out now), here is about the next best thing, the official pics from McFarlane.

Small consolation I know…

Isn’t this a beauty though! Great detailing and paint application.

If any of you did manage to order this, when you get it, take a bunch of photos and I’ll feature it here on the blog.

-Sal (HFFL)

Forward Unto Dawn part Graphic Novel halfway done.

I’ve got the images edited. Now need to lay them out in the graphic novel and then add text and text bubbles.

I pared down the 429 images to exactly 343…(Just worked out that way) Though I may decide to delete others along the way, so that total may not be accurate at the end.

Anyway, with less than one day left until Halo 4, I’m racing to get this done. I’ll be working through the night to get it as done.

This one is likely to be even bigger than part 4’s graphic novel was.

-Sal