
Okay, this set isn’t new per say, as it’s been out at retail for some time. However, it is the first time I’ve purchased the set, so it’s new to me from that perspective.
![]()
Mega Bloks Blue Series Falcon: Set #97204
Technical Specifications:
Build Time: 20 minutes including sorting time, 2 hours build time.x
Set Piece Count: 450
Minifigs: Blue Air Assault Spartan, Blue Grenadier Spartan (Blue versions of Kat and Jorge)
Weapons: Magnum, Detached Turret
Accessories: Large Backpack (for Grenadier Spartan
Price: $40 UK Exclusive, though it comes in stock on Amazon once in awhile.
Special Features: Rotors spin/pivot; cockpit opens/closes; side turrets have multiple points of articulation; from underside turret rotates and pivots up/down; slight up/down pivot of underside front landing gear.
And on with the pics! (Click pics to make BIGGER)
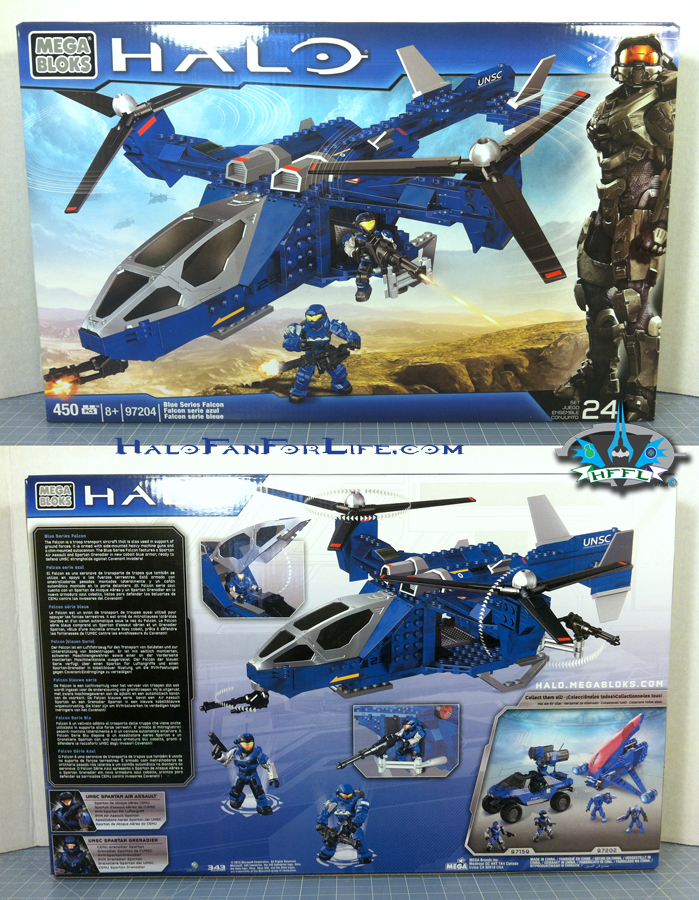 The box design is very “clean”. The front shows the set nicely, while the back displays it again and gives you some additional info, via text bloks.
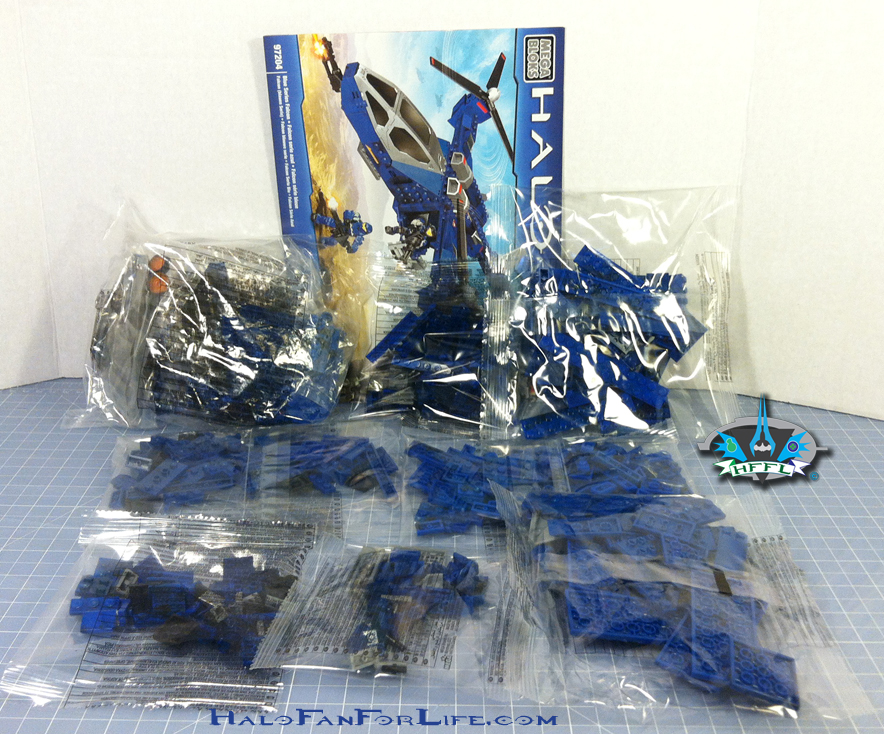 These are the contents of the box. The bag at the upper left has a couple of smaller bags within.
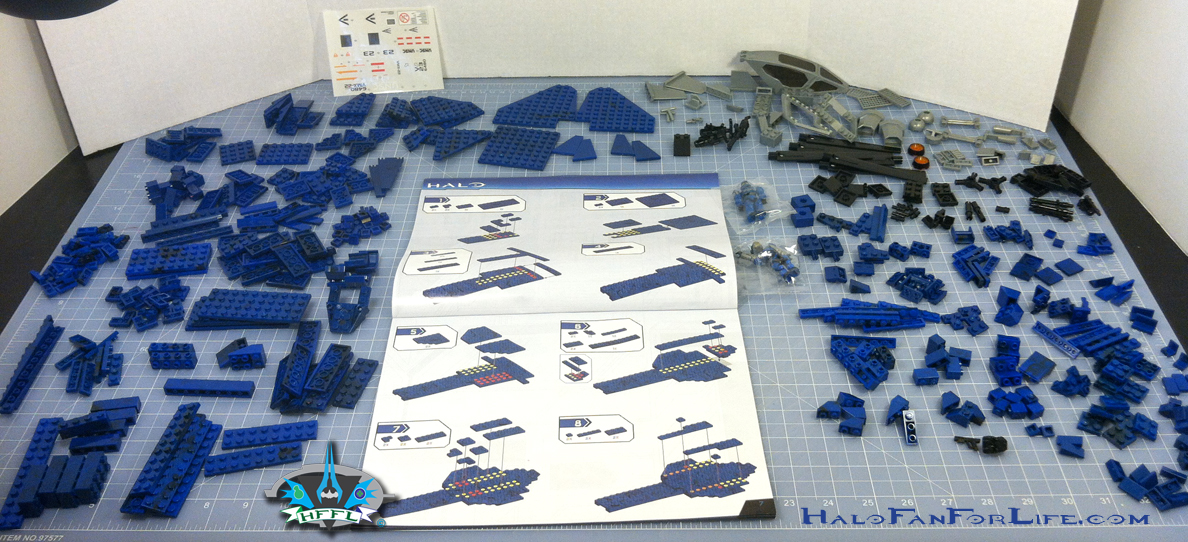 Here are the pieces sorted out. It only took about 20 minutes to do that.
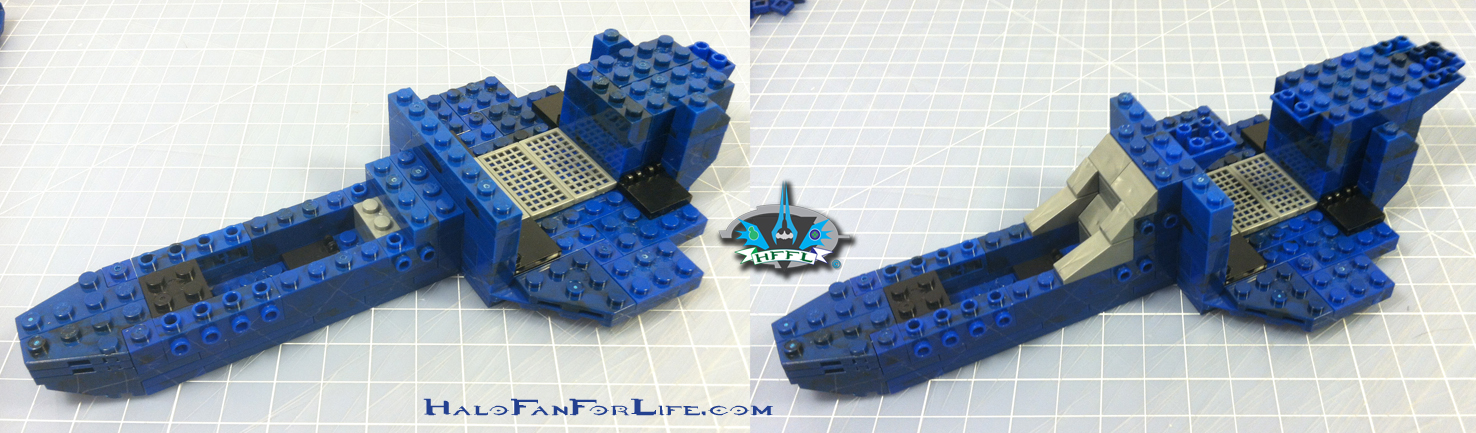
So now we start into the build. First the base of the body starts to take shape.
 Next we have some of the body put together. So far so good. Easy build here. (I’ve done this a couple times already with the original falcon that came out. IIRC, these directions are no different, other than the color of pieces.
 The rear skids and underside turret are added.
 Here we see the side panels of the forward section of the falcon being fitted on.
Placing the body aside for now, we move on to the wing and tail section. 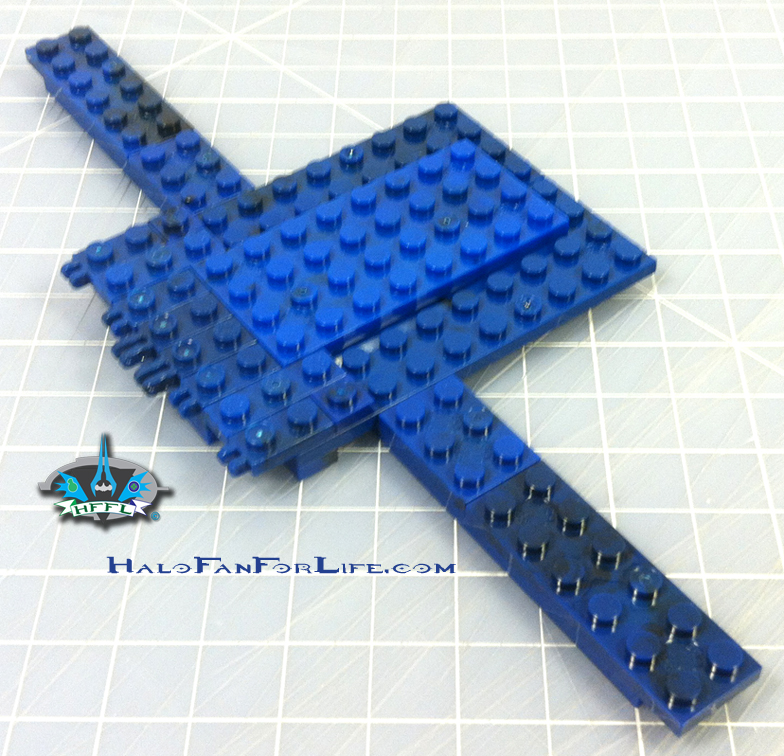
 These steps are a bit further along. The top shows part of the tail assembly as well as the main part of the wing assembly. The middle shows the points of contact between the two section (how they go together). And the bottom shows them snapped into place.

Above we see the engines being built. First the rear section, then added, then the front section added. Also note at the outside edges of the wings that there is an area built up. That prong sticking out is where I later attach the rotor assembly to.
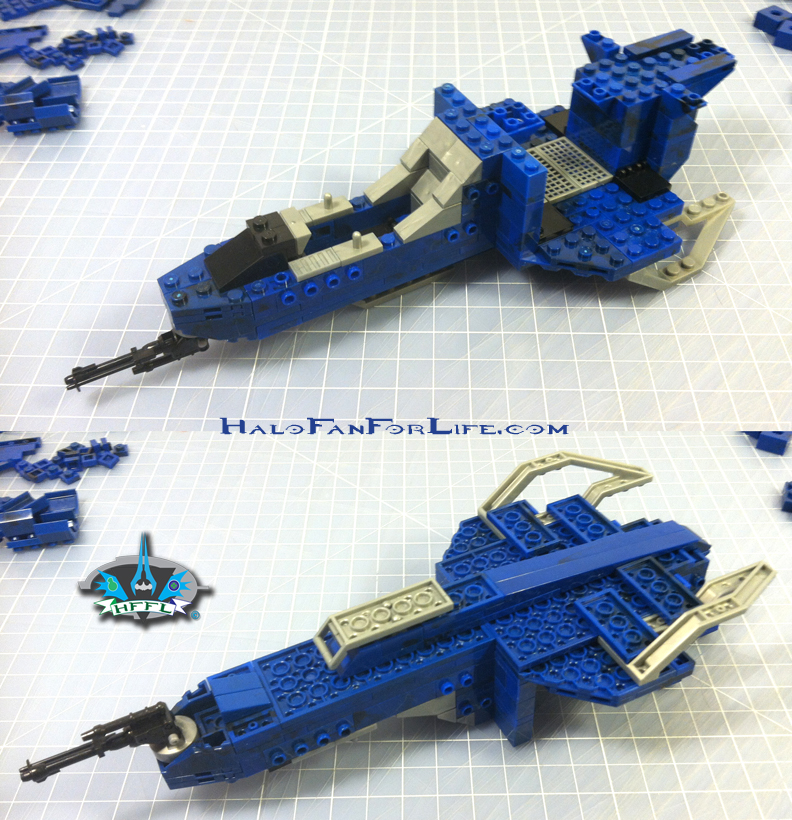
 Okay, so now we have the wing/tail assembly ready to attach to the body.
THIS folks may be a bit tough. Due to the multiple points of contact, that also span half the length of the body, it can get tricky. I had to exert a little bit of force to get the pieces to snap in. They align just fine. It’s just either your front or back section of the wing/tail assembly might not snap in perfectly.
To do this, once I got the sections in place and mostly locked down, I pressed together the wing/tail assembly at the middle as well as on the skids from the underside. Yep, I needed to use both hands for that with a bit of pressure. So parents, help your kids on this step. Kids, get your parents help!
This was the only tricky part in the whole build. The rest from here on is easy.
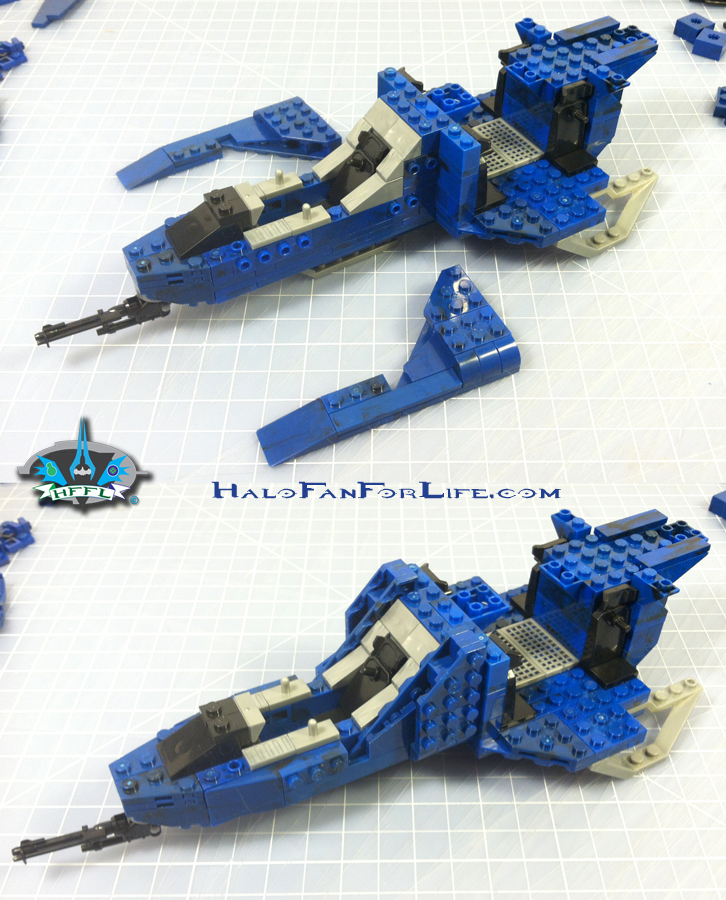
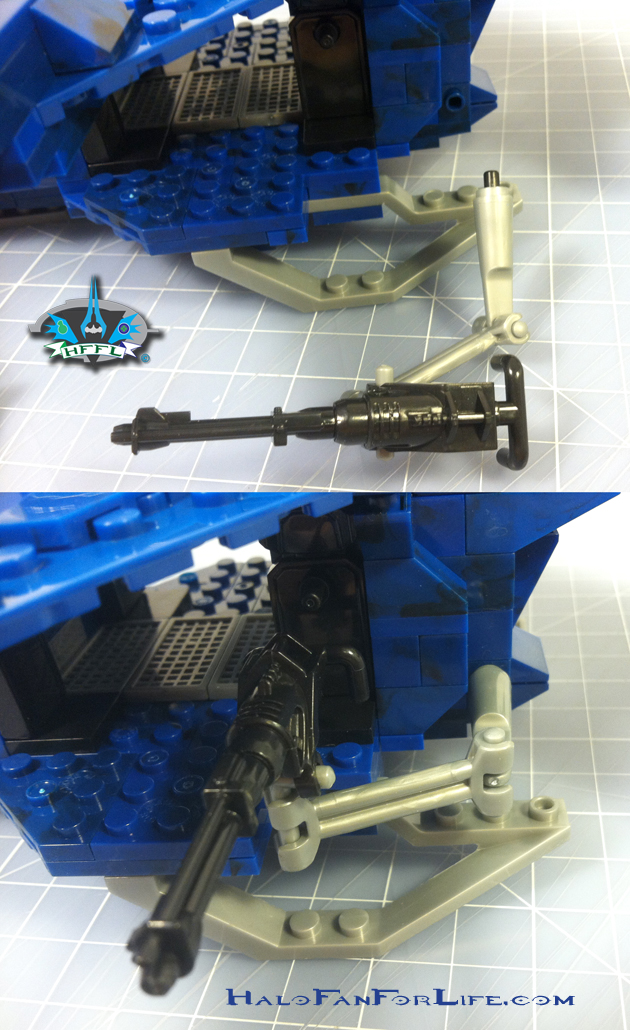 Above shows the side mounted turrets going into place. As you can see there are two pivot points coming from the “double barreled” piece. As well the turret itself is mounted on a bar that allows it to pivot up and down. It’s quite an articulated turret section.
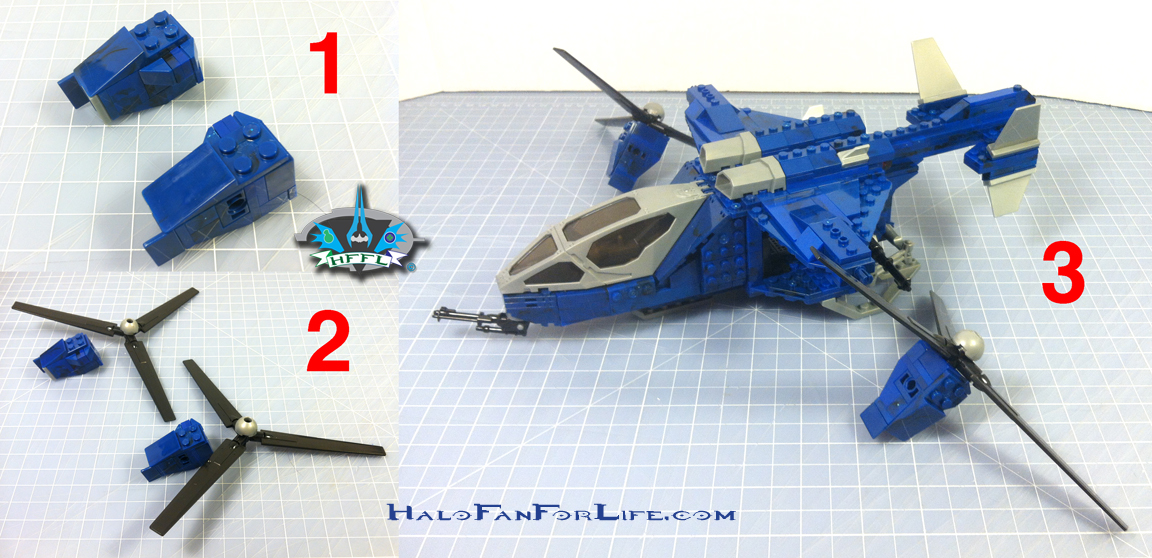 Now we move on to the rotor assembly. 1. The main body part of the rotors. 2. The propellors are created. 3. They are assembled and await to be attached to the falcon.
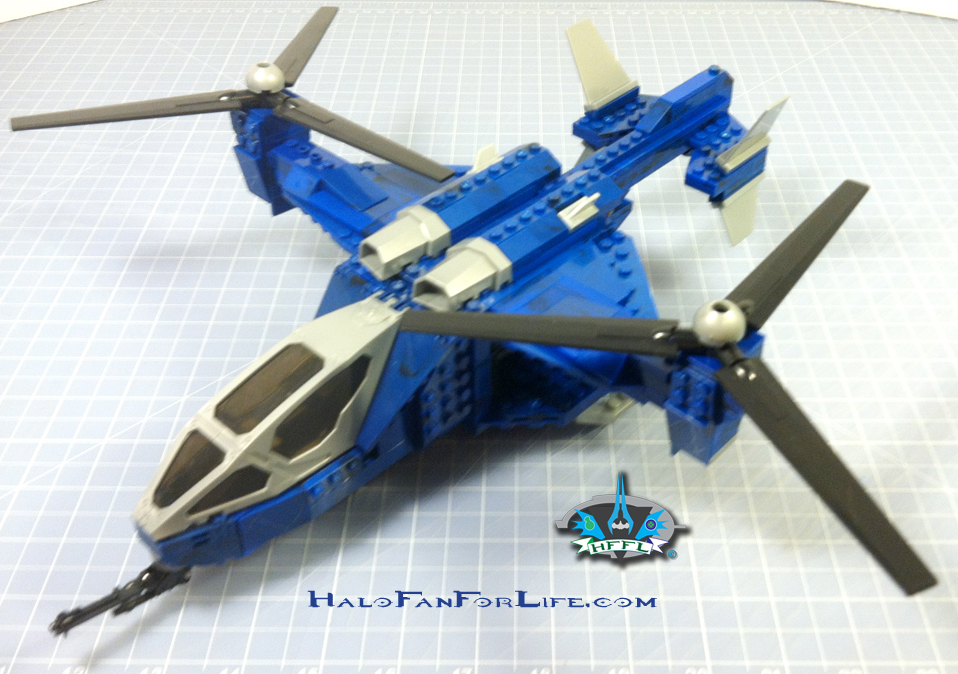 And here it is done. As you all know, I don’t like to put stickers on my sets. Though I may reconsider for this one. I like the blue/silver theme with this set. It looks more like a police falcon, than a UNSC falcon. And that suits me just fine. In fact, I already have a nickname for this falcon. “Blue Thunder” What’s more special about that, is that it’s a friend of mine’s gamer tag. So this set will always remind me of him.
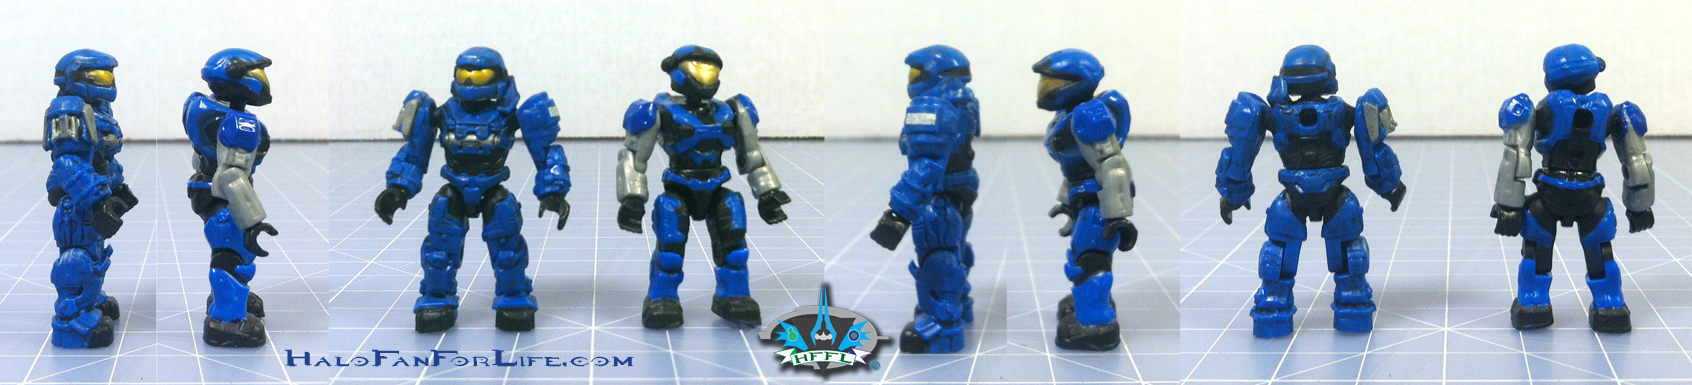 Here are the two figs with the set. We’ve had these before, but not quite in this rich blue hue. I do have slight issues with both of my figures. Both helmets are STUCK in position. I don’t dare try to move them for fear of breaking the neck sprue. So the Air Assault will be permanently cocked to one side. Thankfully the Gungnir is looking straight forward.
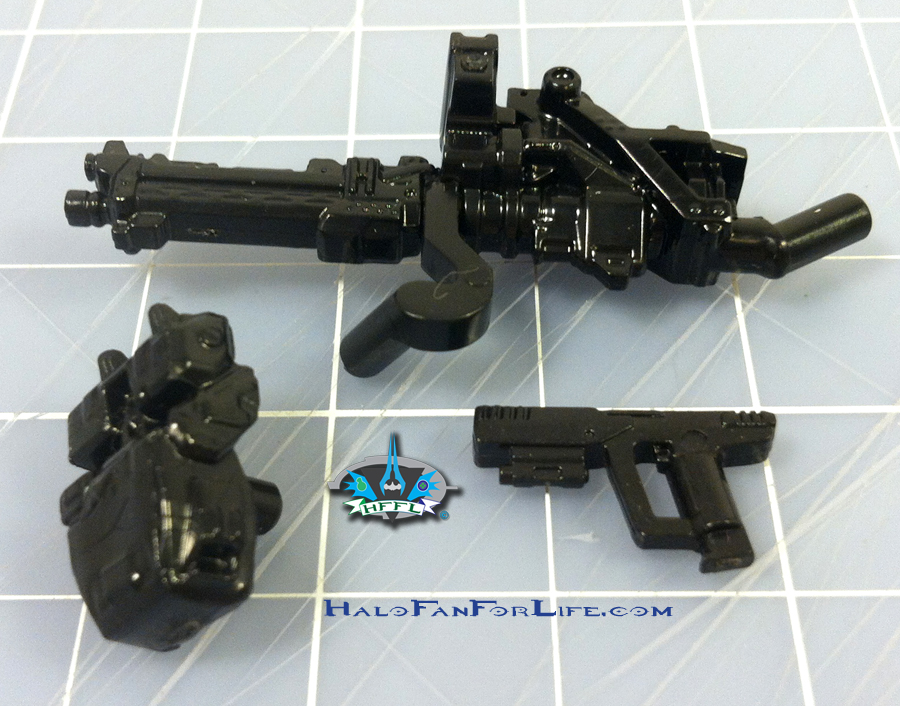 Here are the weapons and accessories with the set. A detached turret. Note the two places for the mini fig to put it’s hands. A magnum and the backpack for the Gungnir Spartan.
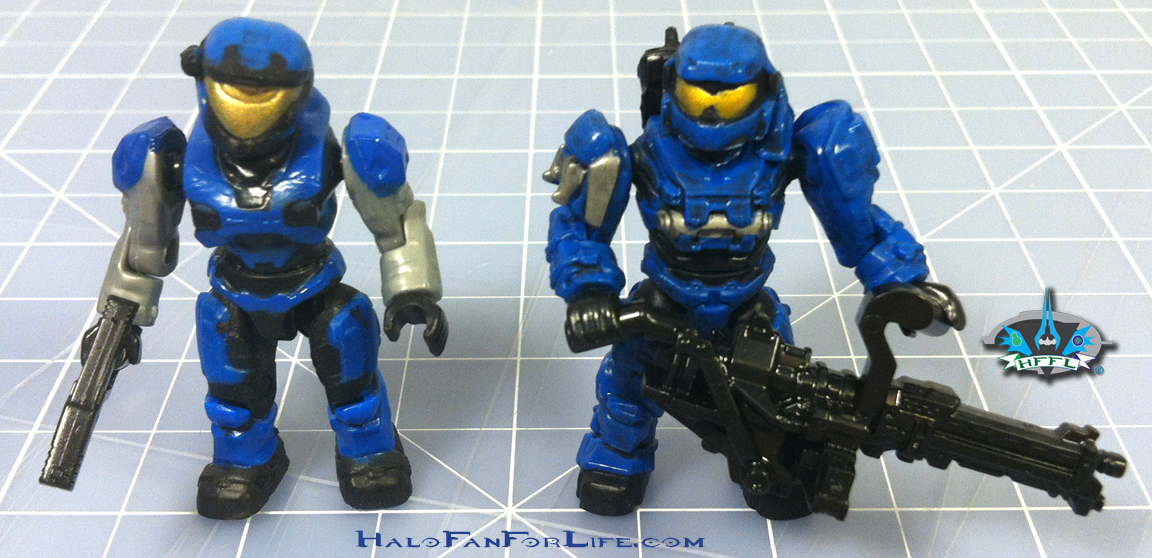 And here are the figs with their respective weapons.
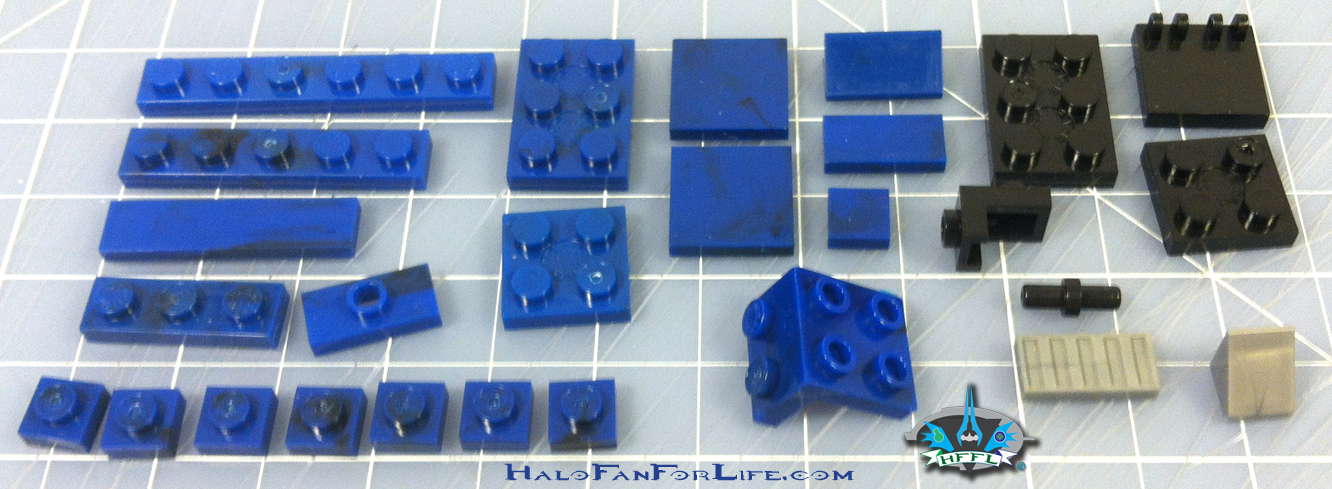 These are the pieces leftover.
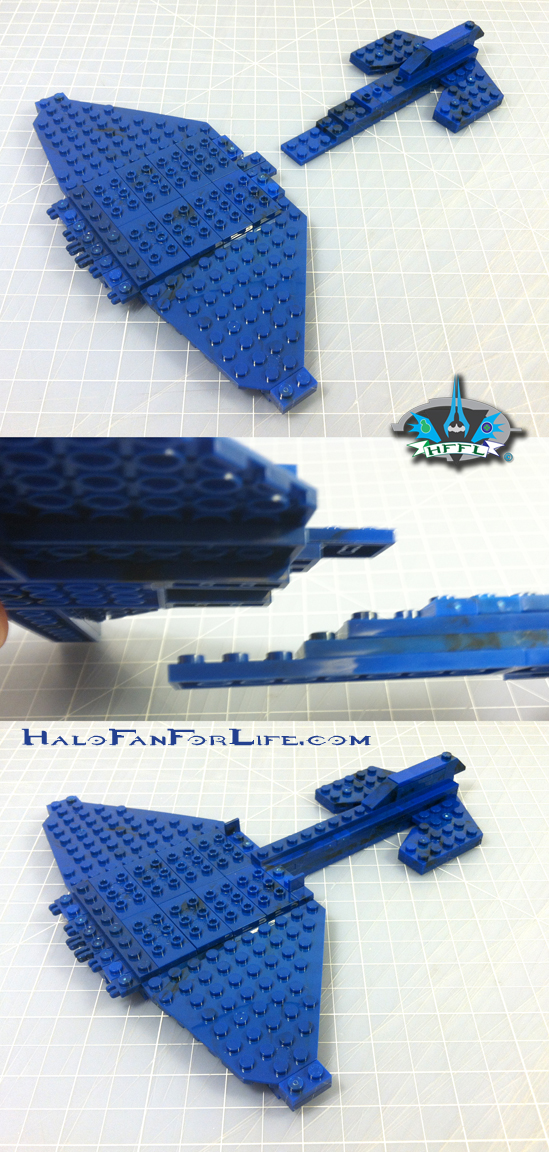
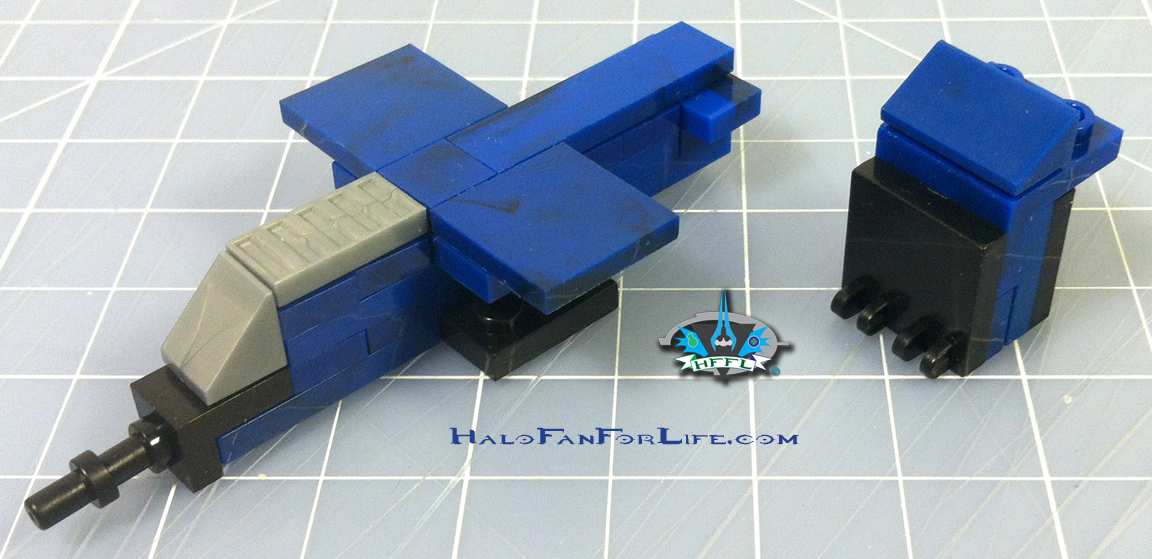 And this is what I did with them. What is ALMOST a mini-falcon (minus rotors) and I’m not sure what the other part is. I’m just calling it a special Blue Unit package for now. Maybe you have a better name for it??
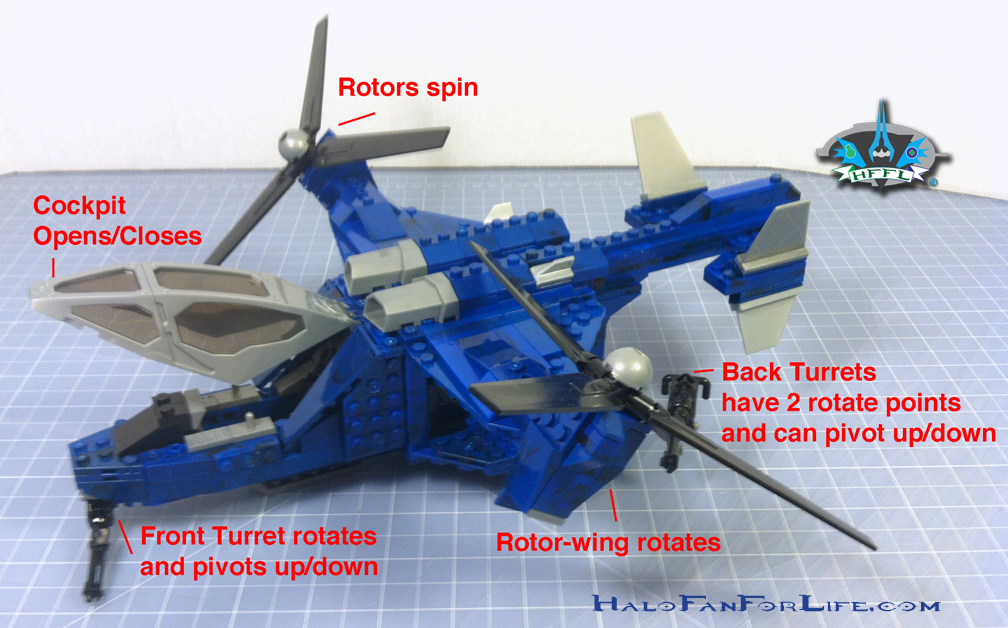 Above shows how very well articulated this set is when built. LOTS of play value!
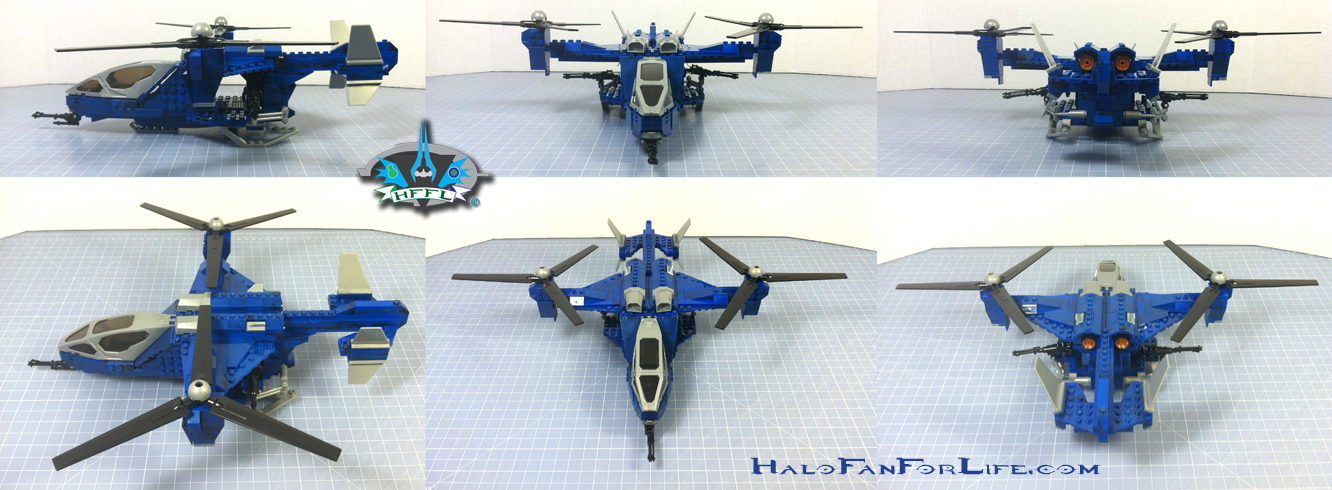 Some orthogonal views as well as slightly tilted looking down on the set.
The Falcon measures approximately 14″ long, 17″ wide (at widest point where the rotors are out-turned), and 5′ high.
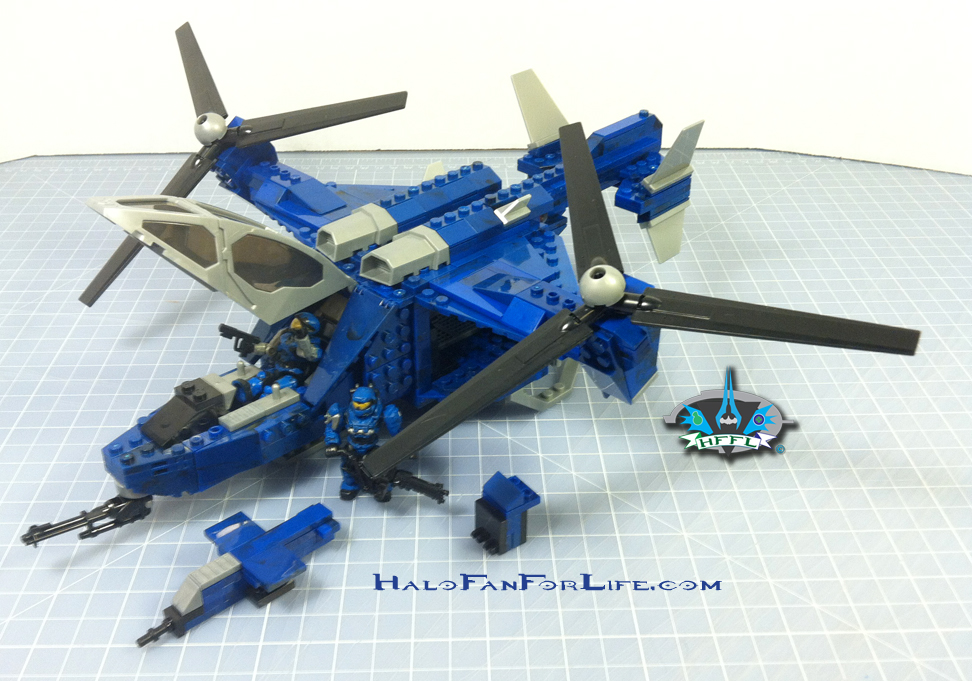 Once again, the final set, with the minifies and leftover pieces.
Summary: This set is fairly quick to build. Other than the step where you attach the body with the wing/tail assembly, it goes together quickly and easily. The blue pieces are rich in color. Oh, and yes, they have the “camp” effect to them. So those pieces will have some black blended in with them. The minifigure choices are good for the set, as are the weapons. This set really shines in the articulation department! That gives the set a LOT of play value!!
Overall Rating: I give this set 9 out for 10 medals. The reasons for the point less is half a point for my Air Assault figure’s head being stuck in a weird position. The other half point for that one step that may cause a little frustration if you’re not careful. Otherwise, it’s a stellar set!
I highly recommend this set. That said, it’s a UK exclusive. So those of you in the States may be out of luck. I got a tip from my good friend, Goodwill Hunter. He let me know they were up on Amazon. So I’m passing that on to you. As of this writing Amazon is sold out of them. However, if you really want this set, keep checking back. They may just come back in stock!
Thanks for reading and let me know what you think of the review. If you have this set yourself, please give me your thoughts on it too!
-Sal
Nice job on the mini falcon, Sal! I can’t wait for tonight because I’ve been promised the Mammoth set for my birthday on tuesday, and after seeing your review of the set I’m quite excited to give the build a try myself!
Thanks kindly. So you read each part of the Mammoth review? It was a fun build. Be sure you have lots of space to sort out your books. I had to use our dining room table for the Mammoth.
Yep, each and every part! I’m going to vacuum my room and build it on the floor there so I’ll have lots of space.
If you’re doing that on a carpeted floor, take care. There are MANY small pieces. Might I suggest using a white plain sheet then to sort your pieces onto? Have fun and when you’re done, please feel free to send some pics along of your set and I’ll post them up on the blog.
My floor isn’t carpeted but thanks for the tip anyways. As of 9:00 this morning I’ve just finished sorting everything, and I only had one wrong peice which I think I can compensate for until a replacement arrives, other than that everything seems to be in order. Sure I’ll send you some pics if you like. Now on to the build!
Great start! Keep me posted.