
![]()
Mega Bloks Vulture Gunship
Technical Specifications:
Build Time: 1 hour 40 minutes sorting; just under 3 hours building
Set Piece Count: 1031
Minifigs: Spartan Locke, Green UNSC Pilot, Silver Spartan Enforcer
Weapons: Magnum, DMR (Halo 5 style), Rocket Launcher (Halo 5 Style)
Accessories: N/A
Special Features: Cockpit opens, mid hatch opens to reveal troop area, rear access hatch, forward cannons pivot/rotate, rear hatch opens, top missile launchers pivot/rotate
Cost: $90 (US)
And on with the pics! (Click pics to make BIGGER)
Okay folks, after a long delay, I finally have the review reading for your dissemination!
The box art is quite nice. Cool action shot on front, while the back shows much of the special features.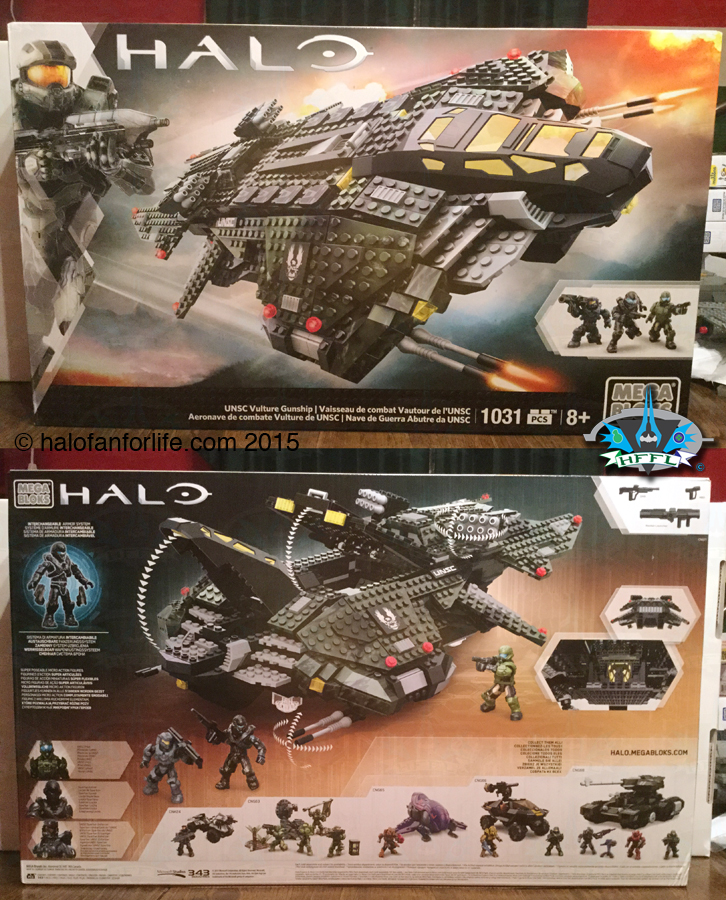
Here’s what you get inside the box. 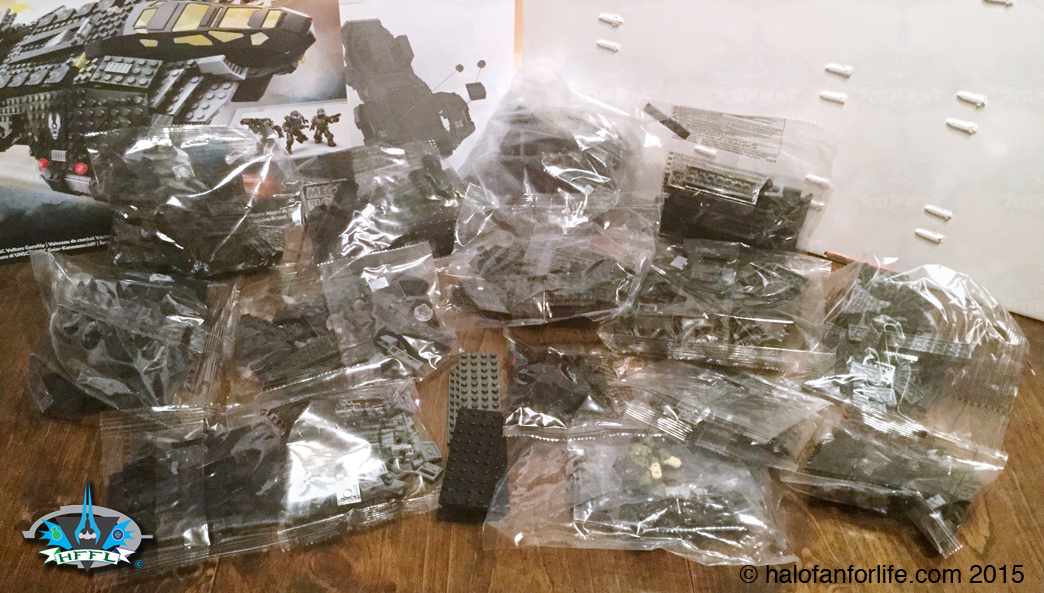
The pieces sorted. Do take care here. I sort mine out by color then shape. It can be quite easy to mistake a color here as the black and green are close in hue. The pictures I’m showing here, I’ve lightened up a bit so you can better see the difference in color.
Okay, on with the build.
Below shows the start of the bottom portion of the Vulture. You quickly build up the side walls.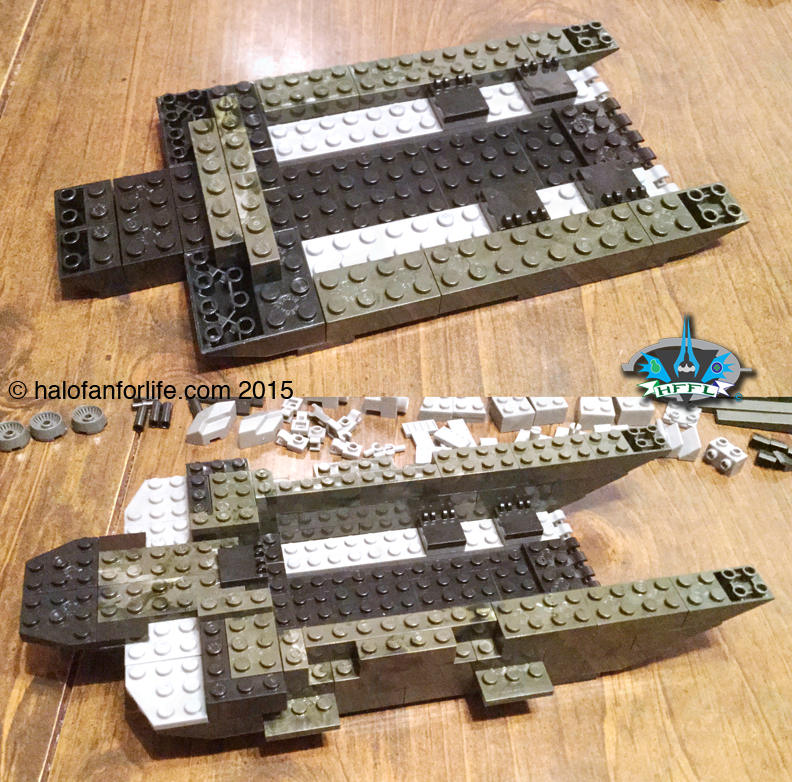
Next we start to build the front wings. Now here ˆ was a little surprised with the construction. I think it could have used more bloks than plates. I’ll come back to this later. 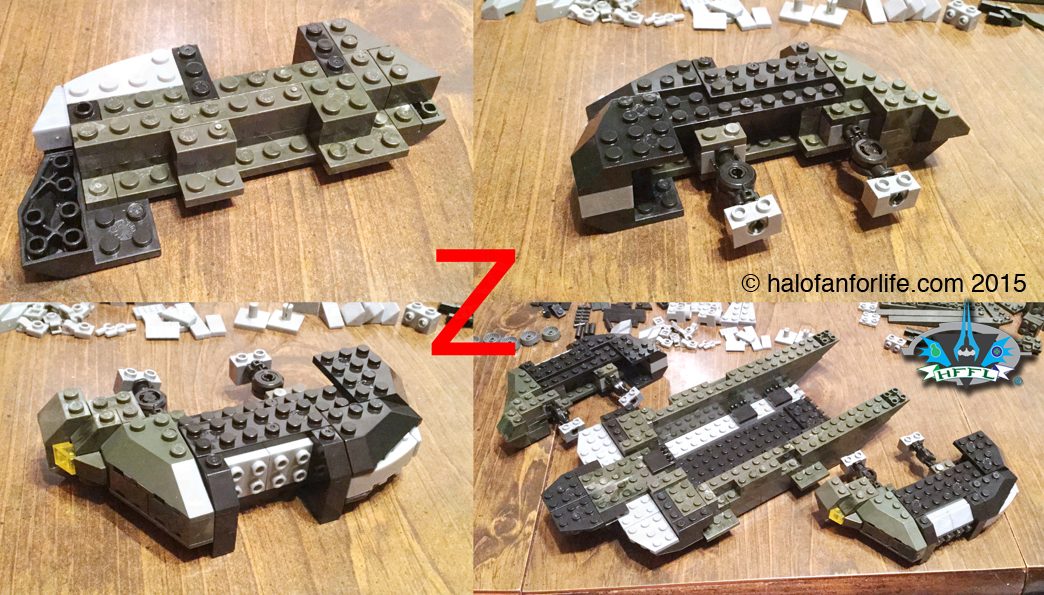
The front wings get attached and the rear/tail section starts to take shape. I’ll admit I think it was somewhere during these steps in the build that I made a slight mistake and put a green 2×1 plate in where it should have been black and later on black went in where it should have been green. Thankfully, it’s not noticeable at all. Still, this is why I stress sorting parts.
However, part of the blame does fall on the directions themselves being hard to see the difference in color. I do think MEGA can do a little better job of color in the directions. If you are having problems with this too, there are two things I suggest. One, call them up and kindly let them know about it. It may help in their decision to review and possible change the way the present the directions. As well, you can download a PDF version of the instructions for most sets direct from their site. Depending on where you build your sets, you may be able to have your computer or iPad handy with the PDF showing and get a clearer picture than shows the colors better. As well, you can zoom in, which for me, helped with this build.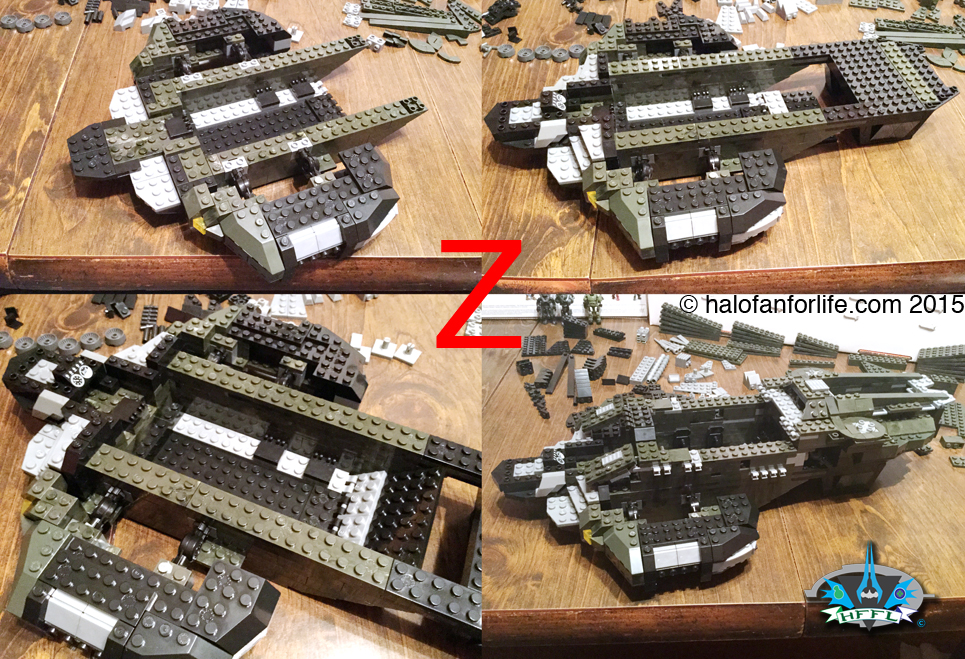
Now, we come to an addendum. I am still perplexed that after 6 years of Halo sets that addendum are still being made. I won’t guess as to the reasons. I just don’t think it should happen. A
Anyway… Here the change is that the small section where the front cannons attach to the underside of the gunship are different.

Below you can see the differences better. The one on the top in the red outlined box is the new versions, with the bottom being the older version. Honestly, either way works. However, the new version is a little bit tighter. This is a benefit as the cannons won’t droop on you as they do with the oder version.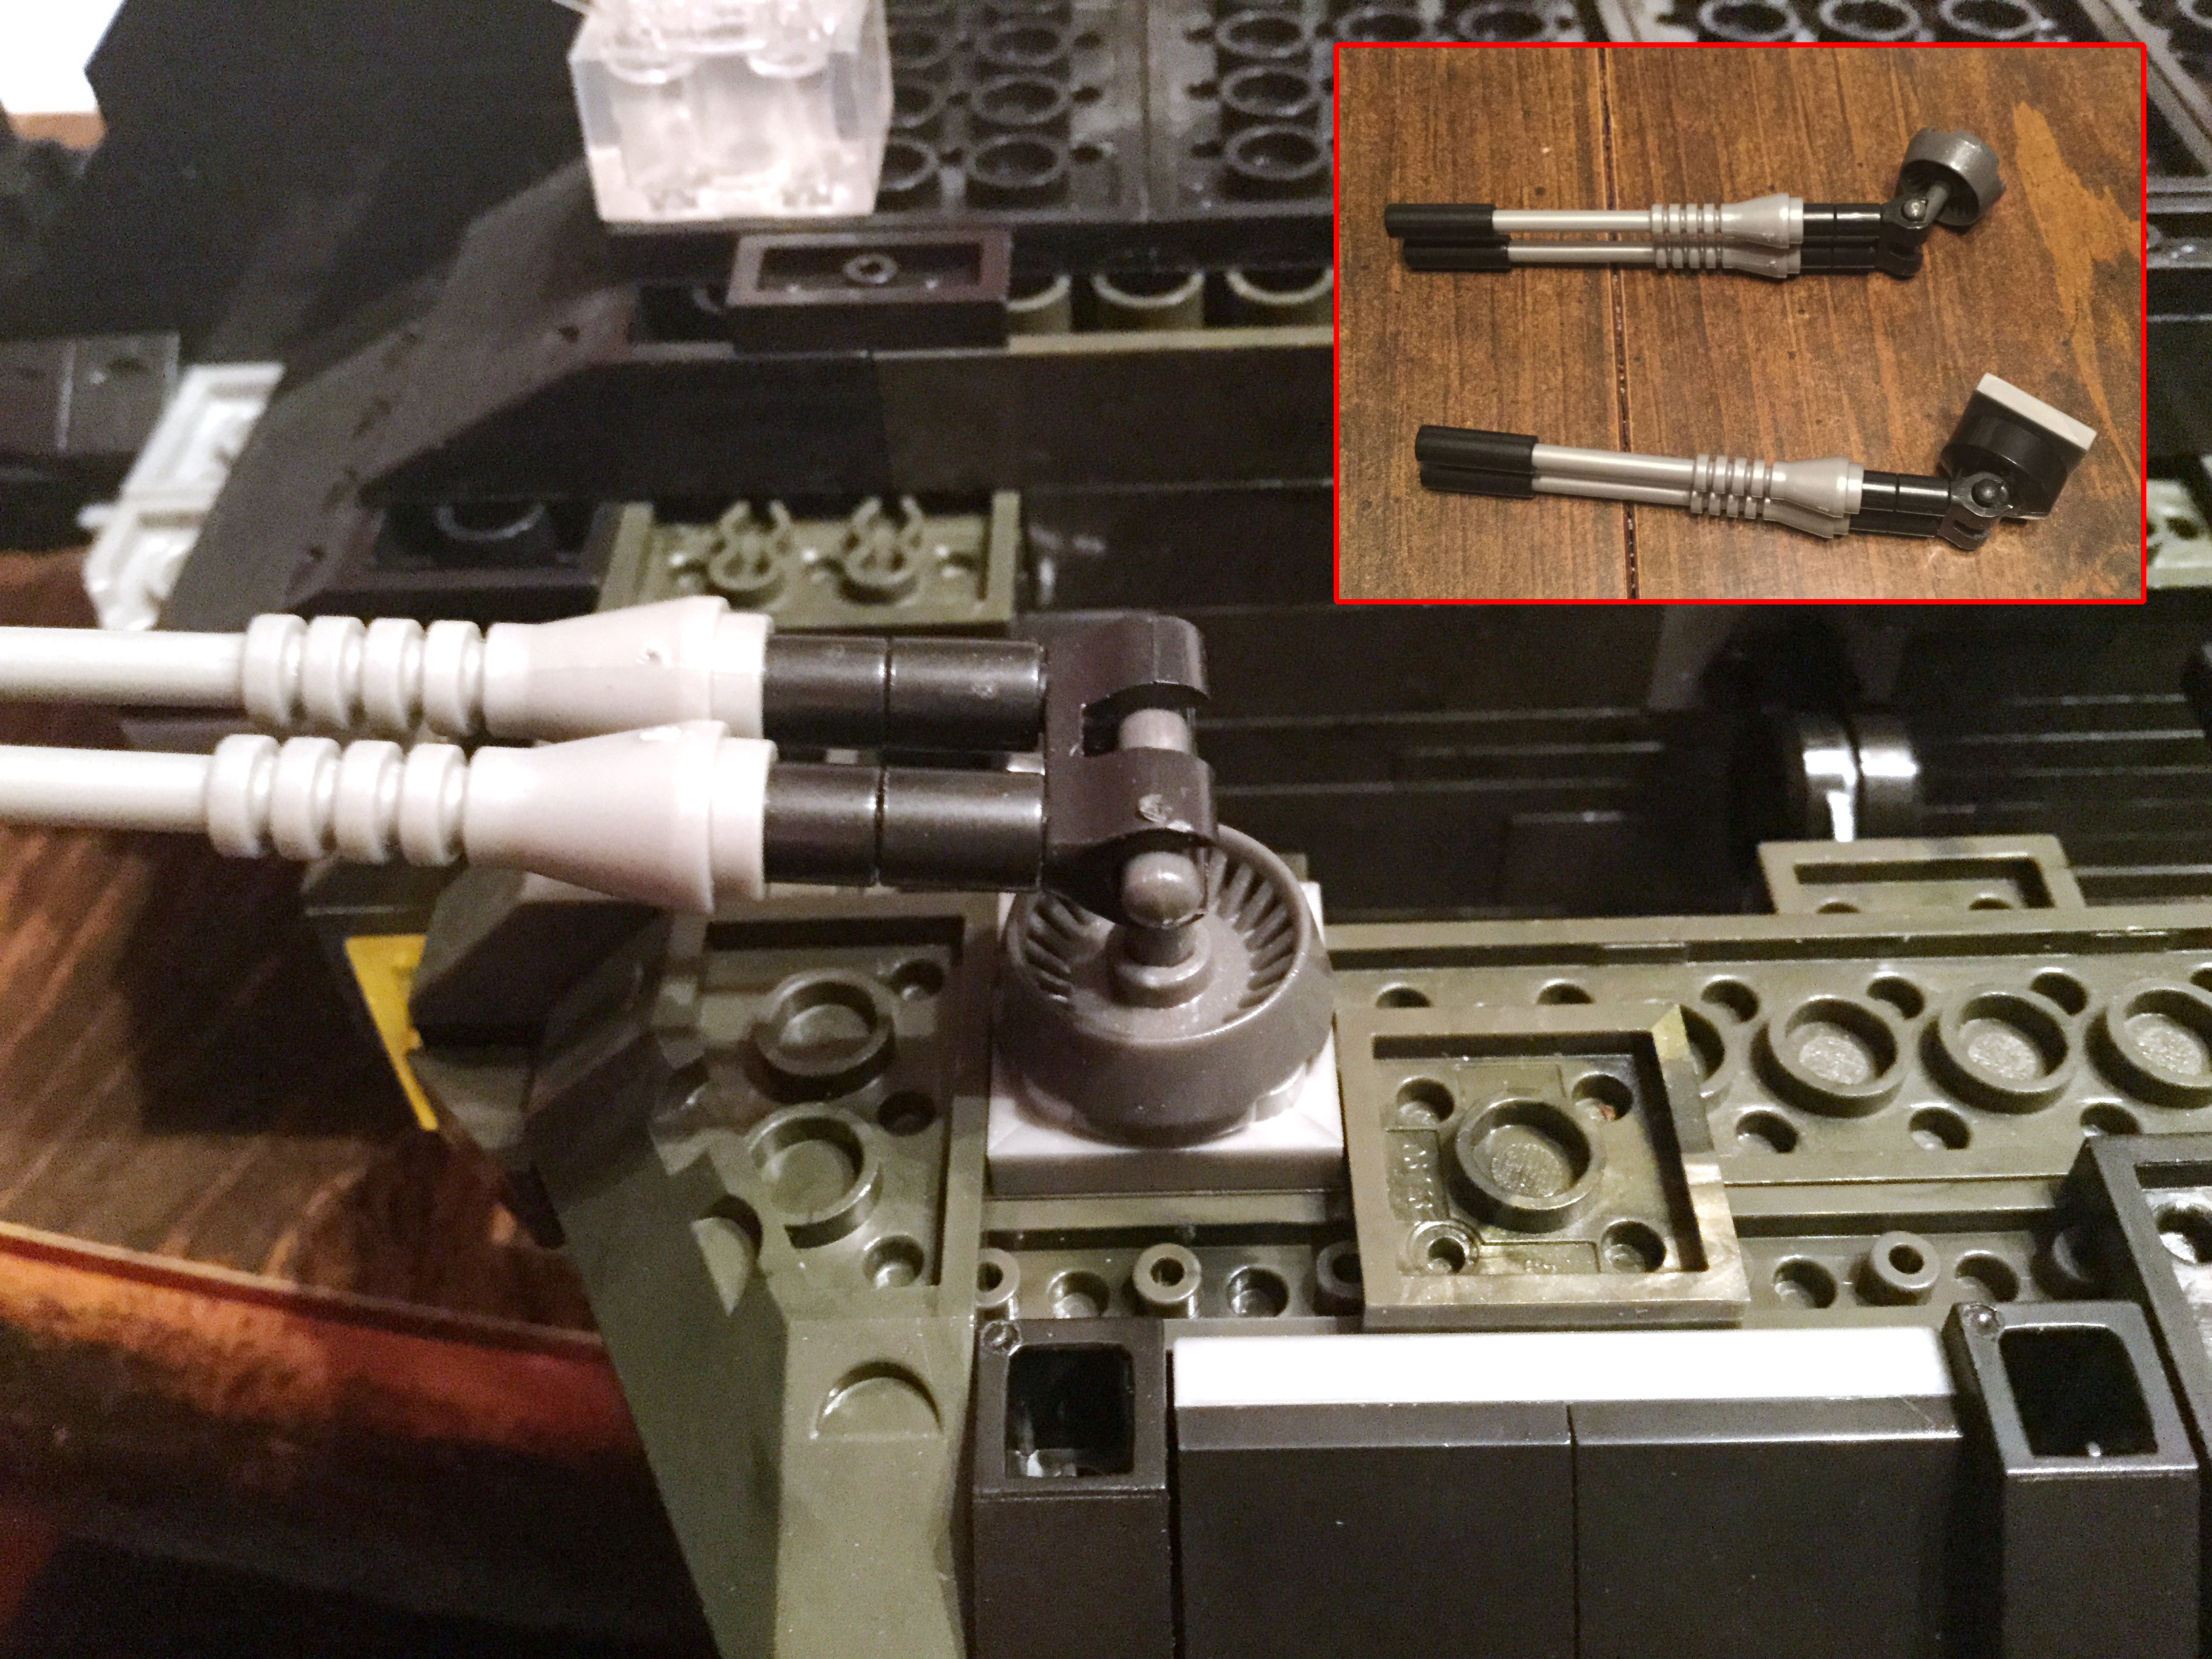
These are the parts you’ll have left over should you make the change using the addendum.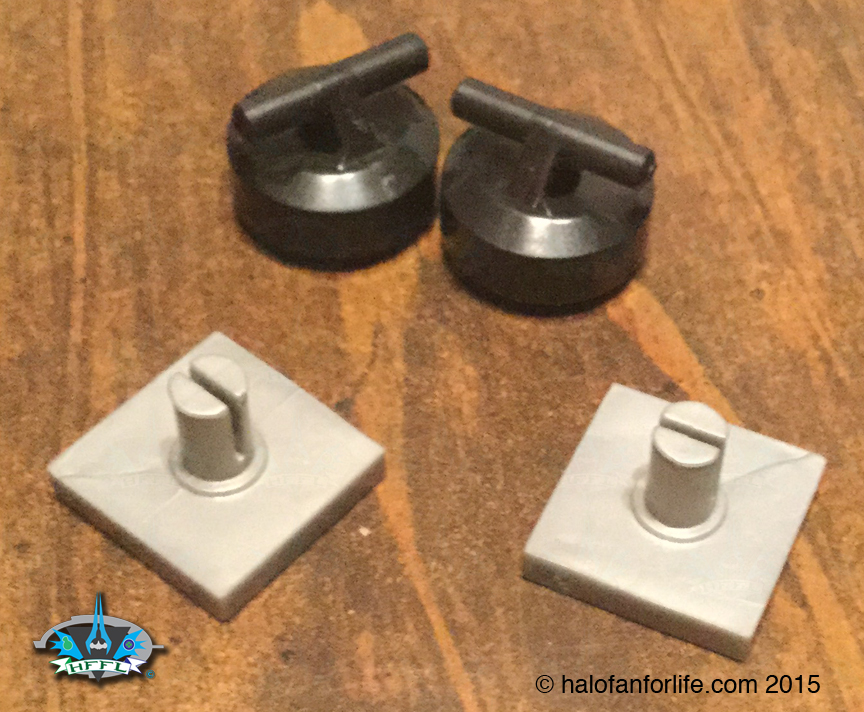
One little side benefit is that you can have your figures have some Curling matches! LOL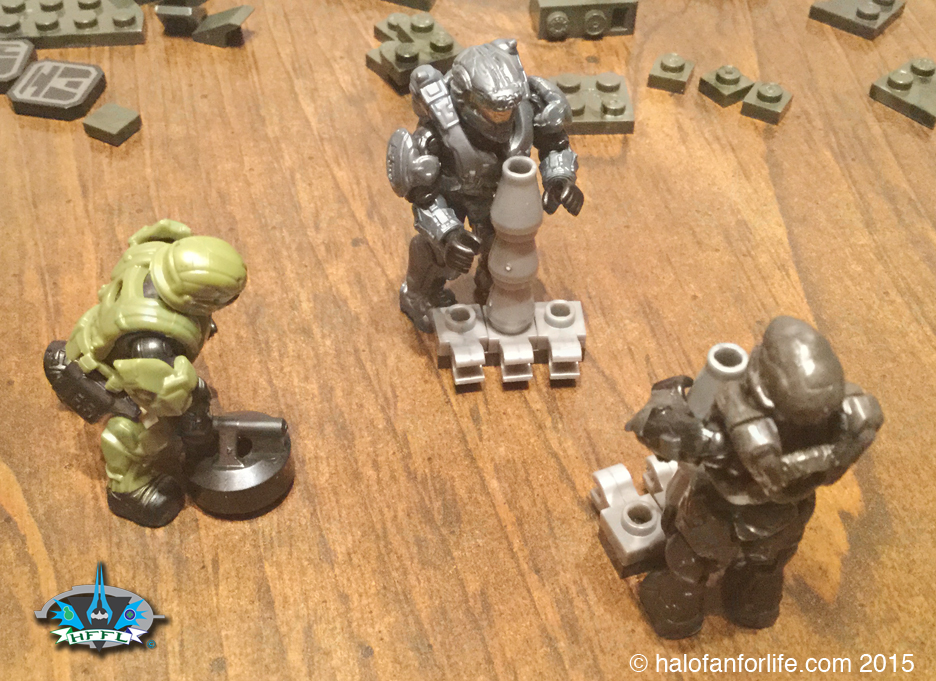
Yes, okay, back to the build…
A bit further alongs, I’ve constructed more of the side wing panels and the cockpit is ready to go one. I need to make a note here. This step is one of the big reasons why I wasn’t able to get this review out there sooner. My cockpit piece was bent. Enough so that it wouldn’t close properly. So I had to call Mega for a replacement (along with a few other small parts missing).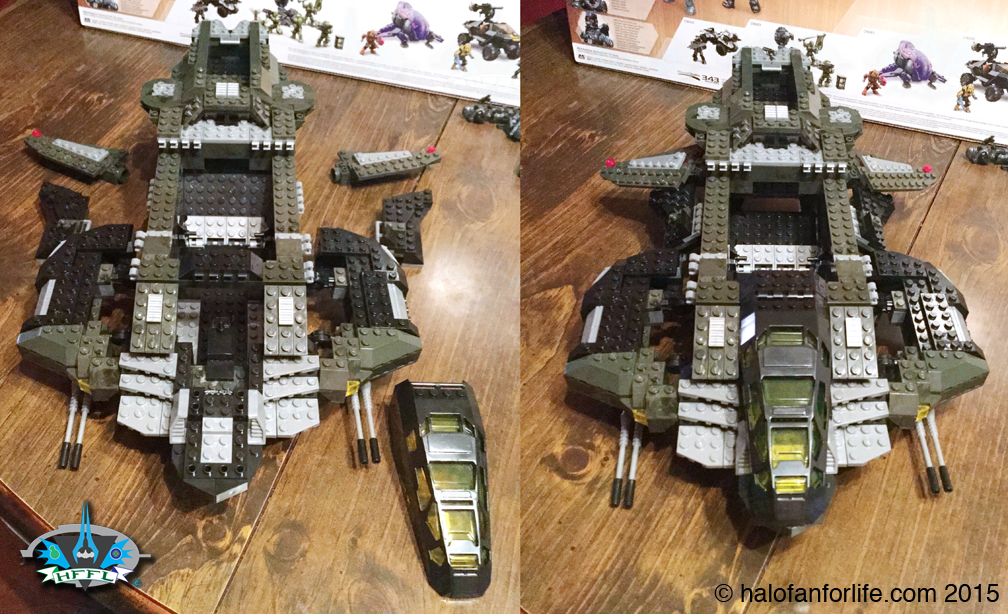
Here, the largest section of the side wing panels is built and attached. Okay, I do get what Mega was going for here. But to be honest, I think they could have achieved this with bloks rather than plates. If you don’t mind the studs showing this isn’t a bother for you. At the end of this build though, there are a LOT of exposed studs. I know some of you are not so fond of that. I’m kind of a mix here. On this model, I would have preferred less studs.
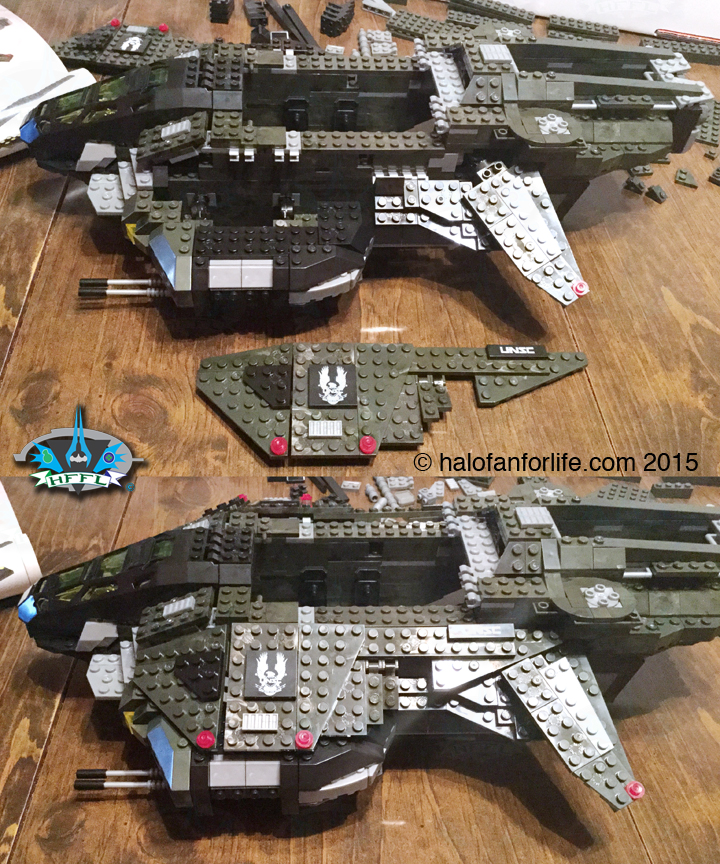
Rear wing panels, mid top hatch, missile tubes and rear top hatch are built and put into place. As you can see by top right, the mid hatch has hooks that you can attach the weapons to, if you want. I ended up string them in the rear hatch area instead.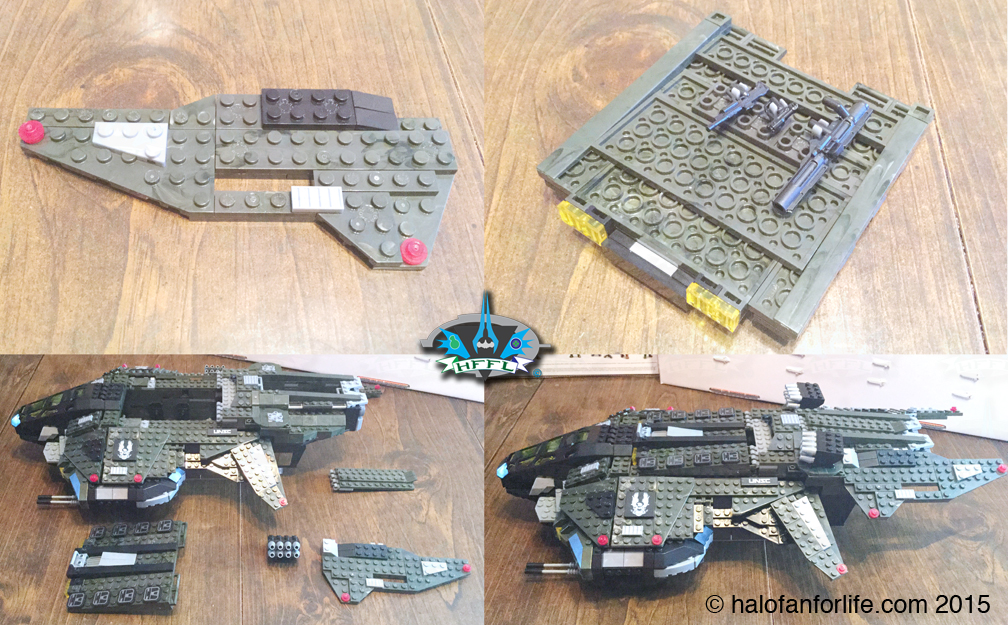
The model here is complete. Middle of this picture shows all but one of the hatches that can open.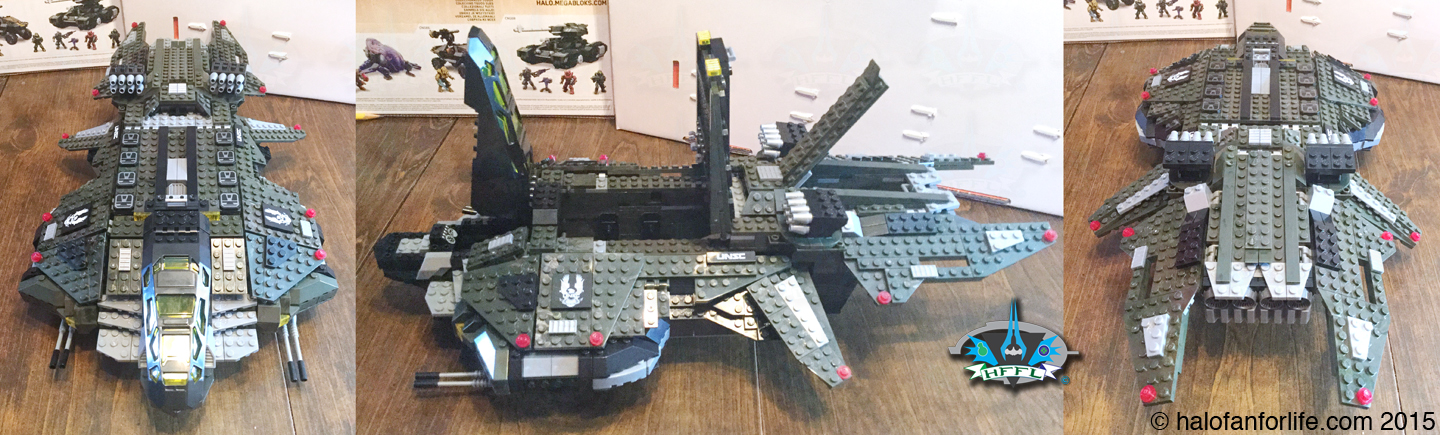
This one shows that last hatch. It’s the rear troop area hatch. When opened, you can see all the way to the cockpit. I think that’s pretty cool!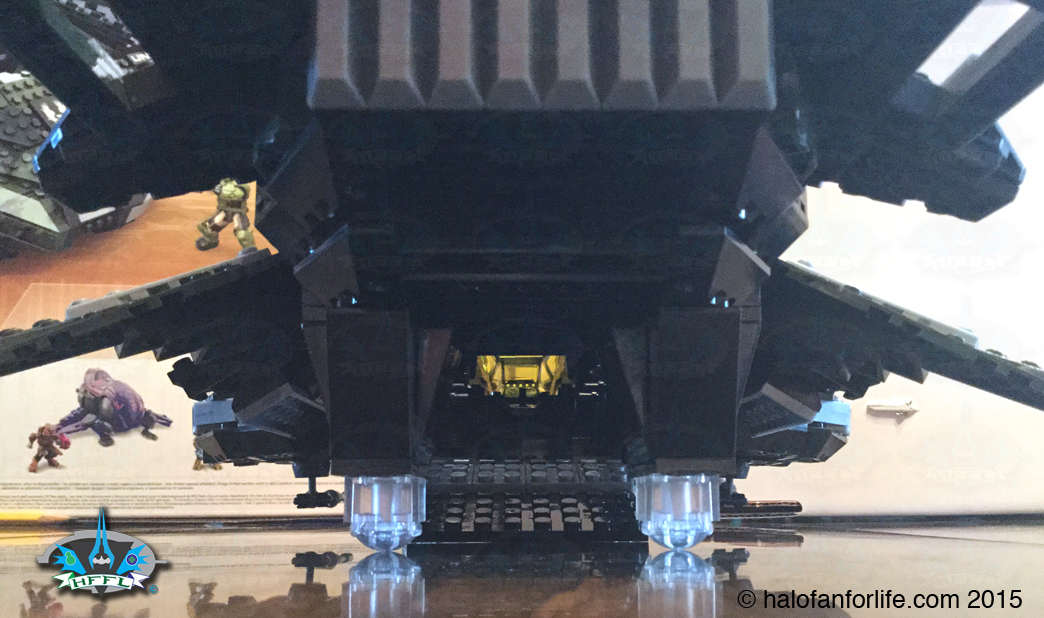
So, here are the pieces I did have left over. I made them into a core of sorts. The Spartans move the core into the rear troop area. Eventually, I did place this in the rear hatch instead, where it fit perfectly.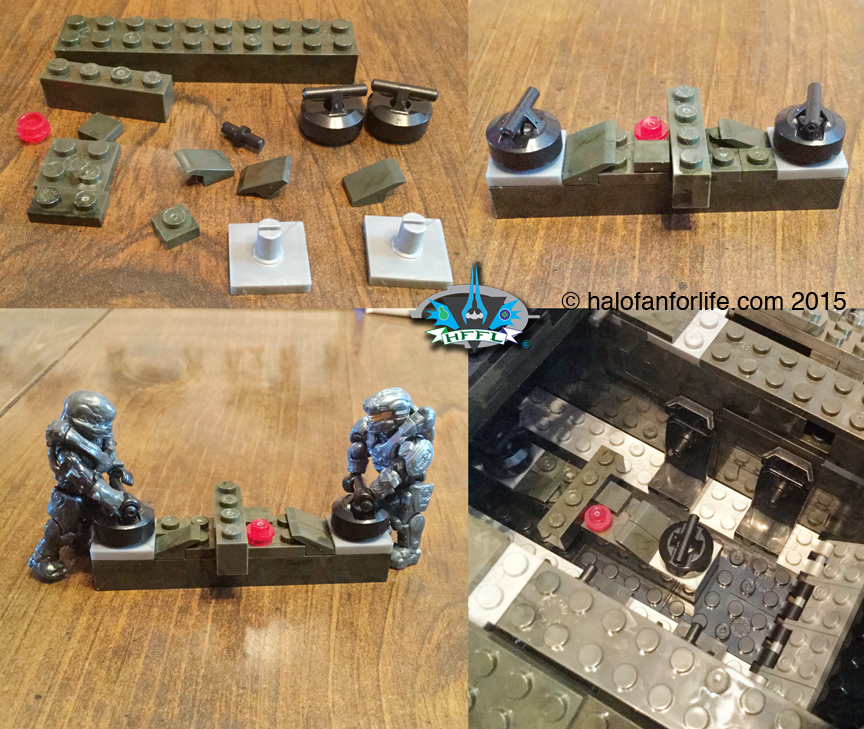
The minifies are good. I’m always welcoming of another UNSC Pilot. Spartan Locke is fantastic! I do like the Enforcer armor, so I was happy with this choice, though I understand where others might have wanted different spartan armor or a named character.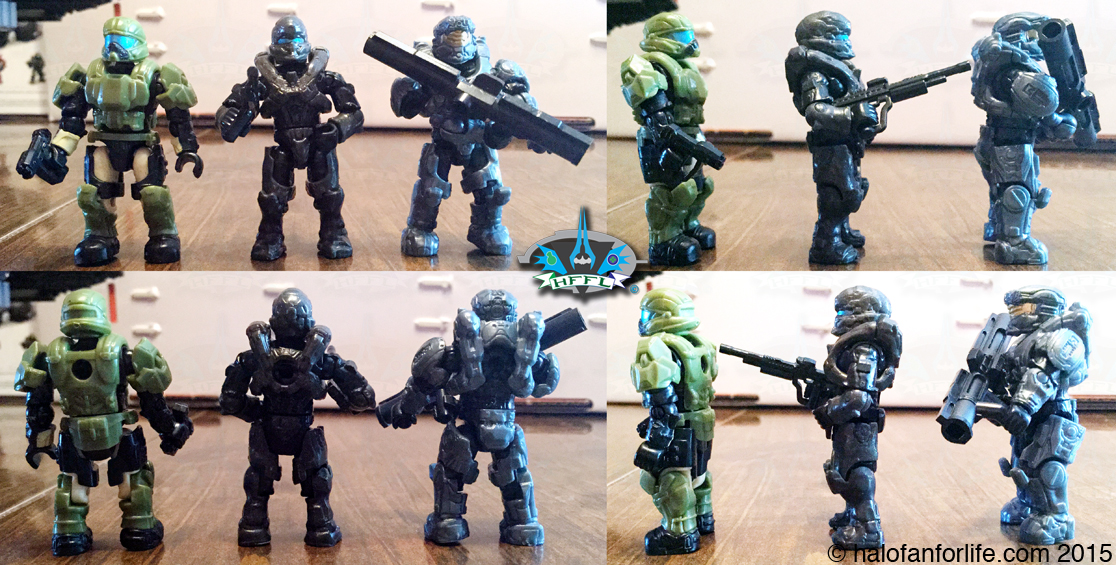
Heres the a better pic of the finished set with the figs on it.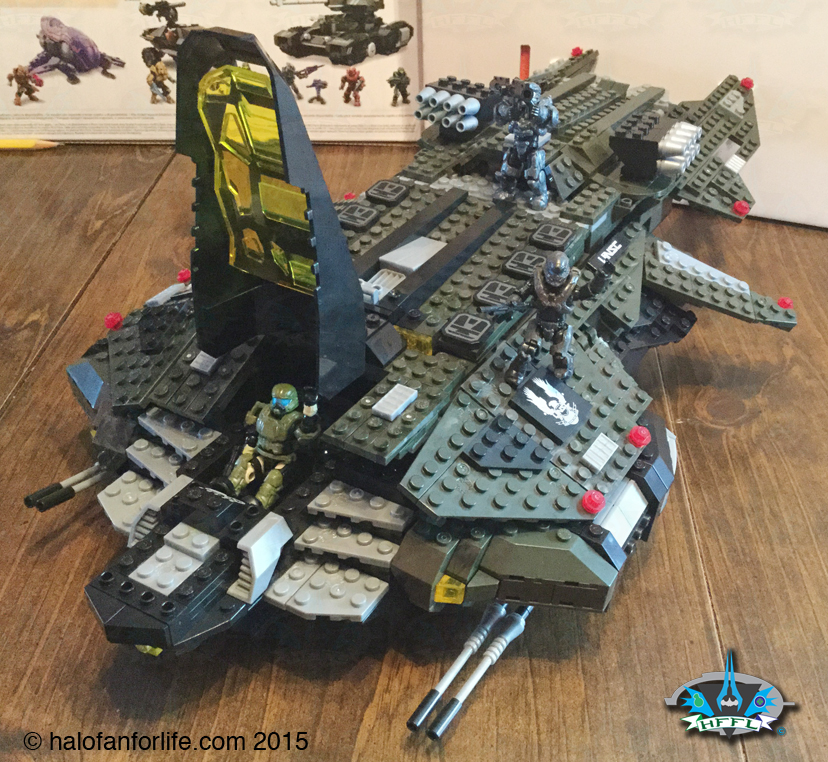
I wanted to shows a better sense of scale for this, so I brought out some of my other UNSC ships to put next to the Vulture, so you can see how big it is by comparison.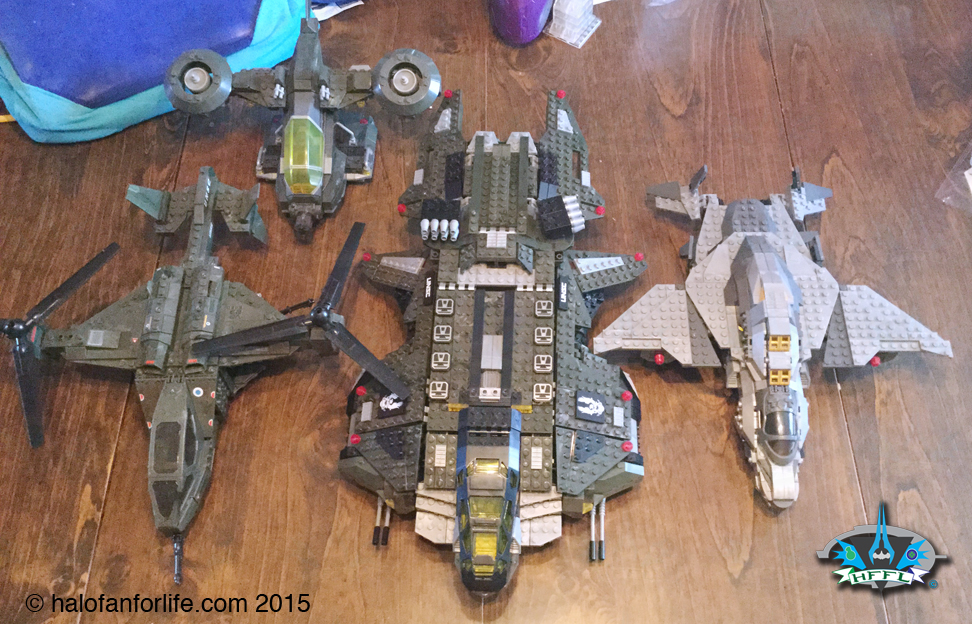
Now, before I start wrapping up the review, I need to address one thing I think was lacking in this build. You read my mentions of this earlier in the review. The front wings just aren’t solid enough. When you flip the Vulture over, you can see that there is quite a bit of exposed area on the under side of the forward wings. While many will just display their Vultures, for those who might want to play with it, or use it for animations, the open area is rather gaping.
Again, I sincerely think bloks would have been better here than plates. At the very least, Mega could have included a few more long plate pieces to cover over the front wing holes.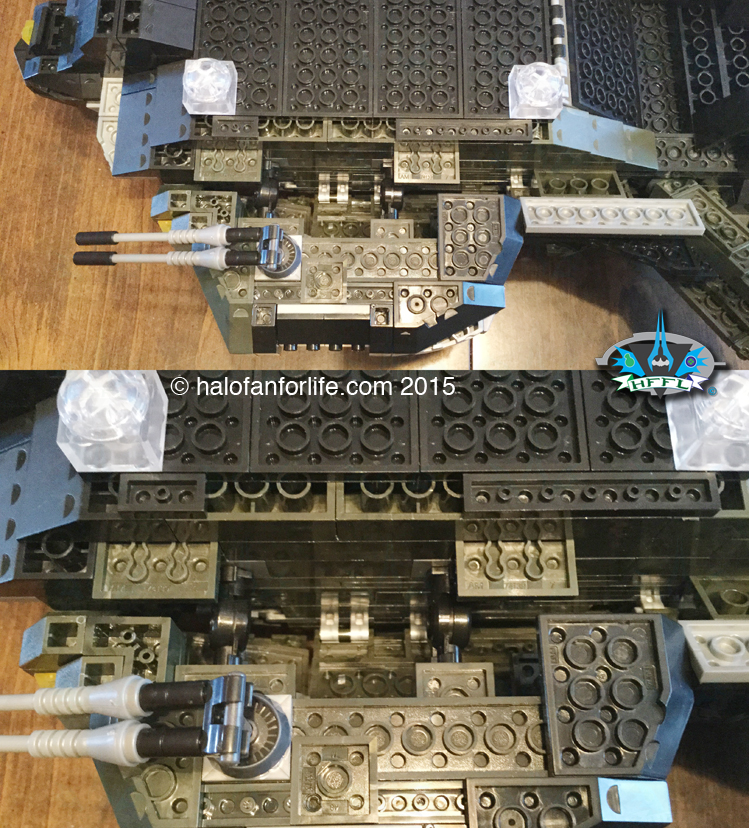
Summary: The set has a long build time. Pace yourself. You don’t have to build it all in one day. I built roughly half of it one day, then finished it the next day. Color representations of the model is good. Overall shape of the the model is representative of the in-game Halo Wars model. A nice mix of mini figures and weapons.
Overall Rating: I give this set 8.75 out for 10 medals. This set has good value at $90. Since the piece count is over 1,000, and there is a general rule of 10 cents per pieces, you’re getting a little bit more than you paid for. So that’s a good thing. Visually, the model is quite nice and BIG.
Why did I give it a 8.75 out of 10?
• The main issue I have I describe above.It’s the gaping areas on the underside of the front wings. For me, that’s half a point off.
• Once again, the directions fail little here. Not only having to have an addendum. but the clarity of them between black and the dark green can make it difficult to read correctly. We as consumers shouldn’t have to go to a website and download a digital version of the instructions. It’s much easier to have them right in front of you and in better color. So Mega really needs to address this. One-quarter point off here.
• One thing I didn’t mention in the review is the lack of the side missile launchers that are on the in-game model. Below you can see what I mean. (Yes, Mega put plate pieces in place, but I know most of you out there would have much rather had actual missile launchers. Another half point taken as this does take away from accuracy and more importantly, playability.
 This particular pic only shows two on each side, when there really are four. Even if there were just two on each side, I know people would be a lot happier about it.
Do I recommend it? Absolutely YES Despite the issues I presented above, this is still a very good set. Value is here for sure and it will make a fine addition to anyone’s collection.
If you have any questions about this set that I didn’t cover in the review, please do not hesitate to ask me. Either reply below or e-mail me at [email protected]
Thanks for reading and let me know what you think of the review. If you get this set yourself, please let me know your thoughts on it too!
If this review gives you an informed decision on whether to purchase the set or not, please consider a small donation (50 cents) maybe. It’s much appreciated and helps ensure that HFFL stays active on the internet. Thank You.
-Sal
Good review, especially the impromptu curling match 😉 ! I certainly see what you’re talking about regarding the colours in the instructions. I’ve also come to find that the lighting in which one builds these sets also greatly affects that issue.
For example, a while back I bought one of the COD sets (APC ambush). I was building it in my room after dark so I was using plain old artificial light. This set had both dark green, and dark grey pieces, which was very hard to tell in that particular light. However the next morning when I went to finish the build, in natural light via my window, the colour difference was much easier to notice, both in the pieces themselves and in the instructions.
Also if you don’t feel like downloading the PDF version, I find that using any sort of blue LED lighting works extremely well.
Blue LED huh? I’ll have to look into that. Normally I build these at my work station in my home, but it’s a bit cramped with stuff ATM from my LAN a little while back. Need to clean that stuff up!
Spectacular review Sal!
This seems like an overall great set, even with its shortcomings.
I need to get my hands on a Locke figure!
Oh yeah! It’s a very cool armor design. One thing I didn’t mention in the review was the lack of the yellow ‘arrow’ marking on his helmet. I might have to custom mine so that it looks more like the in-game armor. On a related note, there is another version of Locke in another set. The ‘Smuggler Intercept” set has Agent (not Spartan) Locke in it. He’s in his close to ODST armor and is helmetless! So we have another human head named character!!