
![]()
Mega Bloks Kodiak Siege Cannon
Technical Specifications:
Build Time: 1 hour sorting; 2 hours building. Your time will vary as I took time to take pictures for this toy review.
Set Piece Count: 868
Minifigures: Spartan Alice-130, 2X Brute Minor (Halo Wars 2 style)
Accessories: Shotgun, Battle Rifle, Brute Spiker, Bruteshot, removable gas cans
Special Features: Forward hatches open/close, side hatch open/close, front and mid roofs removable, side stabilizers pivot into position (multiple joints), rear stabilizers pivot into position (multiple joints); cannon raises, lowers and pivots, wheels spin, room for a driver and a gunner in forward section of vehicle.
Cost: $70 US; Mass Retail set
And on with the pics! (Click pics to make BIGGER)
One of the first of the Halo Wars 2 sets, the front of the box has a great action shot on it! 
A little piece of trivia, the Halo Mega Bloks line started as a Halo Wars toy line first, then moved on to the FPS games for more/ner sets.
The back of the box shows some of the moveable parts on the Kodiak, as well as the weapons and figures that come with the set.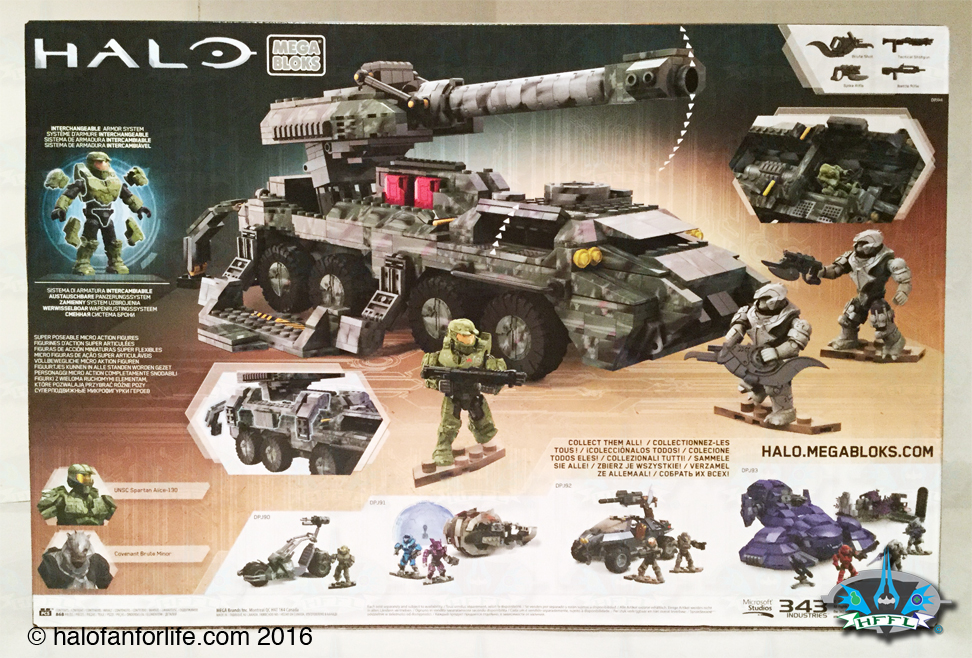
Here is what you get in the box. Make note, there is an addendum insert page. I will let you know later in the review where this comes into play. There are TWO building manuals that come with this set. Only ONE of them is online, the first one. There is reason for that, that I will explain later.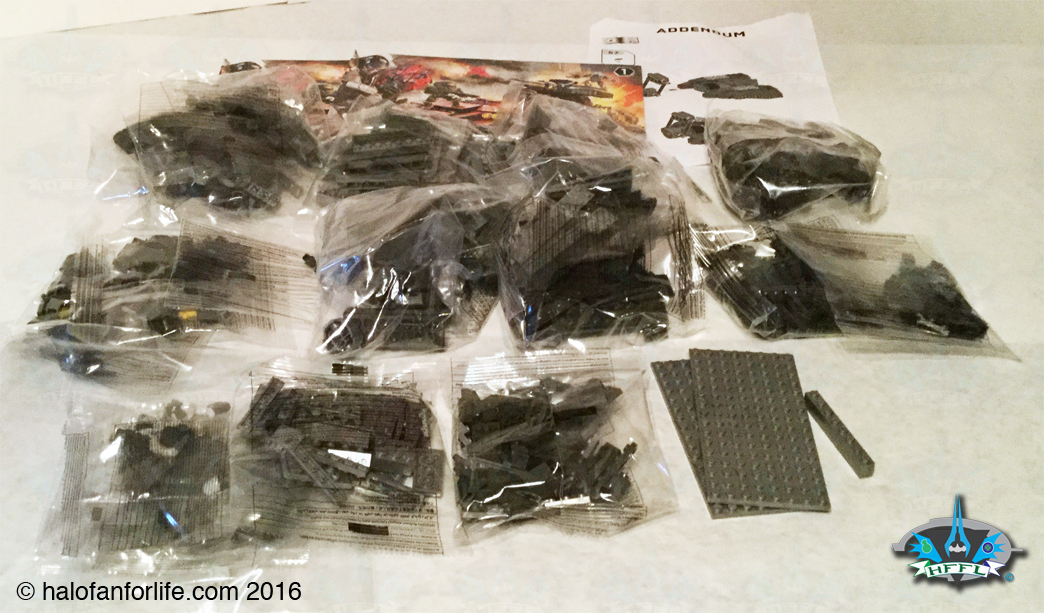
All the pieces sorted out. As this is an almost 900 piece set, you want to have a reasonble sized are to build this on. I used my dining room table (with white paper covering it). That gave me more than enough space to build.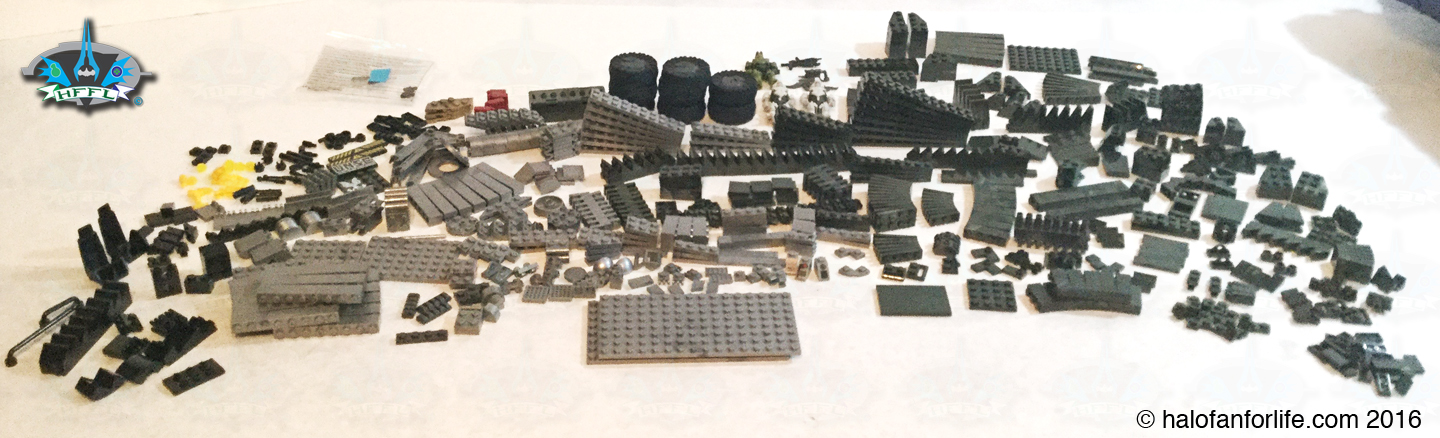 Note the bag with the little blue tab on it. I’ll get to that later on.
Okay, let’s get into the build!
The Kodiak starts out as a long rectangle and quickly builds up on the sides.
As you can see by the pics collage below, the Kodiak has 3 sections. The front houses the driving area and can hold both a driver and gunner. As this set only comes with one spartan, you’ll have to get some other set to fill the extra seat. The middle compartment is for the engine and the rear section is the mechanism for the canon to raise and lower.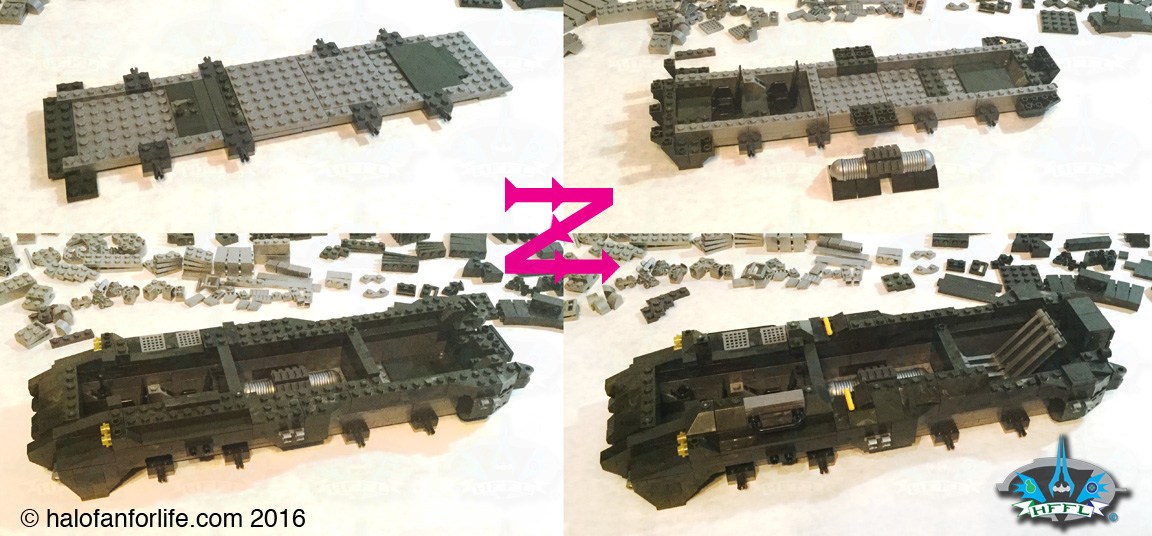
Here’s a better straight on view from the top to see the three copmartments.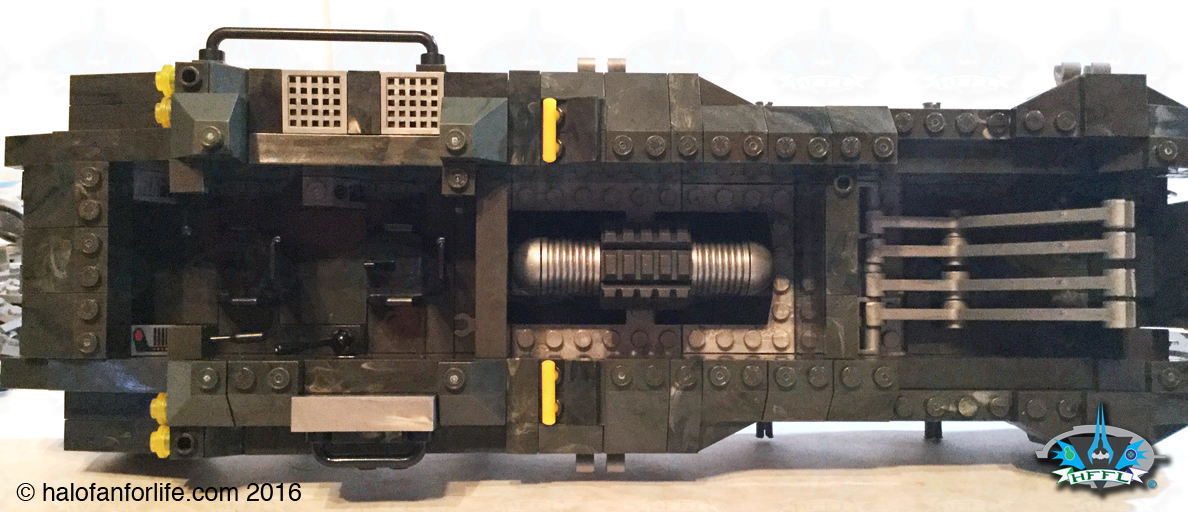
Now, at this point in the build, you’re in the second build manual. As there is an addendum, Mega elected to not put the second manual online in PDF format. I do hope that changes. One big reason is for the step below. I had to take a pic of this step from the printed manual and blow it up and lighten it, so I could see exactly how the pieces were laid out. Please feelf ree to use this during your build of this set as it will make it easier for you too. The build manuals always seem to be printed just a bit too dark. This has been an issue I’ve brought up with them many times. We can only hope that eventually they will change these for the better.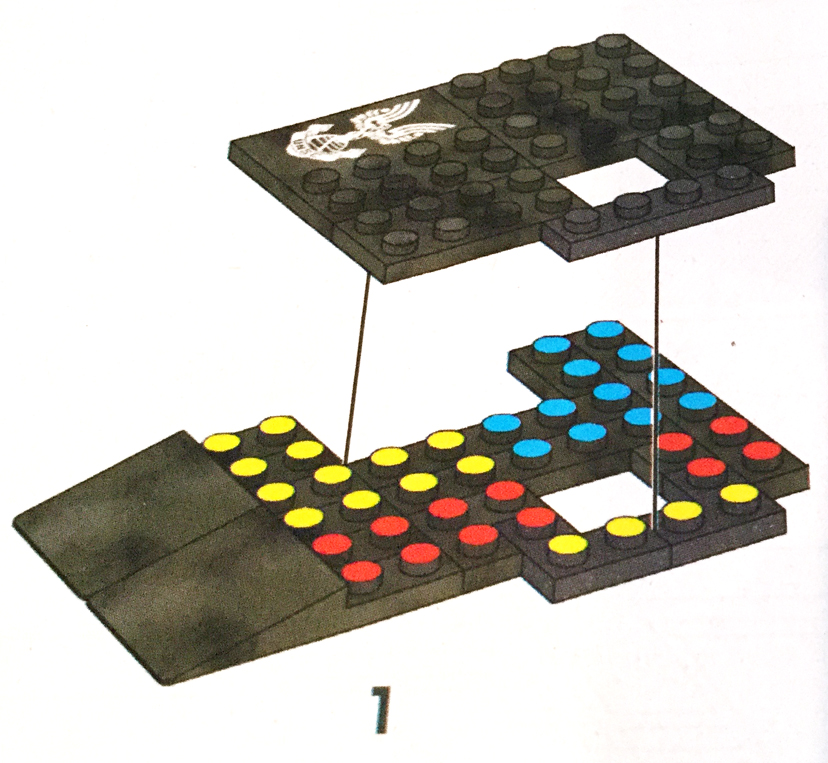
Okay, so we have the forward and middle roofs built and the rear section that helps the cannon pivot up and down.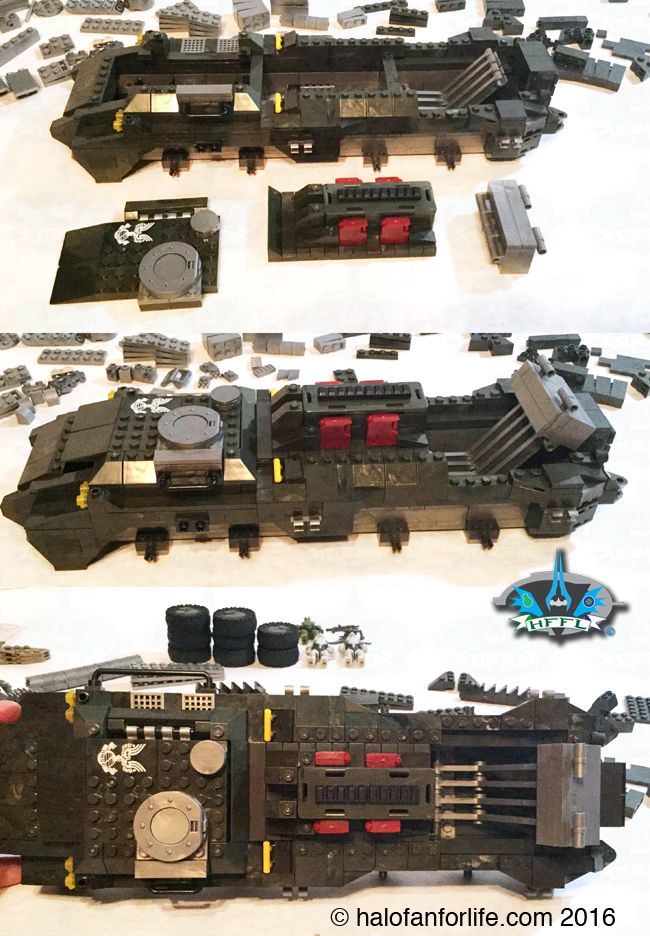 The front and middle roofs are held in place by only one stud. So be careful if you tilt your set over end as these may fall off. I do wish they would have been anchored a little better. Even just one more stud would have helped greatly. Also, note the four gas cans. THey are removable. A nice little touch.
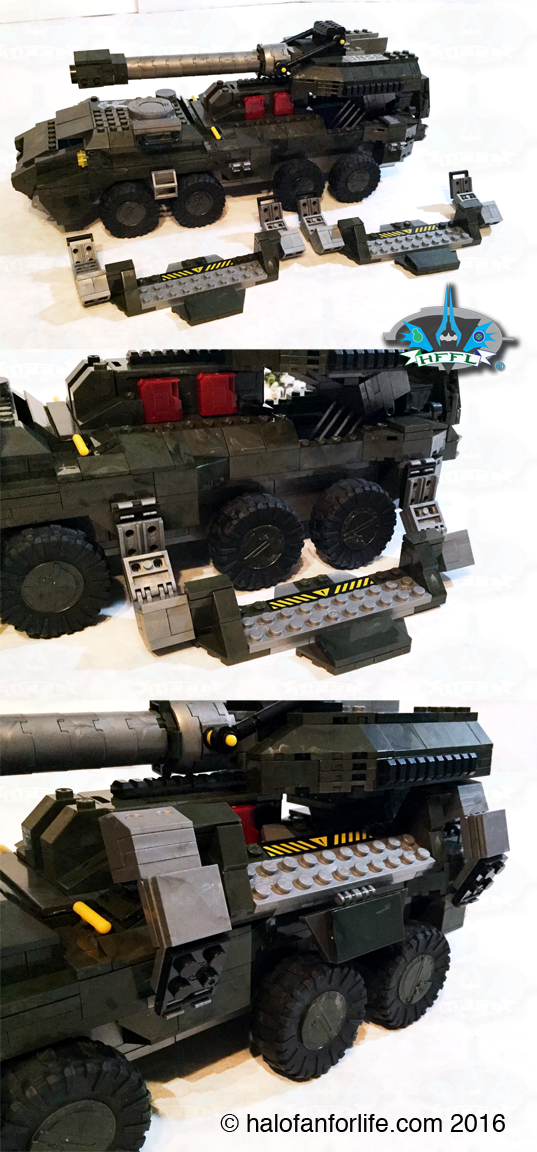
Here we being to build the huge cannon.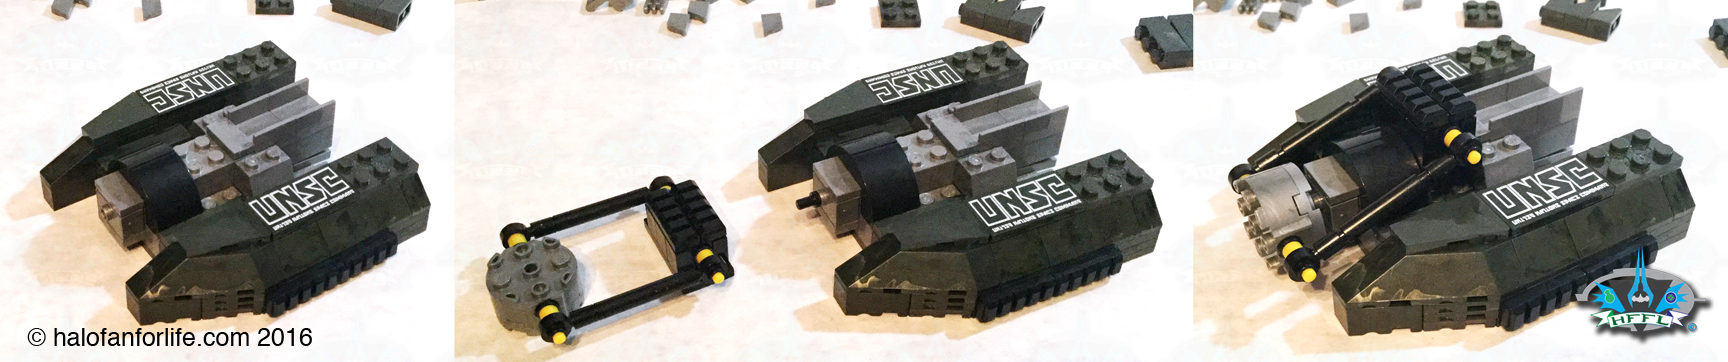
The pic below is where the addendum comes into place. The bag I noted near the beginning is where this comes into the build as well. That bag contains pins not listed in the directions. You only need one of the pins for this set. My bag came with 3 pins. (Always nice to have extras of these! Where the pin goes is just up and left to the left most red circle in the pic below. The reason those red circles are there are to not that the side bars do not completely press together and you will have small gaps as you see. This was a slight bit of frustration with the set. Not bad, just slight.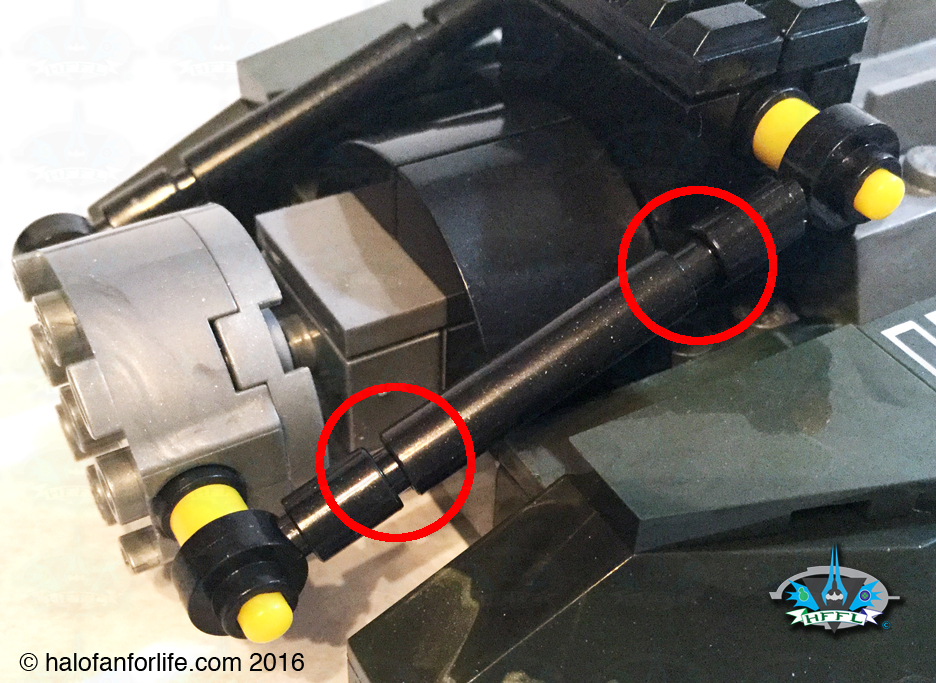
Next we put the cannon onto the Kodiak. I missed a step in the pic below and forgot to put some pieces on. I fixed that later though… (Yep, I can make a mistake from time to time, I’m not afraid to admit it…LOL)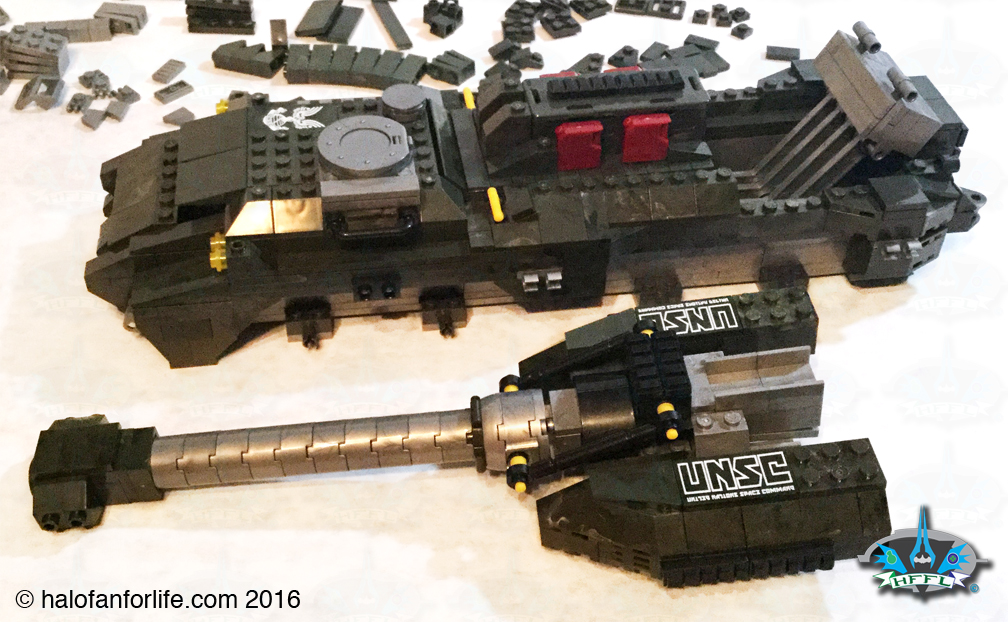 I should make note here that there are no pins inside the cannon to keep it together. So it can easily come apart at the pieces seams. Not necessarily a good thing.
Here is where you can really get a grasp as to how high up the cannon pivots!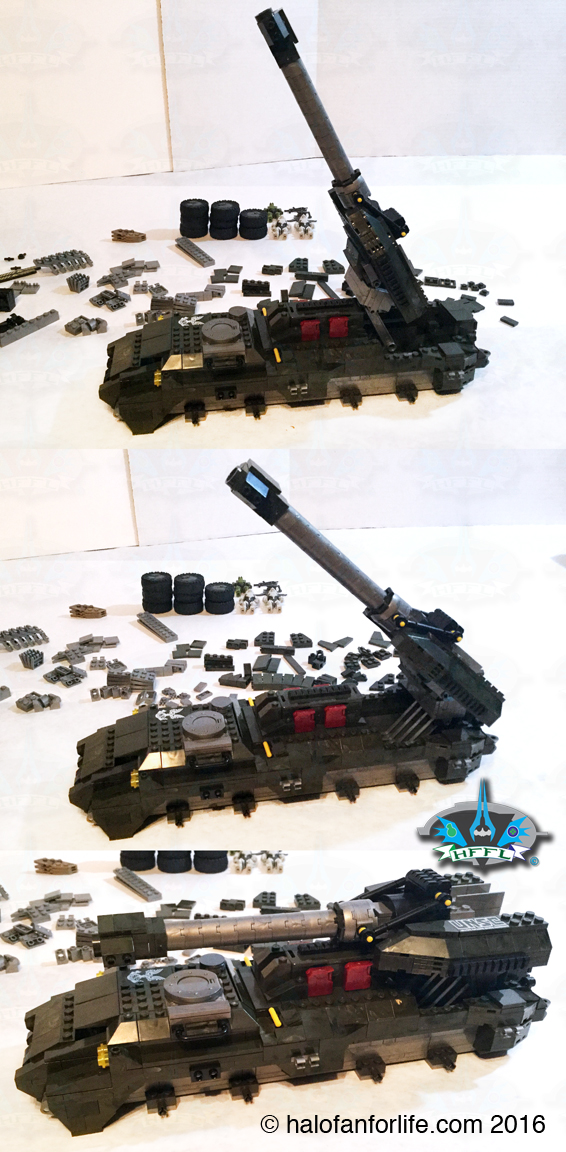
Okay, we’re ready to start putting on the stabilizing parts!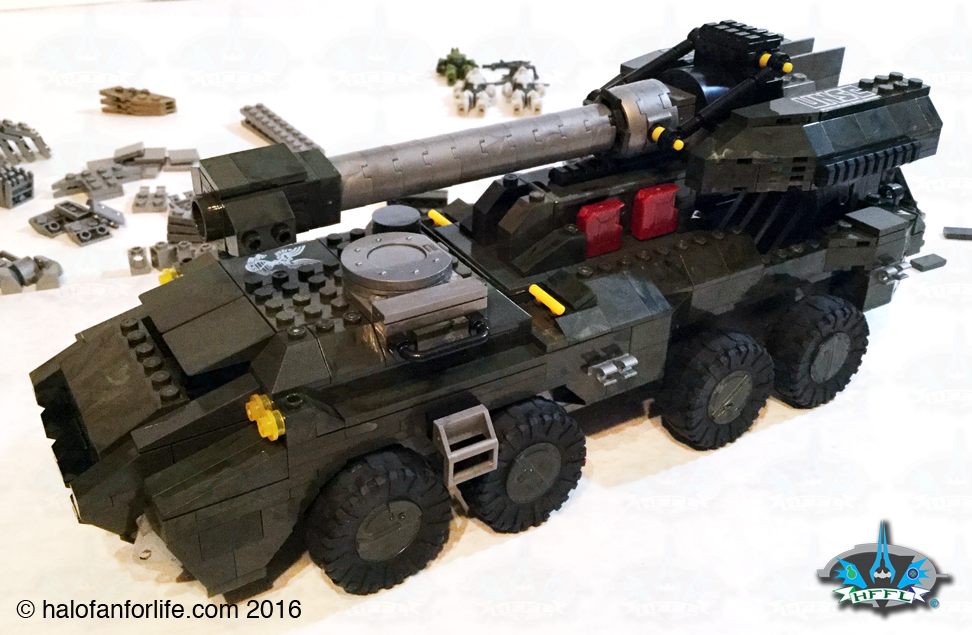
The rear has a two hinged stabilzing pieces. Oh, I should note, these stabilizers are made so that the cannon when deployed (in-game) keep the Kodiak in position and not blown out of position from the firing of the cannon.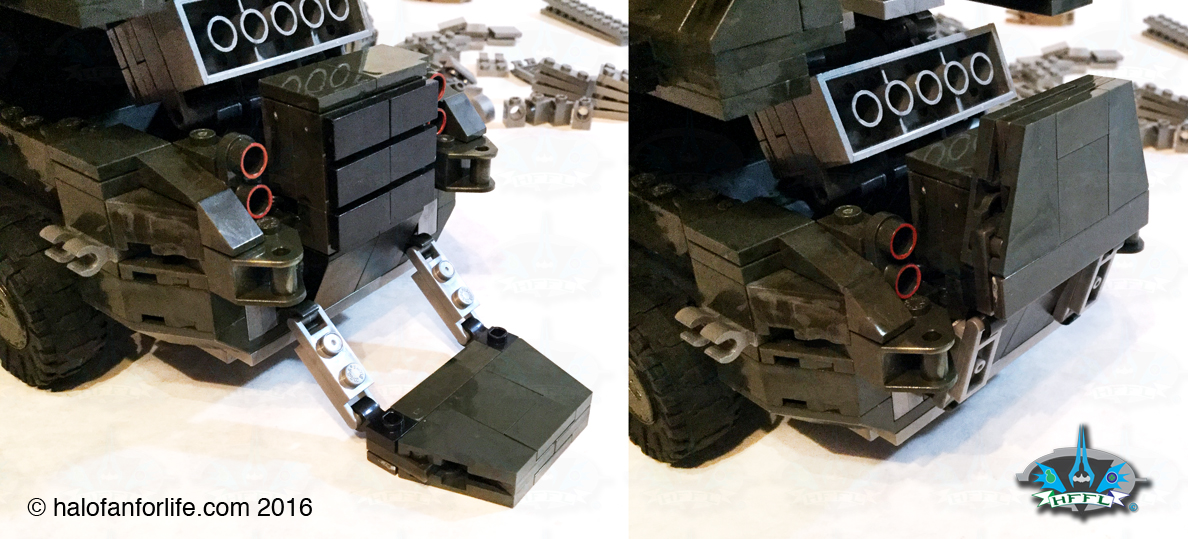
Next we build two side stabilizers. There are two sets of hinges on each side of each side stabilizer. As well, there is a swivel slot on each side of each side stabilizer. You can see in the series of pics below where these go, how they are deployed and lastly how they are stored.
The last set of stabilizers are also at the rear. These pivot out slightly and have three hinges. In the middle image below, the left circle shows where the leg stabilzers are inserted. The two left circles show the hinges. The right most pic below shows one of these legs stored correctly.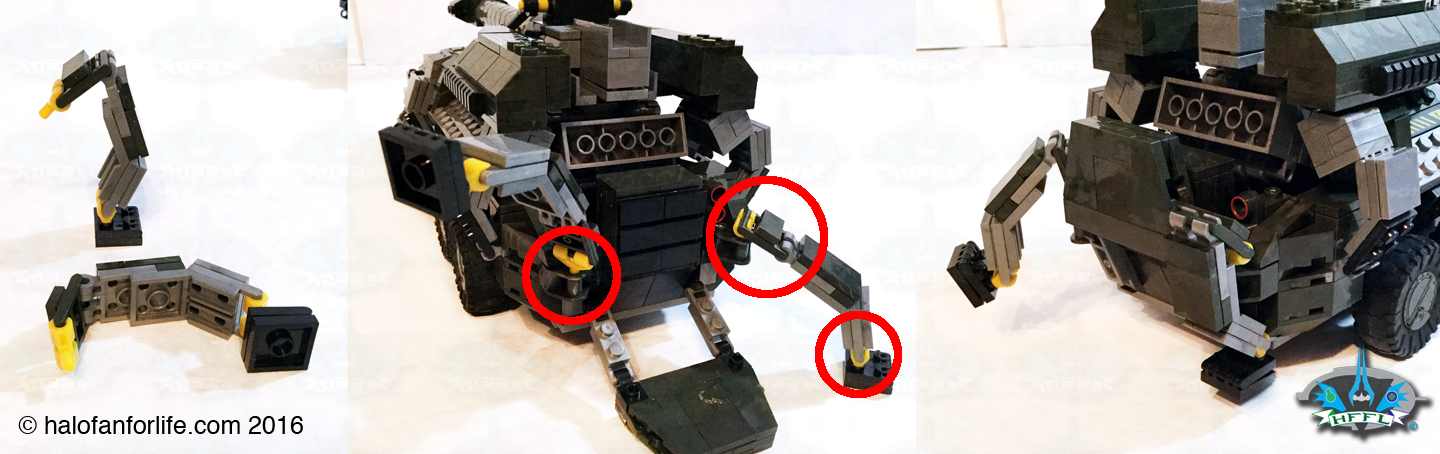
Okay, let’s look at the driver/gunner section.
To the left you see where the gunner sits, below that, the driver. Again, as there is only one UNSC figure here, I had to photograph Spartan Alice twice. To the right in the collage below, there is a small hinge. The arrowed curved line shows how this swings out.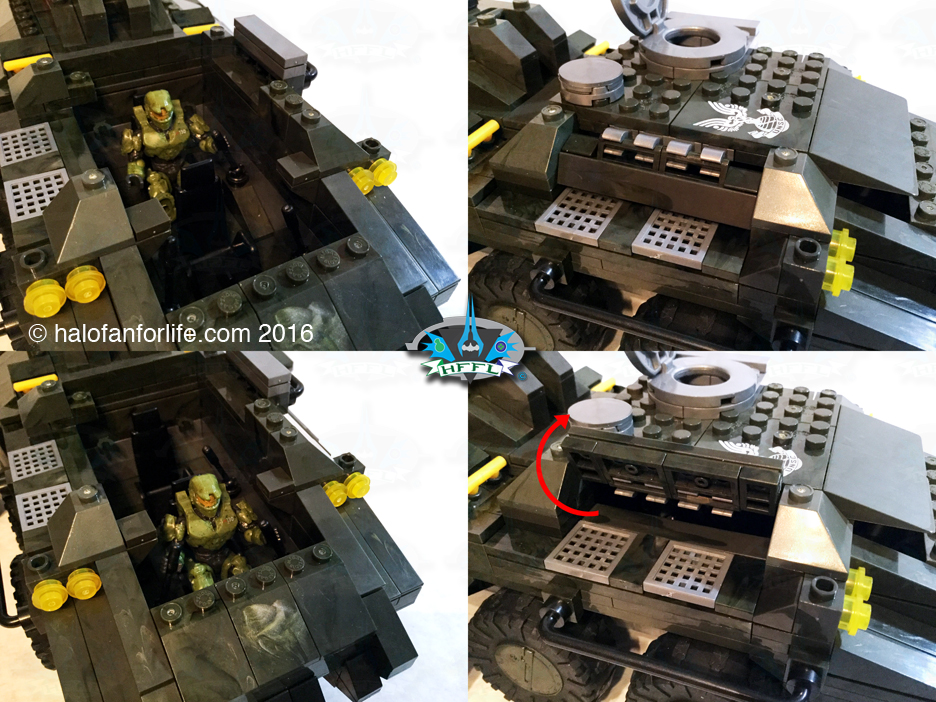
These are the pieces I had left over. As I always try to do, if I have enough pieces left over, I recreate a mini version of the set I just built. Thankfully, this was one of those times…well, sort-of. Ha ha!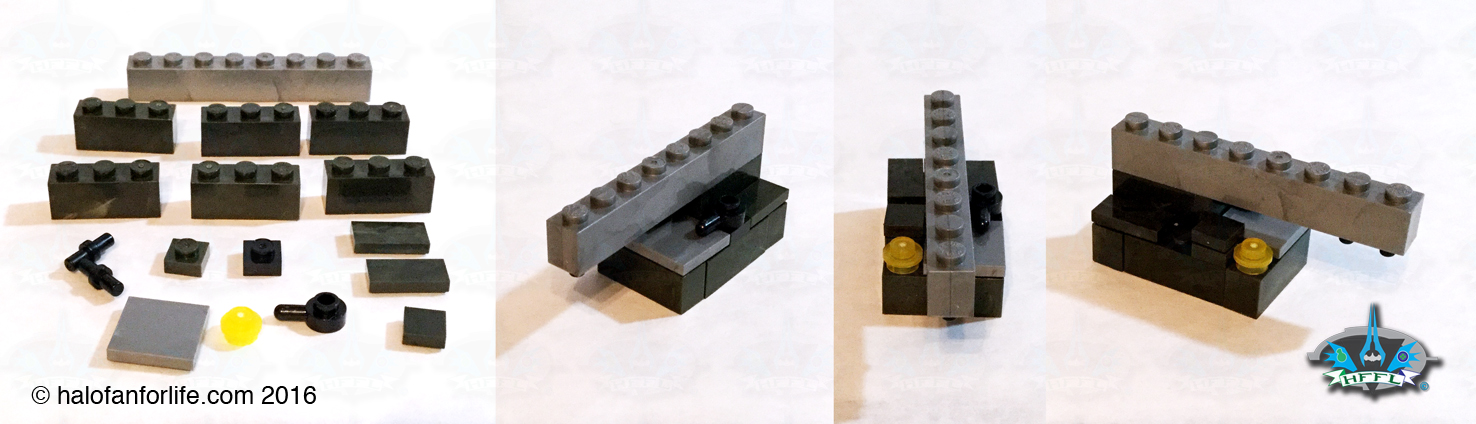
You get 4 weapons. A Brute Spiker, Bruteshot, Shotgun and Battle Rifle.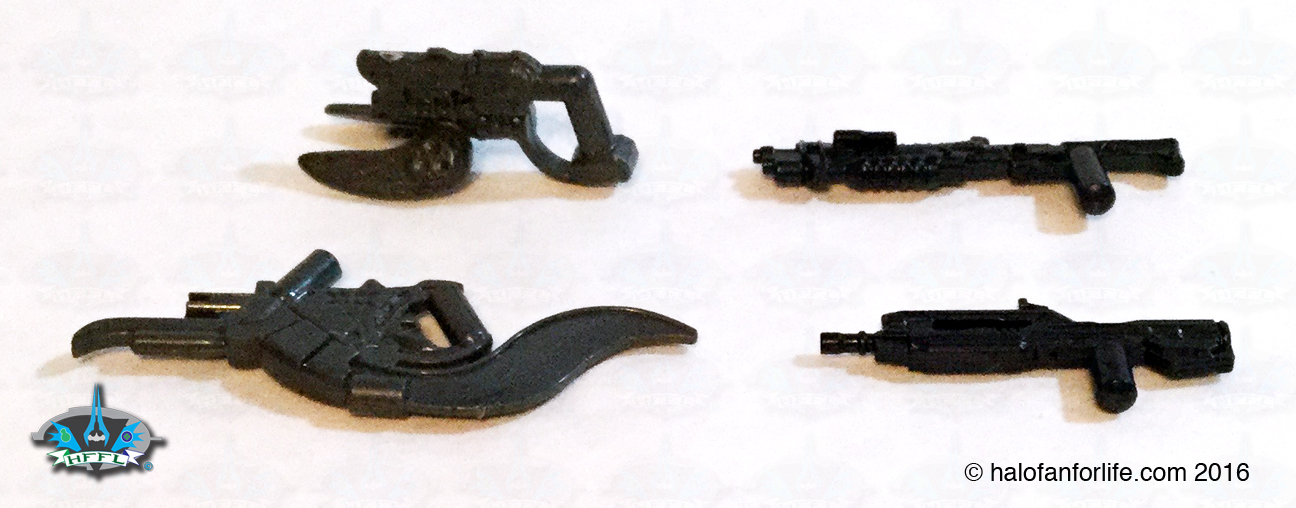
Here are the 3 figures. 2 Brute minors and Spartan Alice. I took off the helmet on one of the Bruted for you to see it is indeed removable. 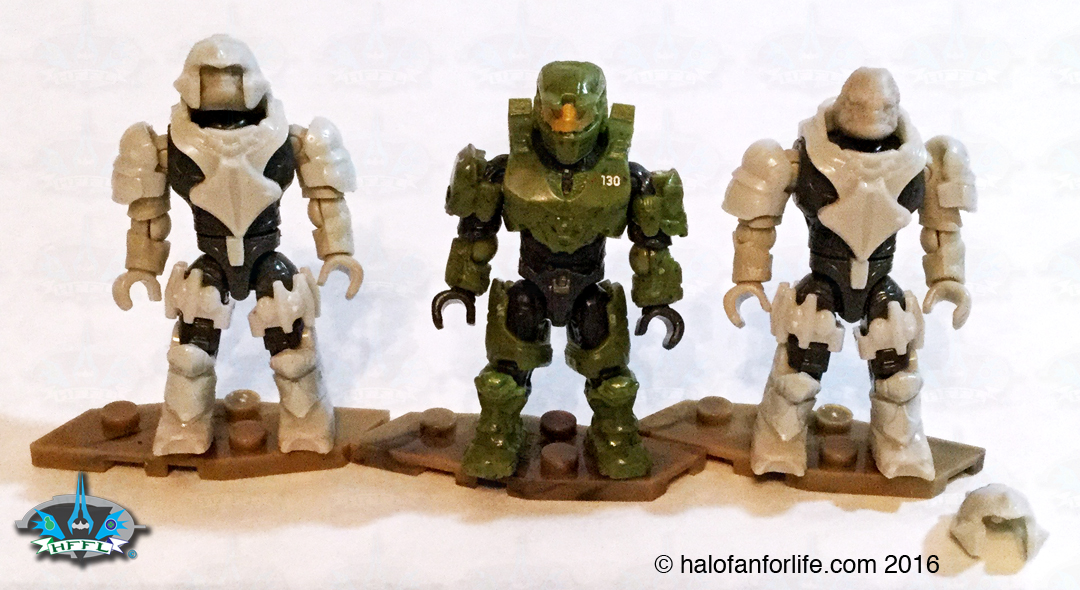
Orthogonal views of the figs.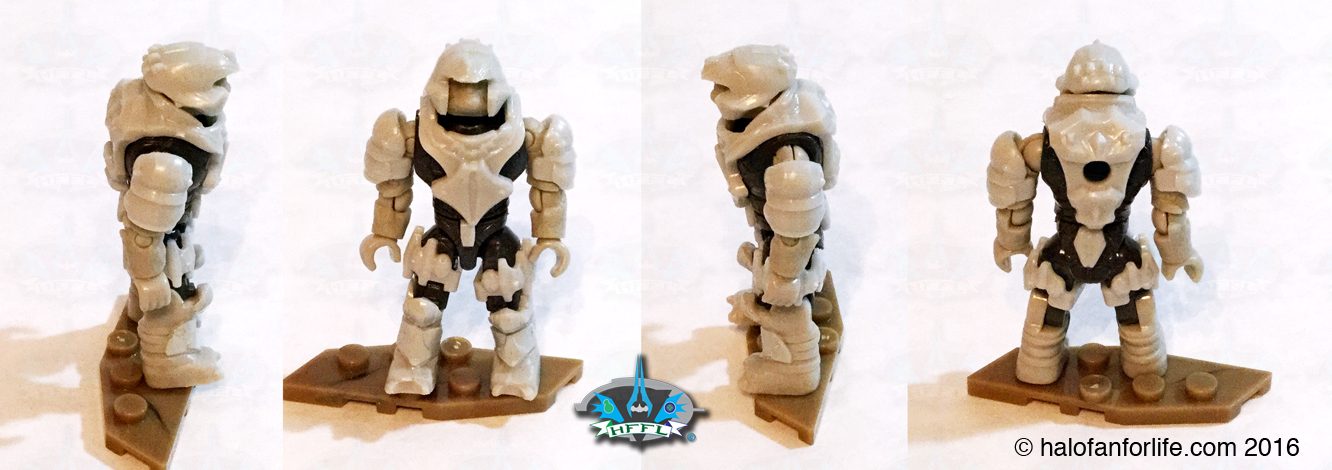
A close-up of the Brute’s head, helmet, this shows the pin in the helmet and the hole in the head. I wish there was a least a small blackwash on the brute figures as that would help bring out the sculpted details of the figures. I’ll have to do that later and I’ll post an update of them when I do.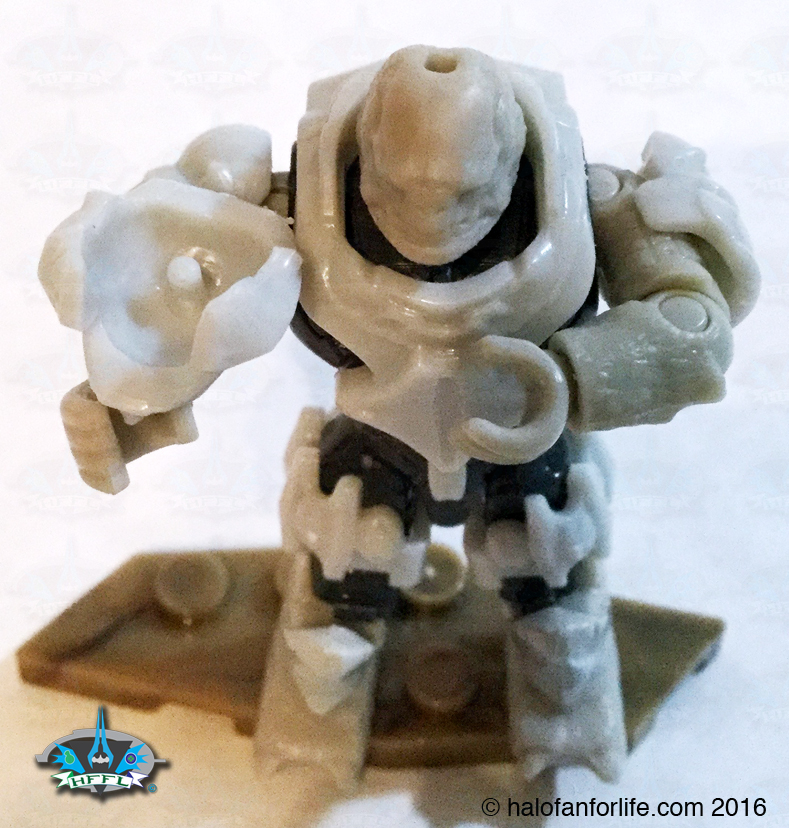
Spartan Alice (part of Red team from Halo Wars (1).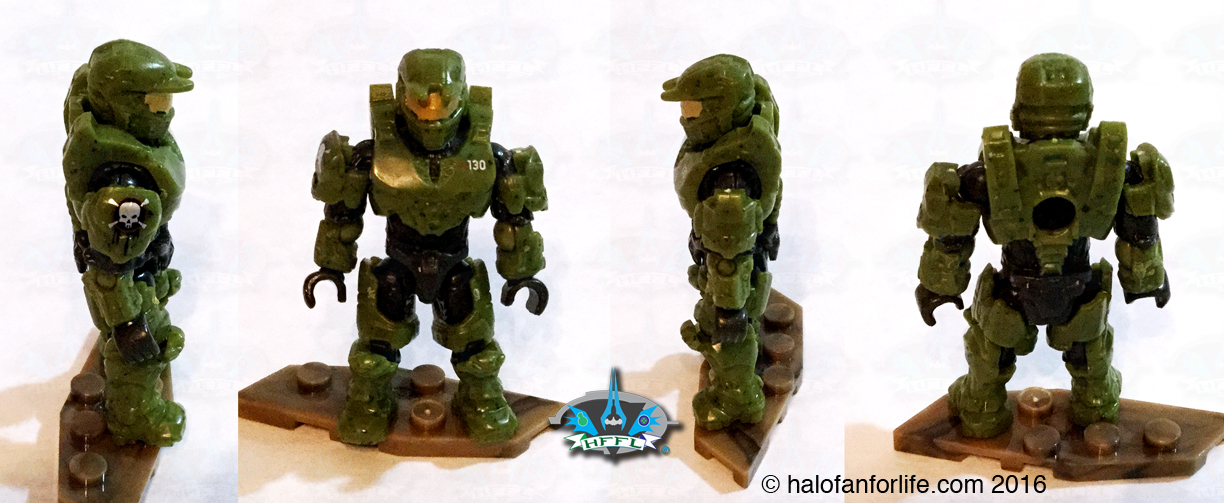
She has her number printed on the chest armor. It’s a tiny detail that was very cool of Mega to include!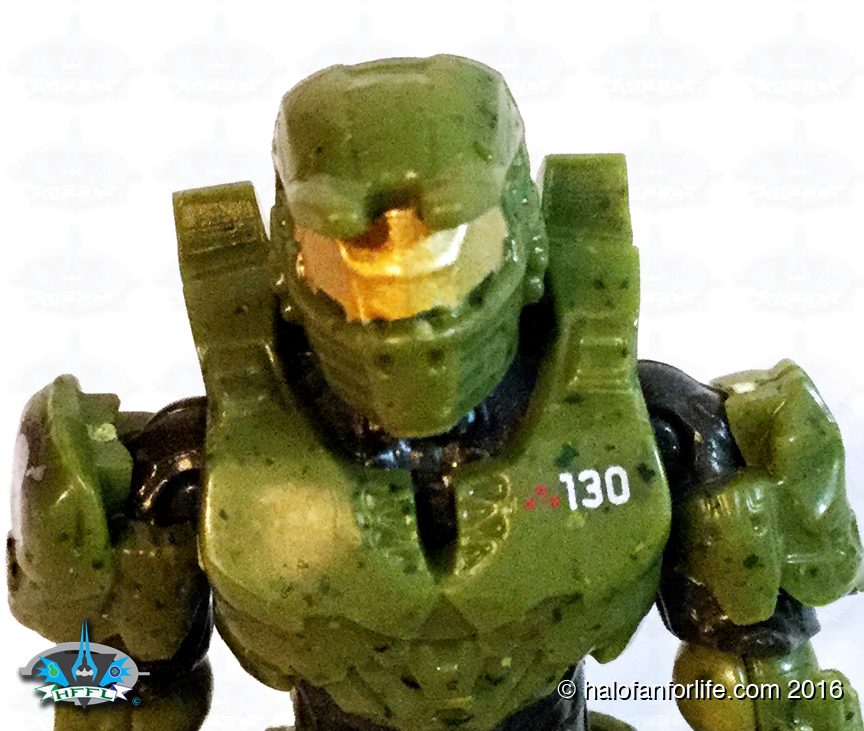
And finally, the whole set with figs. Will the Kodiak be able to deploy it’s stabilizers to shell the far away enemy? Or, will the Brutes take it out first? If Alice has anything to say about it, I think the Kodiak will be just fine, how about you??
Summary: This set is an good build. Though nearly 900 pieces, I found this easy to complete the build in one sitting. Lots of moving parts and removable pieces make this a fun set. A named Spartan adds to the appeal of the set. I consider this a mostly easy build with just one or two intermediate levels of build. Those being the cannon assembly I mentioned during the review as well as the side stabilizers.
Overall Rating: I give this set 9.25 out for 10 medals.
Why did I give it a 9 out of 10?
• The cannon assembly with exception to the section I mentioned earlier is easy to build. It’s that one section though that gave me a little frustration. Take your time. It will come together. 1/4 star off here
• The side stabilizers could have been built a little more solidly. They popped off a coupld of times. Also, how they are stored isn’t quite…stable. They just sit on the side, rather than locking in place with the use of one of the top side studs. Missed opportunity there. 1/4 star off here
• Finally, I feel this set should have had at least one more figure with it. Preferably a UNSC figure, even if just a Marine to use as the driver or gunner. The other thing regarding the figures is the lack of paint on the brutes. They have some great sculpted details that unless you’re really zoomed up on them go unnoticed due to being a very light shade (both armor and skin). half star off here.
Other than those small bits, the set is a good set. I enjoyed building it, especially in one sitting instead of two as I might have normally done with a piece count of this many.
Let me break down my opinion of the value of this set. (In US dollars)
3 figures equals $10.50 ($3.50 each)
All the rest of the pieces with exception to the 3 standsw and weapons, goes into the vehicle. While that is cearly over 800 pieces, it didn’t feel like it. The set is long, yet narrow. The set does follow the industry guideline of 10 cents per piece (actually a little bit better). As the set has 868 pieces, by that standard, the set should have cost right around $87 US. Instead it cost $70. Though a long set and some neat moving parts, it didn’t quite feel like a set worthy of being $70. Another figure would have helped this greatly. Had the side stabilizing sections been built better and able to be secured better to the vehicle, that most certainly would have added to the value.
As it stands, with those short comings, even with the generous piece count, I put the value of the vehicle itself at only $50. Add the three figs in and again, you can up that amount by $10.50.
So value wise, this falls just a little short. (Not much though) To me, this really points out the value of figures to sets. I have a guideline I’d like to see become standard if not better than this. Basically it’s one figure per $20 of the pricetag. In this case, being a $80 set, it would have had 4 figs. Any set less than $20, but requires a figure would still get a least one figure. The stability of the build is the other thing that struck me here. The vehicle itself is solid. The cannon’s barrel could have benefitted by having long t rods inserted to keep it together. It doesnt have that, so the barrel can come apart a little easily. And I’ve already noted the side stabilizers.
As of this writing (11-24-16), there is a Black Friday sale on this at Amazon for $45.50 (not including shipping). Get it while it’s hot for that price! https://www.amazon.com/Mattel-Mega-Bloks-DPJ94-Kodiak/dp/B01ARGB8GQ
Do I recommend it? YES, with those caveats mentioned above. As someone who LOVES building and collecting Halo Mega Bloks, this was a mustg buy for me. If you’re more into the FPS games and not the RTS games, then you might consider a pass. If you’re on the fence about this, you might consider waiting for this to go on sale and getting it for less.
On that note, since it JUST came out at retail not long before this review, it is going to be some months before the Kodiak goes on sale. So this will depend on your desire to have the set and how much you’re willing to pay for it.
If you have any questions about this set that I didn’t cover in the review, please do not hesitate to ask me. Either reply below or e-mail me at [email protected]
Thanks for reading and let me know what you think of the review. If you get this set yourself, please let me know your thoughts on it too!
If this review gives you an informed decision on whether to purchase the set or not, please consider a small donation (50 cents) maybe. It’s much appreciated and helps ensure that HFFL stays active on the internet. Thank You.
-Sal