
![]()
Mega Construx Aerial Ambush
Technical Specifications:
Build Time: 35 minutes to sort, roughly 1 hour 10 minutes to build (your time will vary as I took pics along the way for this review)
Set Piece Count: 541
Minifigures: Elite Minor, Grunt Minor, FlameMarine, Spartan Mark V
Weapons: Shotgun, Plasma Pistol, Beam Rifle (special GOLD variant), buildable flamethrower
Accessories: x4 figure stands, buildable display base for Banshee
Special Features: Banshee: Cockpit hatch opens/closes, button launch able projectiles; Sparrowhawk: Cockpit opens/closes, side mounted guns rotate
Cost: $50 US (Mass Retail) I got mine from Amazon.
And on with the pics! (Click pics to make BIGGER)
The front of the box shows a very cool aerial combat, with figures engaged in ground combat, as well. The back of the box shows most of the features, the figures and weapons included.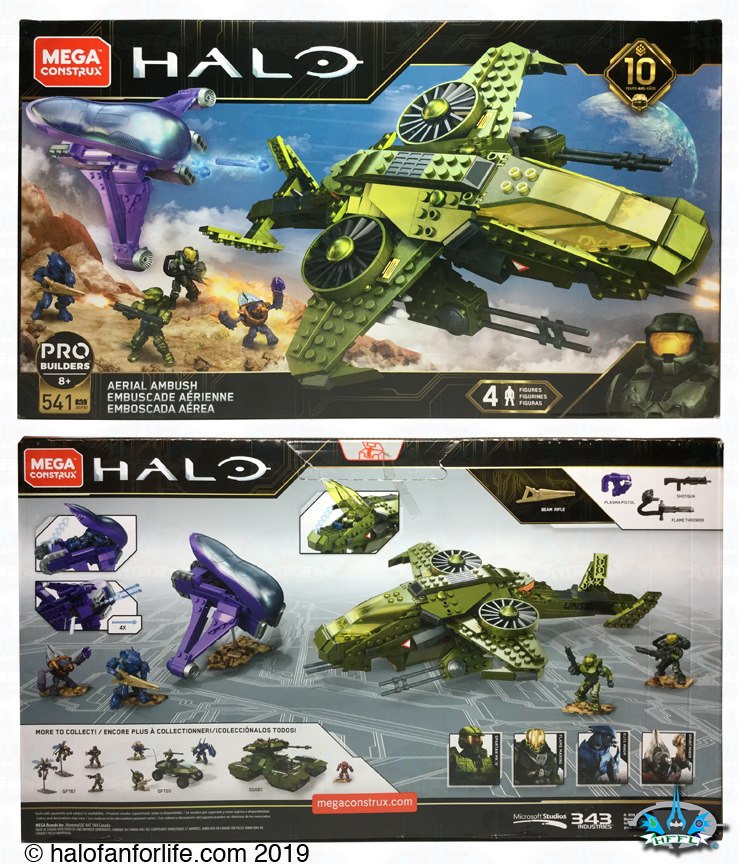
In the box you get several numbered bags, a medium sized “MCX” labeled bag, 2 instruction booklets and an addendum sheet.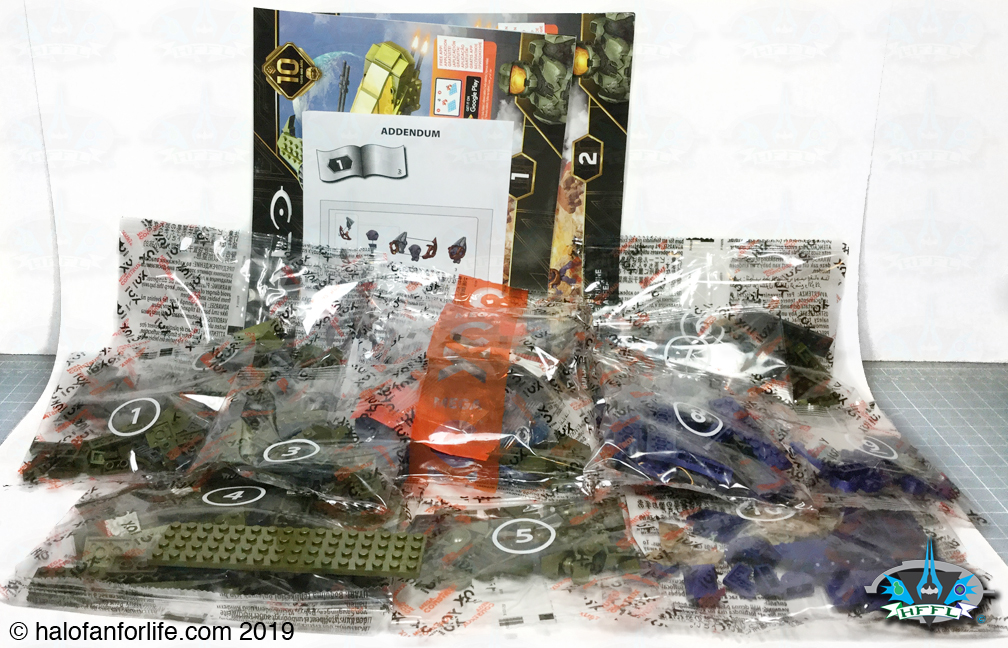
Here’s the addendum sheet. It correctly shows how the Grunt minifigure is assembled.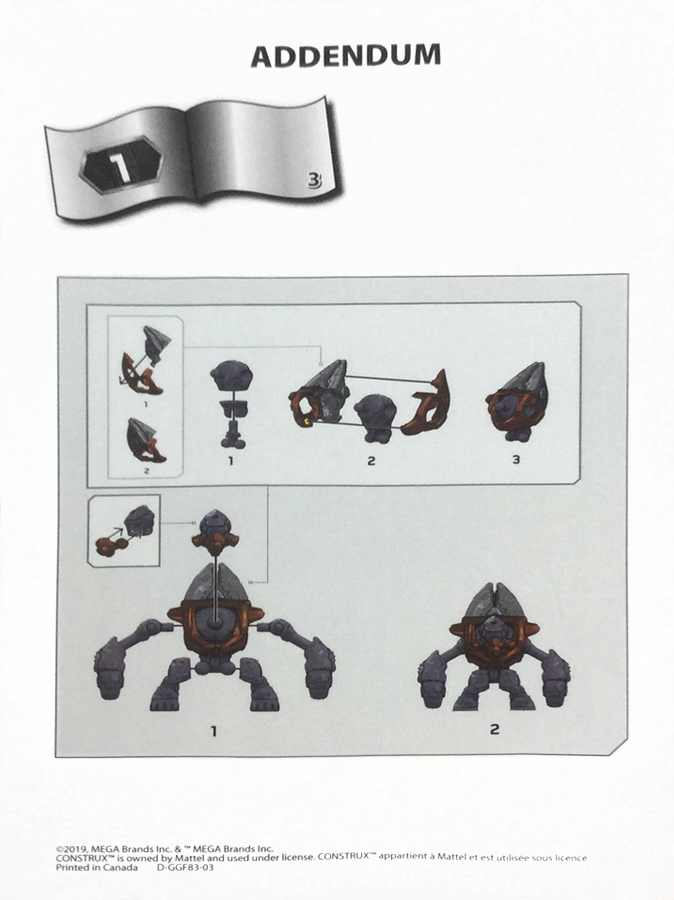
Let’s get into the build!
We start with this MCX bag.
Contents include some large parts, the figure bags, a smaller parts bags, and the Mega tool bag.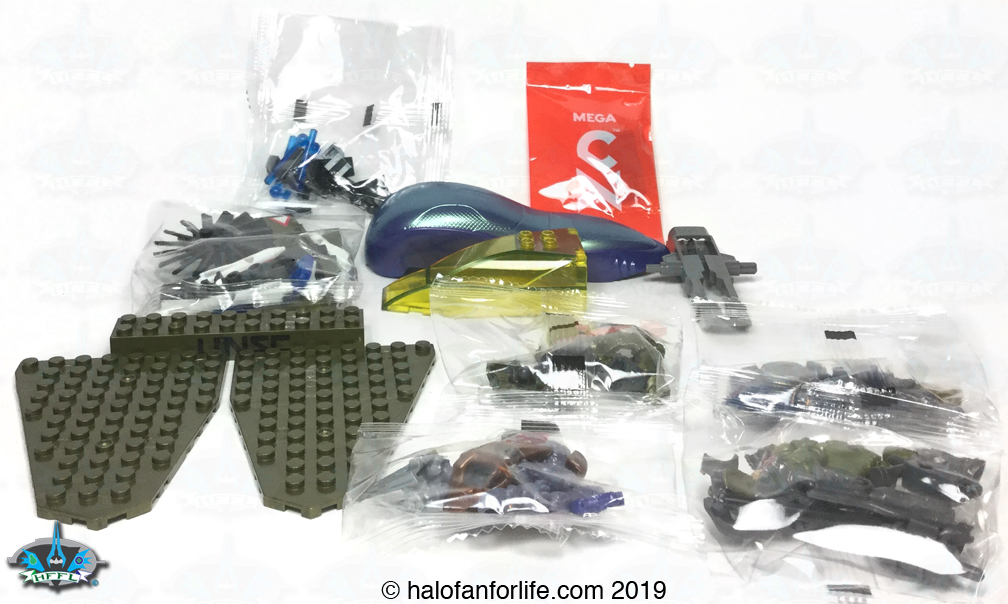
I built the figures at this point, but wanted to make special note of the Grunt, since there is an addendum to the instructions. The methane tank/harness is now 3 parts. Prior to this, as recent as 3 months ago (Jun 2019) as of this writing, the harness was a 2-piece mold with some painted areas. With the 3-piece harness, the individual pieces are solid colors. However, when put together, make for a fantastic looking shell.
Fair warning, it doesn’t completely fit snugly. Though it’s very close. Also, you may find that the Grunt torso seems to fit a bit too snug. Whatever the case, it all works for me as we get an outstanding Grunt Minor figure from this new design.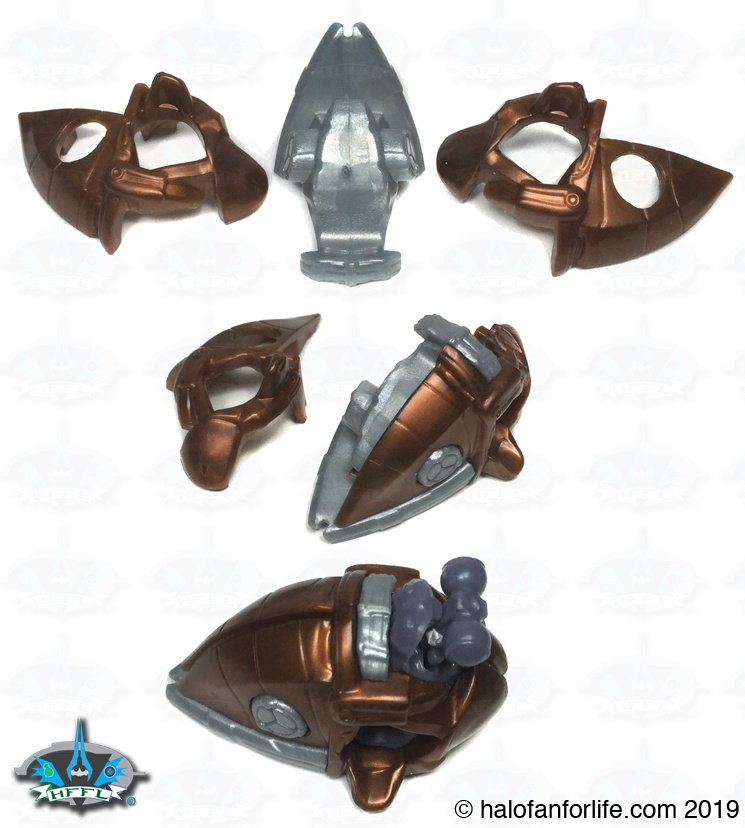
Several pieces have printing on them. All of the green pieces belong to the Sparrowhawk, while the rest of the printed pieces go with the Banshee.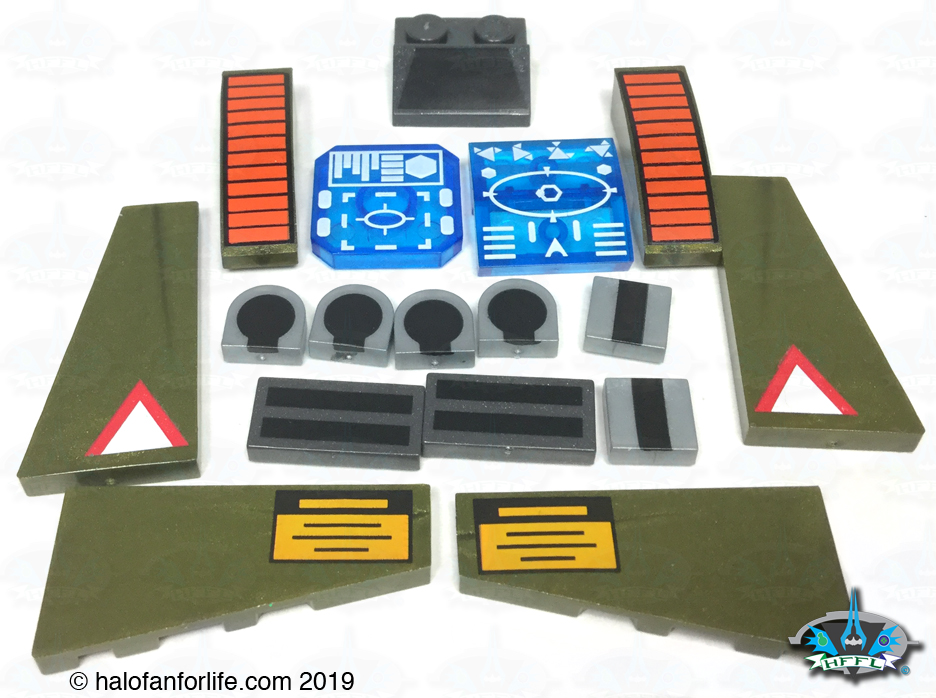
Here are all of the pieces from the MCX bag sorted out.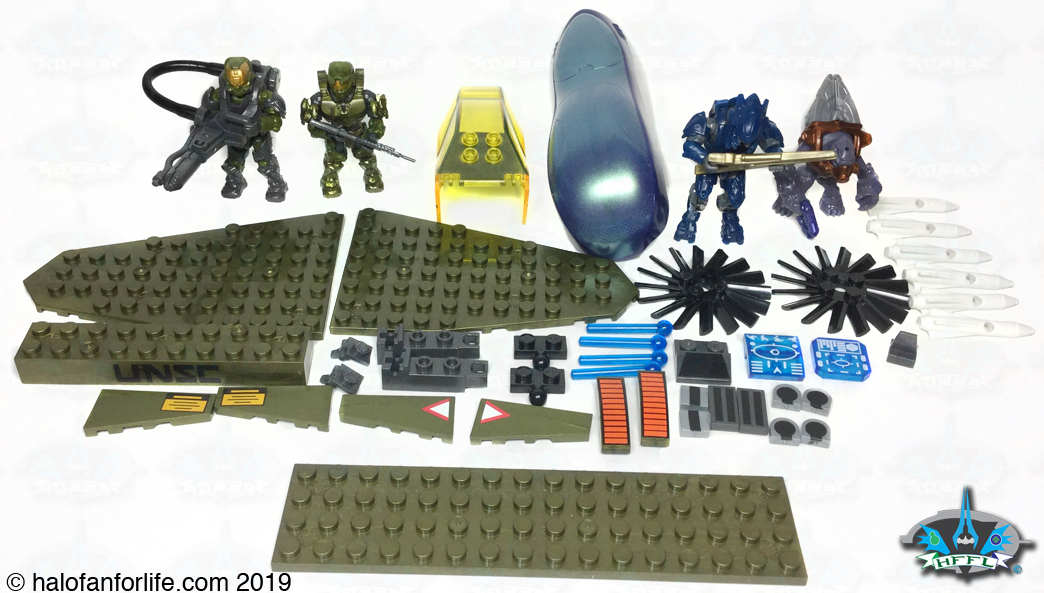
As with many sets this year, in appreciation of Mega’s 10 year license with 343/Microsoft, there is a Gold part within. This set includes a Gold Beam Rifle. You may notice a slight stress mark on my shotgun. Originally it was a little bent, so I carefully straightened it as best I could without breaking it. I have SO many extra of these, that this didn’t bother me. However, if you find a part in your set that is damaged, you can always call Mega’s customer support line for replacement parts.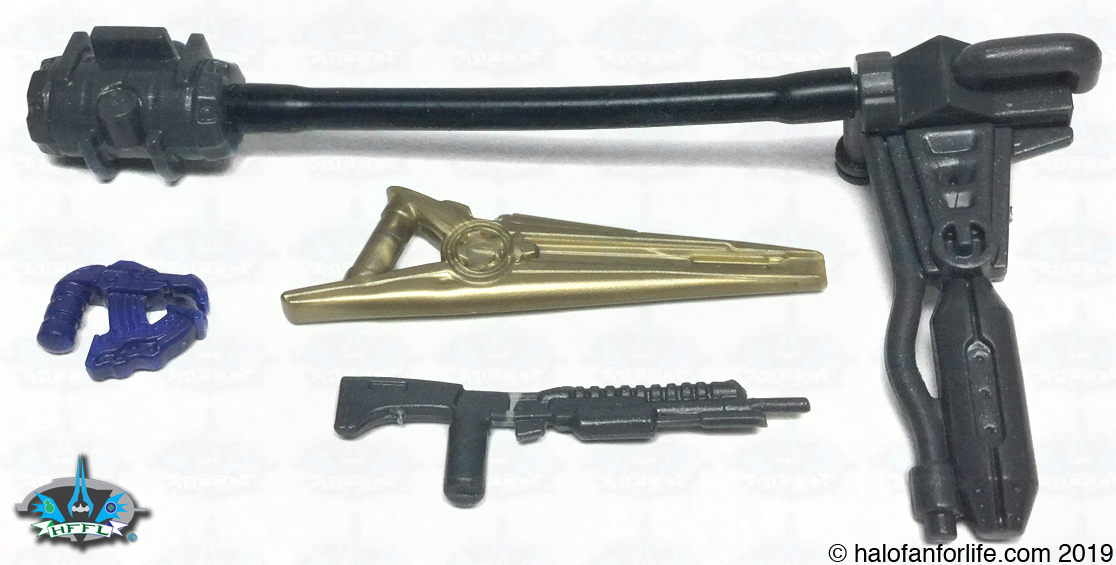
Strangely enough, there wasn’t really anything to build quite yet with the MCX bag. Those parts will all be used along the way in the build. So we move on to bags 1 and 2.
Here you can see the MCX and bags 1 and 2 sorted out.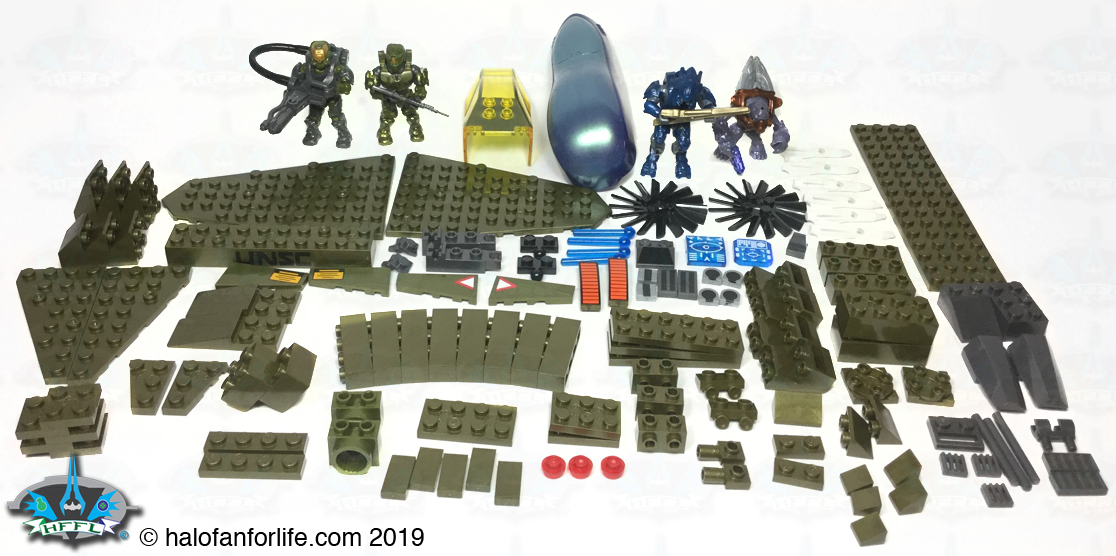
We start the build with the main fuselage. Here the forward guns are mounted, much of the inner cockpit is built, adding to that the display screen. More is built up, with two ball joint attachments sticking out of the side. These will have side mounted guns added to them. 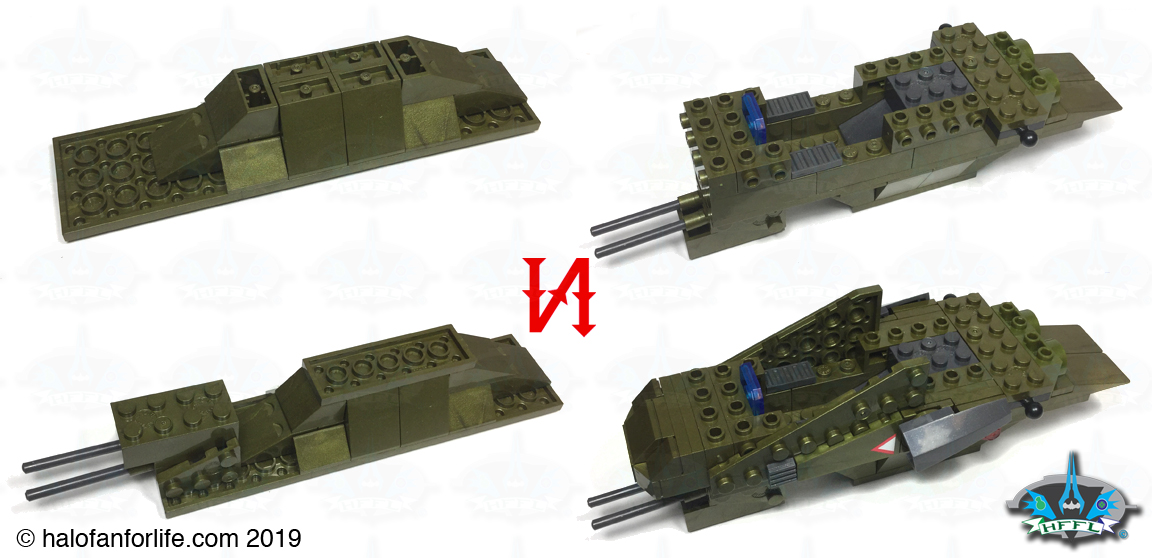
Bags 3 and 4
Sorted out, these two bags contain the parts for the side mounted guns and tail section of the Sparrowhawk.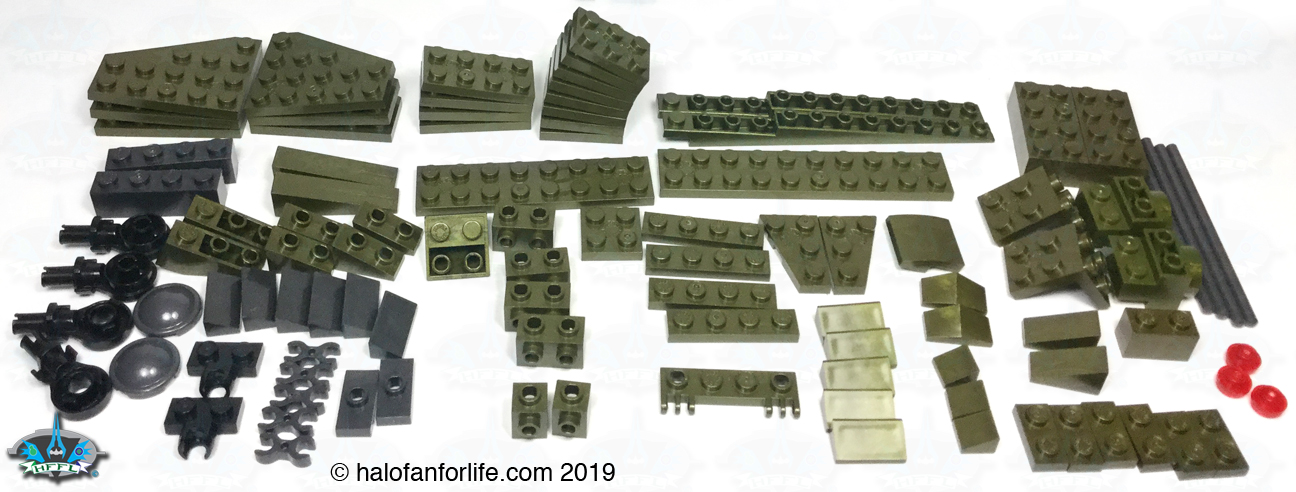
Each side gun is built and attached to the previously mention ball joints. At the end, this does allow for some range of movement with those guns, if you so choose.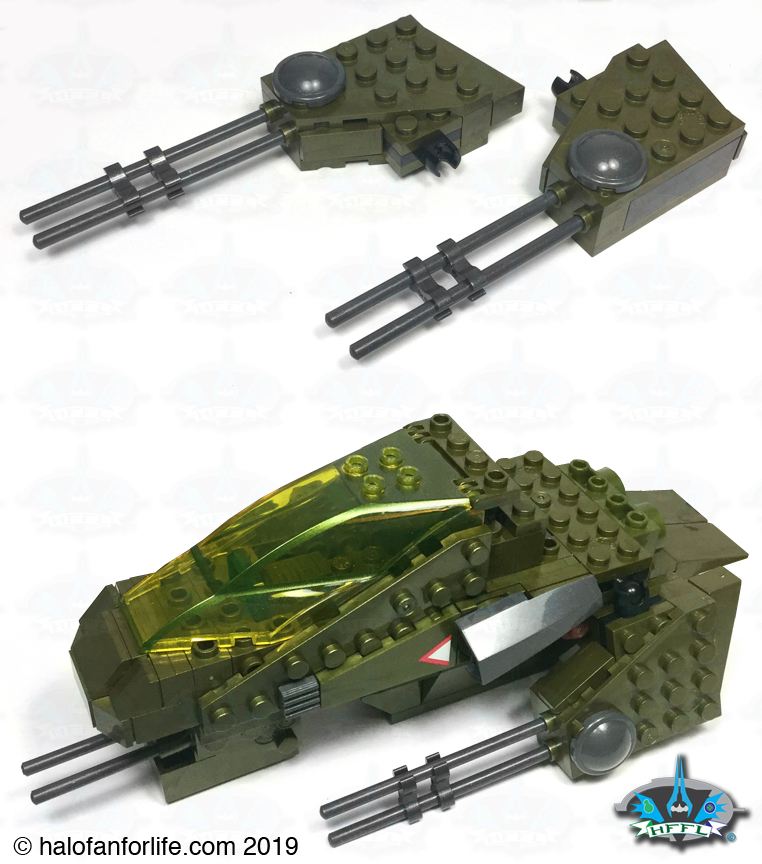
Next the tail section comes together. I like the way this is built. Minimal pieces, with those very long underside sloped parts. The tail wings could be a little more securely built for my tastes, but they look GREAT!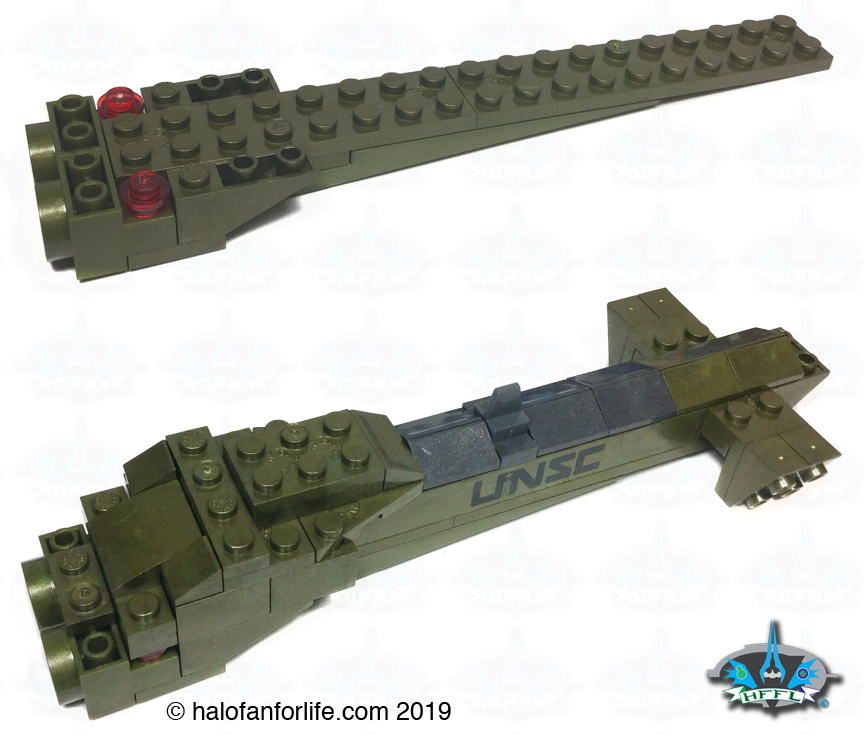
We add the tail section to the front section via 2 black hinge pieces. Once these are clicked into place, you won’t be able to move the joints downward, due to pieces being deliberately in the way. Later on, more pieces are built over those joints to further secure the position of the tail. It’s a good solution to the way the tail bends from the front section.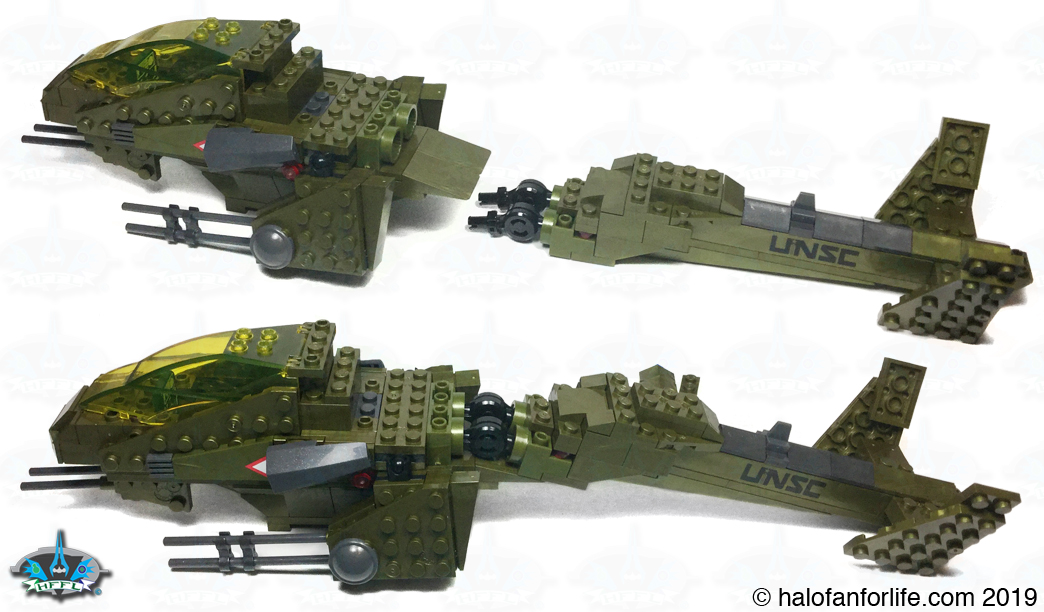
A close-up of the hinge joint attachment area.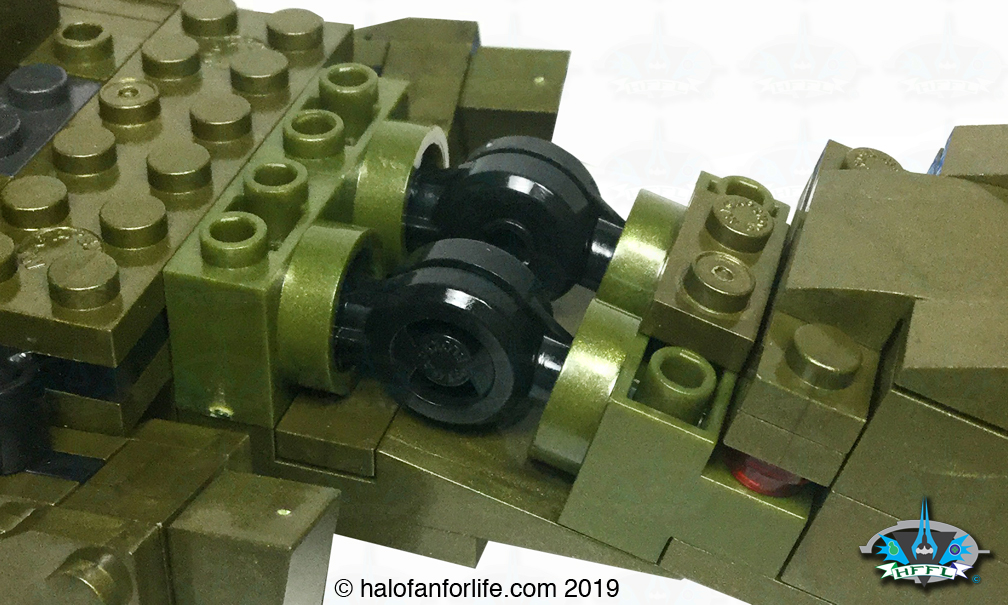
Bags 5 and 6
The pieces for bags 5 and 6 contain the front wings (with those large wing pieces from the MCX bag at the start of the build).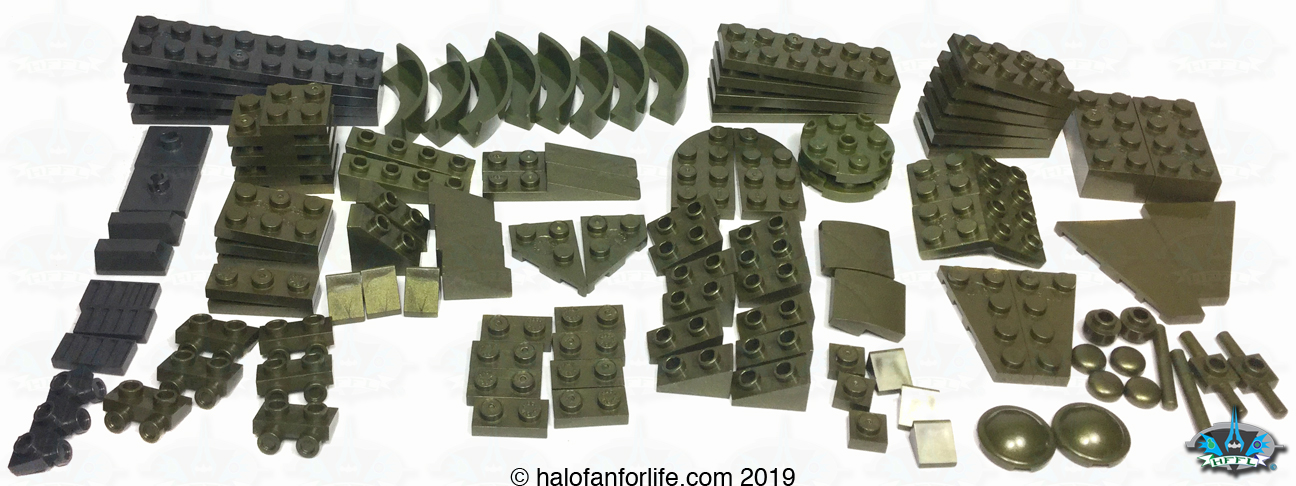
Lots of great detail is built up on the top of the wings. A couple of the printed pieces add to this as well. On the underside, you build small missile racks. The missiles can be taken off, but not flicked off. I suggest leaving them there for display and so as to not lose them.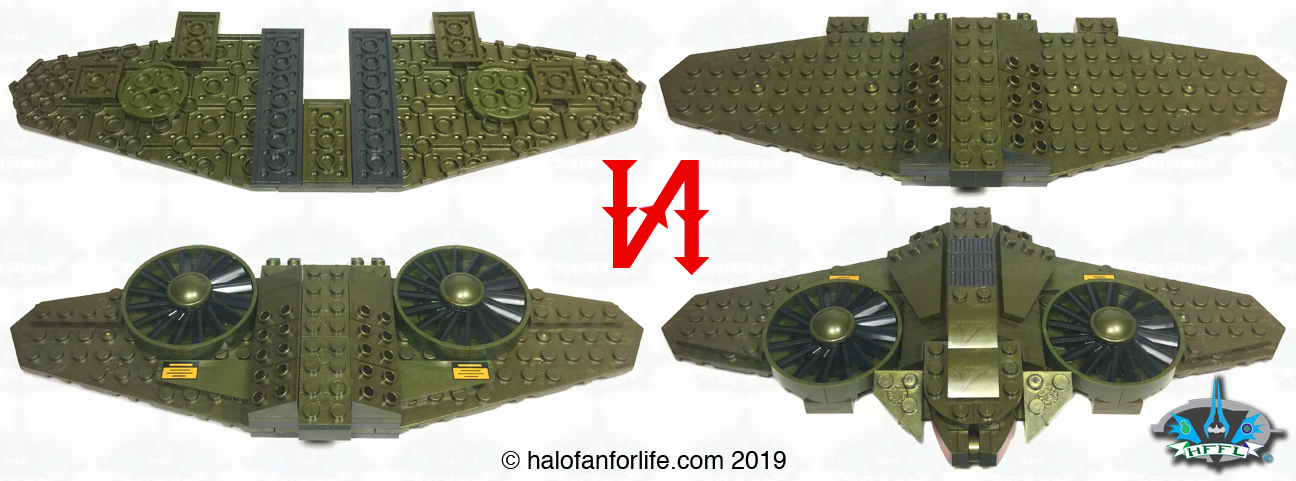
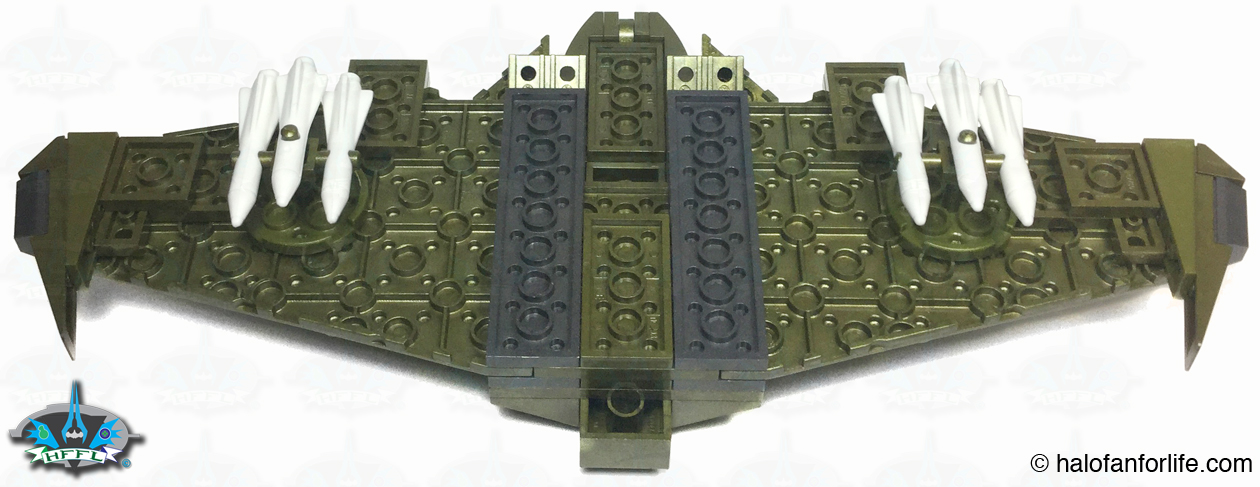
The wings are attached! At this pint the Sparrowhawk is complete! She looks FANTASTIC!
Now we move on to the Banshee part of the build!
Bags 7 and 8
Much of the fuselage of the Banshee is included in these two bags. Lots of deep purple pieces here!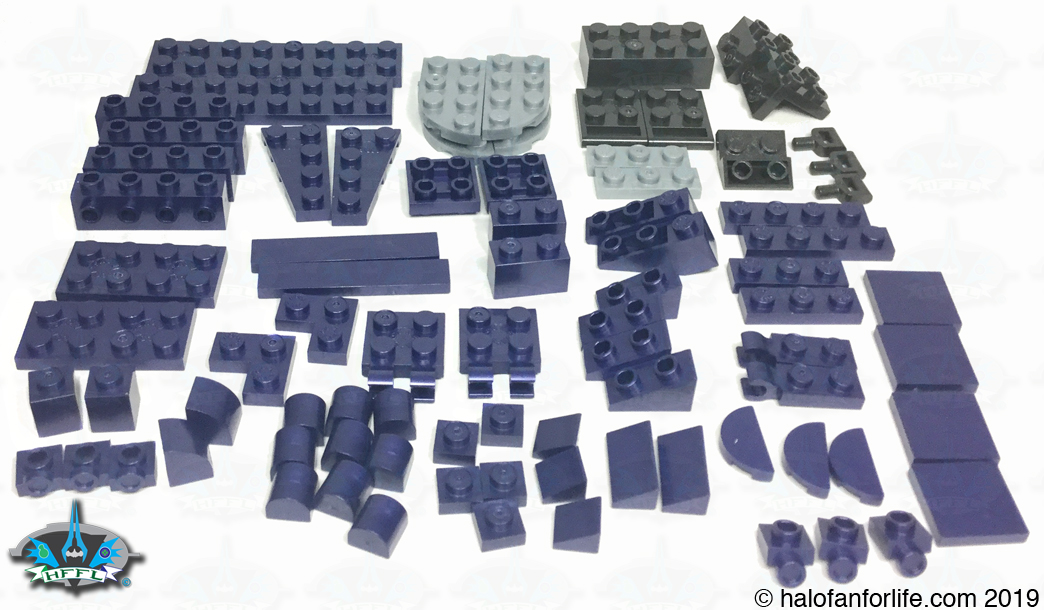
As you can see by this progression graphic, the display screen is added on. So to are attachment points for the cockpit hatch and wings. My only disappointment with this set is that the cannons on the front of the Banshee are built from printed pieces instead of stylized parts. This makes them flat, figuratively and literally speaking.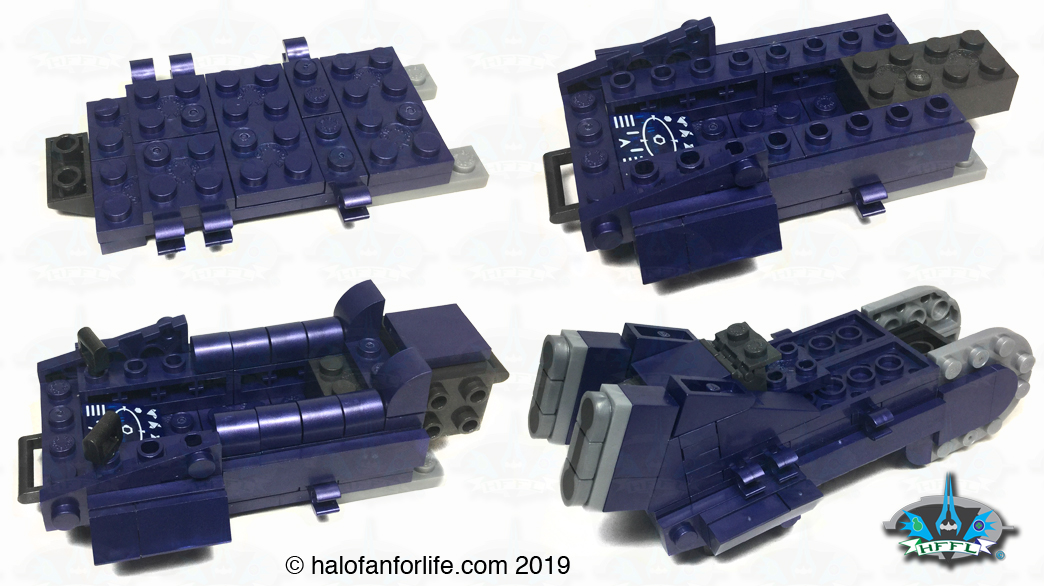
Bags 9 and 10
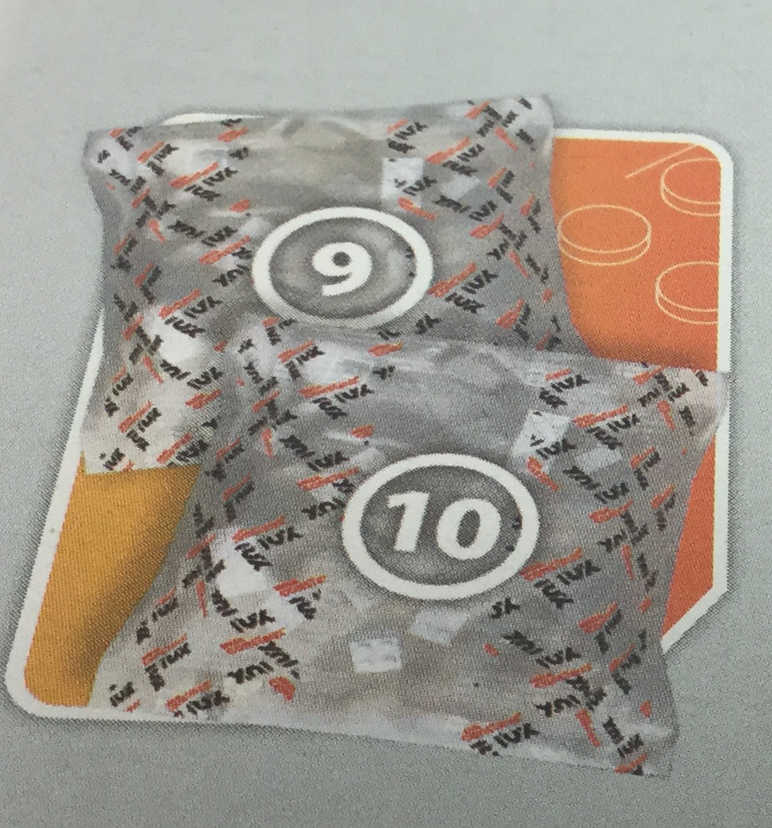
These last two bags have the parts for the wings and the buildable stand for the Banshee.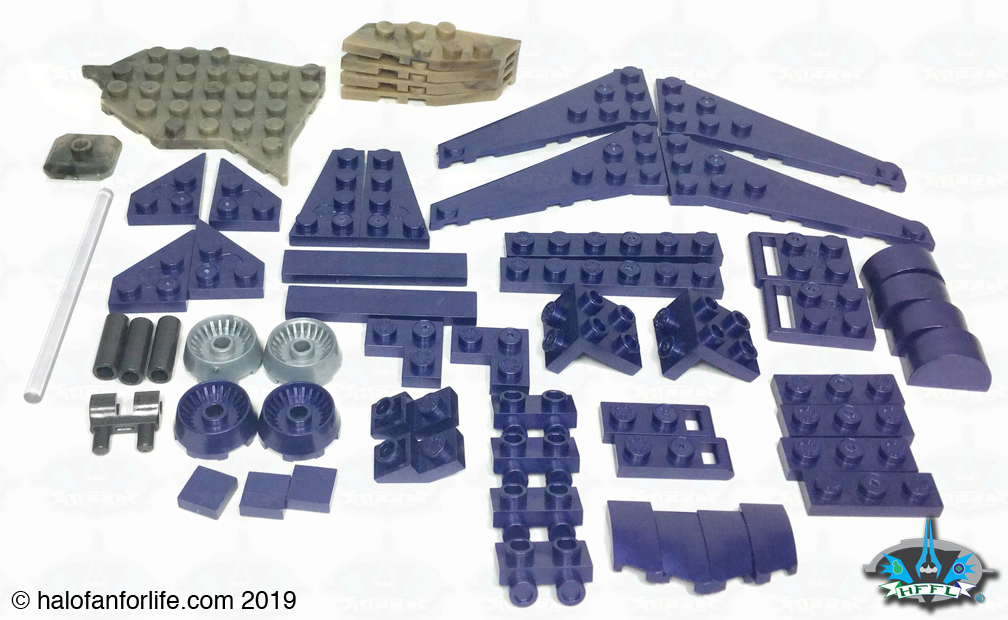
I really like that most of the wings do not show studs on top. This makes them look more “clean” and streamlined for flight.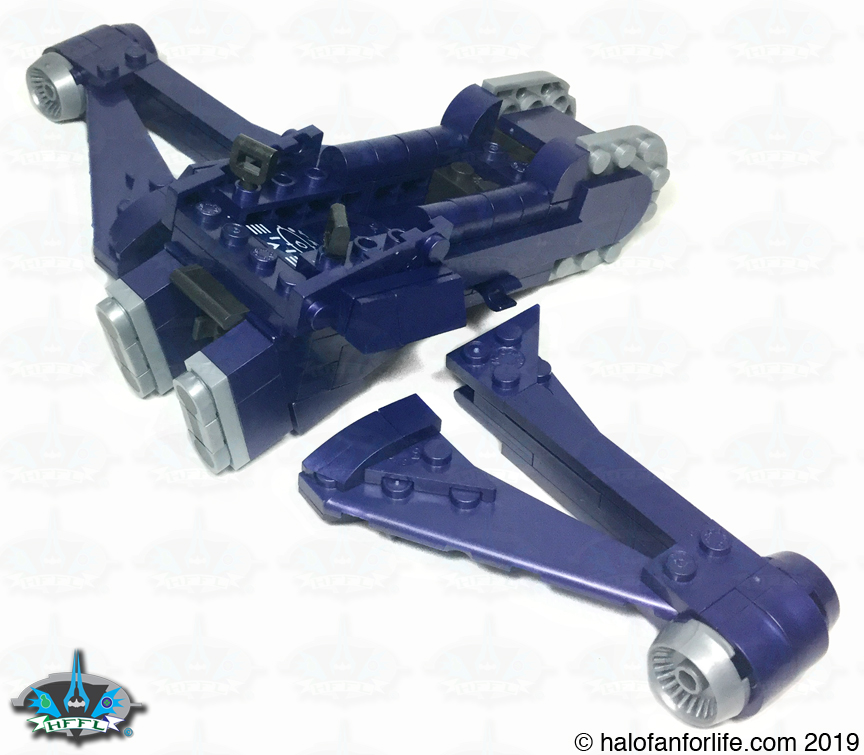
Here’s a closeup of the connection points for the wings.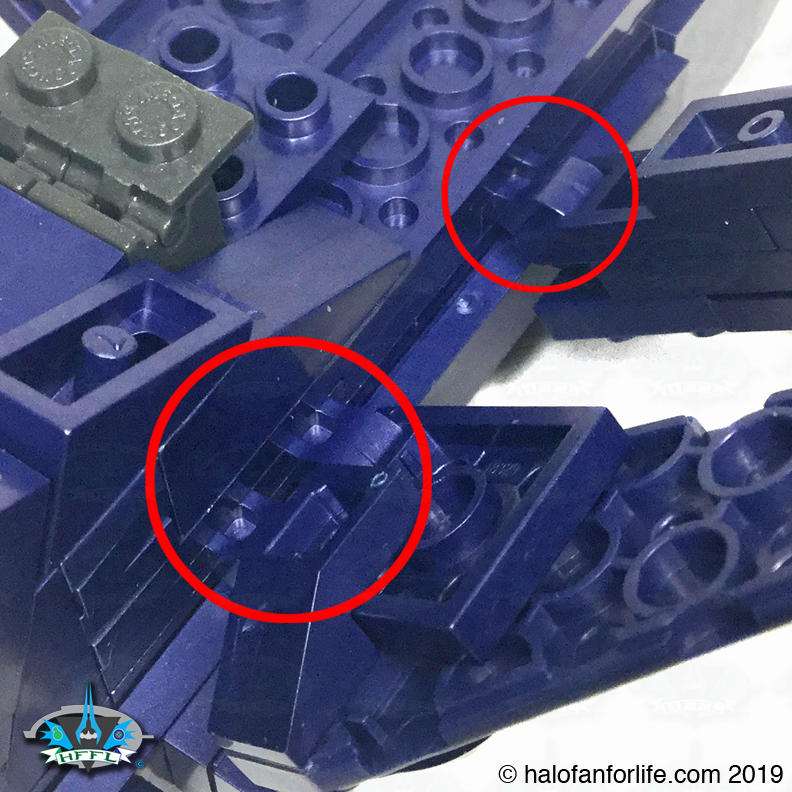
On the underside of the Banshee, you build two button pressed missile projectors. The top arrow in the graphic below shows the missile in locked position, while the bottom arrow shows the missile not fully inserted and the button flat against the bottom of the Banshee. It’s your choice how you want to display this. I kept them both in. Again, so as to not lose the projectile parts.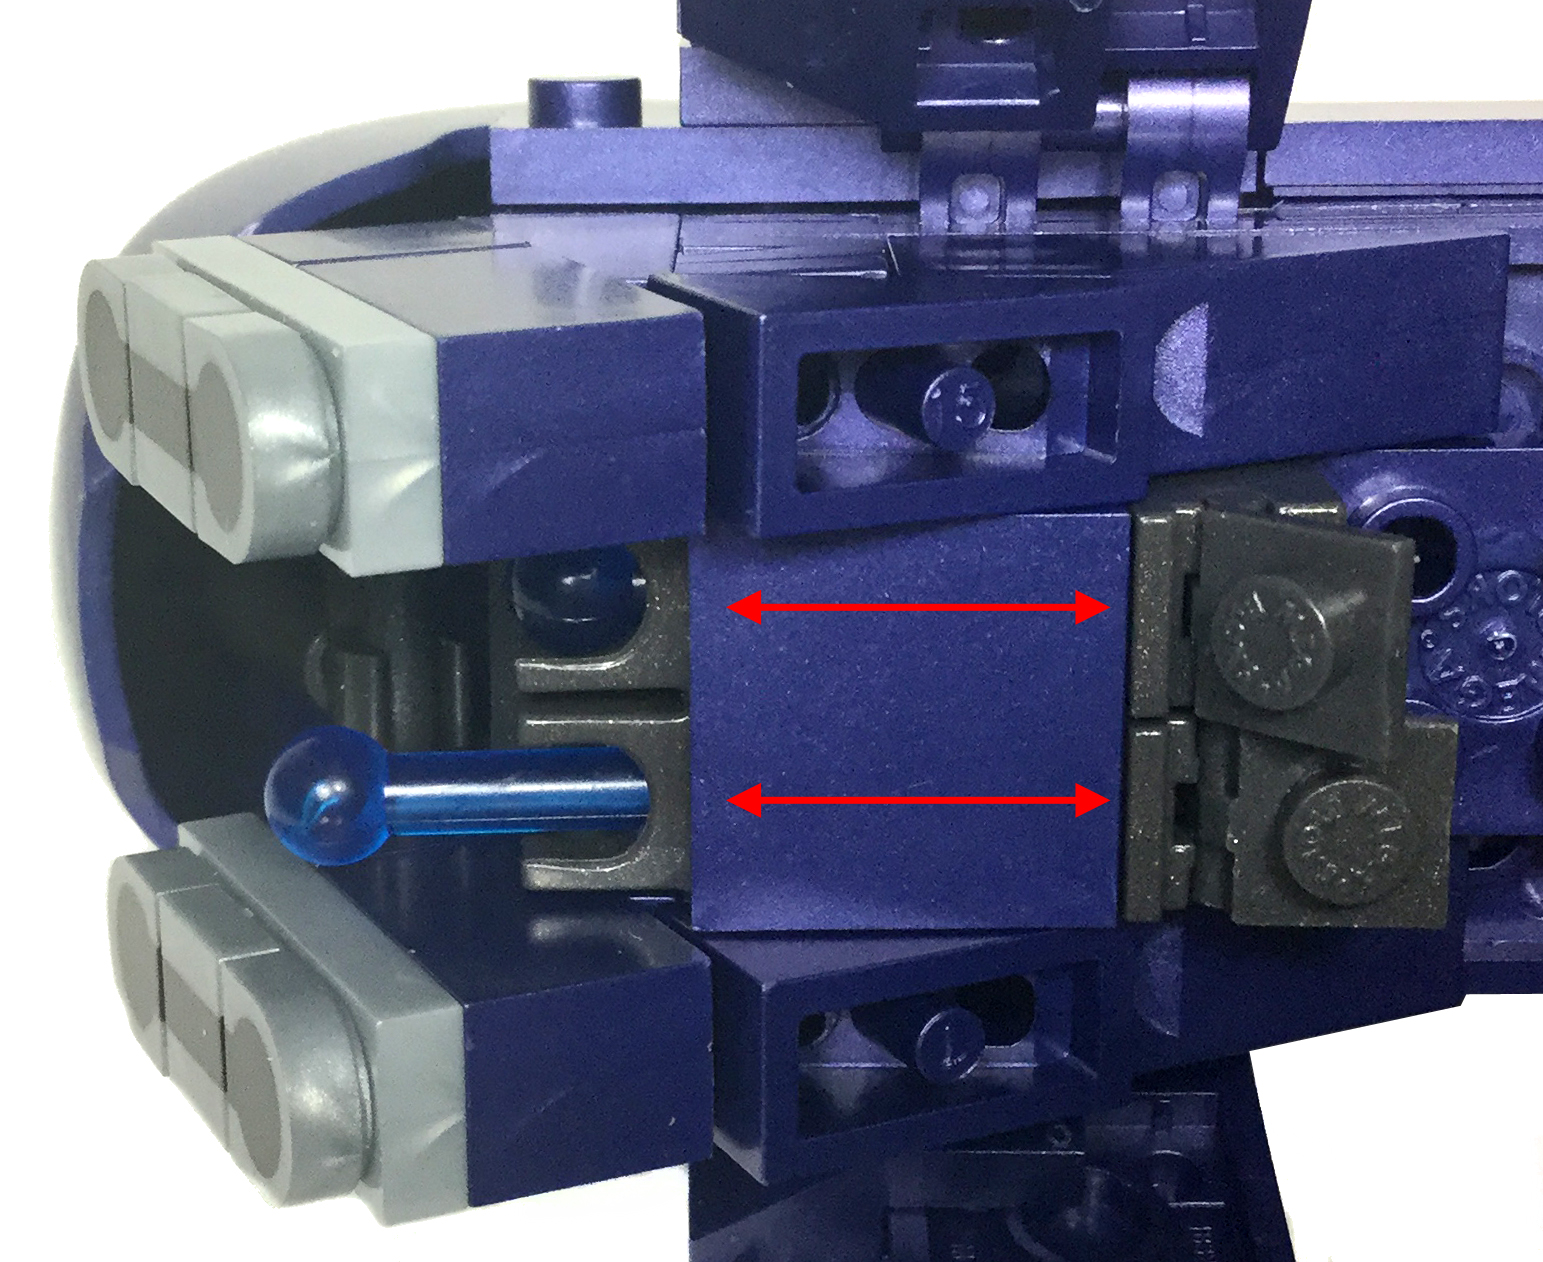
Lastly the display stand is built. Just a 3-piece stand, but it works quite well.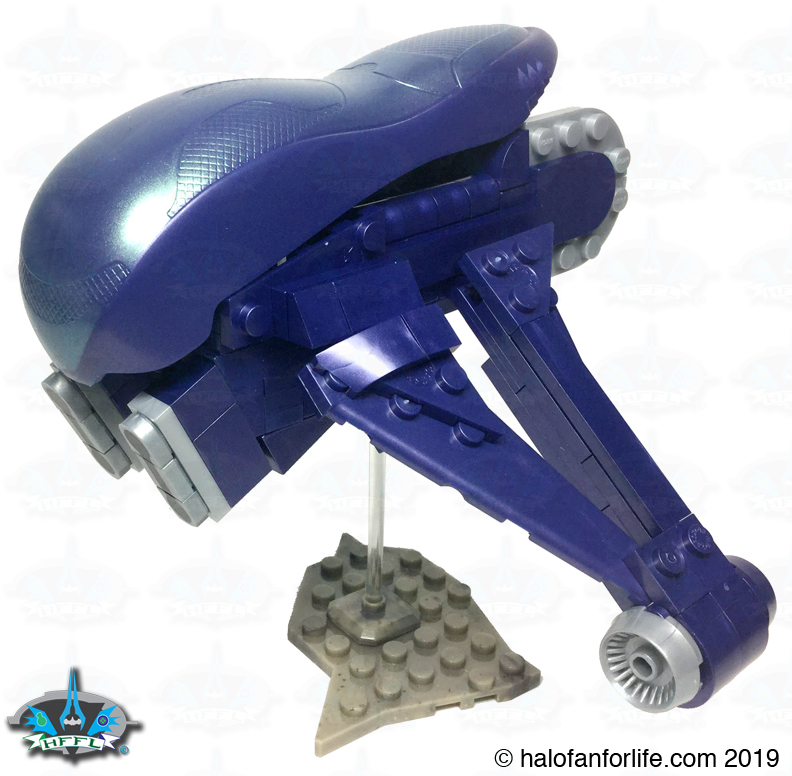
With the two ships complete, let’s move on to the figures, shall we?
Elite Minor
We’ve gotten many Elites over the course of Mega’s license. This one is about the best of the Elite minor variants we’ve gotten yet. I really hope this is rereleased in either other sets or in a blind bag series as I would LOVE to army build this figure!!!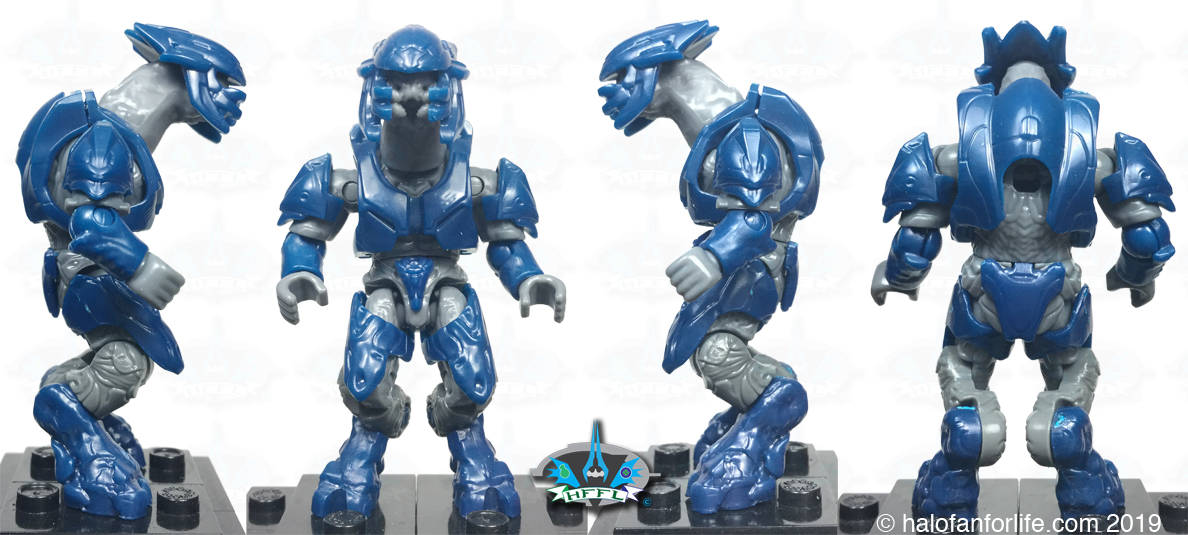
Grunt Minor
A great call back to the original small grunt with purple skin. I just LOVE this little figure! Again, another I hope to see rereleased! (I want LOTS of these little guys!!!)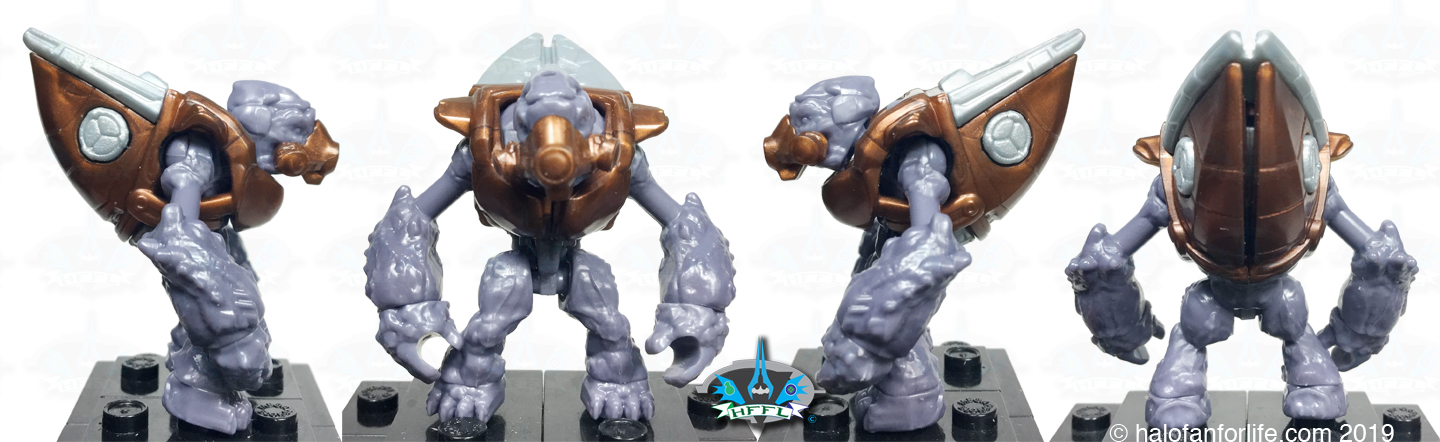
Flame Marine
Mega’s revised Flame Marine looks great as always. It’s back pack (as seen above) is that of the older type and not the newer one that has several small button pieces to it.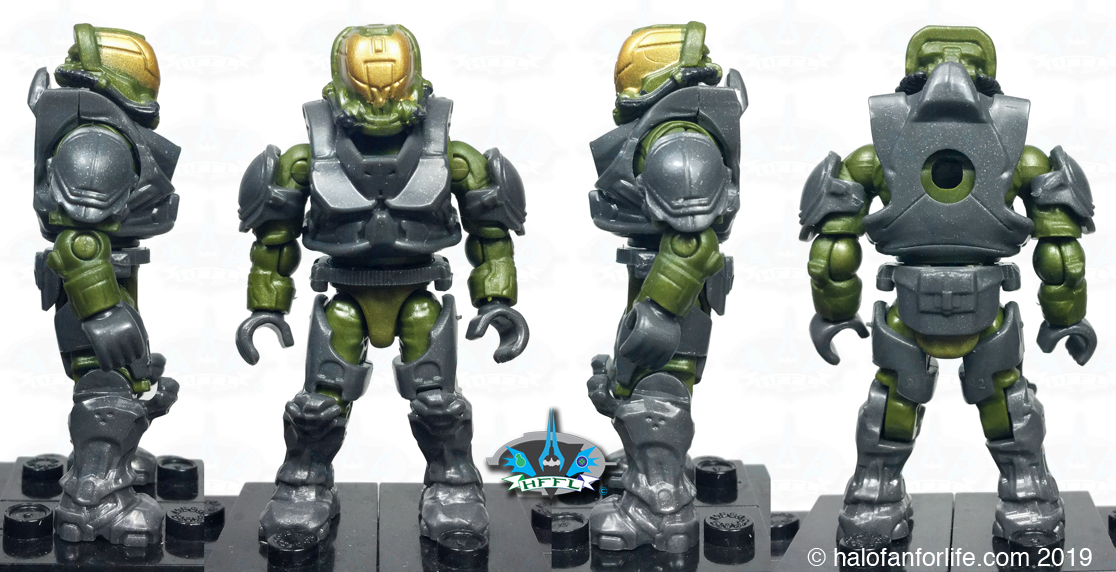
Spartan Mark V
This isn’t a name figure, but you sure as heck could call it just about any of Red Team from Halo Wars! 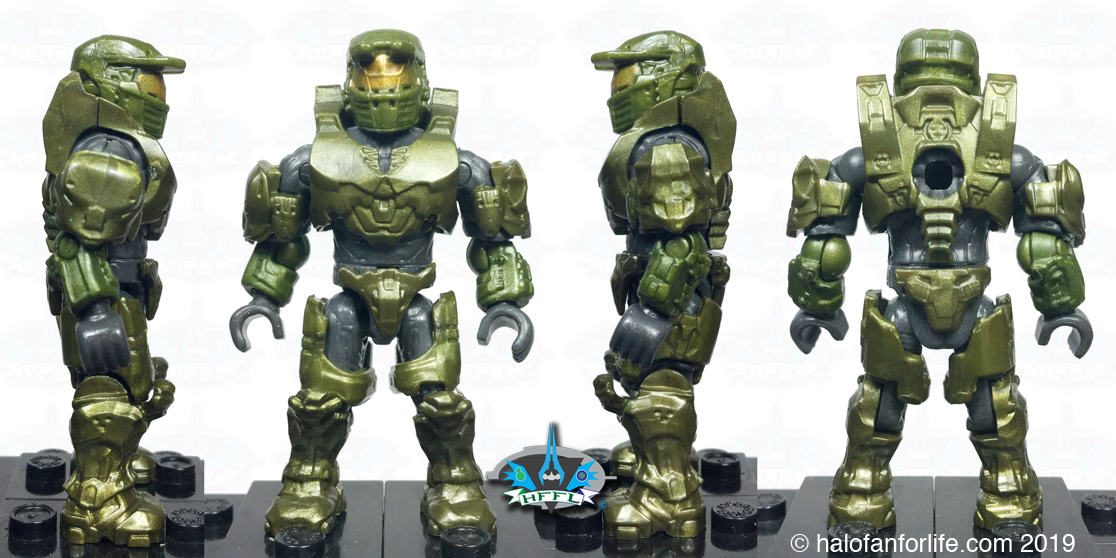
The cockpit on the Sparrowhawk does indeed fit standard sized figures. The cockpit close nicely, with little room for the figure to jostle around inside.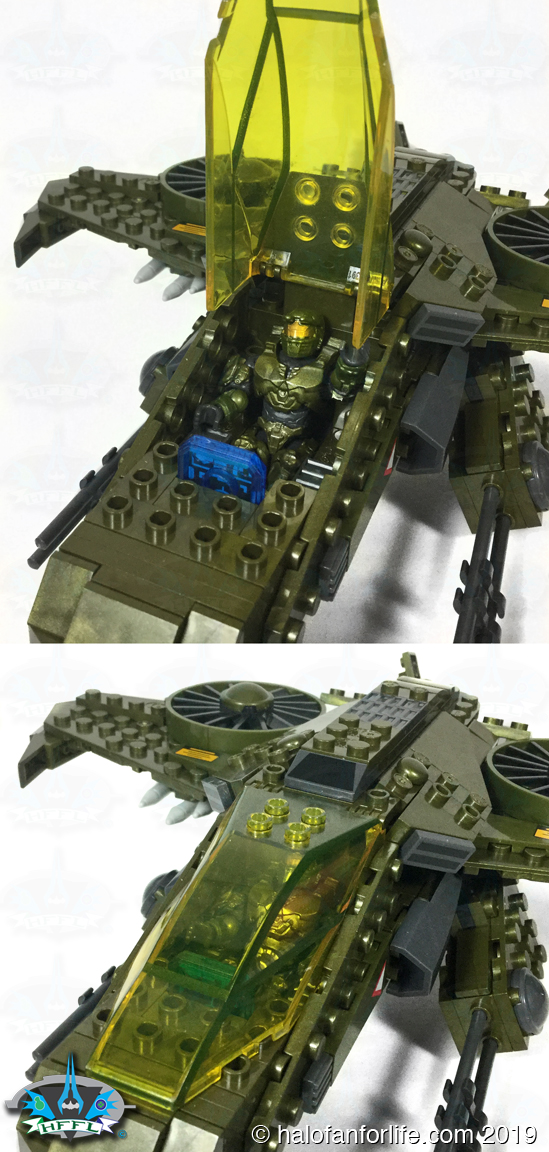
You can attach any standard sized figure to the Banshee via two hand locks that the figure’s hands clasp onto, to hold them in place. And yes, the cockpit fits fine. Though I do wish there were less of the gap on the sides and back.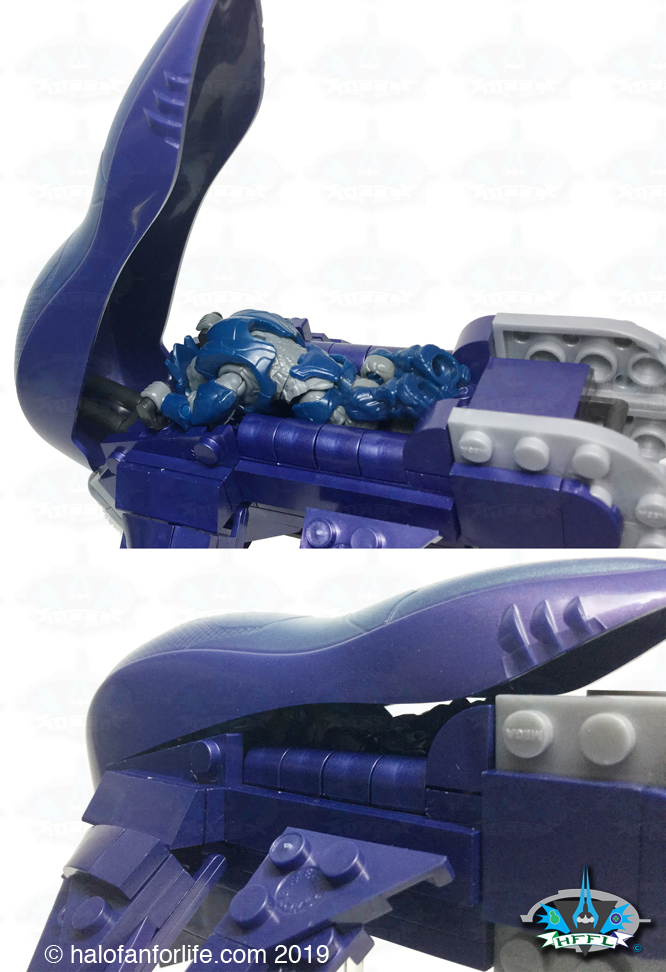
I had PLENTY of pieces left over. So I made a joint UNSC/Covenant drone with them!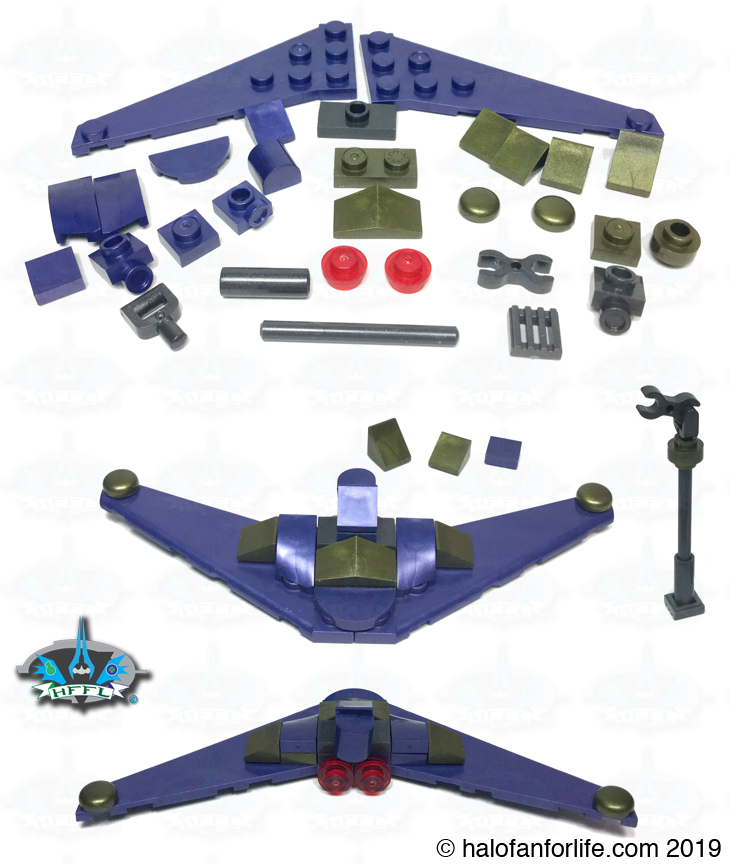
And finally, the whole set together! The 4 figure stands included help to display your figures without them falling over. 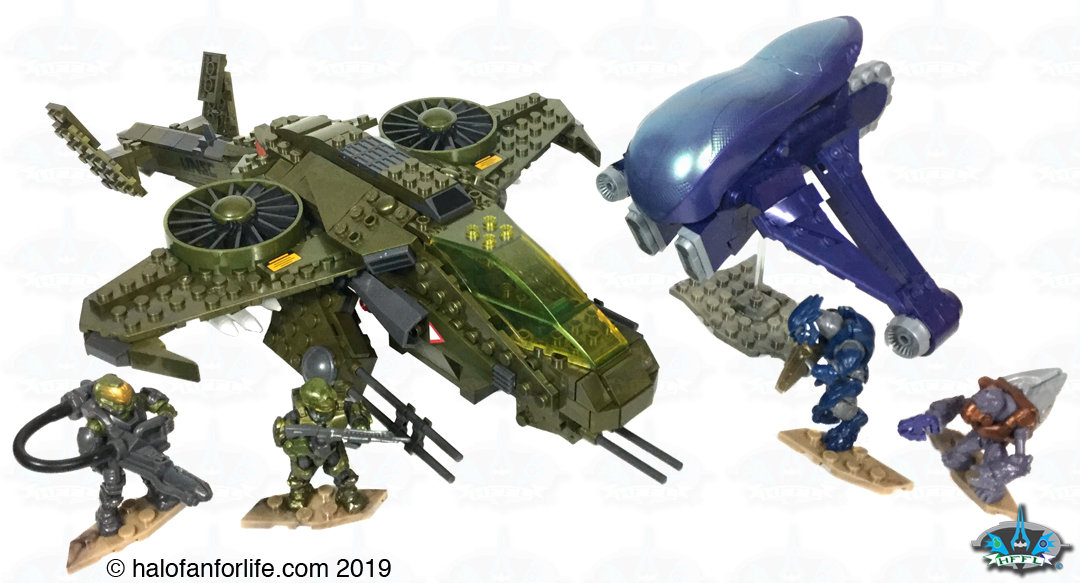
Summary: The set’s build time is reasonable and can be done in relatively short time. Both ships look great when completed. Figure choice matches that of the original release set, but with modern updates to the figures.
Overall Rating: I give this set 9.5 out of 10 medals.
Why did I give it a 9.5 out of 10?
• The only 2 small issues I have are the gaps on the sides and back of the Banshee and that the guns on the Banshee are flat printed pieces.
Other than that, this set is STELLAR!
Here’s my opinion on the break down of the value of this set. (In US dollars)
• Each figure with it’s stand and weapon I put at $3.50US. Total $14
• The Banshee I value at $12 (including the display stand).
• The Sparrowhawk I value at $28.
TOTAL: $54 (before tax and in U.S. dollars)
Given that the set costs $50 US before tax, I think this is an very good value. Also consider that piece count is 518. If we use the guideline of 10 cents per part, the set could have easily cost $52 and still been worth it!
Do I recommend it? Absolutely! A fantastic call back to one of the original sets. The Sparrowhawk has only been done twice before. That of the original, back in 2009 and again as a dark grey ODST version, in 2010. Given that those are LONG out of production, if you EVER wanted a Sparrowhawk, NOW is the time to buy one. Admittedly these are hard to find, so do due diligence when searching it out and look for the best price. This set will no doubt gain value, over time.
If you have any questions about this set that I didn’t cover in the review, please do not hesitate to ask me. Either reply below or e-mail me at [email protected].
If this review gives you an informed decision on whether to purchase the toy or not, please consider a small donation (50 cents) to the blog.You can donate via PayPal to [email protected]. Or just click the paypal link at the right on the main page of the site. It’s much appreciated and helps ensure that HFFL stays registered/active on the internet. Thank You.
-Sal