
![]()
Mega Construx Master Chief Battle For The Ark
Technical Specifications:
Build Time: 45 minutes to sort, roughly 1 1/2 to 2 hours to build (your time will vary as I took pics along the way for this review)
Set Piece Count: 638
Weapons: Buildable assault rifle
Accessories: buildable baseplate
Special Features: Many points of articulation, clip left hand can hold assault rifle.
Cost: $60 US. I got mine from Target on sale for $50.
And on with the pics! (Click pics to make BIGGER)
It’s been quite some time since we’ve had a large figure build set. To the best of my recollection, it’s been 9-10 years in fact.
So when this set was announced, it was a very welcomed surprise! (And I hope it’s not the last of the big fig builds!)
While the box isn’t labeled as such, I’m told this is a Target exclusive.
The box shows the buildable Master Chief in a action position on the buildable base. On the back of the box are shown various other poses. This figure is chock full of articulation and can be set into a LOT of various poses. I’ll show a few of those at the end of this article.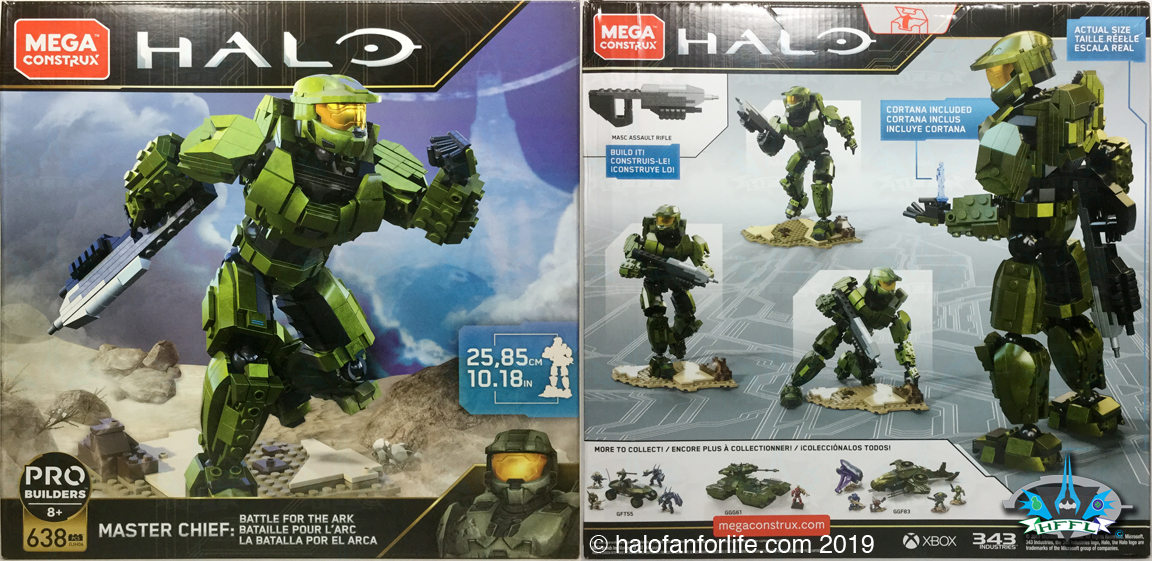
In the box you get an instruction booklet, 11 numbered bags, a small MCX bag and a large MCX bag.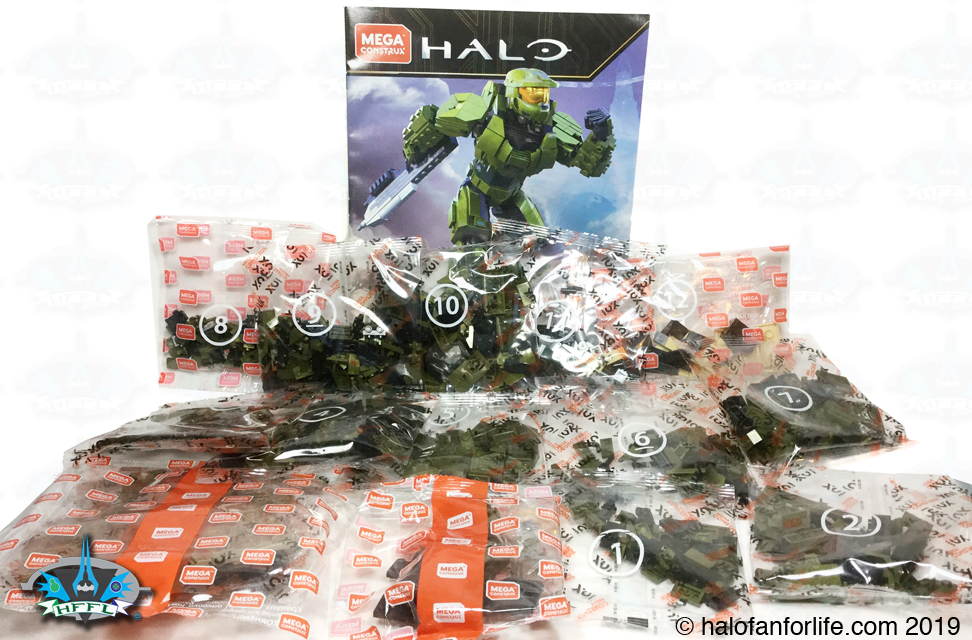
The large MCX bag contains the huge baseplate as well as two small baggies within.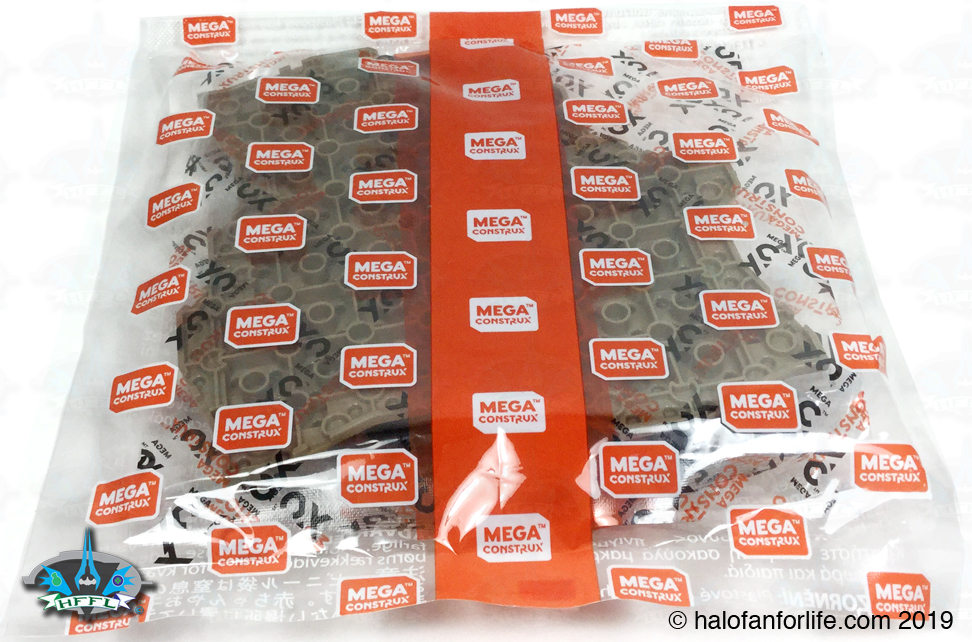
Another view of the two MCX bags.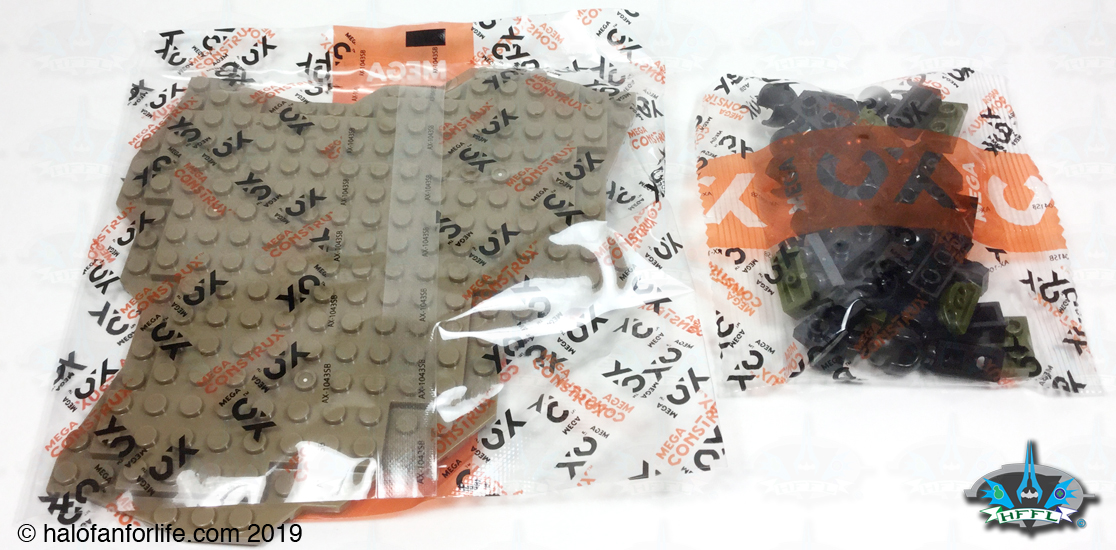
The baseplate.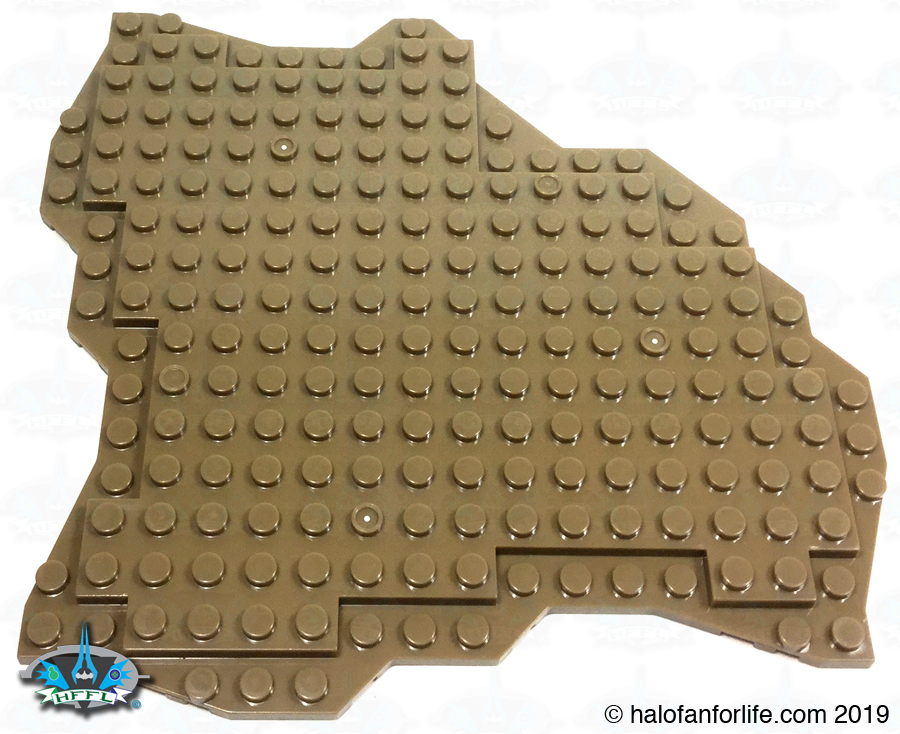
The contents of the two MCX bags, with the two small baggies unopened.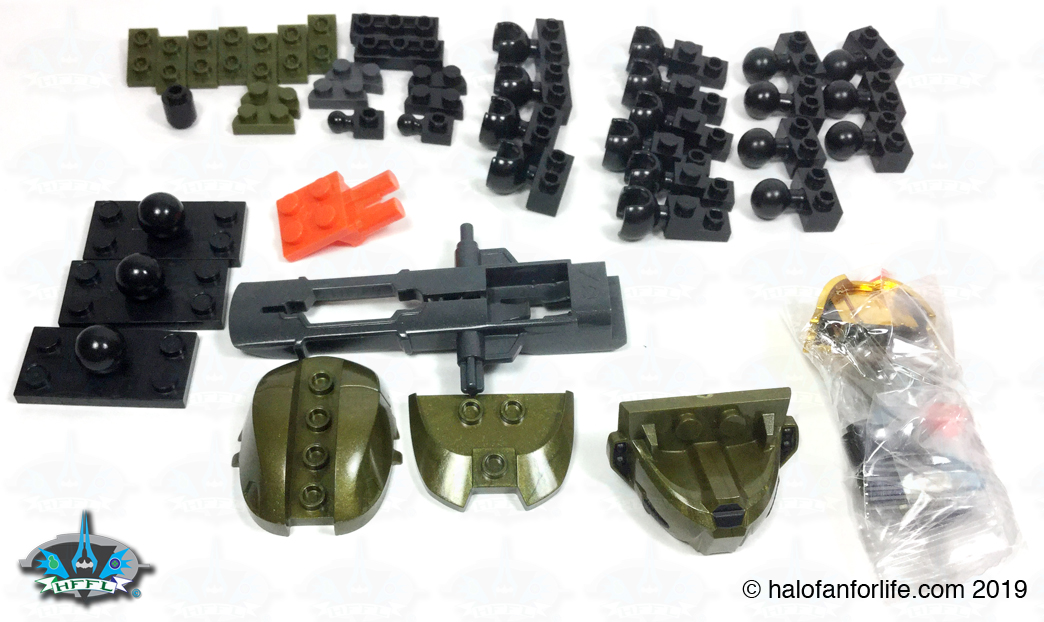
These are the pieces in the two small baggies. Note the few printed pieces, the micro scale Cortana and the two orange pieces. I’ll explain the orange ones later in the review.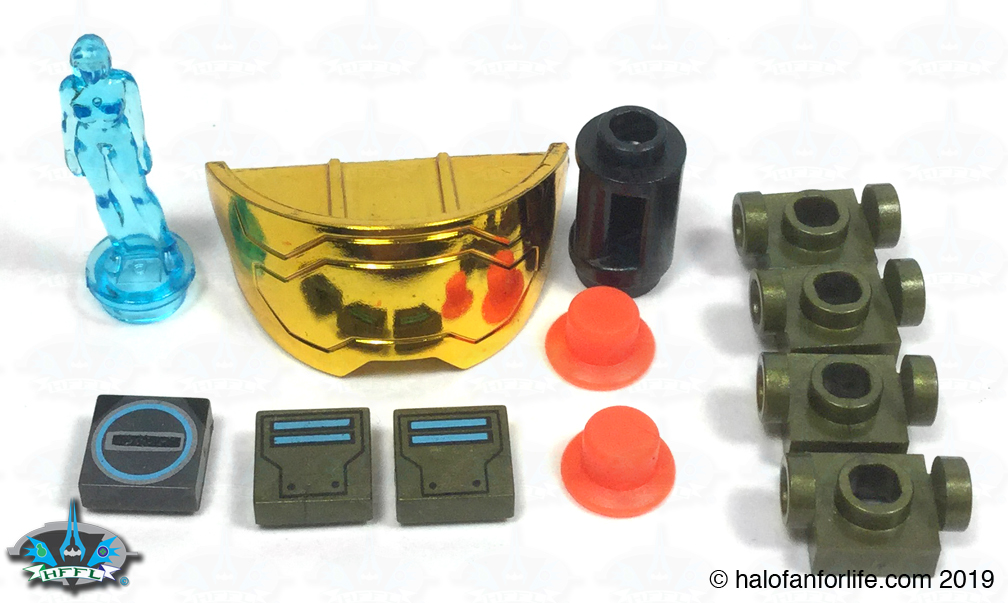
Okay, let’s get started with the build!
Bags


(and MCX bags)
Those sorted out.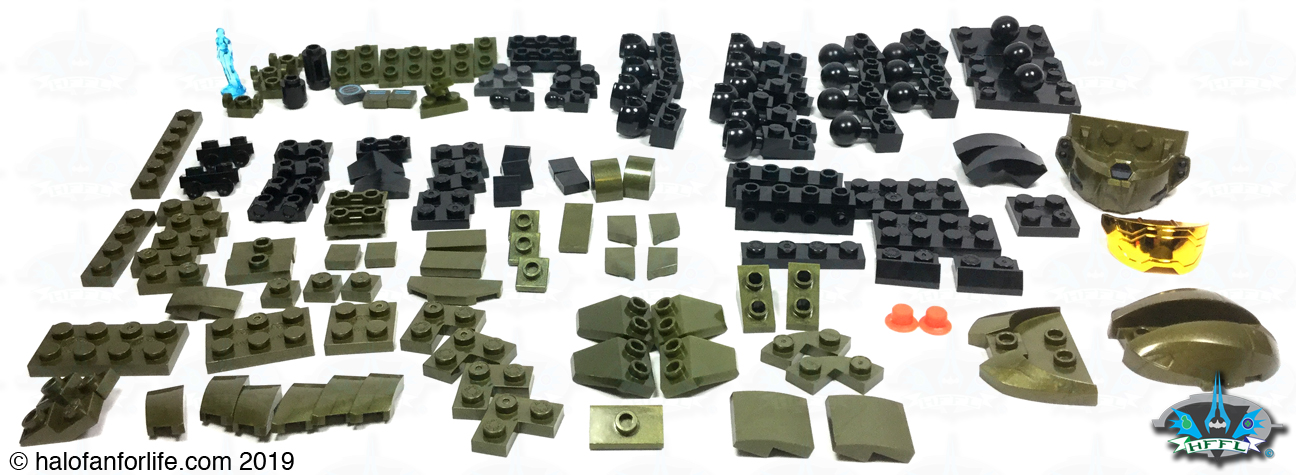
We start by building the helmet of Master Chief. The large ball joint clip seen below represents his neck. The top of the helmet has a couple of very specialized pieces, that will likely only ever be seen in this set.
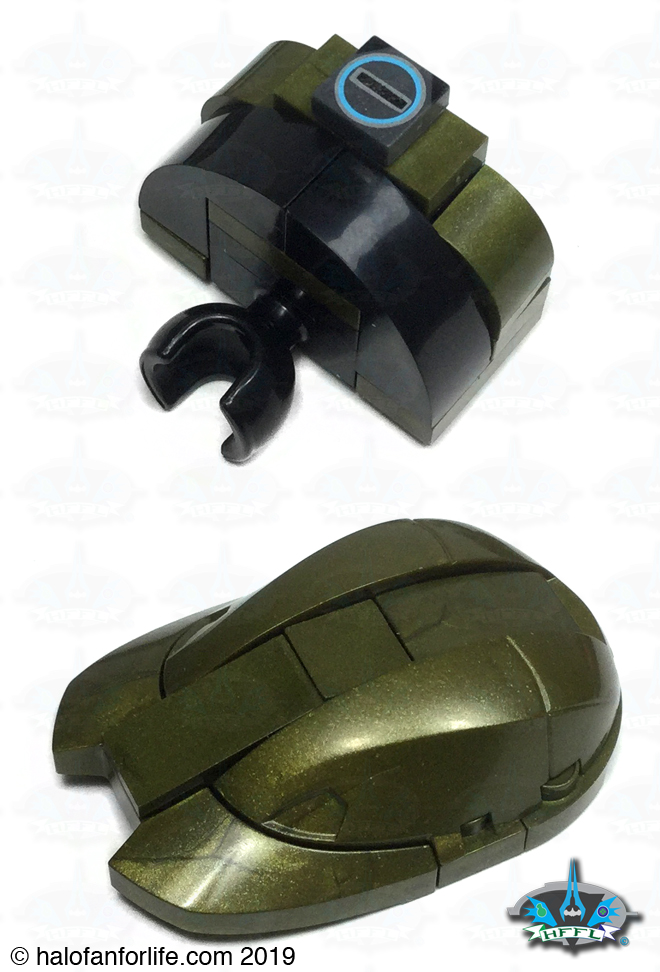
Four major components make up the helmet. The top, visor, front bottom and blok built back section. Seen below are those as well as three views of the helmet. It looks FANTASTIC!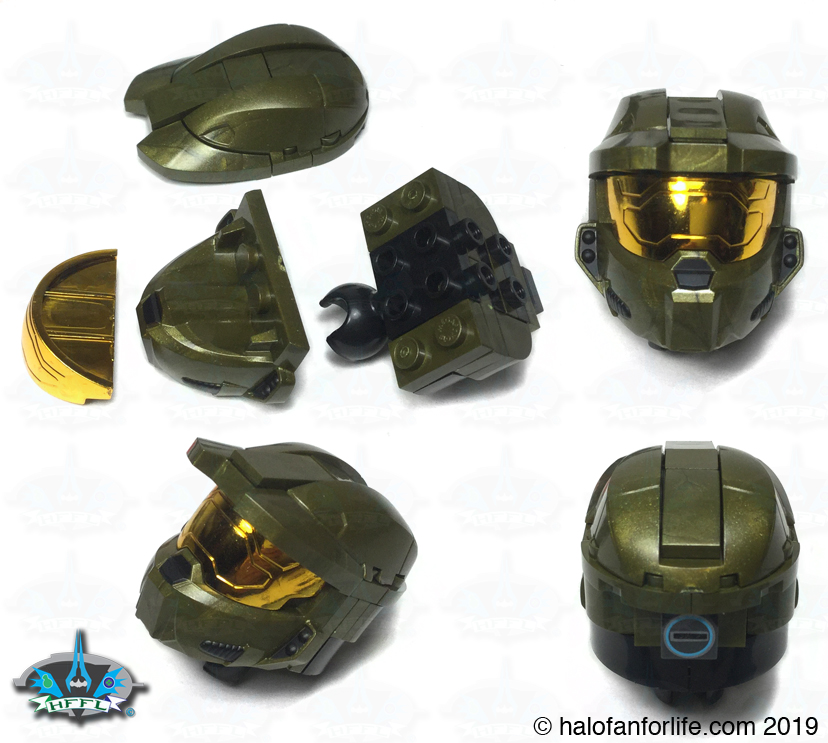
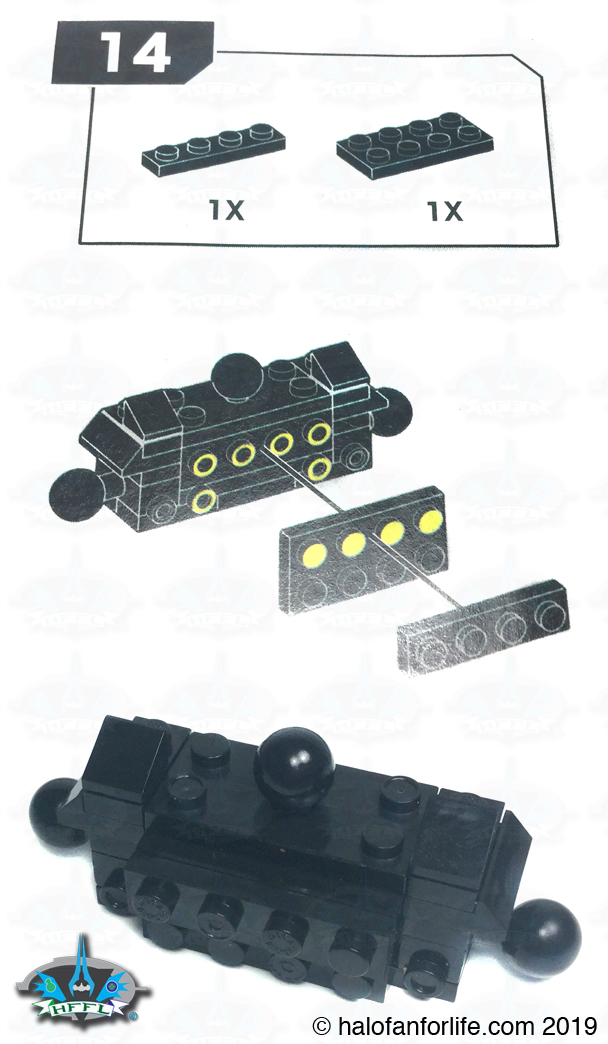
Now, I need to point out something that came up a few times in this set. Clutch. That is to say how pieces fit well together. This may be the first time where I say it was a little too good. Meaning they were an extra tight fit. The instances where this occurred were mostly with side builds. Everything fits but it may take a little extra effort to snap those in place. Step 14 is the first step that I came across this, that’s why I note it here.
The torso armor looks fantastic! Bulked out just right, IMO.
Below are the leftover pieces I had from bags 1 and 2.
Bags

3-4 sorted out.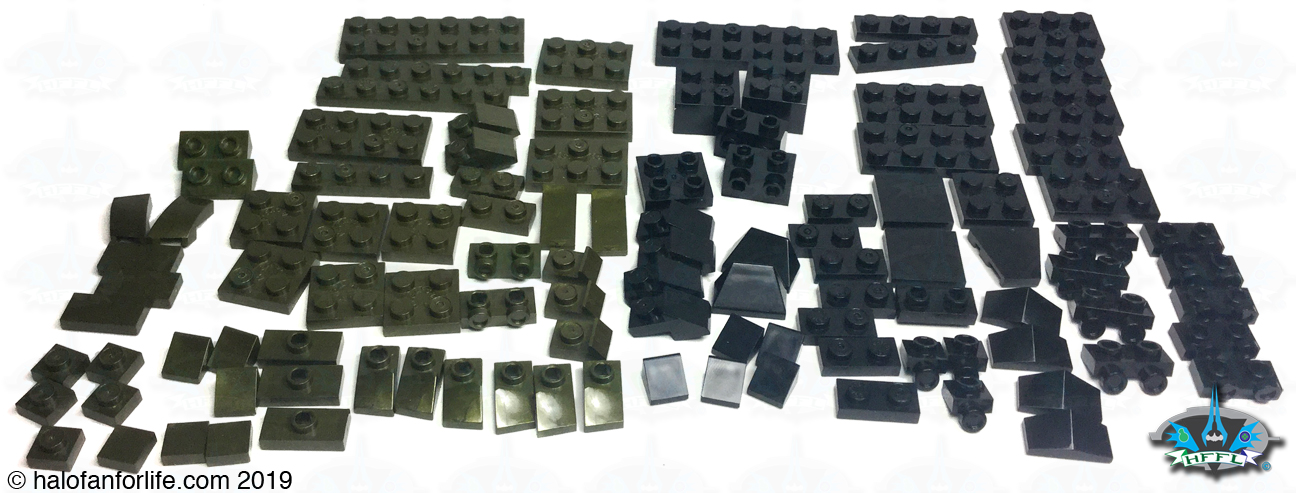
Here the abdomen section is built. The joint is hidden by the build, but you can see it here in the upper left of the graphic below.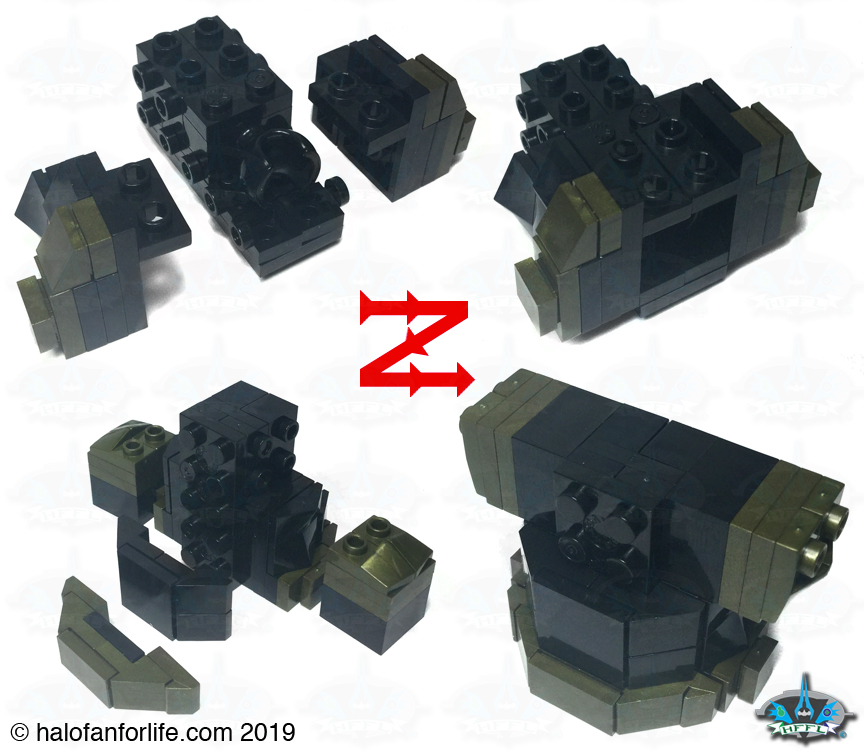
The abdomen and chest sections are put together.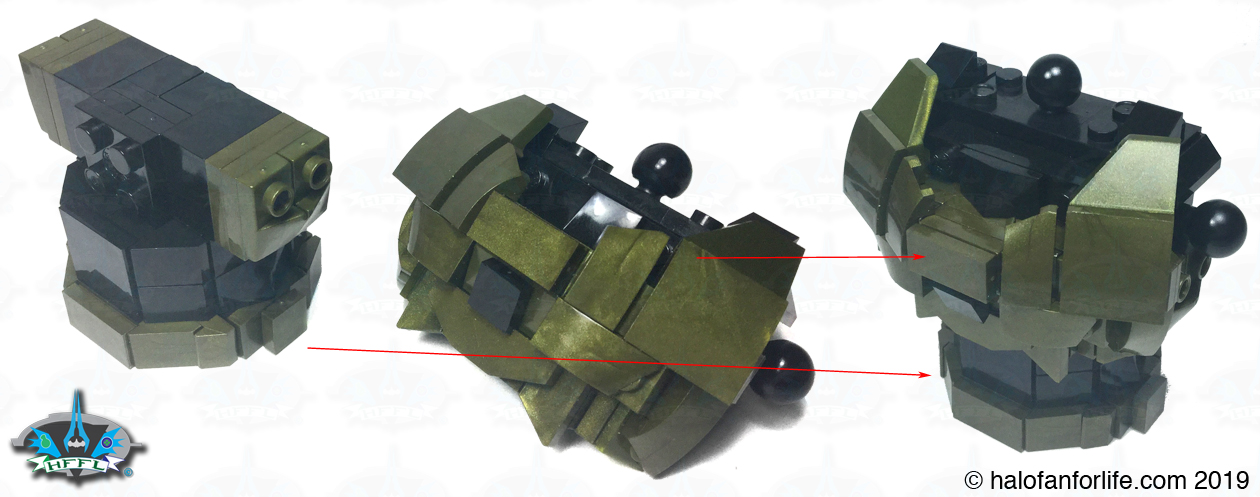
We next build up some of the backplates and add those to the torso.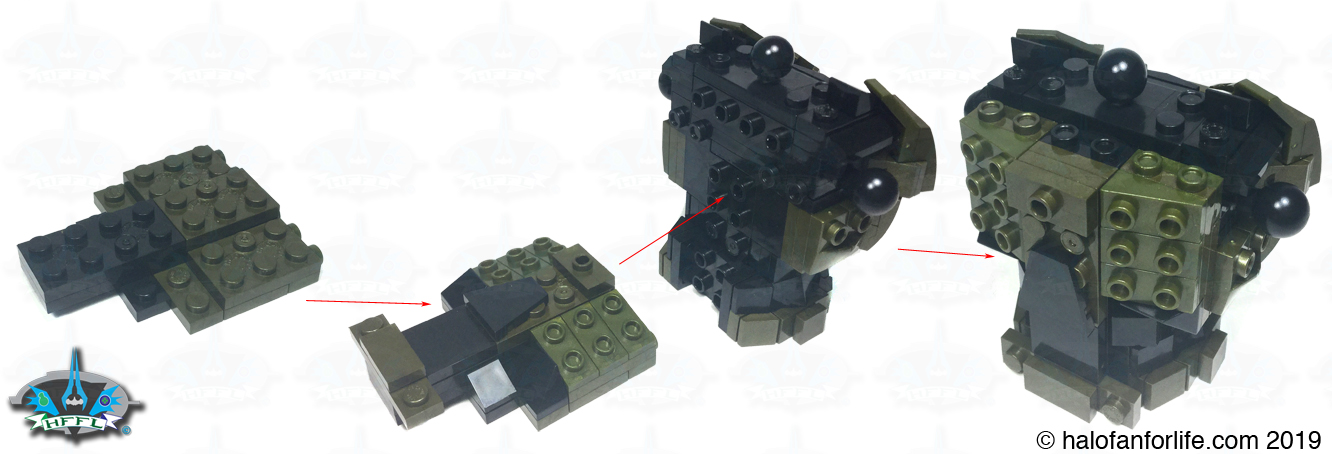
Here are the leftovers I had from bags 3 and 4.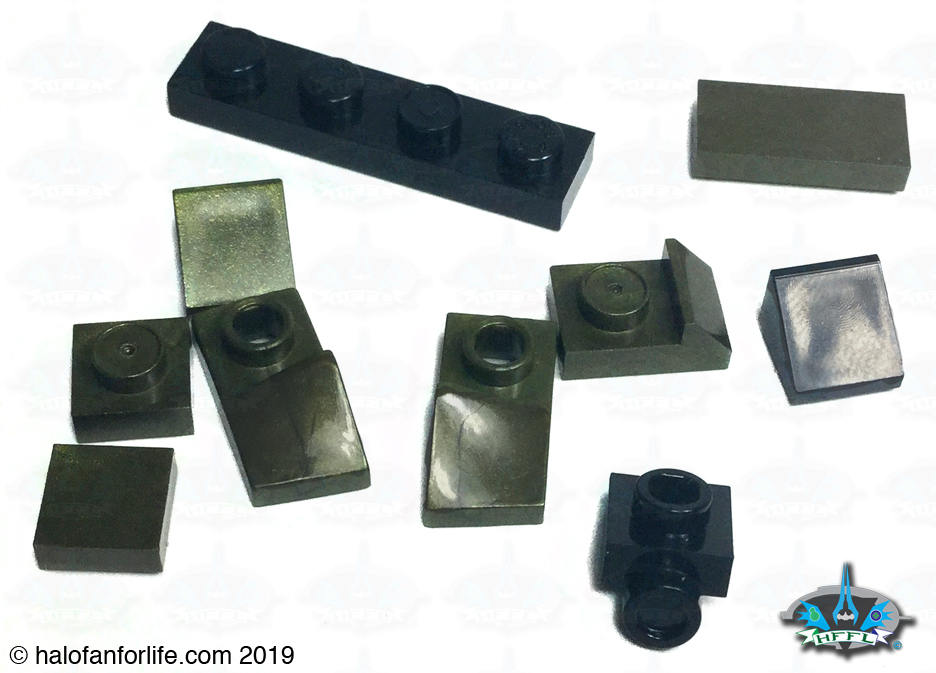
Bag

Bag 5 pieces sorted.
The thruster sections are built and added. I love the amount of detail here.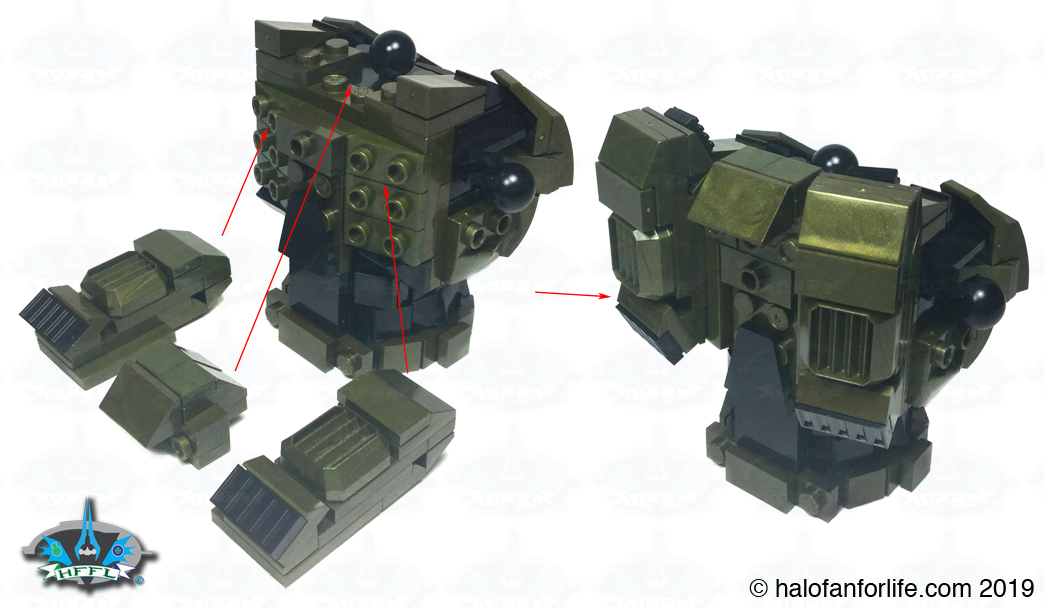
At this point we add the helmet.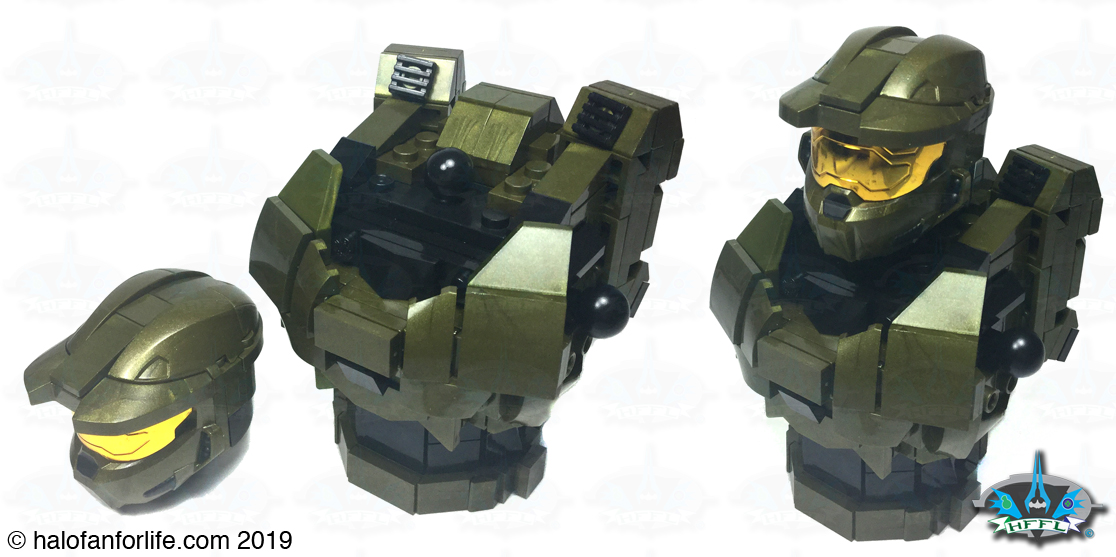
The few leftovers I had from bag 5. It should be noted that there are a LOT of leftovers to this build at the end.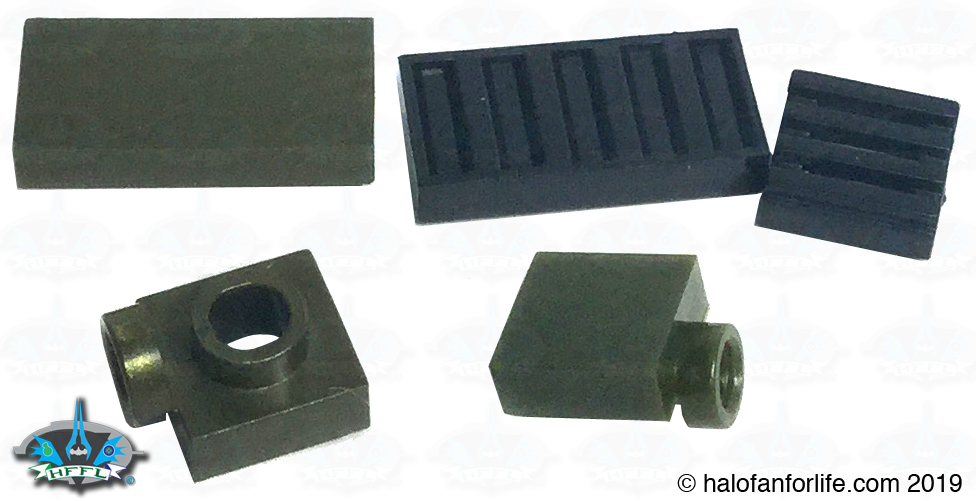
Bags


Bags 6-7 sorted out.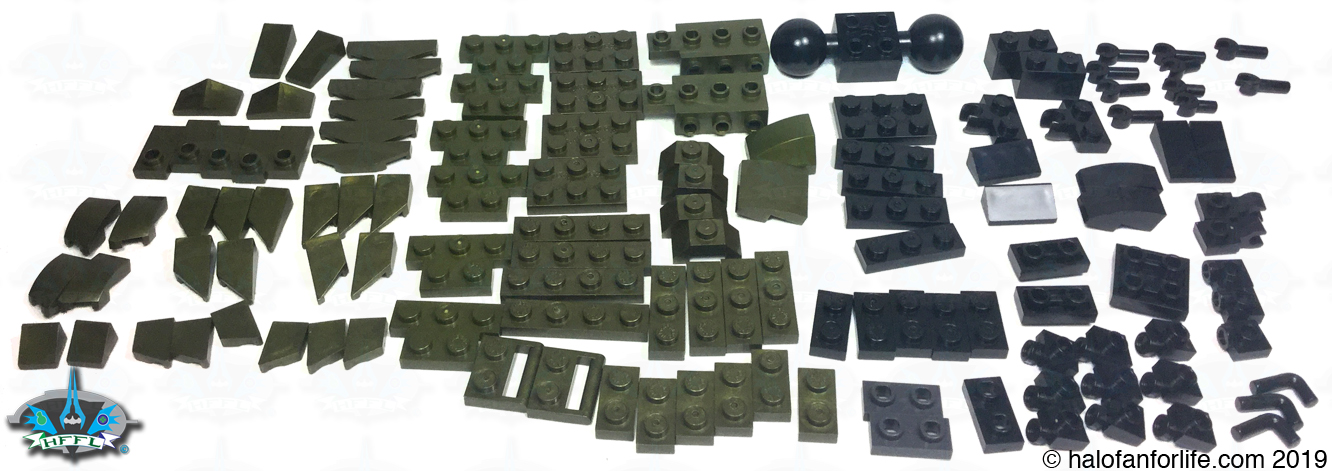
Next we build up the hips and associated joints. The two larger ball joints are for the legs to attach to, while the smaller one (seen bottom left), is to insert into the hip joint of the abdomen section.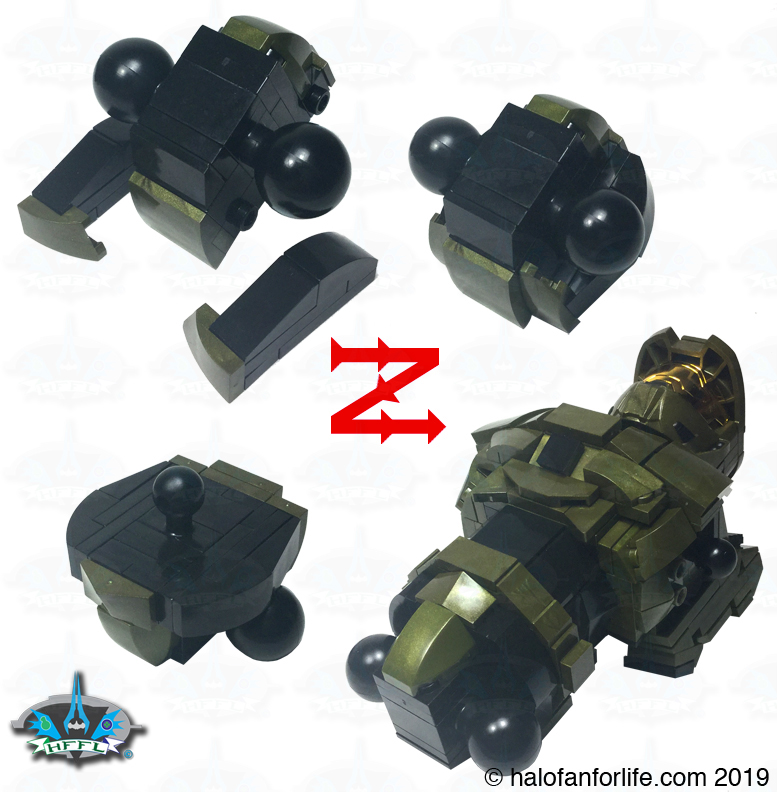
Here’s what we have so far. Looking pretty good, huh?
The arms are near identical builds, with there being only slight differences in the hands. The right hand has a clip built into it to allow for holding the buildable assault rifle.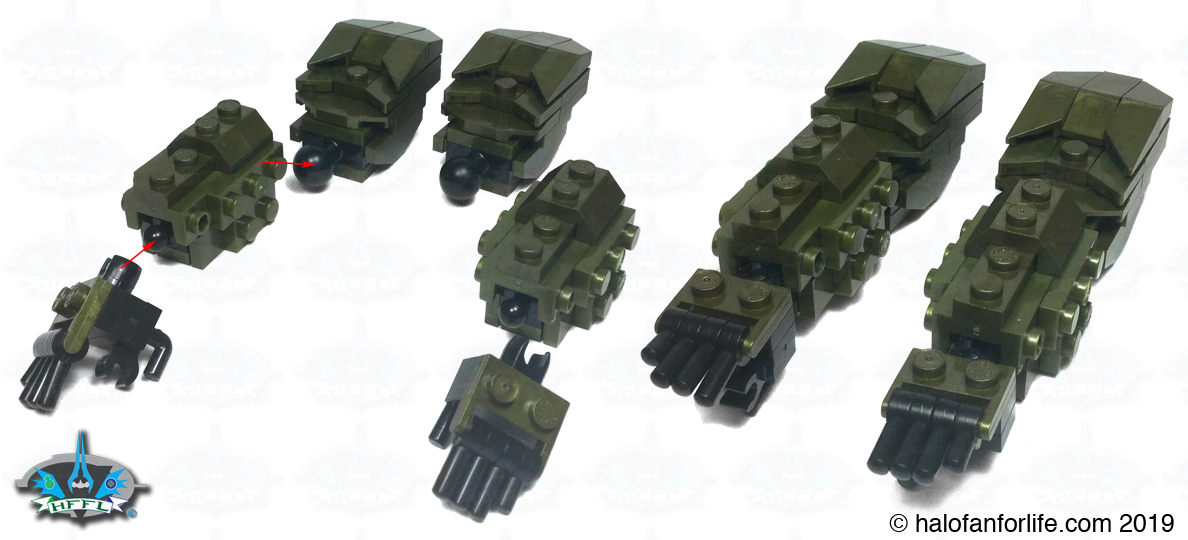
The arms are added. Chief has a decent wing span here. I also like that each finger has one point of articulation each.
Leftover parts I had from bags 6 and 7.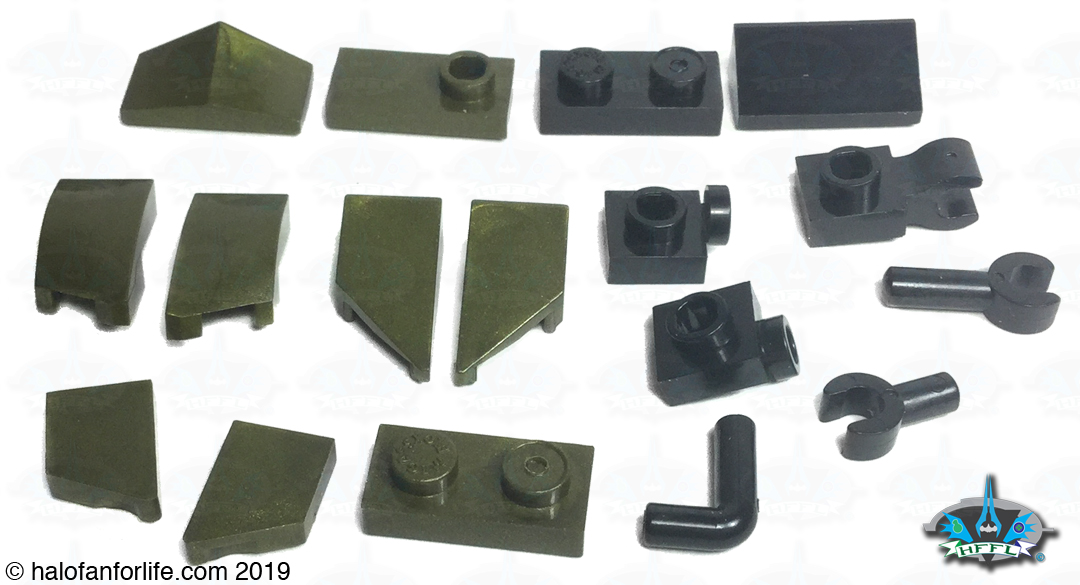
Bags


Bags 8, 9, and 10 sorted out. Lots of pieces here. They make up all the pieces needed for the legs of the figure.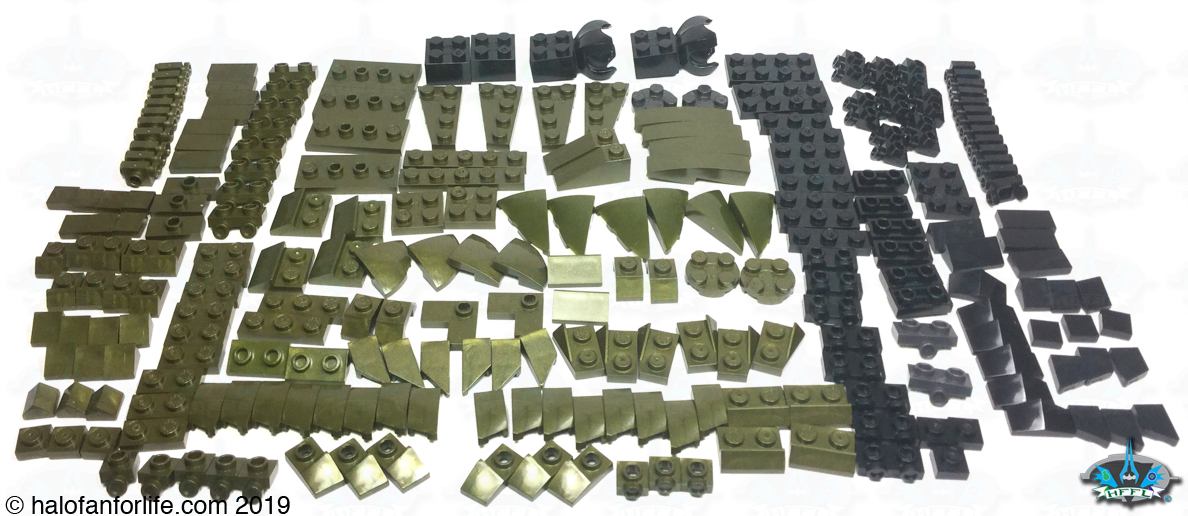
Here the feet and lower legs are the same. The upper legs are mirror opposites of each other. Also, note the orange piece. This was one of the pieces from the MCX bags. It’s a small rubber stop, used to add friction to the hip joints. This makes posing and keeping the figure in that pose much easier.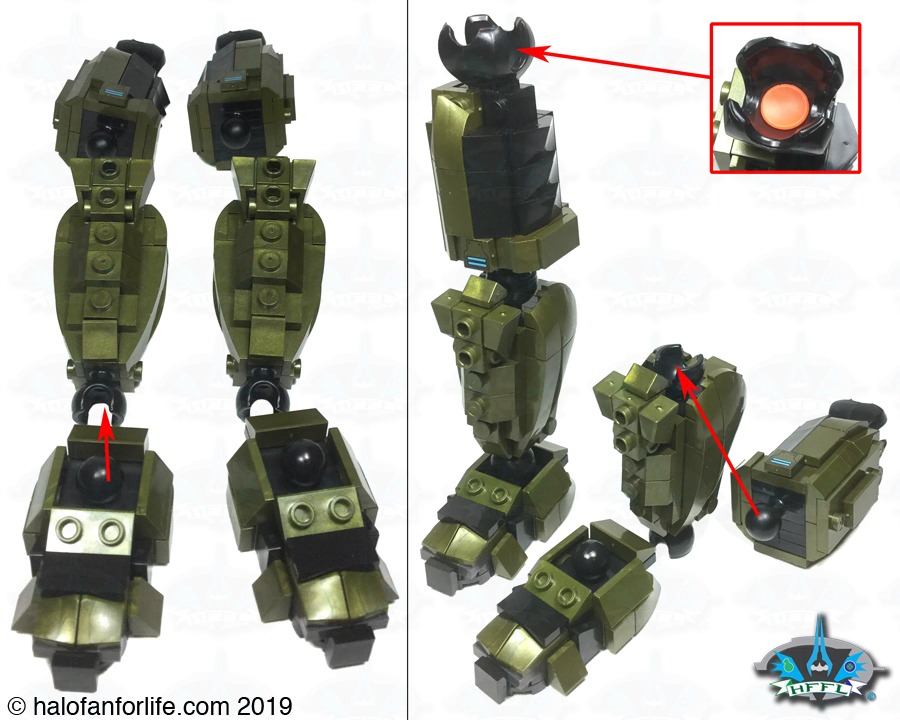
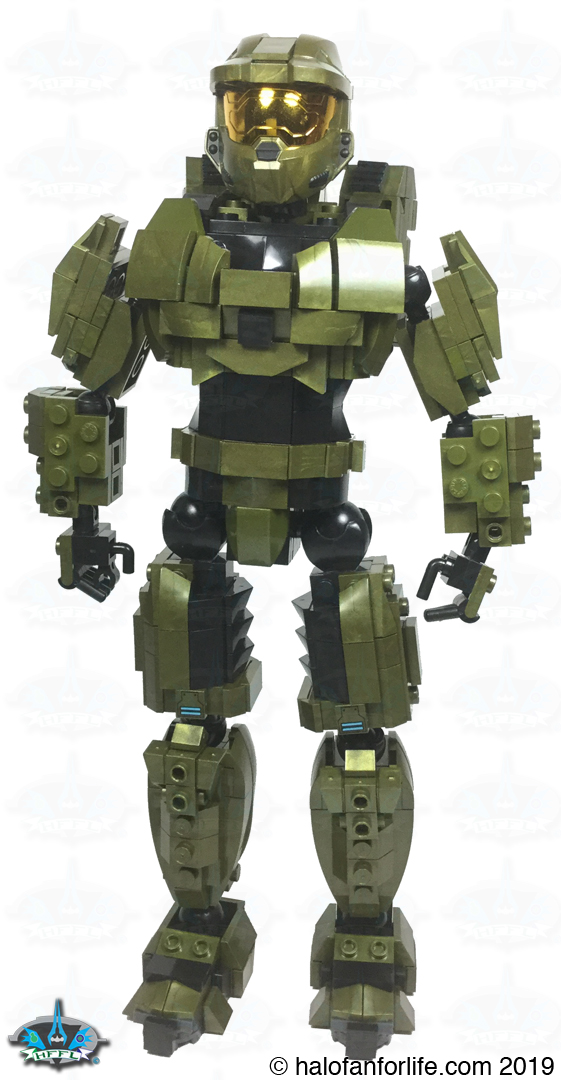
Chief is complete!!
The leftovers I had from bags 8, 9, 10. Seems like a lot, though I did check again to be certain I didn’t miss any steps. I didn’t.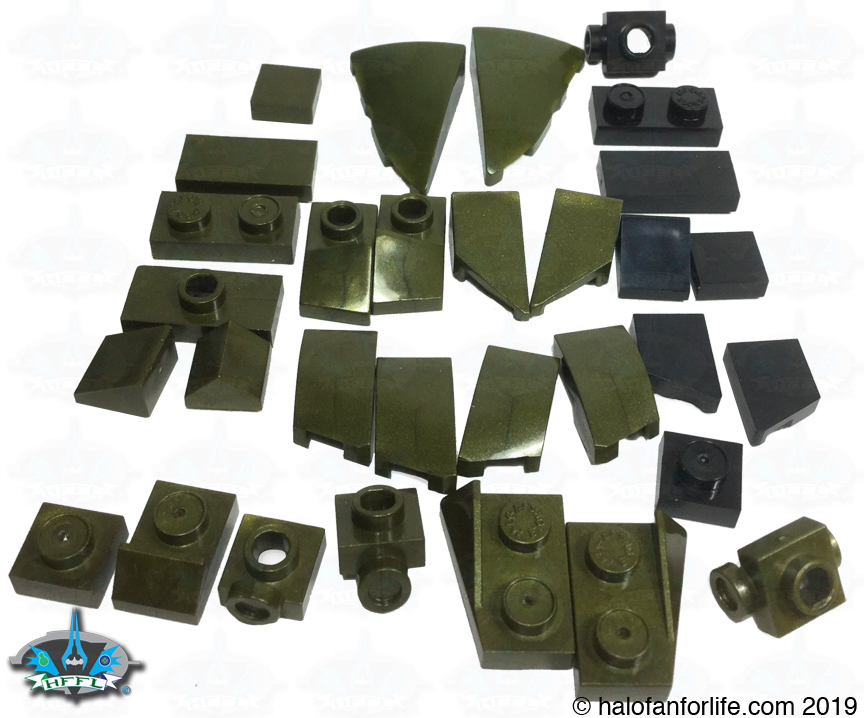
The last two bags.


Bags 11 and 12 contain the parts for the assault rifle and buildable figure stand.
The base itself is quite simple. As it’s not the focal point of the set though, I’m fine with it. It is helpful for getting Chief into certain poses. Using the large baseplate, you then add the dark brown and cream colored pieces to it.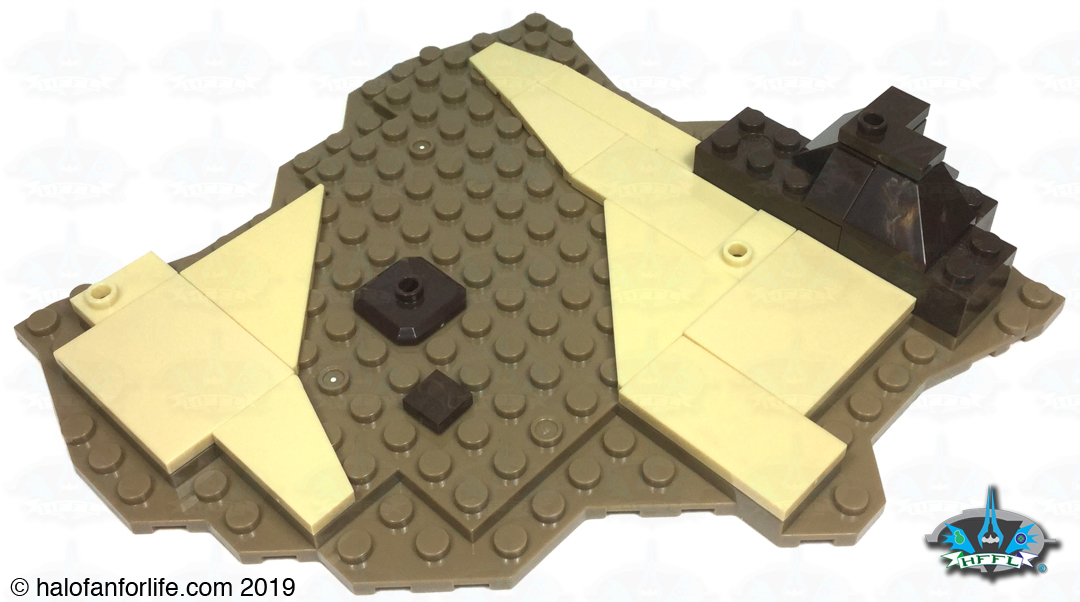
The assault rifle. This is the only thing I’m a little disappointed with. It appears to me that Mega was going for the look of the Halo 3 Assault Rifle, which makes total sense, given the name of the set including “Battle for the Ark” in it. However, as you can see by the build pic below and the in-game version below that, it’s not quite there. I think a rebuild is in order here and I’ll post that at a later date in this article, as I have time. 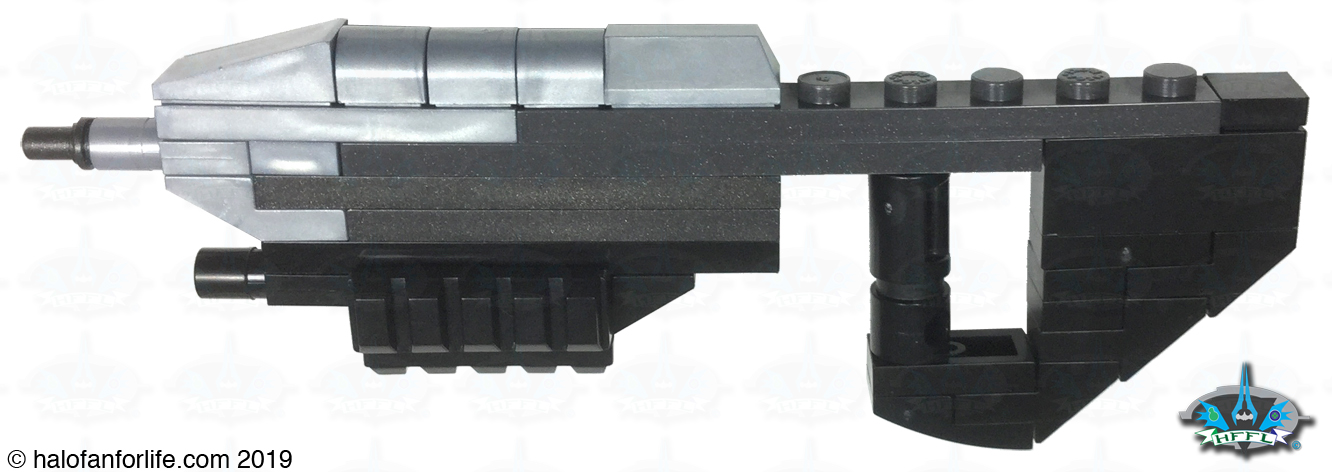
![]()
The clip hand (outlined in red below), clips onto a small bar that is hidden within the larger of the two cylindrical pieces of the rifle.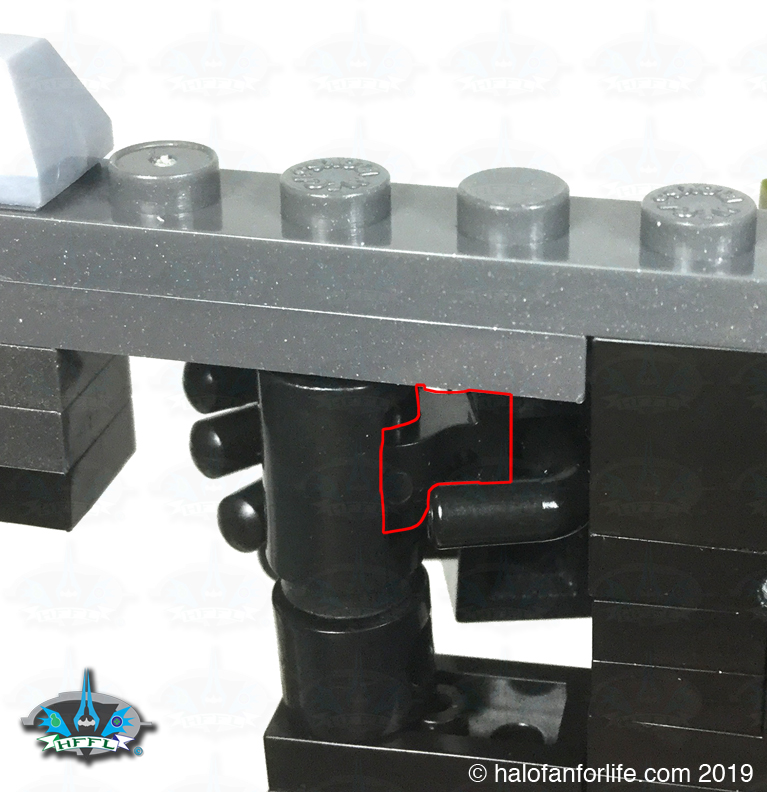
Leftovers I had from bags 11-12.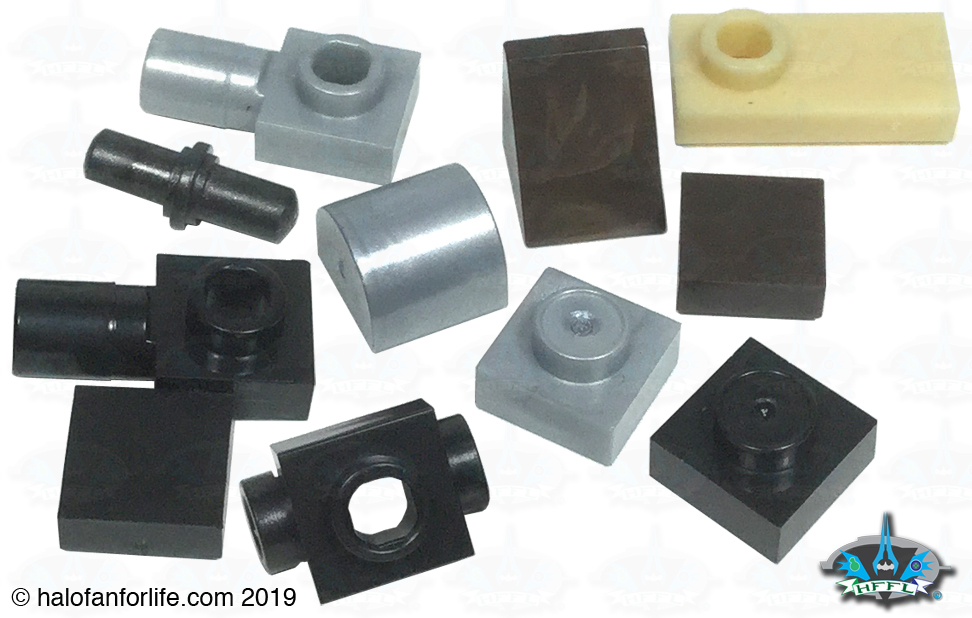
Okay, let’s look at some poses!
This first one, is similar to one shown in the instruction booklet. Thankfully, there is a peg for which micro scale Cortana can post onto.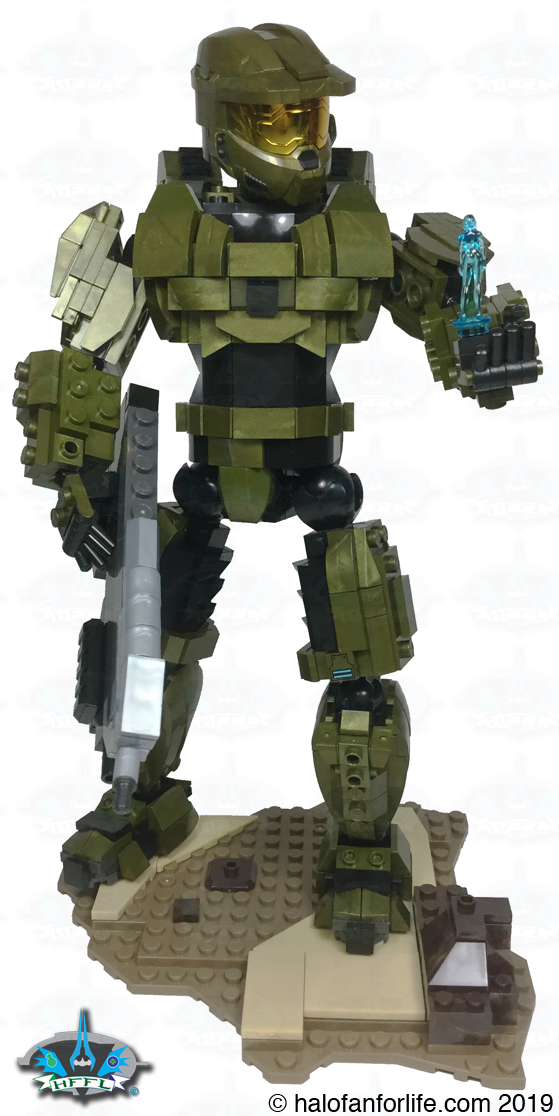
The articulation of the figure is fantastic.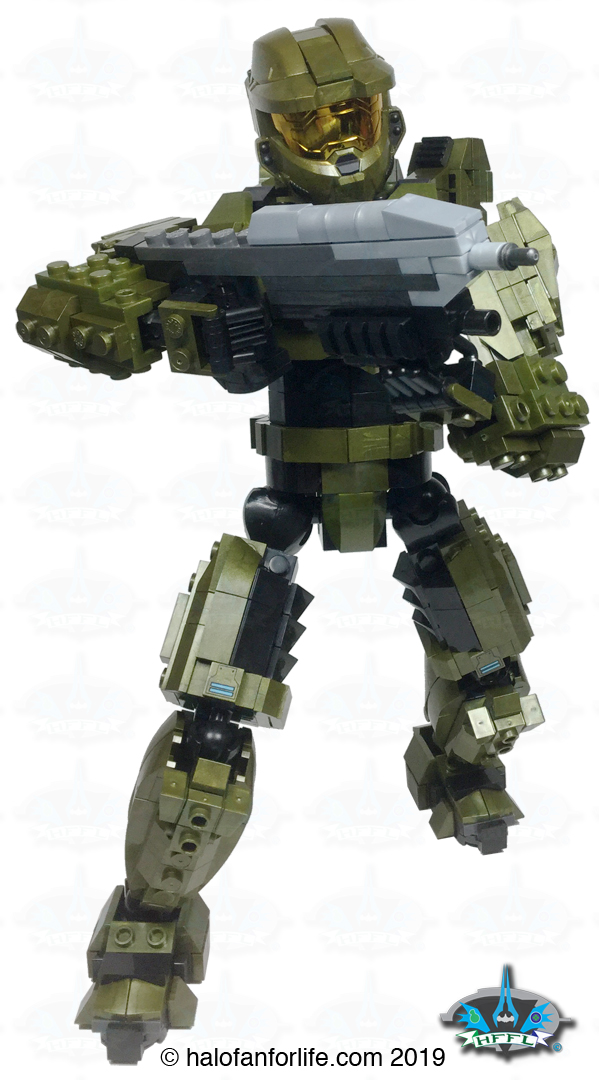
Articulation is as follows:
• ball joint neck
• ball joint shoulders
• ball joint elbows
• ball joint wrists
• pivot joint fingers
• swivel joint abdomen
– (though it’s made with a ball joint, the build only allows for it to swivel 360*)
• ball joint hips
• ball joint knees
• ball joint ankles
Here we see Chief in orthogonal views. I am really digging the detail in this build. With exception to the hip joints, all of the other joints are pretty well hidden.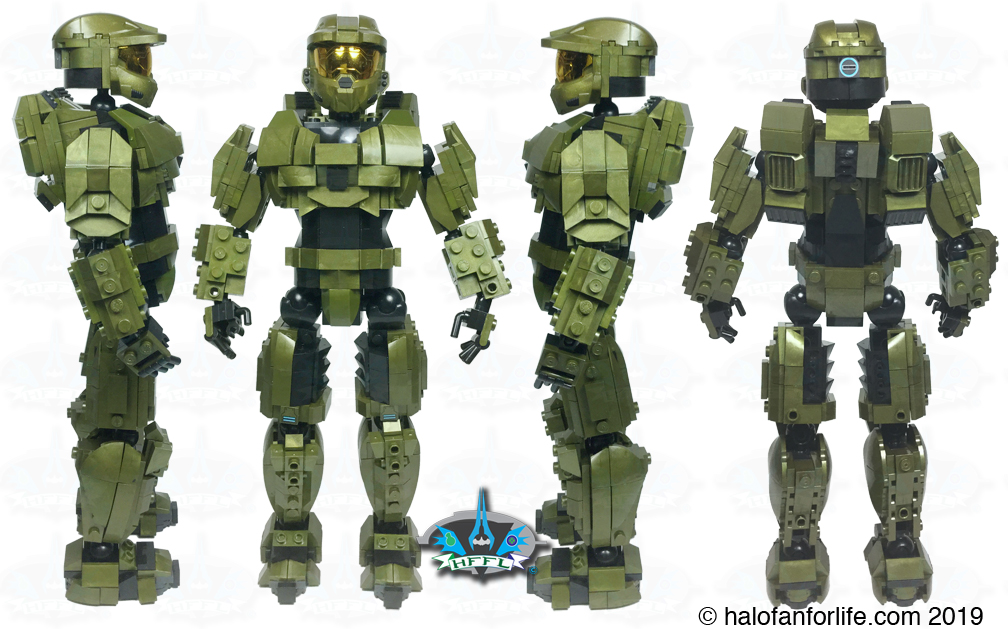
Chief in the now classic Halo 4 pose on the cover art for the game (as well as shown in the instruction booklet).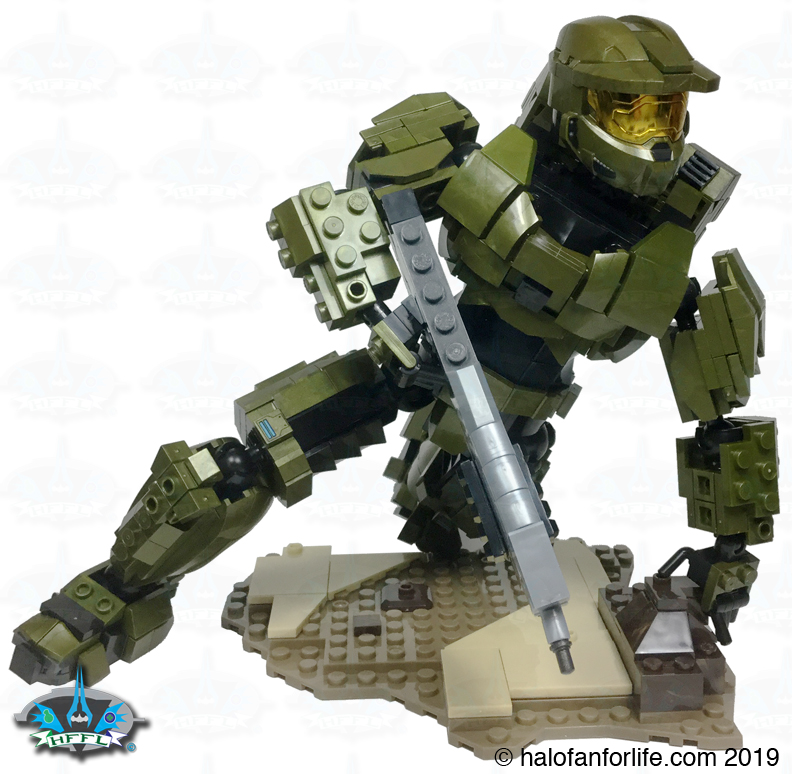
“T” pose!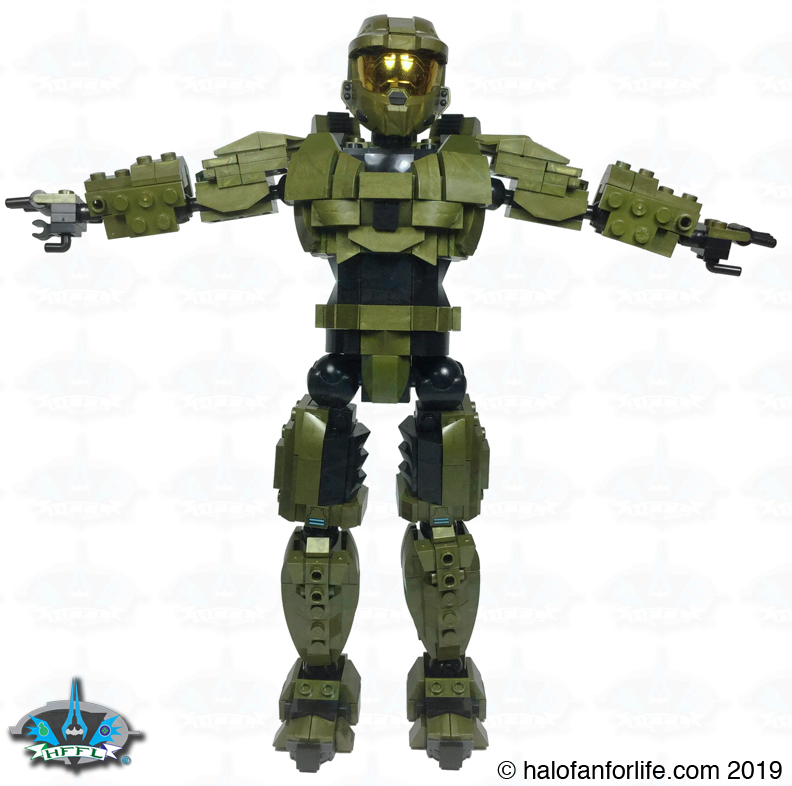
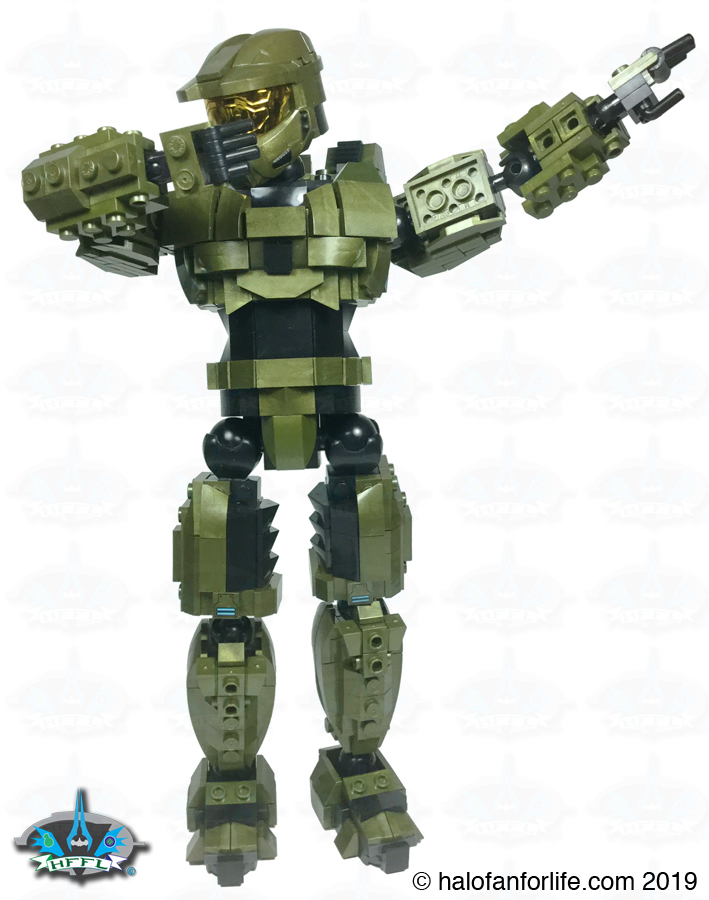
DAB!
And finally, here are ALL of the left over pieces I had. I will use some of these to modify the assault rifle. Not sure if there is anything I can use to make Chief look better, but I’ll be checking it out later. Again, I’ll add that to this review if I do.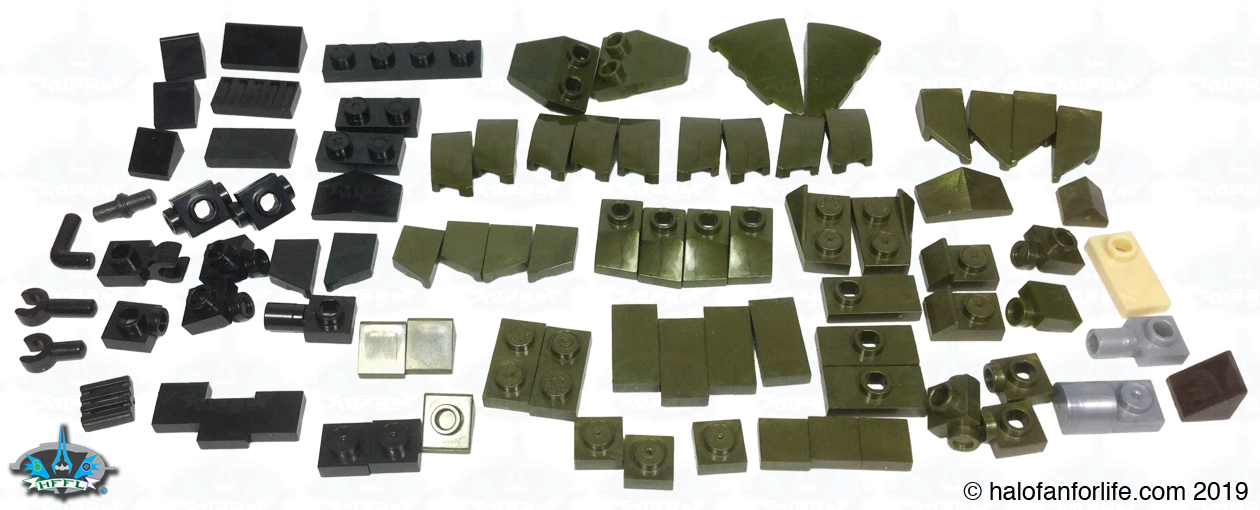
Summary: The set’s build time is moderate. You can easily get it done in one sitting. Articulation is the word for this set as you can put it in many poses.
Overall Rating: I give this set 9 out of 10 medals.
Why did I give it a 9 out of 10?
• The hip joints are a bit too exposed. Thankfully, all the rest of the joints are fairly well hidden though. 1/4 point off.
• The assault rifle often pops off when trying to repose. If not the gun, then the whole clip part of the hand. 1/4 point off.
• Speaking of the Assault Rifle, this is the one area where I think Mega should have done a better job. It’s slightly accurate, though it could have been better. 1/2 point off.
• The baseplate assembly is a bit plain. As noted though, it’s not the focal point of this set. I’m going to use it for other things instead. No points off as this is just my personal opinion.
Other than those points, this large buildable Master Chief is EXCELLENT! Lots of detail packed in those bloks.
Here’s my opinion on the break down of the value of this set. (In US dollars)
The number of pieces in this set is 638, as such, I expected to pay $60-65. I got it on sale at Target for $50. As of this writing, it’s gone down even further to $45.
When I consider action figures of this scale, articulation and detail, I often refer to other lines for price and quality comparisons. Take for example Star Wars Hot Toys 12 inch figures. Those figures are roughly $60 or more. Given that this is a blok set and not realistic, I forego the total realism and look to detail created when building the bloks. It’s there! Again, the articulation is fantastic and not just rivals but surpasses that of most 12 inch “realistic” figures.
Given that the set costs $60 US before tax at normal retail price, I think this is an good value. If you get it on sale, as I did, much the better.
Do I recommend it? YES! Absolutely! The quality of this build with its side building technique adds so much more detail than Mega first version that was 9-10 years ago. The size, color and articulation round out a set worthy of the MSRP.
If you have any questions about this set that I didn’t cover in the review, please do not hesitate to ask me. Either reply below or e-mail me at [email protected].
If this review gives you an informed decision on whether to purchase the toy or not, please consider a small donation (50 cents) to the blog.You can donate via PayPal to [email protected]. Or just click the paypal link at the right on the main page of the site. It’s much appreciated and helps ensure that HFFL stays registered/active on the internet. Thank You.
-Sal