
This set is not just large, but has many variant builds you can create with it. As such, I’m splitting it into 3 parts. The Body, The Treads and the Turrets. After I publish all three articles, there will be links to each of the articles for the other two parts.
![]()
Mega Construx Designer Series UNSC Scorpion Tank
Technical Specifications:
Build Time: 45 minutes to sort, roughly 1 1/2 to 2 hours to build. Your time will vary greatly as I took pics along the way for this review. Not to mention, each variant tread and turret has different building times.
Set Piece Count: 1014
Minifigures: Red Spartan Mark IV
Weapons: 5 different variant turrets for Scorpion, Gold 10th Anniversary Rocket Launcher for figure
Accessories: figure baseplate
Special Features: 4 different variant builds of treads
Cost: Between $70-100 US. Depending on where you purchase it from. I got mine from Target for $70.
And on with the pics! (Click pics to make BIGGER)
The front box art shows the Scorpion in an action move. As well, on the right it shows the other turret variants.
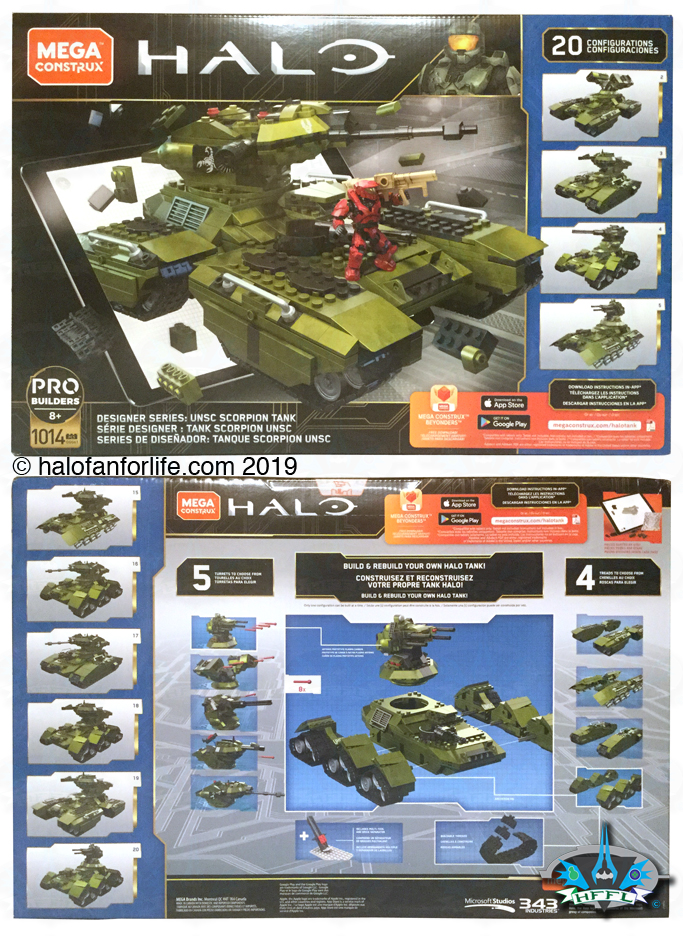
The back of the box shows the turrets and treads, along with some of the action features for the turrets.
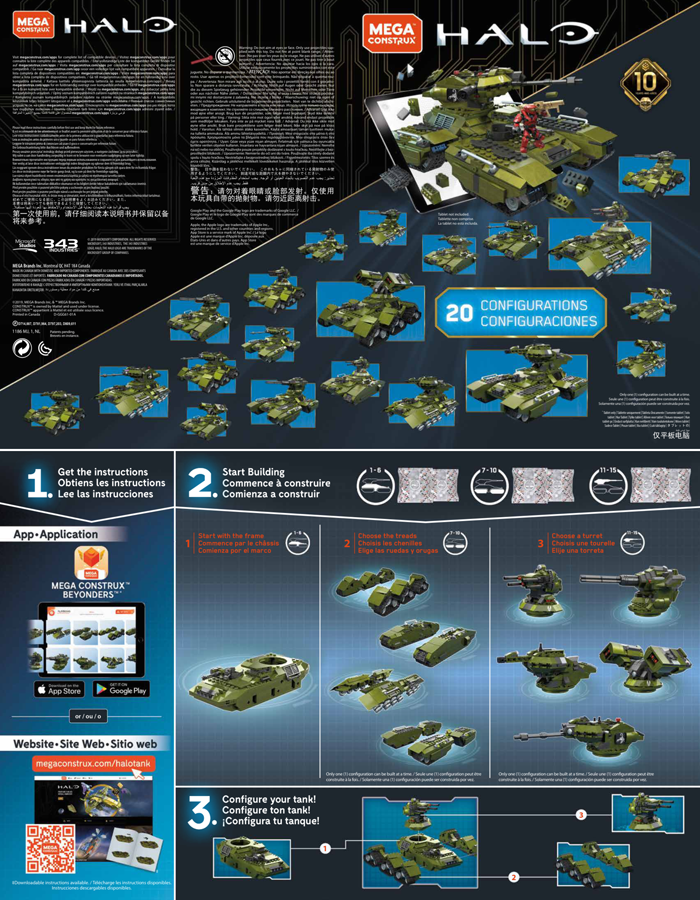
In the box you get an sheet showing the variations of the treads and turrets, a large and small MCX Bags, and 15 bags of parts. 6 for the body, 4 for treads, and 5 for the turrets.
For this portion of the Scorpion build, you use the leftover parts form the MCX bags, as well as bags 11-15 which are clearly marked with a graphic that shows the turret highlighted.

Bag 11’s contents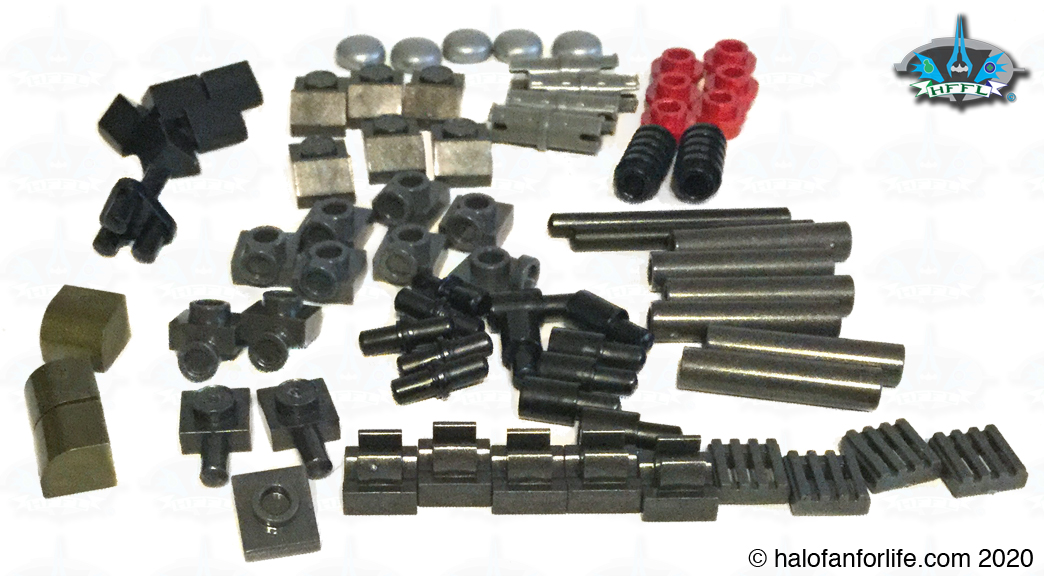
Bag 12’s contents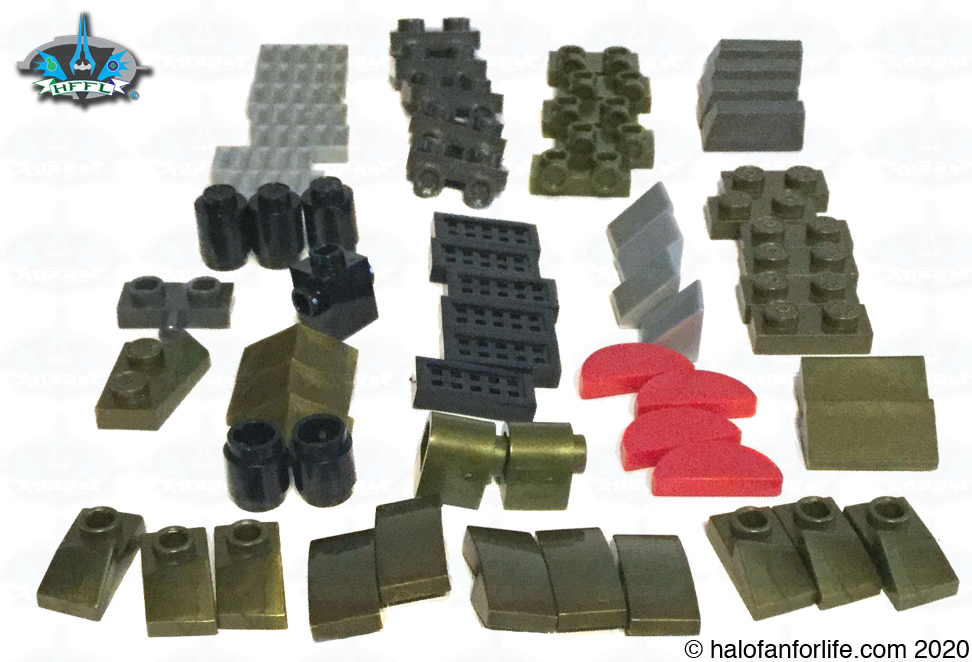
Bag 13 ‘s contents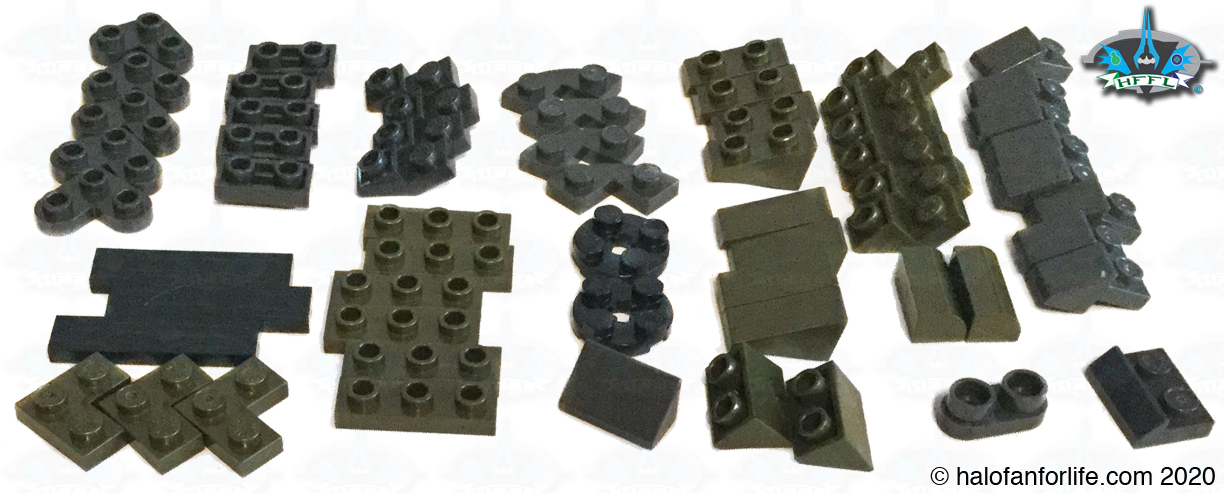
Bag 14’s contents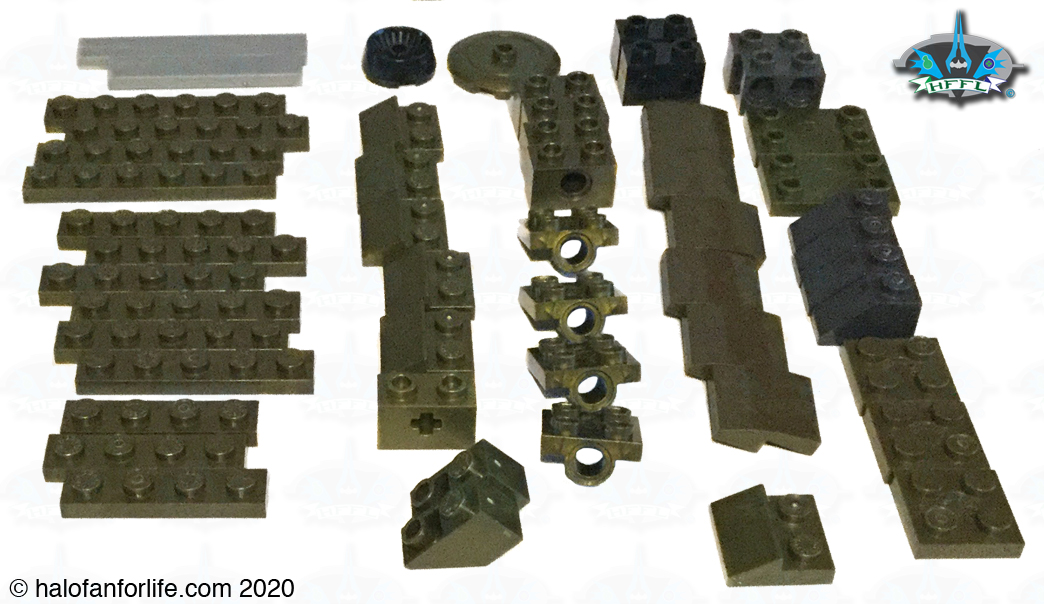
And lastly Bag 15’s contents. This one is most important of all the turret bags as it is used the most of the others for all the variations of the turrets.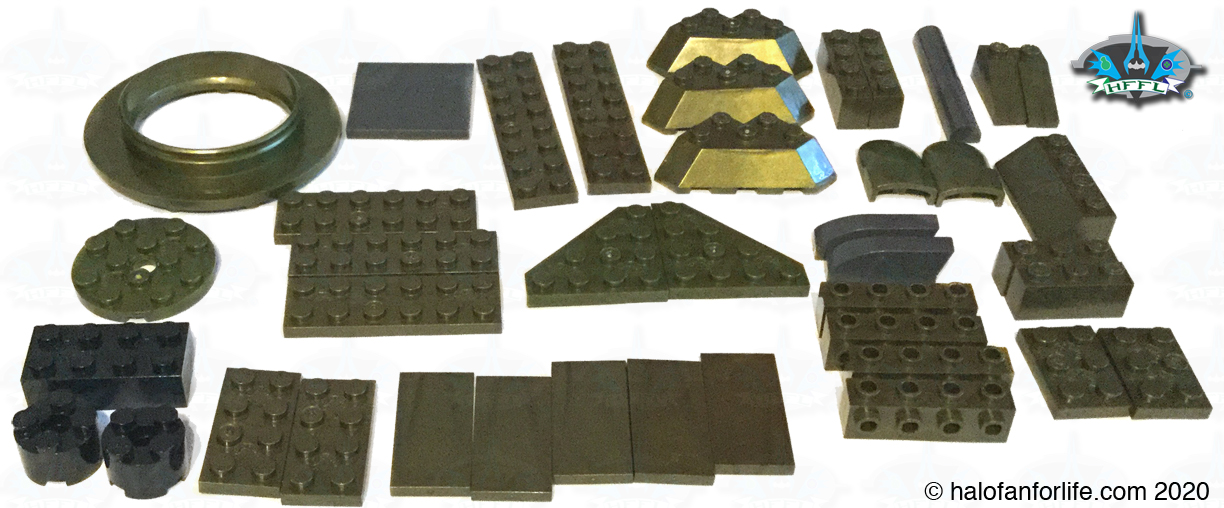
Here are all of those pieces sorted out, including the leftovers from the MCX bags.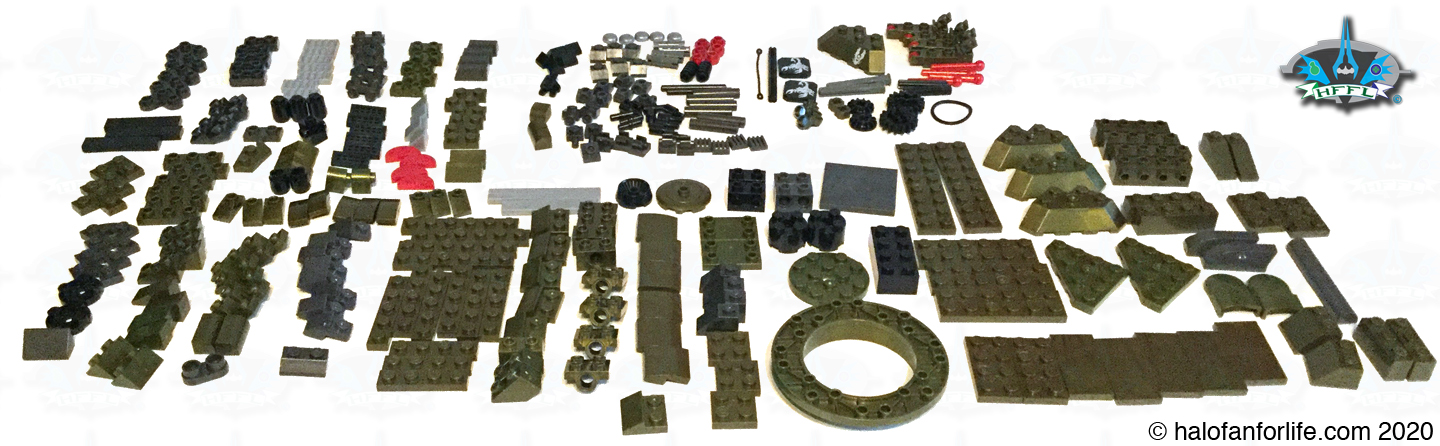
Let’s get into the build variations, shall we?
Standard Cannon Turret
This one is, for this build, considered to be the standard Scorpion cannon. It has an action feature that I’ll show in just a minute. As such, it looks slightly different in final form to the actual standard cannon of a Scorpion.
First we start by building what will be the base of the turret.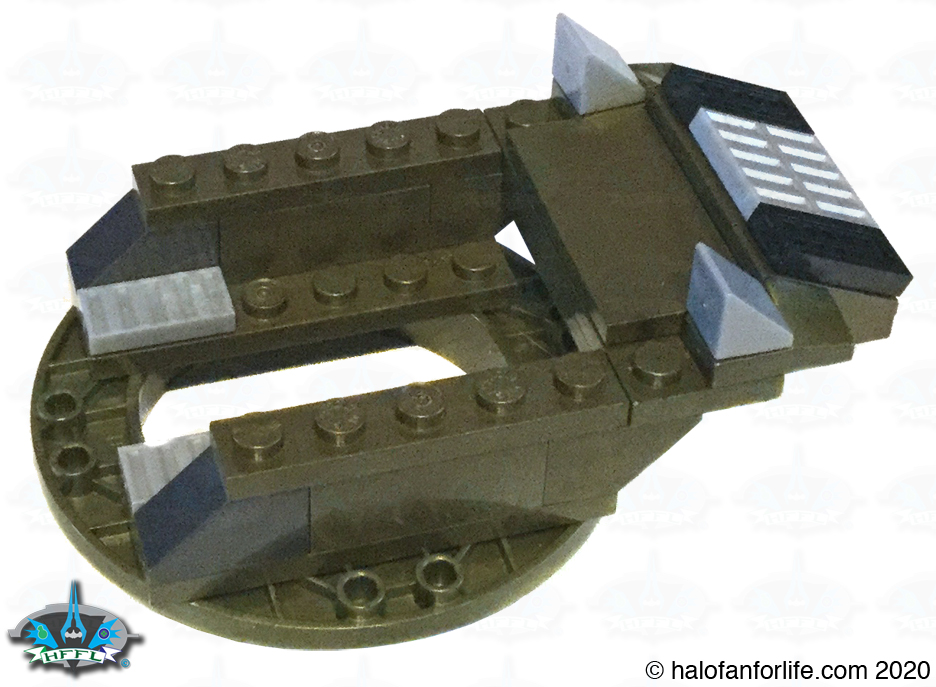
Over the next few steps we build a slightly complex mechanism for the cannon to snap back and forth as if firing.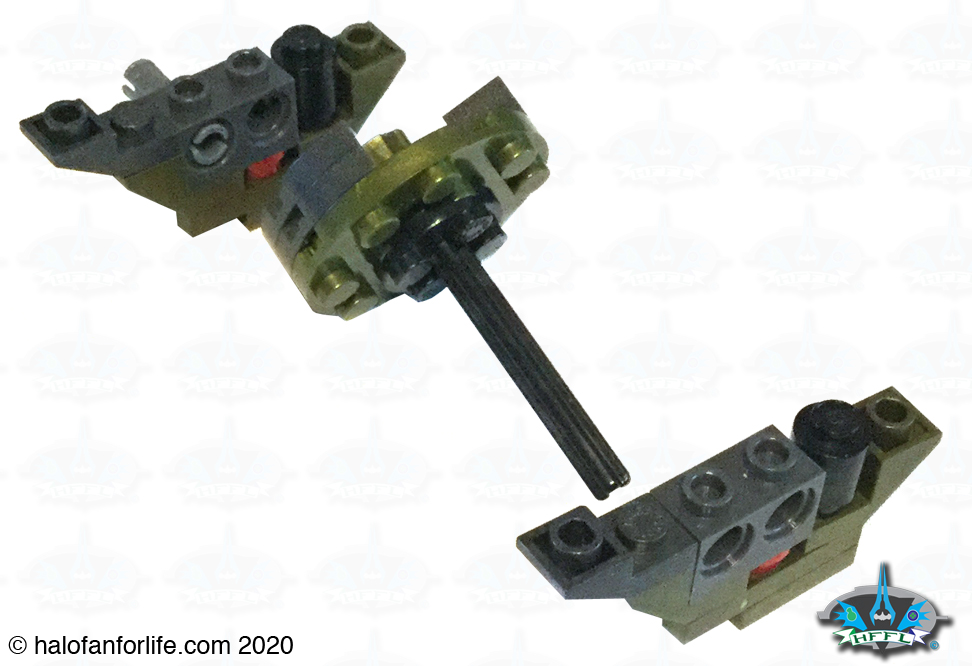
The mechanism is locked into place.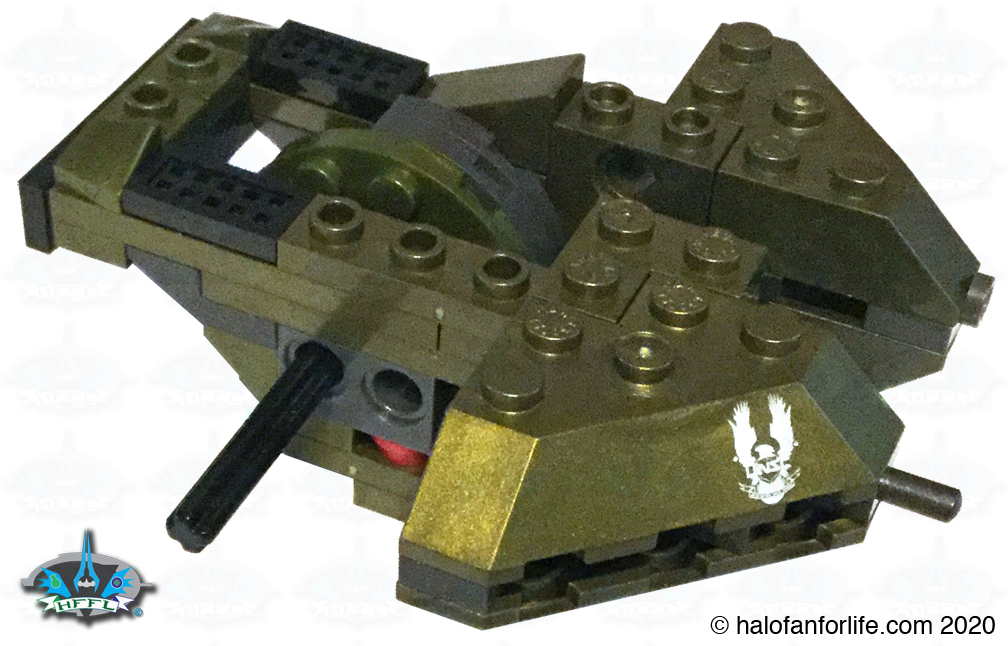
Next we add the barrel of the cannon itself. As you can see, it attaches to a black pin, via it’s 1×1 red round brick, with a hole in it. 
The barrel is connected to pulley system of sorts. This allows the barrel to glide along the rounded plates within the firing mechanism.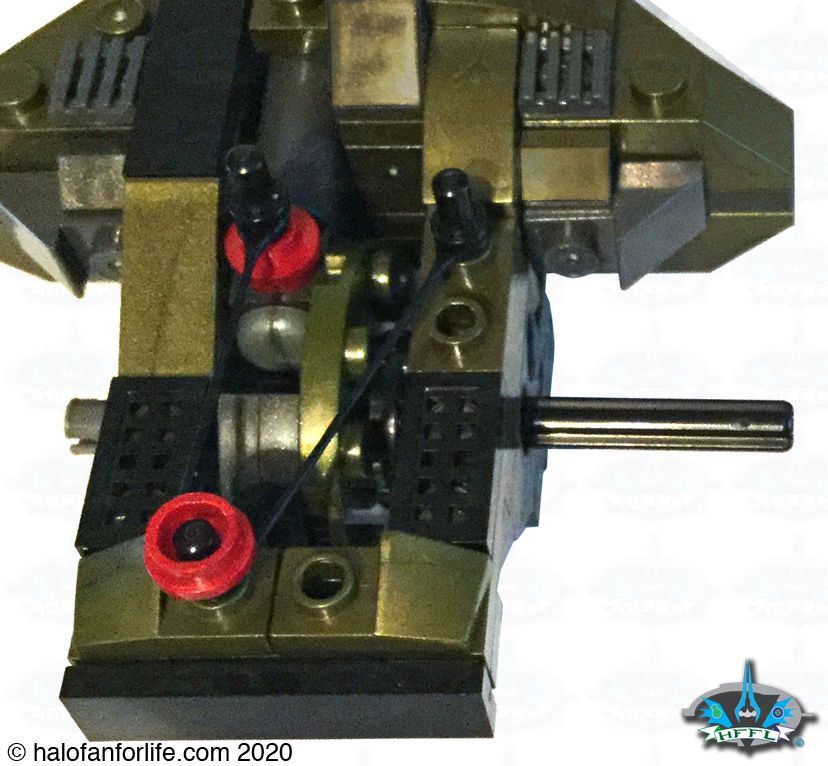
Here you can see the mechanism in action!
This whole section is them mounted onto the base of the turret itself.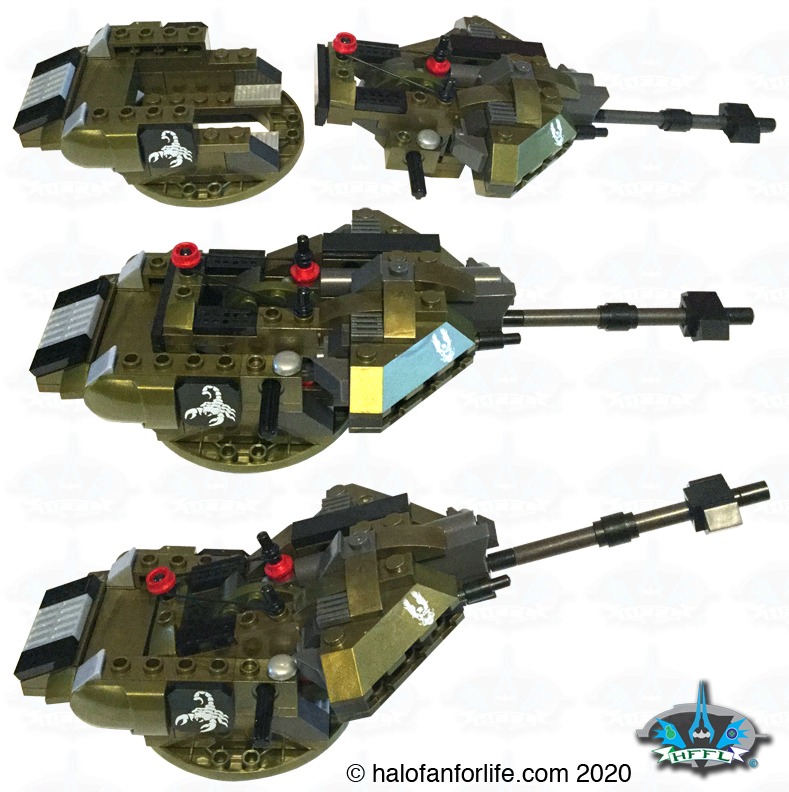
The round 2×2 blok and plate section, seen just right of the Scorpion printed tile, is what you operate the mechanism with. You simply twist the round black section and the action happens.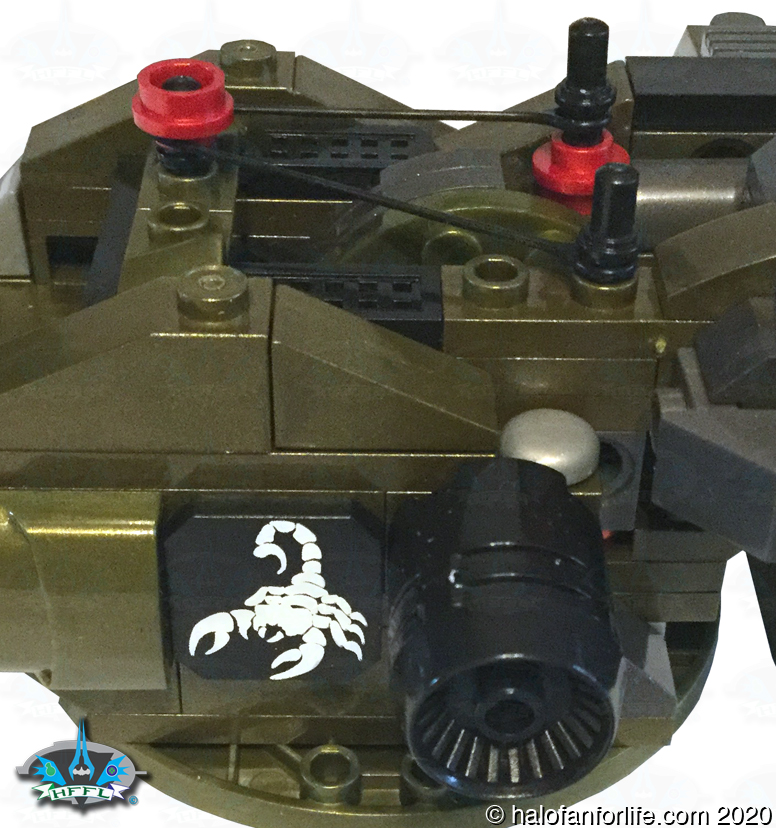
And here is the Standard Turret mounted onto the body. If you want a Scorpion that looks as close to toady’s modern day tanks, this is the version you should go with.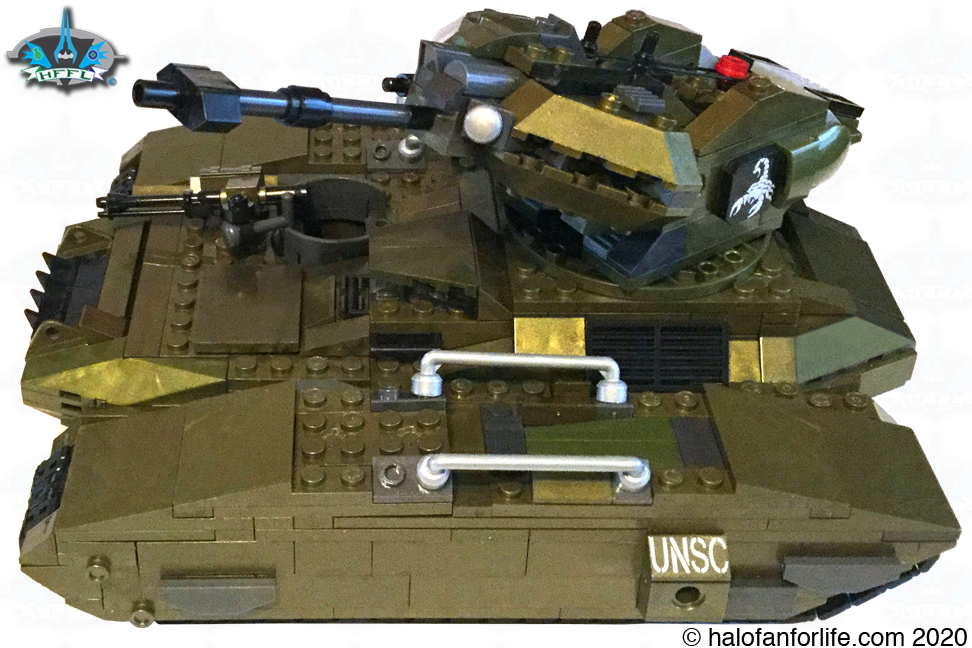
Next up is the Missile Turret!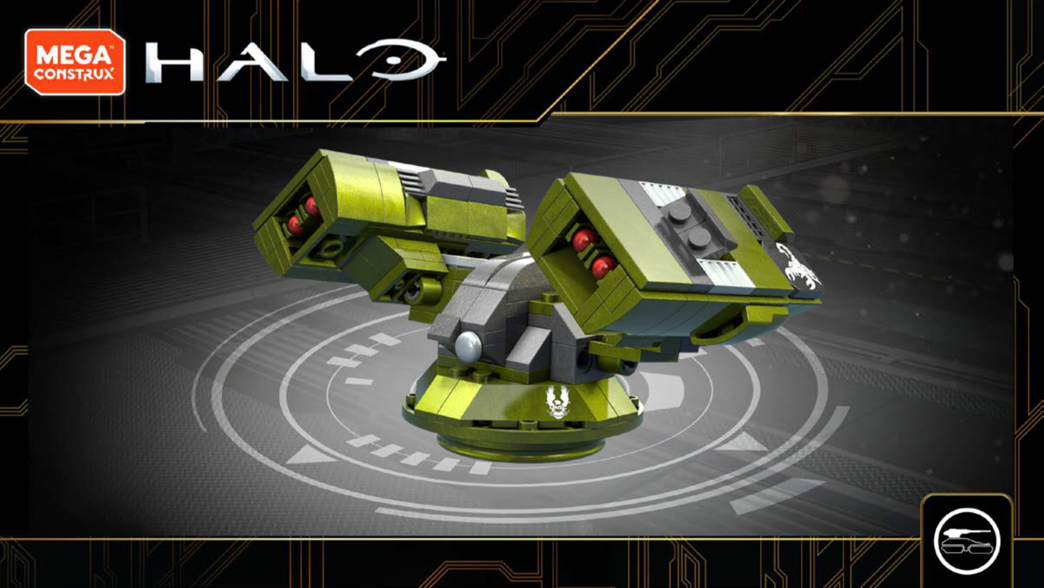
Again, we start with the base of the turret. Note the orientation of the large angle blok that has the UNSC logo on it.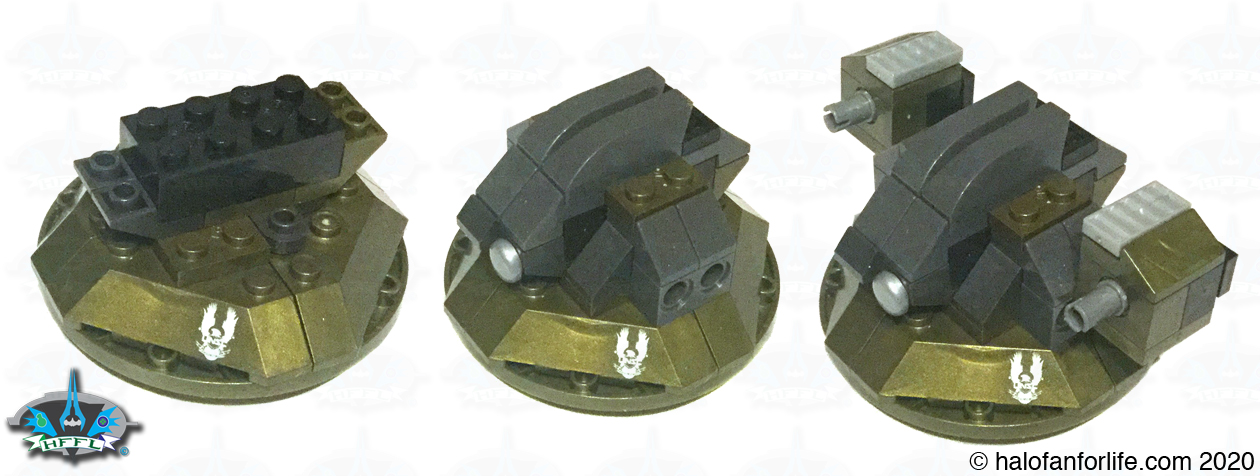
Each missile pod is the same, built in opposition sides (right from left).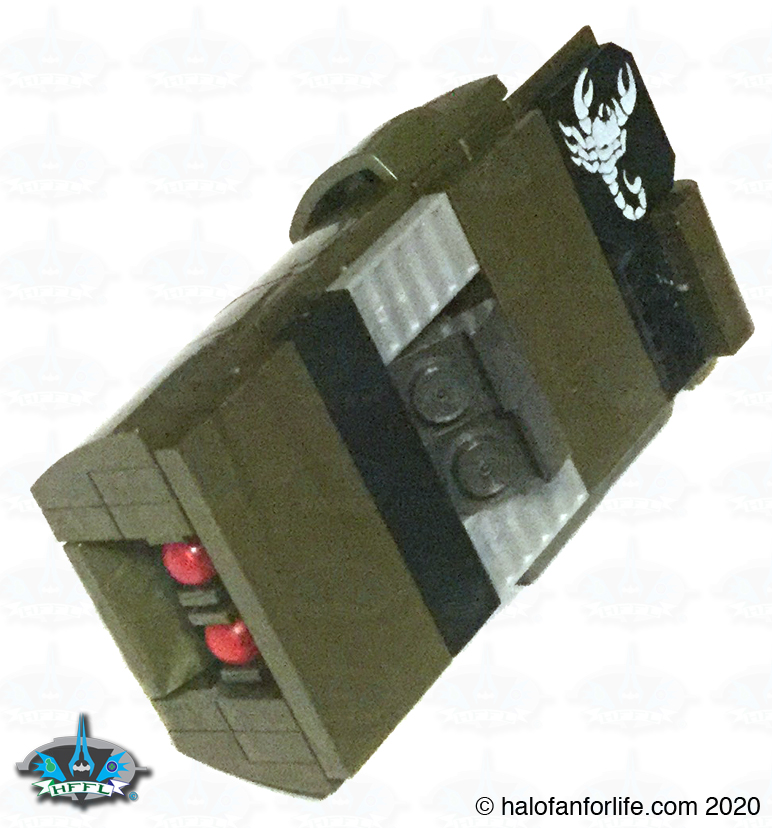
These are then attached to the base of the turret. Note in the two graphics below how the missile pods can be positioned at different angles. This adds a lot of versatility to them, especially if you plan to fire the projectiles. Just be careful with those folks.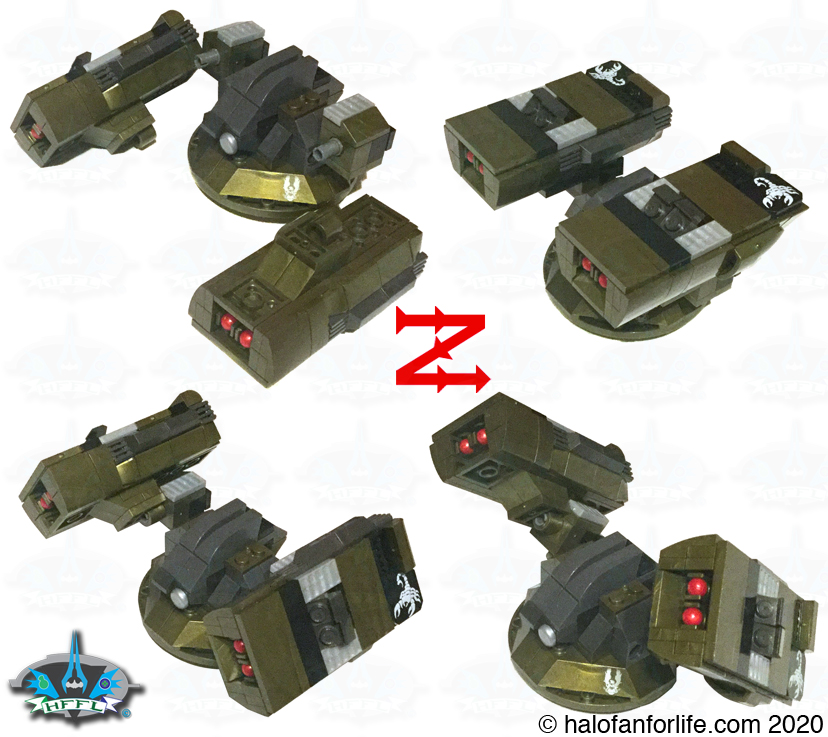
Here is the Missile Turret mounted to the body. 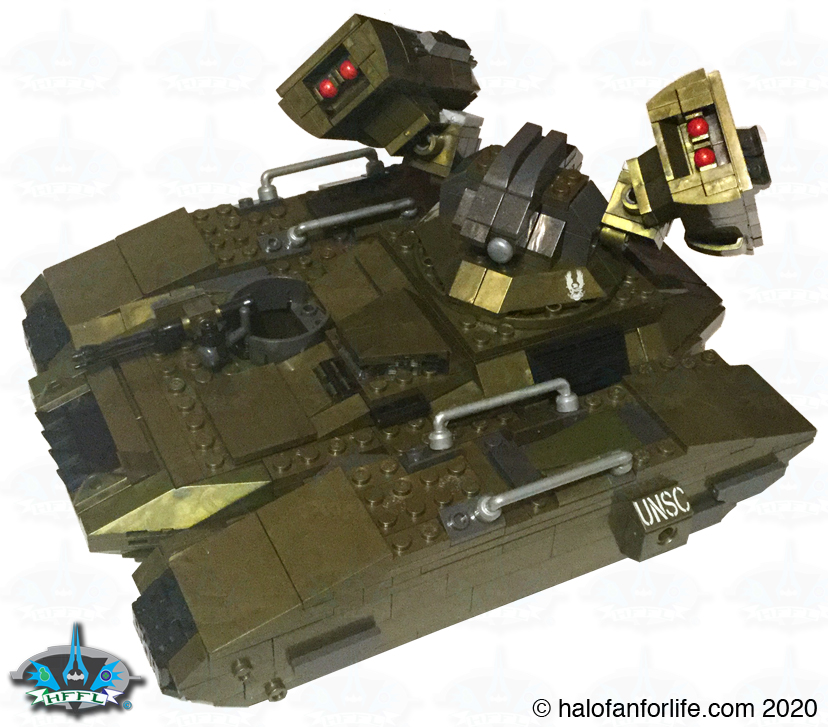
Thirdly, what I’m calling the Short Turret, due to the cannon’s short length.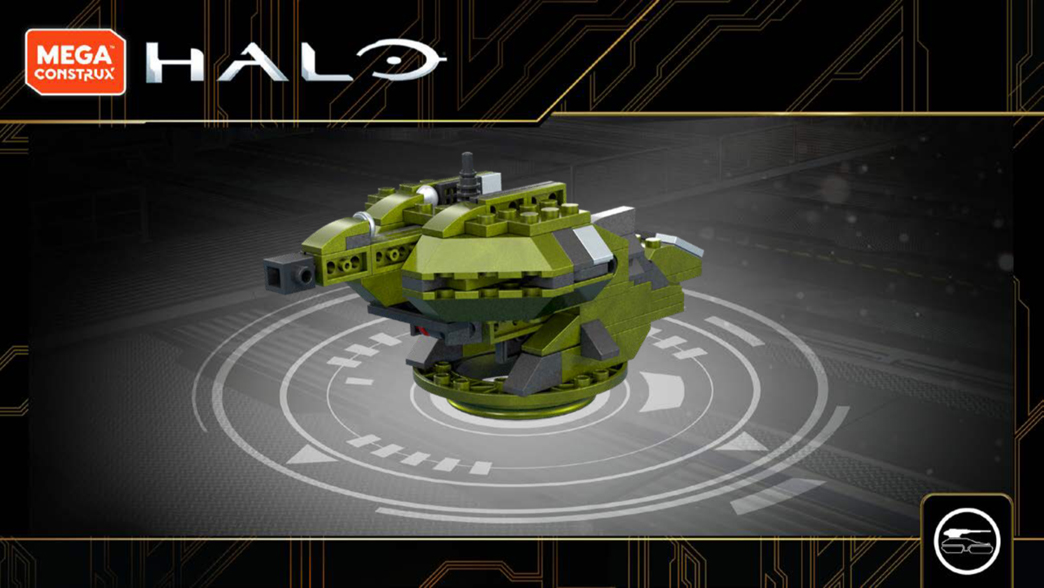
First we build one side of the turret assembly. This has some nice side building techniques to it. Those will become important later. They just aren’t for aesthetics.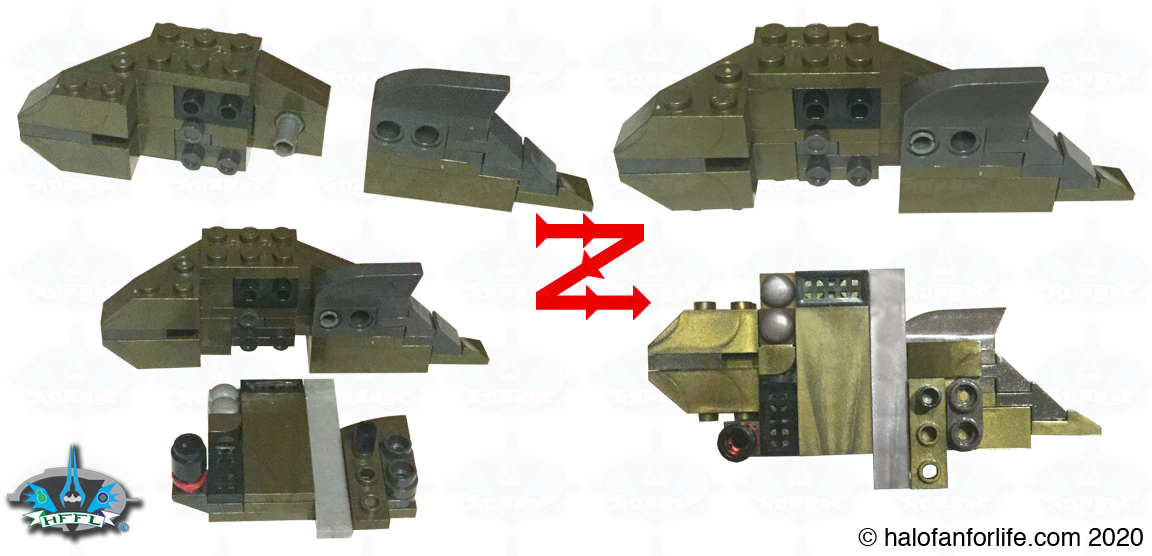
Next, the inner mechanism is built. This will be used to eject spent cannon rounds.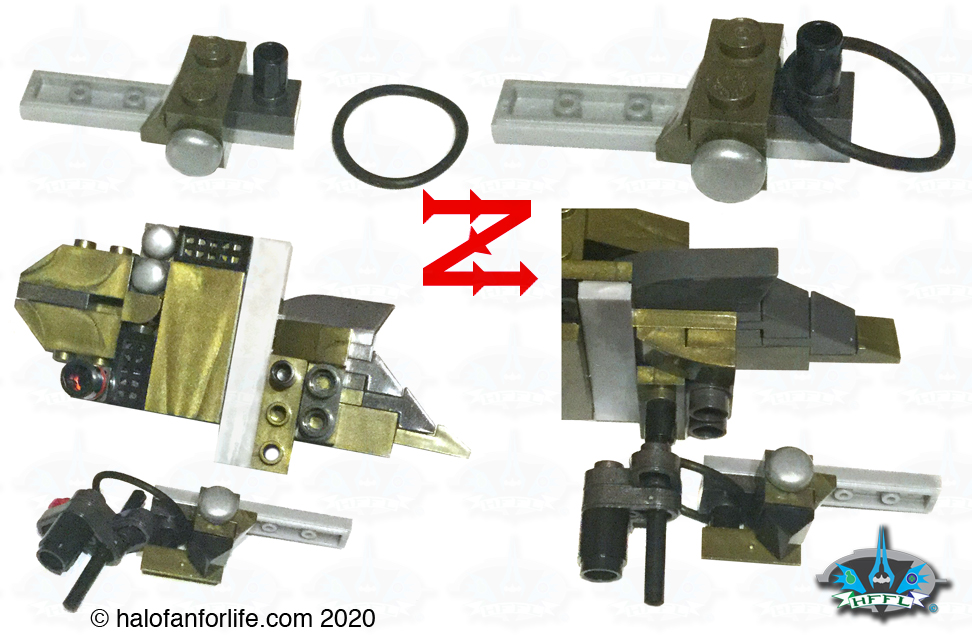
The mechanism stays exposed for several steps until you make the other side of the turret. Then you carefully flip it into position.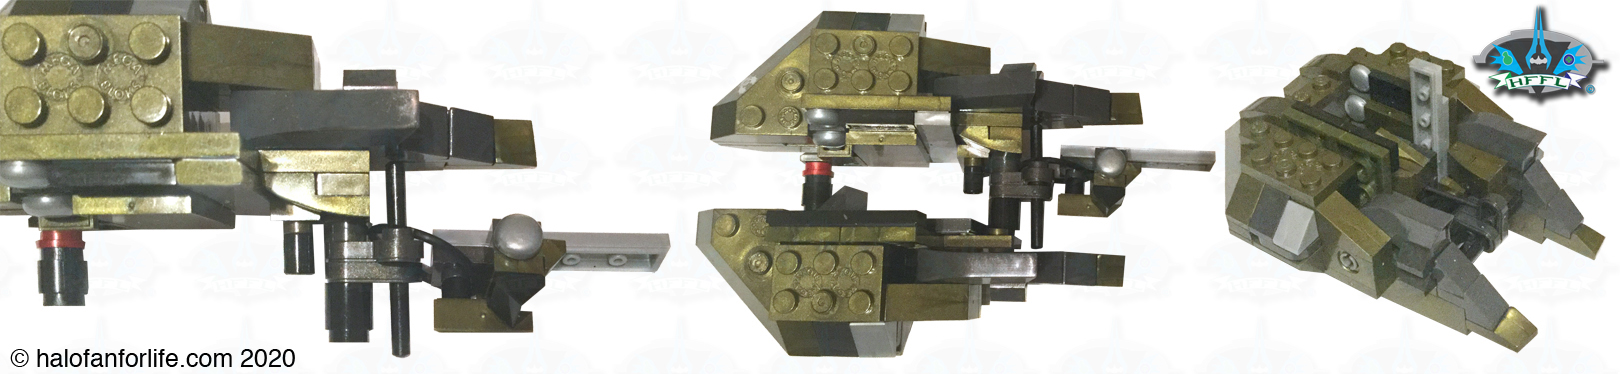
This is the other side of the turret.
Next we add the short cannon. This can be a complicated step. I had to do this twice to get it to seat properly.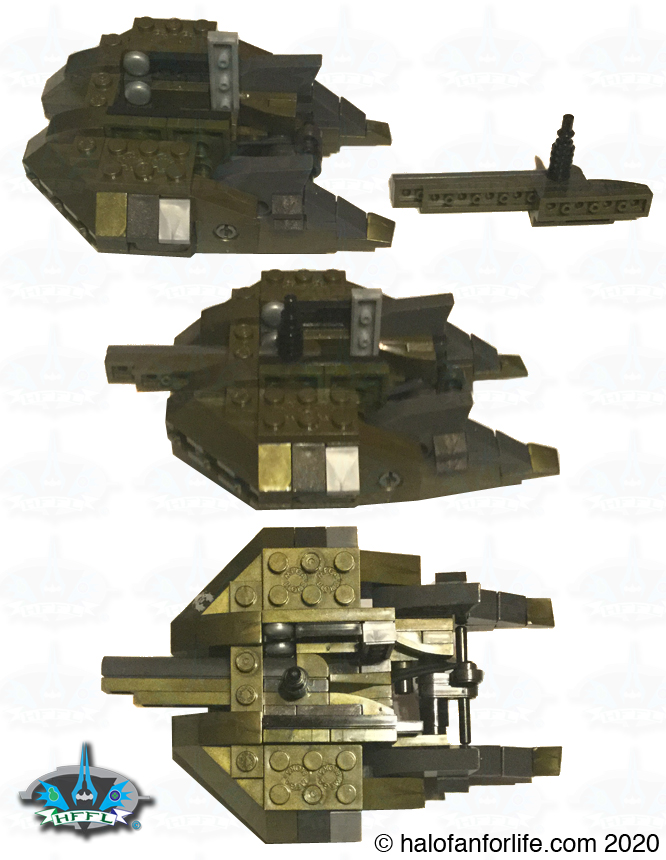
We then join the turret and the base.
Now, this next step is definitely difficult. It’s NOT a beginner step. You have to slide in at an angle one “cartridge” at a time. The first one goes in relatively easy. The second one will have some friction as you have to not only slide it in, but also push down on the first cartridge to lock it into position. The third is even tougher as there is more friction. This step cause me quite a bit of consternation. So parents and kids alike, be forewarned that you must exercise patience with this particular turret build.
Cartridges (seen inset) are button activated projectile launchers. The projectiles come out of the front just under the cannon, while the cartridge itself is supposed to be expelled though the back.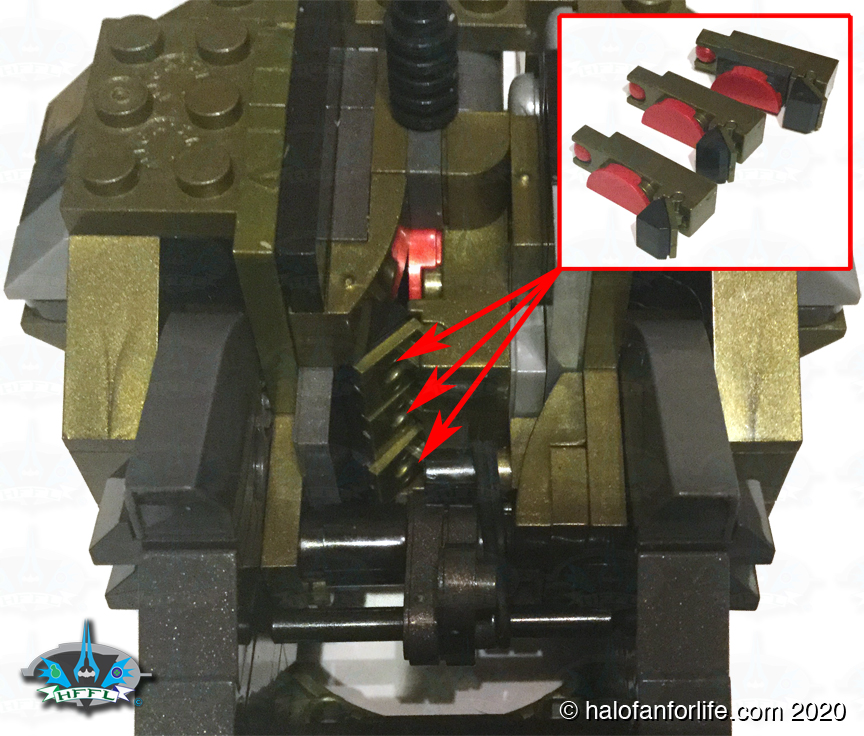
Here is the Short Turret mounted onto the body.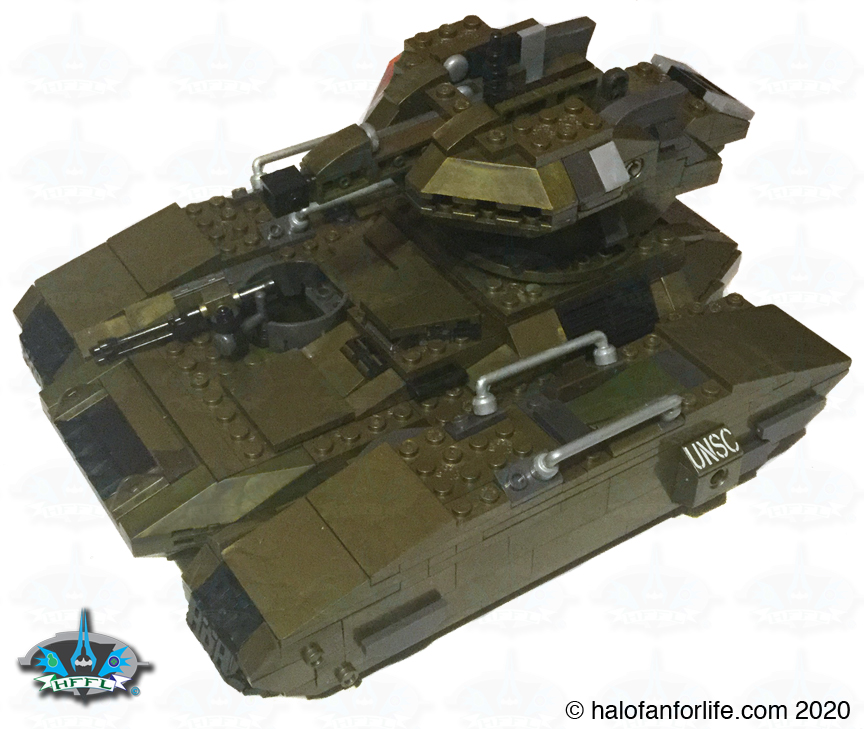
Yes, it can pivot upwards.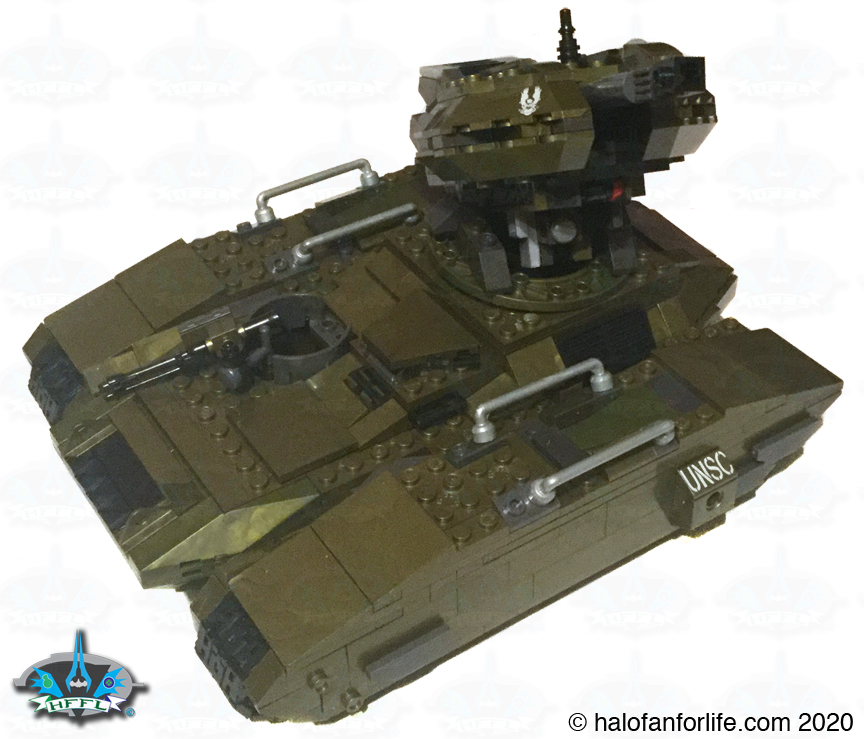
This is how the the projectiles look from under the cannon at the front.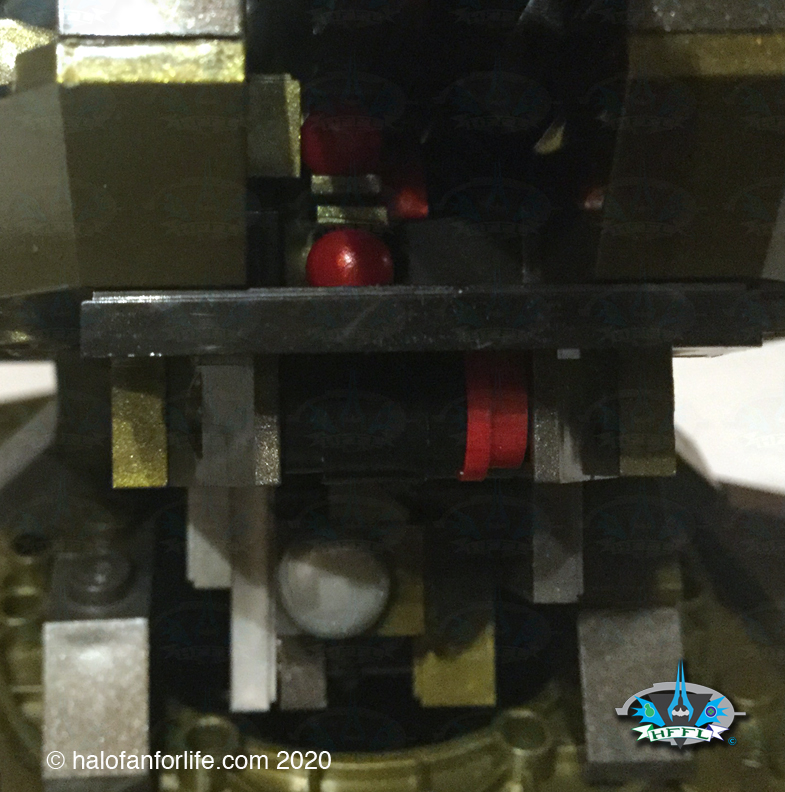
I had to put this graphics from the directions in, to show how the projectiles launch and how the cartridges eject. I would have included a short video showing this. However, unfortunately, I was unable to get it to work properly. Believe me, I tried. I rebuilt this turret THREE times, to make sure I hadn’t missed a step or put something together incorrectly. Nope, each time I still had the same result. The projectile wouldn’t launch and the cartridge would get stuck. 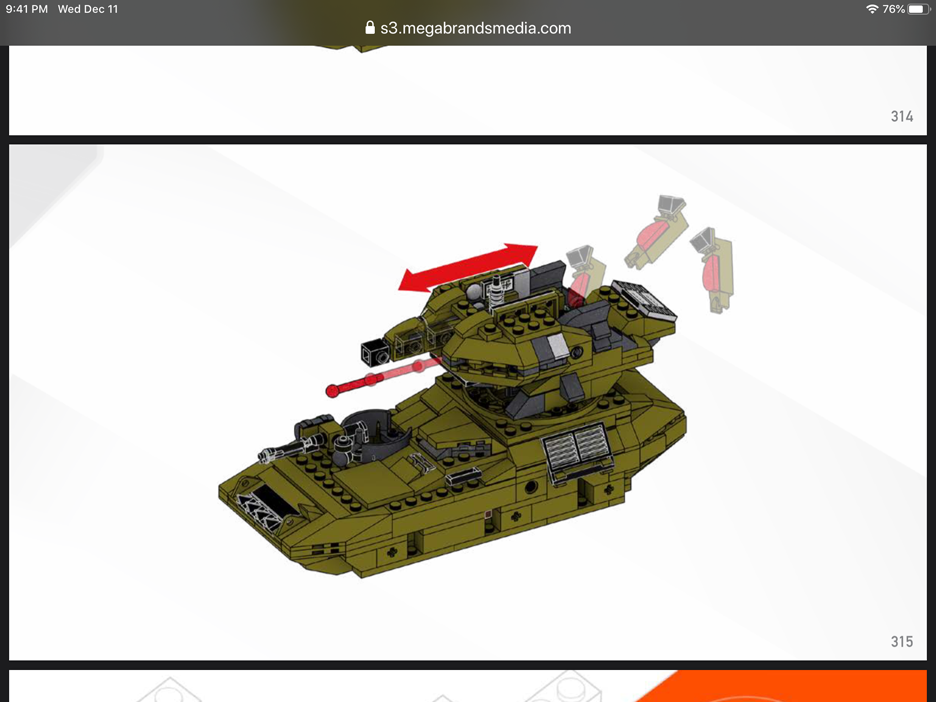
For such a neat feature, I was bummed that it didn’t work. Only once did I even get one cartridge to pop out right. Every other time it jammed within the turret itself.
Okay, let’s move on.
Next we have the Anti-Air Turret (That’s what I’m calling it anyway).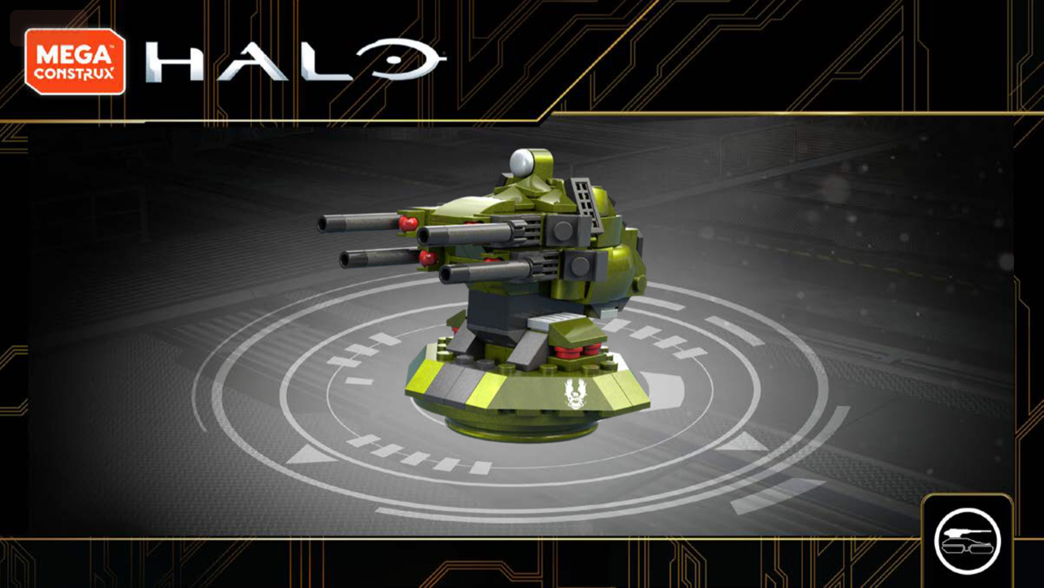
The base of this turret is unlike the others. You build into it a swivel section that will raise or lower the entire turret. (Unlike the ones previously that only pivot the cannon or missile pods.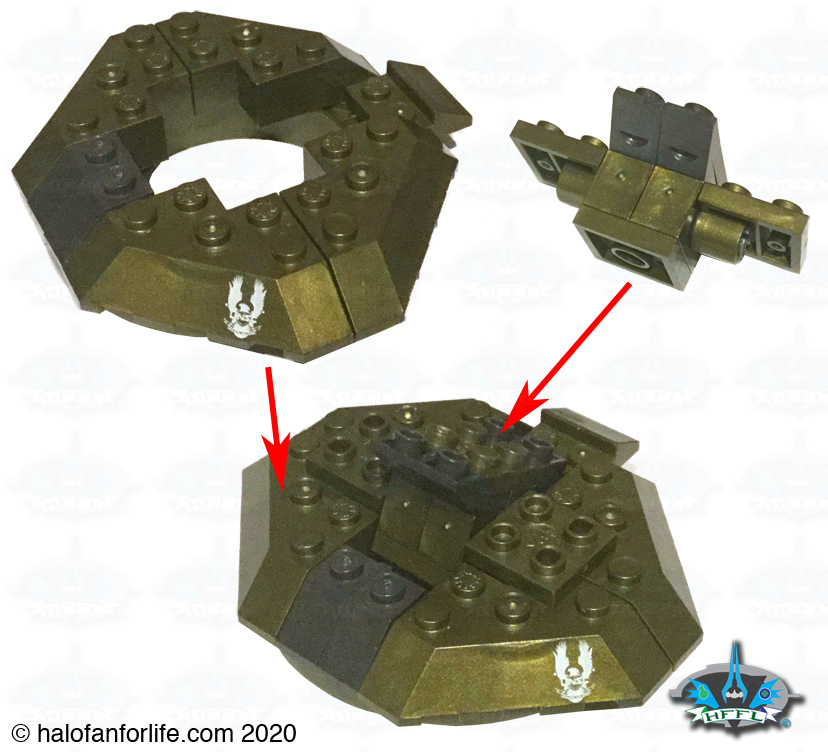
Some fun side building techniques are used here as well. This for the guns. Just interior to the guns are the projectile launchers.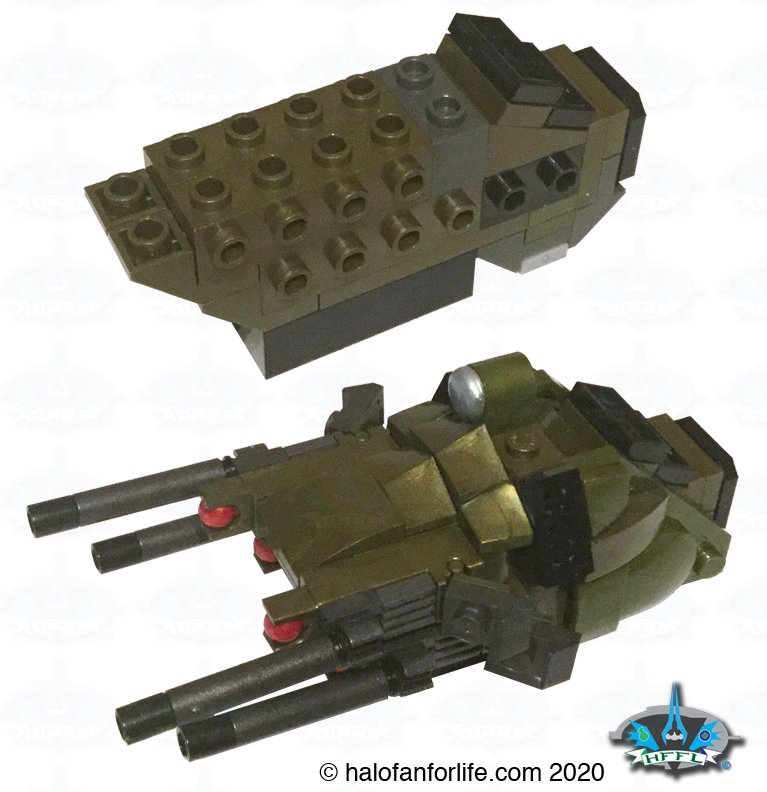
I like that Mega incorporated the Scorpion printed piece into this build as well.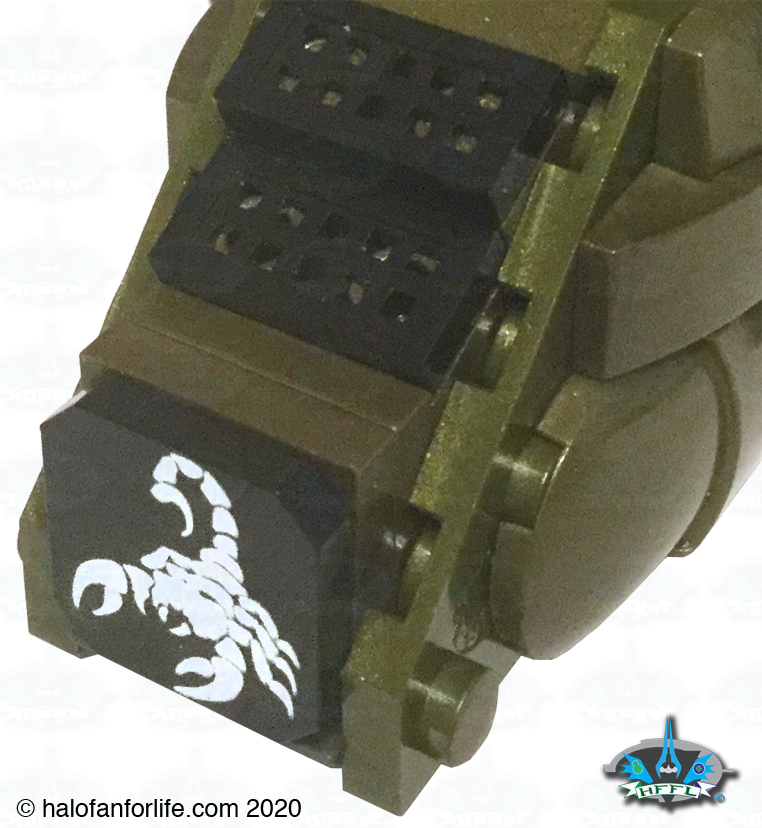
Now mechanism internally built with this turret. Instead you push in on the side mounted slope pieces that are attached to the projectile launchers. 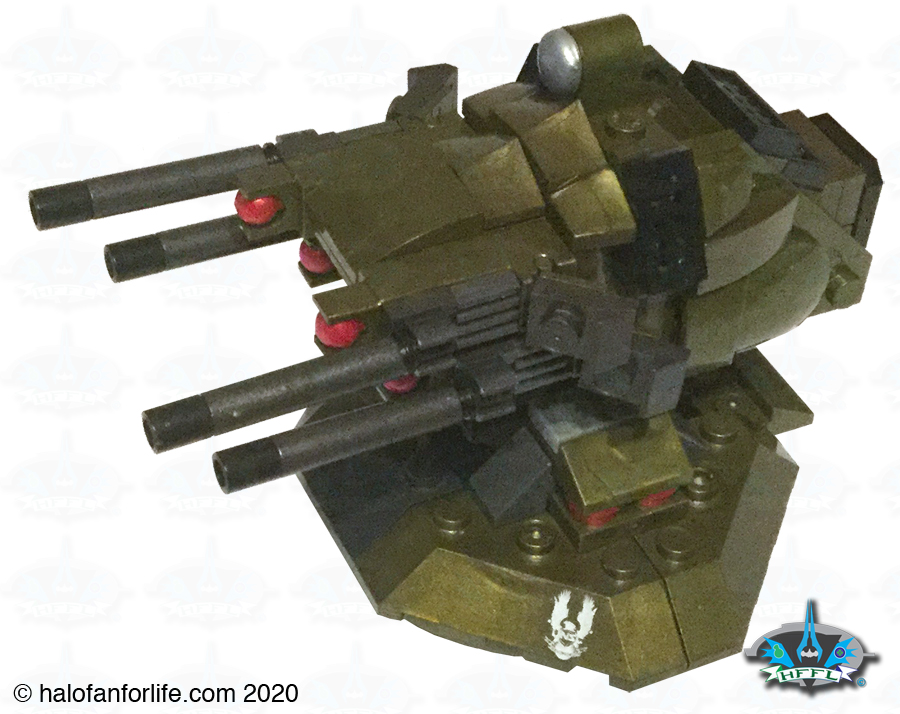
And the Anti Air turret is locked into the body.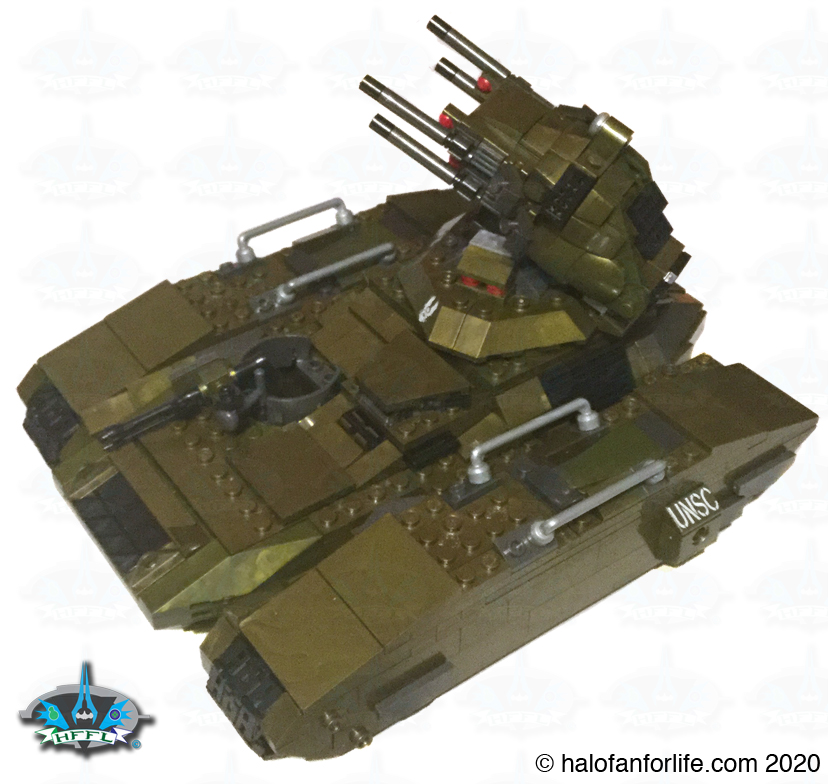
Last, but certainly not least of the five official turret designs is the Heavy Machine Gun turret. This is the version I ultimately went with for my 20 in 1 Scorpion.
The base is built with two side ends that allow for the turret to easily pivot on. Note the gears on the one side of the turret assembly. These will be used in the mechanical feature, shown later.
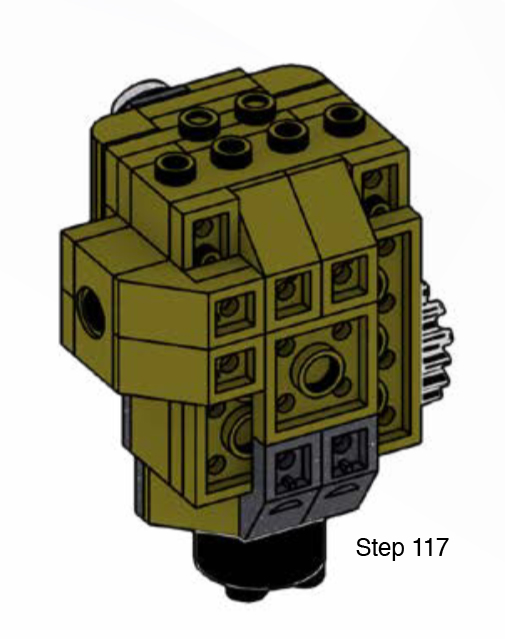
I included this graphic from the instructions to show the placement of the GREY inverse slopes. Not to be confused with the GREEN inverse slopes. Heh, just so happens it’s step 117!
Further building up the turret assembly, you also add on this “crank” section. This will make the Heavy Machine Gun turret spin!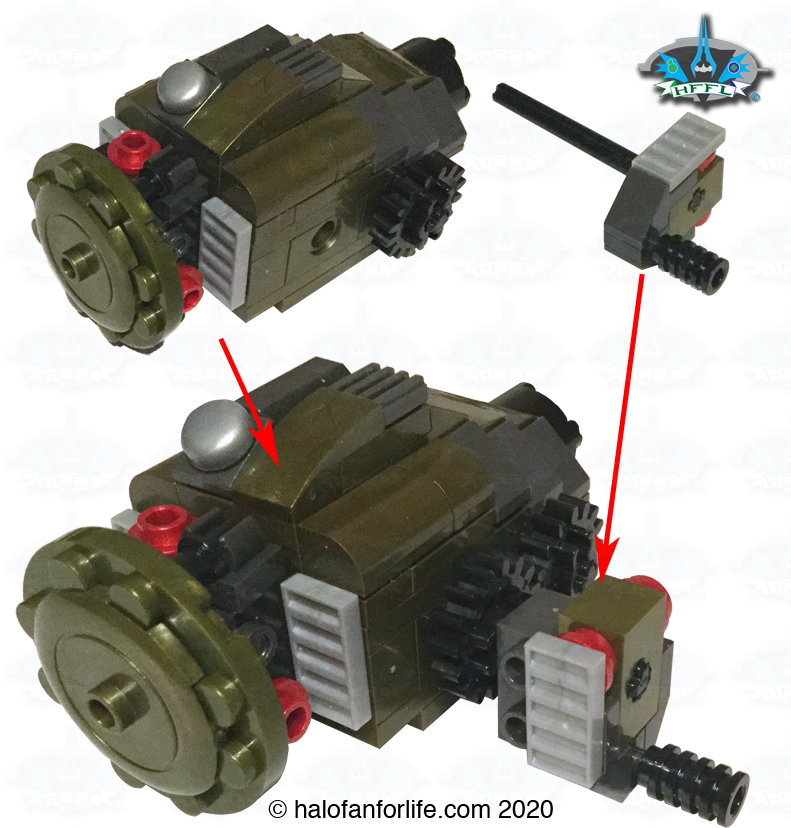
We have both the turret and base sections ready to merge together.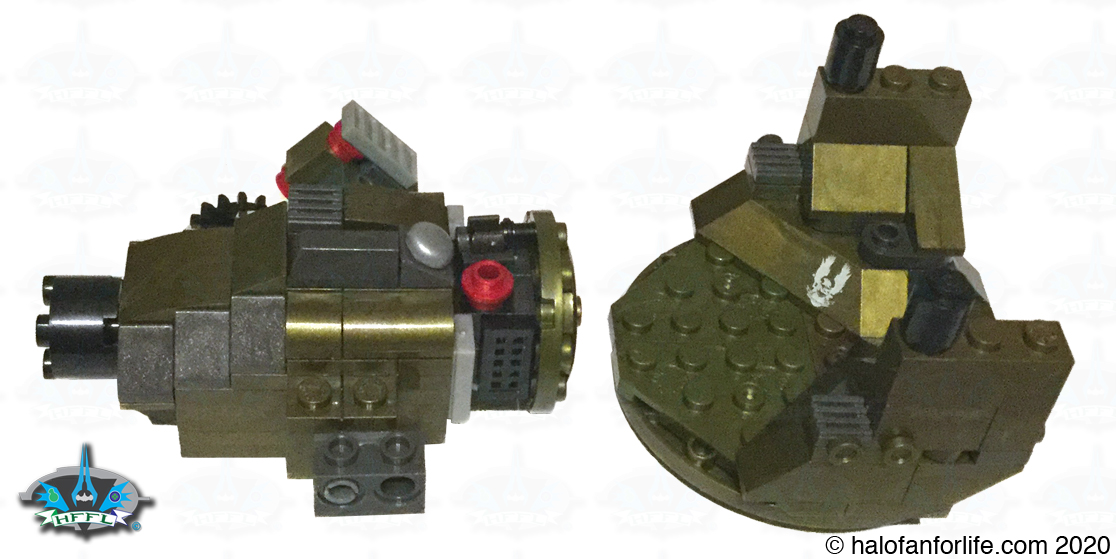
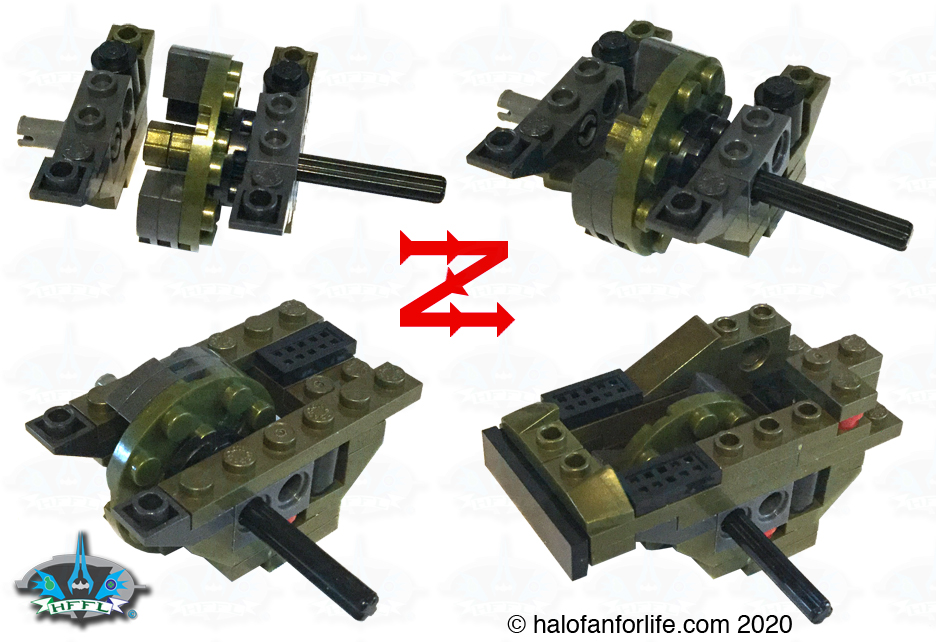
So here is what we have so far. Now, I need to make note of something here. The instructions call for a 2×2 rounded black blok to mount on. However, those pieces have a hollow hole in the middle. So the cannon, should you turn it downwards, towards the floor or ground, will slide off. Likewise, if you turn the turret upward, it may not spin at all, due to this hollow hole.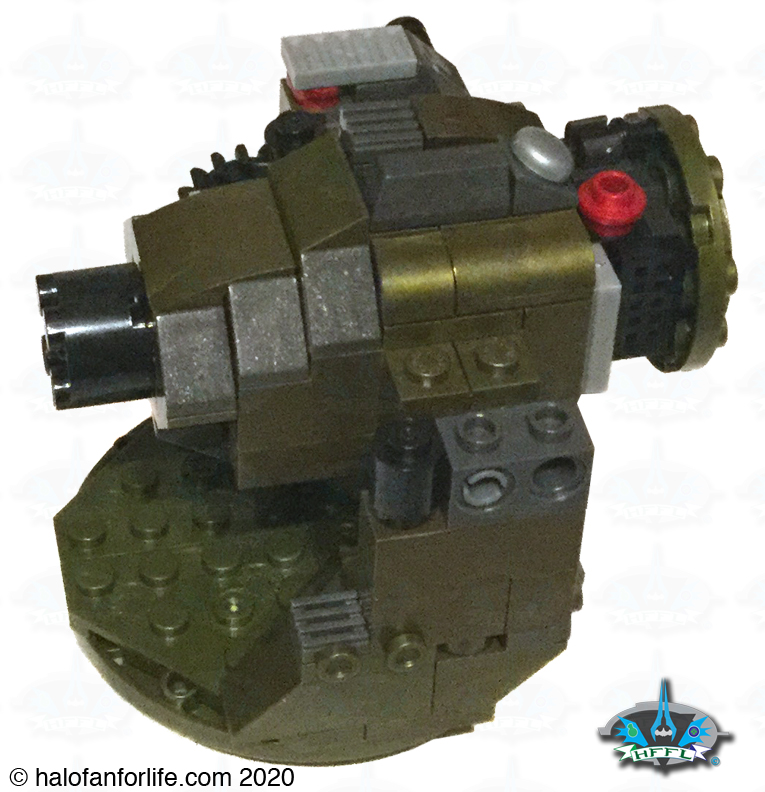
See the video below to see exactly what I mean. To fix this issue, instead of using a 2×2 rounded black BLOK first, I used a 2×2 rounded black PLATE. The plate has a “+” shaped hole in it that mounts to the pin coming out of the mechanism perfectly! This allows the turret to properly lock into place.
Now with that plate in place first, the turret can turn with the mechanism as shown by the video below.
The steps here show that I’ve put the plate on first, instead of the blok.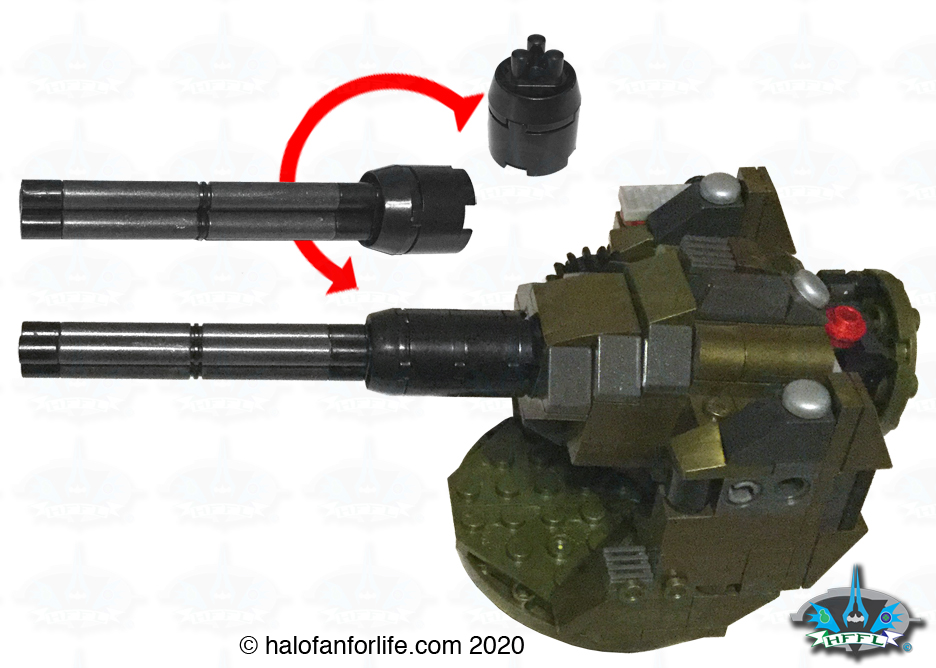
Next we build side mounted missile launchers! One for each side!! These are activated by pushing in on the black double sided sloped 1×1 pieces.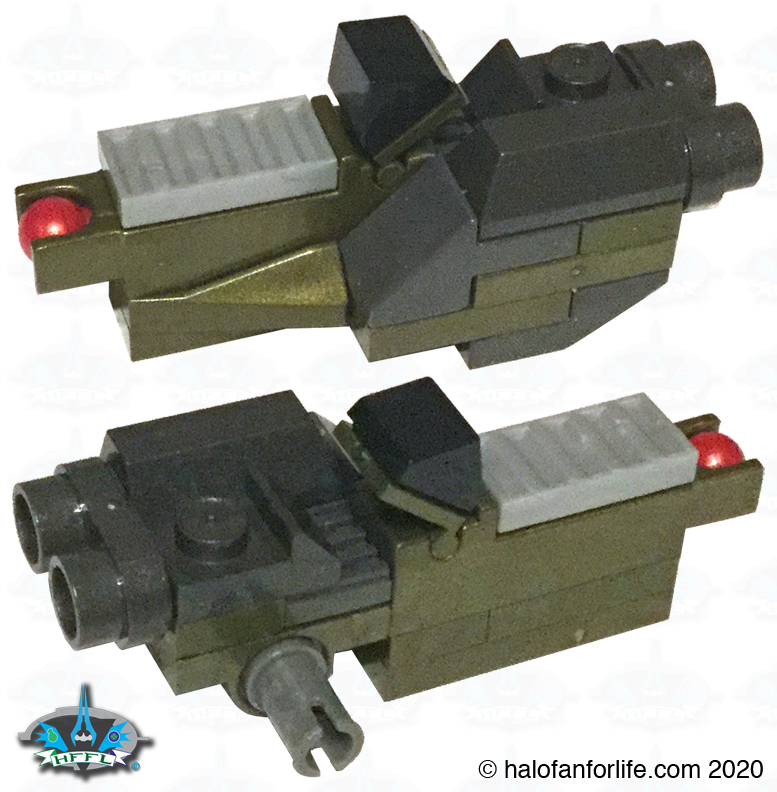
Here one side is shown attached to the turret.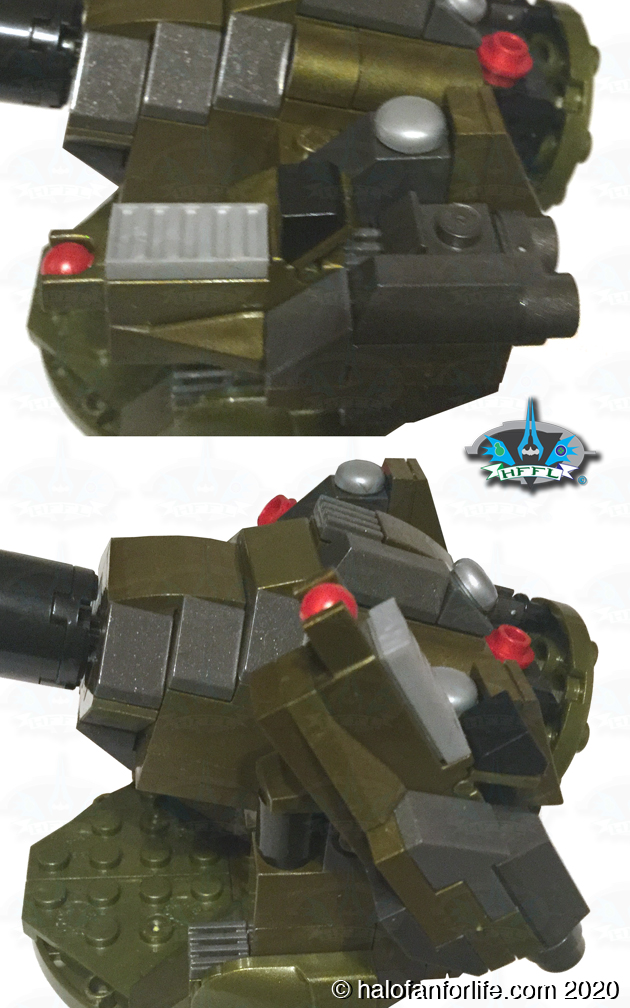
And below the turret mounted to the body.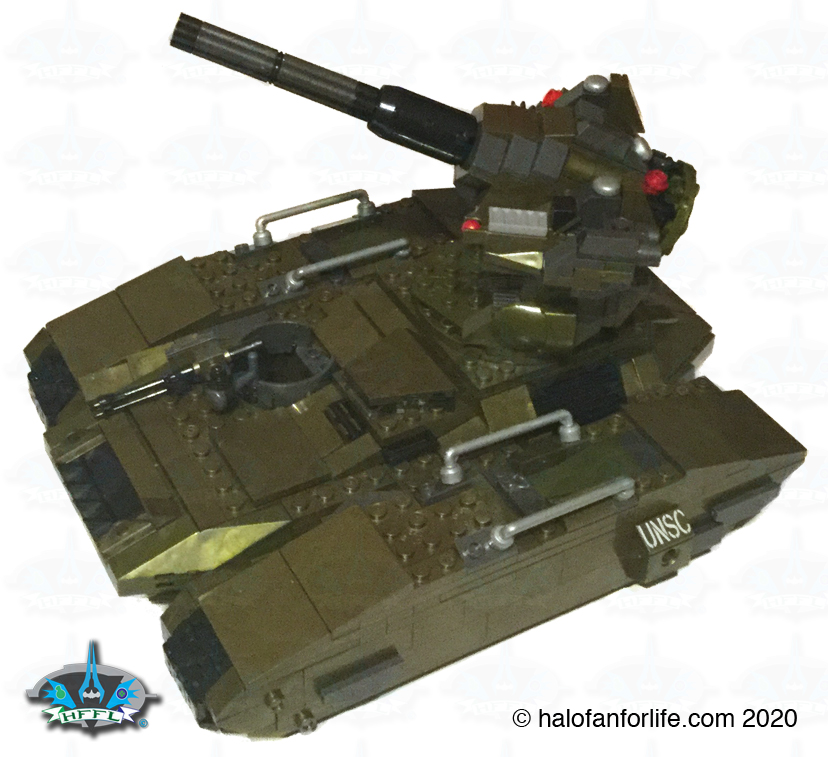
This second mounted pic also shows that the projectile launchers can pivot into different positions as well. EXCELLENT design over all!! And that’s why I chose it to be my final version turret to be displayed.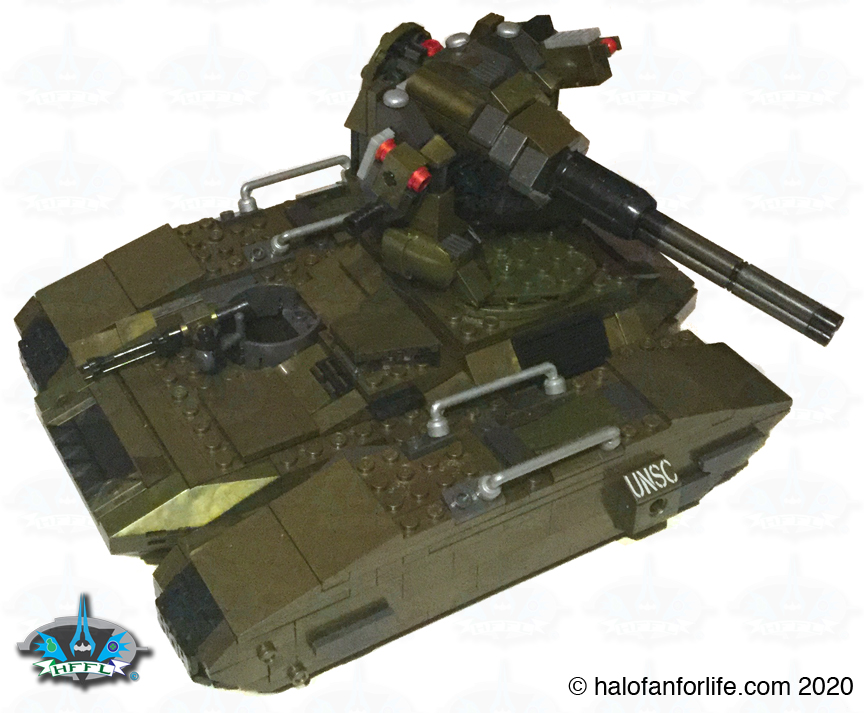
Here are all the parts from the turret bags that were leftover.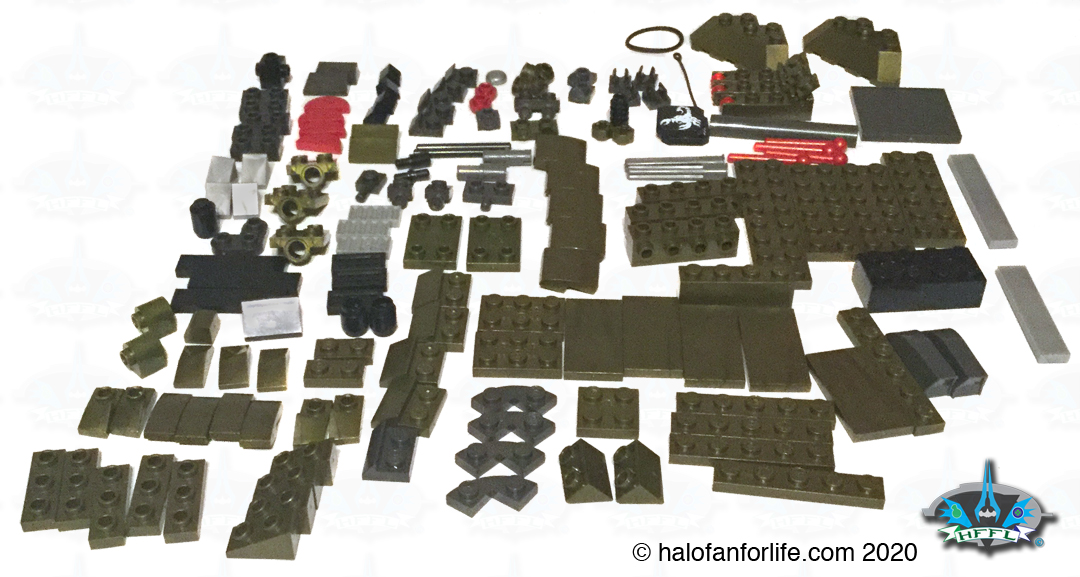
You get one lone figure in this set. It’s a Red Mark IV Spartan. This correlates to the ORIGINAL Scorpion that was release way back in 2009!! In that set, Mega also included an Elite. I do wish they’d have done that here too.
Note the gold color Rocket Launcher. This in keeping with Mega’s 10 year anniversary celebration of having the license with Microsoft.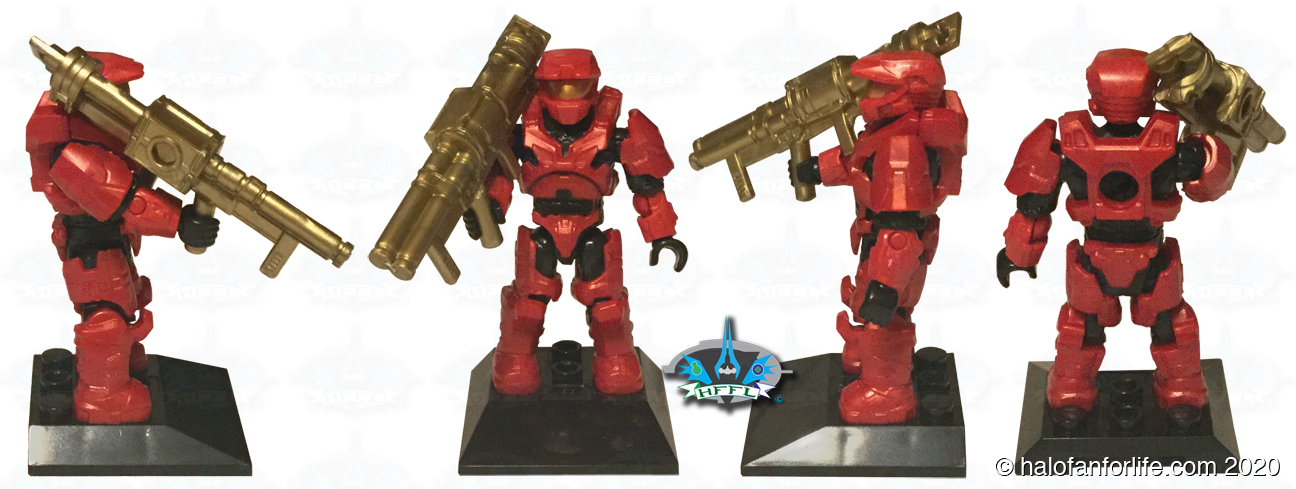
Here are all the pieces from the whole set that were left over. LOTS and LOTS to build with.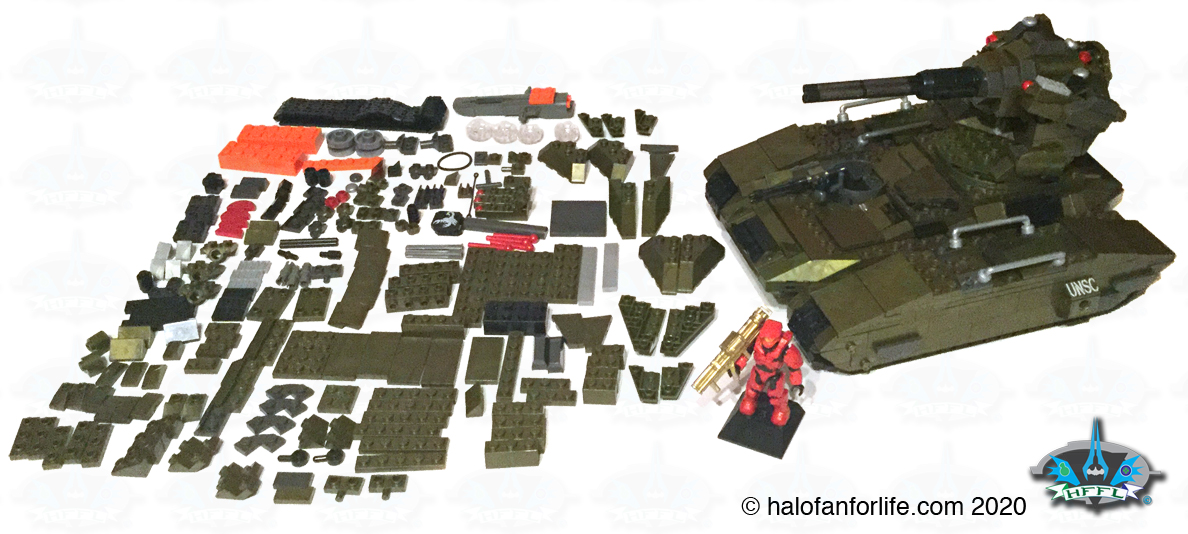
SOOOOoooo, I did just that!!!
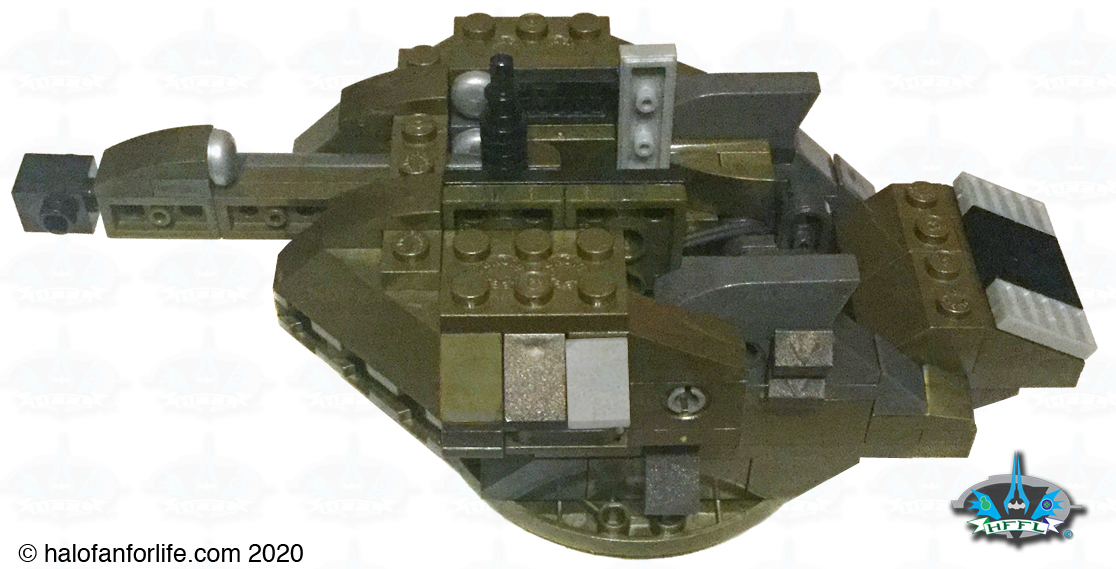
Here with the leftover parts, I present to you my “Railgun” turret! This turret features side mounted useable projectile launchers and a pivoting turret. There are also two small “machine guns” close to the bottom of the turret for anti-infantry purposes.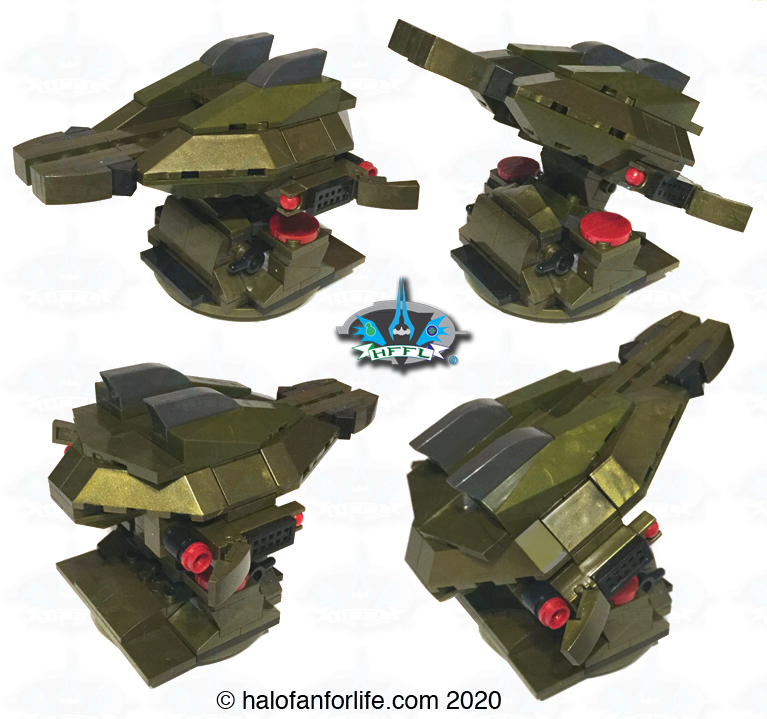
Below shows clearly that the turret can pivot up and down.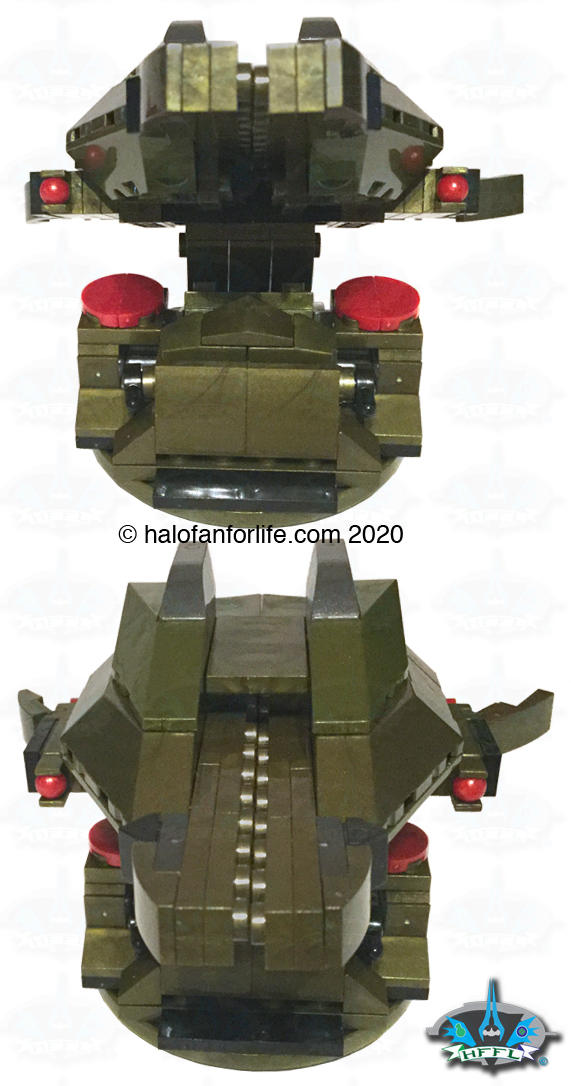
Here’s a closer view of the small “machine guns”. Really they are just 1×1 rounded plates with a pin. But I used my imagination for this!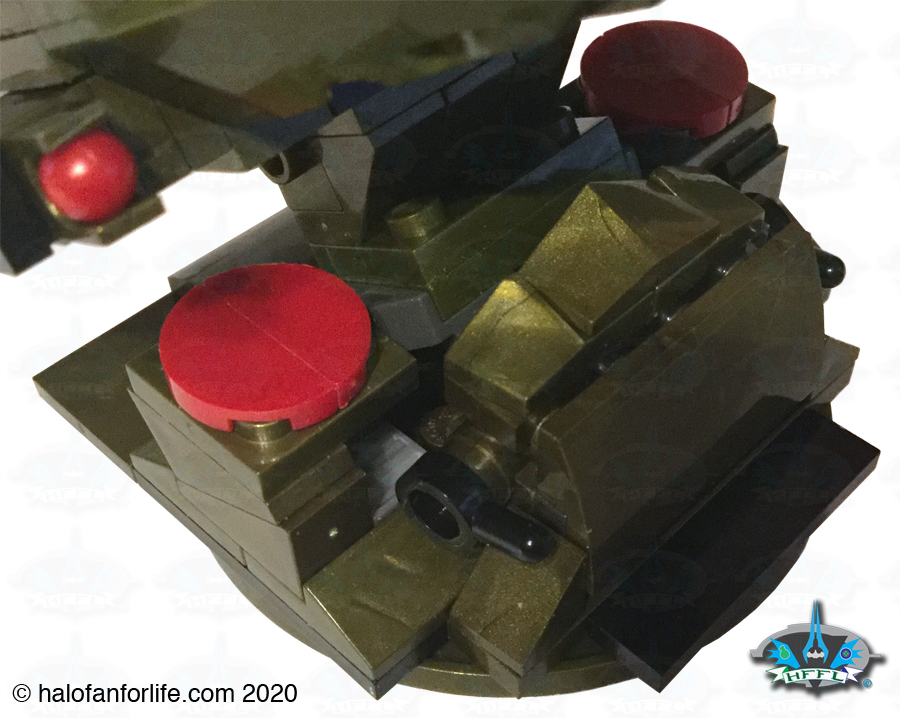
The base has “free floating” parts. Meaning you build those first directly onto the body, around the hole where the turret is inserted into. Then you pop the turret into place.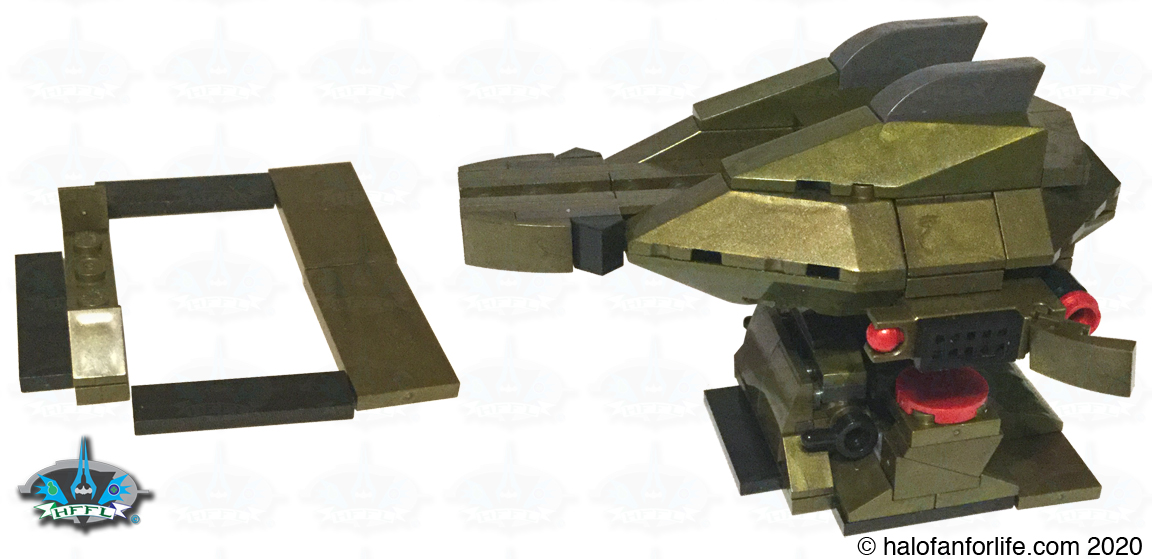
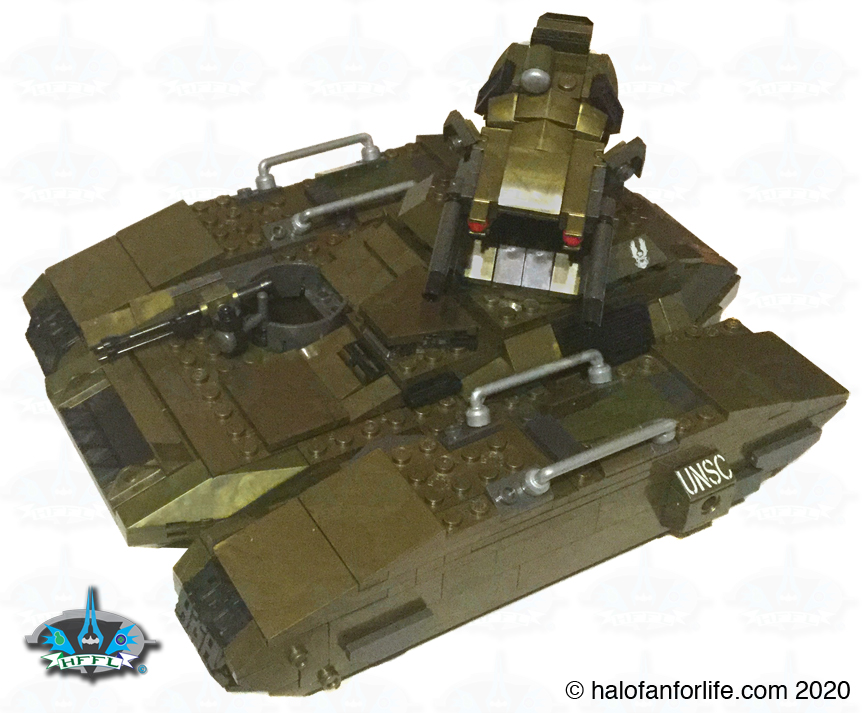
Here is the Railgun turret mounted onto the body. Yes, I know it’s a little tall. I needed that height to get the turret to pivot properly with just the pieces I had leftover.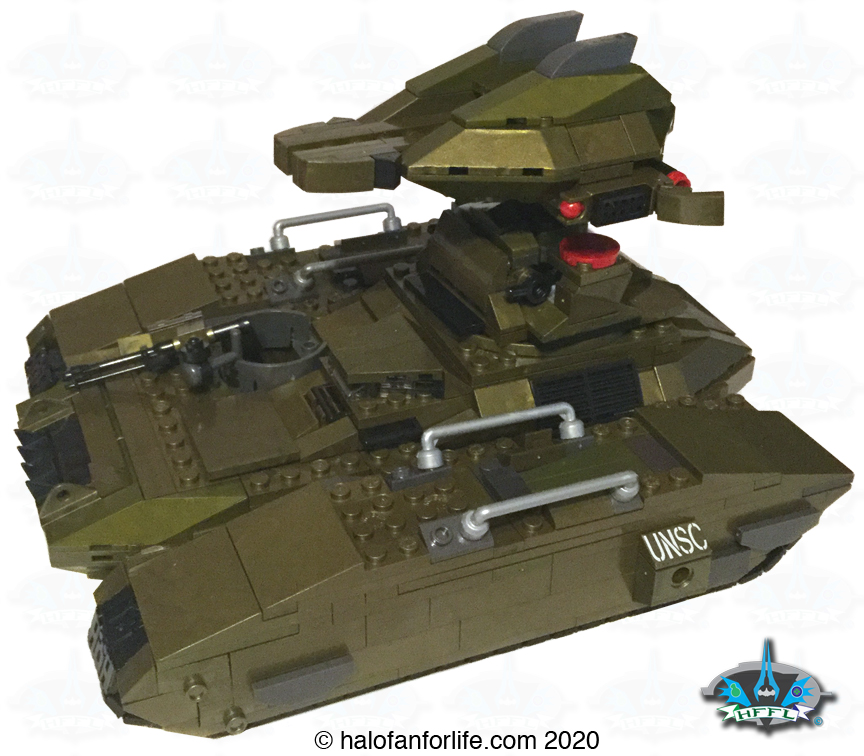
So after having built the Scorpion with the long treads, machine gun turret AND additional railgun turret, I had only these pieces left. I decided to put those into the MCX bag I saved from this build to be used in so other future project.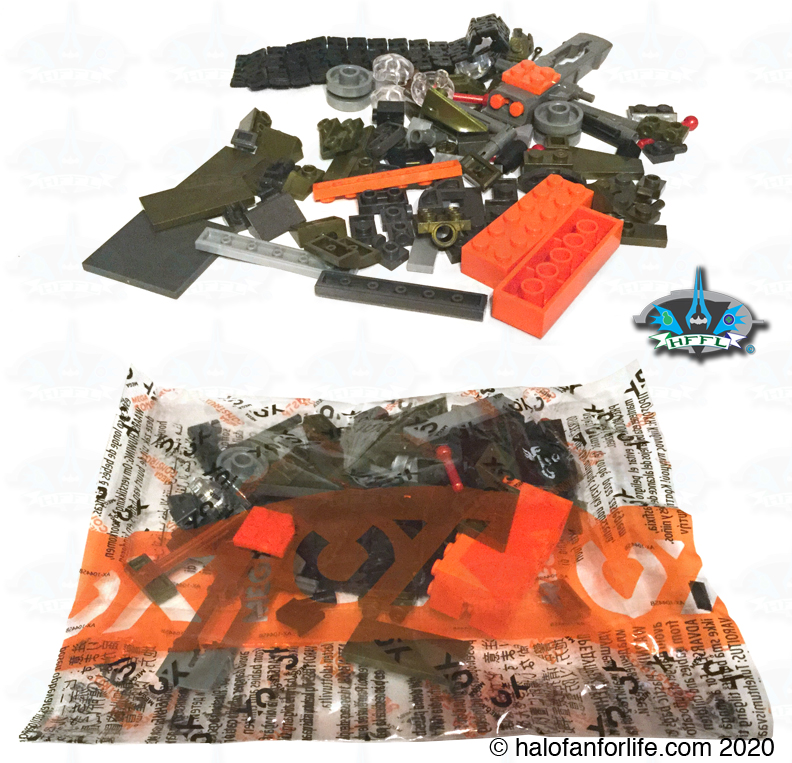
Summary: The set’s build time is moderate and will vary greatly depending on which set of treads and which turret you choose to build. The whole set can be assembled in a few hours though, regardless of which versions you choose.
Overall Rating: I give the Turret portion of this set a 42 out of 50 medals.
Why did I give it a 42 out of 50?
Since there are five variant turrets, I rated each version below and came up with the overall average between all five.
• The Standard Turret: The Standard turret is well designed. And is mostly in keeping with the in-game version, save for the bits needed to activate it’s mechanism feature. The only part of this turret that I didn’t like was the expose section in the back that shows the mechanism. Perhaps with the parts left over, you may be able to cover that if you so choose. I give this turret a 9 out of 10 medals.
• The Missile Turret: This turret design is a pretty cool smaller version of the Wolverine turrets. Thats my only very small issue with this one is that I feel it should be at least the same size as the Wolverine. But it’s still cool. The poseability of the missile pods, especially independently makes it’s replay value high, IMO. I give this 9 out of 10 medals.
• The Short Turret: Let me say first, this turret version is my least favorite. I’m not fond of the side built cannon. That the action feature of the projectiles and cartridges didn’t work for me, especially after I rebuilt it a few times to try again, were disheartening. Had this feature worked, I’d have given it a 9 or 10 medals. Because it didn’t though, I can only honestly give it a 6 of 10 medals. This only because it still looks pretty good, except for the side built cannon.
• The Anti-Air Turret: Though not the most powerful looking of the five turrets, it still looks great. It definitely works as a mobile anti-air platform! I think it just needed a little extra bulk to give it the power look. I give this turret design 9 out of 10 medals.
• The Machine Gun Turret: This is a fun design and the action feature works well, IF you switch the parts as I described and showed video for. The only thing that’s slightly out of place here is the rotating crank. Still, that’s pretty small. As originally built, this would have received an 8.5 out of 10 medals, due mostly to the cannon assembly. But with my improved version, I give this a 9 out of 10 medals.
Overall the turret variants garner 42 out of 50 medals for an average of 8.4 medals. However, I think that’s a little unfair, as I gave the short turret a not so good score. So taking that one out of the equation, the other four turrets get an exact 9 out of 10 medals average.
When you couple the turret score of 9 (excluding the short turret), the treads score of 9.3 and the body score of 10 all out of 10 medals, you get an average for the WHOLE set of 9.43 out of 10 medals!
Here’s my opinion on the break down of the value of this set. (In US dollars)
The number of pieces in this set is 1014. When you consider my typical rule of 10 cents per parts, you might expect to pay $100 or so for this set. And indeed, some retailers are asking that. However, you can definitely find this for less. As stated at the top of the review, you can get it for as low as $70. That’s what I paid for mine.
I think it’s a solid purchase at $70. A really great value. At $100, it’s right on par with the piece count and an even value for the money spent.
Do I recommend it? MOST DEFINITELY! I really enjoyed building the different versions for the most part. I liked three of the four treads variants and four of the five turret variants.
You will have LOTS of pieces left over with this set, due to the variant builds. Perhaps you may choose to make something else for the Scorpion as I did with the Railgun turret. Or, maybe you’ll make something else with them. Regardless, enjoy this set! It’s worth it!!
Here are the links to the other parts of this review:
Halo Toy Review: Mega Construx Designer Series UNSC Scorpion Tank Part 1 The Body
Halo Toy Review: Mega Construx Designer Series UNSC Scorpion Tank Part 2 The Treads
If you have any questions about this set that I didn’t cover in the review, please do not hesitate to ask me. Either reply below or e-mail me at [email protected].
If this review gives you an informed decision on whether to purchase the toy or not, please consider a small donation (50 cents) to the blog.You can donate via PayPal to [email protected]. Or just click the paypal link at the right on the main page of the site. It’s much appreciated and helps ensure that HFFL stays registered/active on the internet. Thank You.
-Sal
Pingback: Halo Toy Review: Mega Construx Designer Series UNSC Scorpion Tank Part 2 The Treads | HaloFanForLife