
Mega Construx Point Defense Showdown
Technical Specifications:
Build Time: roughly 75-100 minutes to build (Your time will vary from mine as I took pics along the way for this review)
Set Piece Count: 782
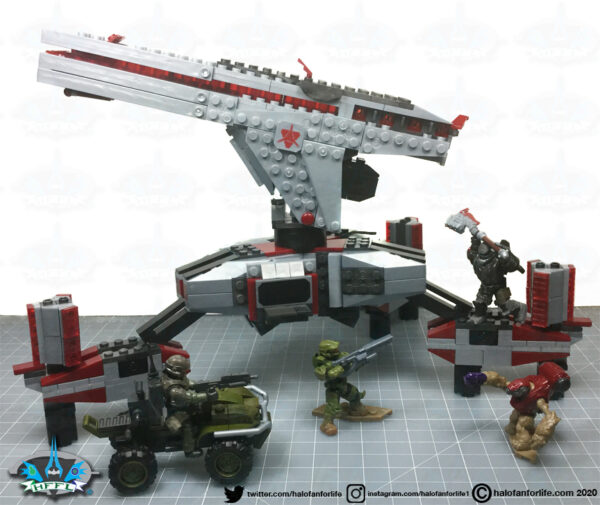
Minifigures: Master Chief (Infinite armor, muddy), Marine, Hyperius (Brute Banished leader), Grunt Assault
Weapons: Gravity Hammer, “Mangler” Energy Rifle, Assault Rifle, Plasma Pistol
Accessories: X4 figure stand, Communcations Backpack, Jump pack, x4 projectiles
Special Features: Alternate build via APP.
Cost: $80 US Target, $60 Amazon The set may be available elsewhere, but these were the only two places found as of this writing.
A friend of mine got this for me early, for my birthday.
And on with the pics! (Click pics to make BIGGER)
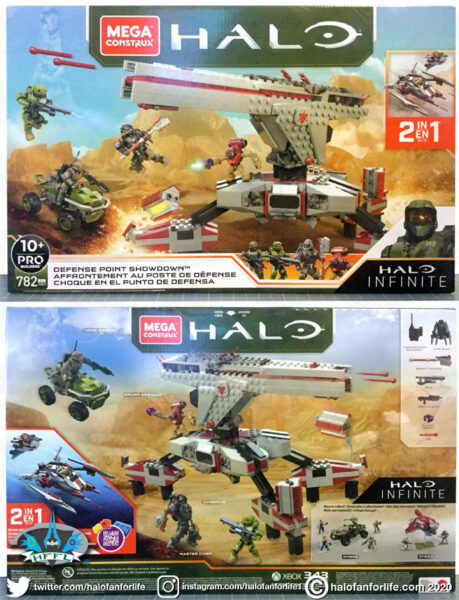
The front of the package shows the set in a cool action shot. As well, it again shows the figures included at the bottom of the front of the box. The back displays shows another action scene, the weapons and accessories included as well as alternate build and two other sets available as of this writing.
In the box you get an instruction manual, 11 numbered bags and a Orange bar labeled Mega Construx bag.

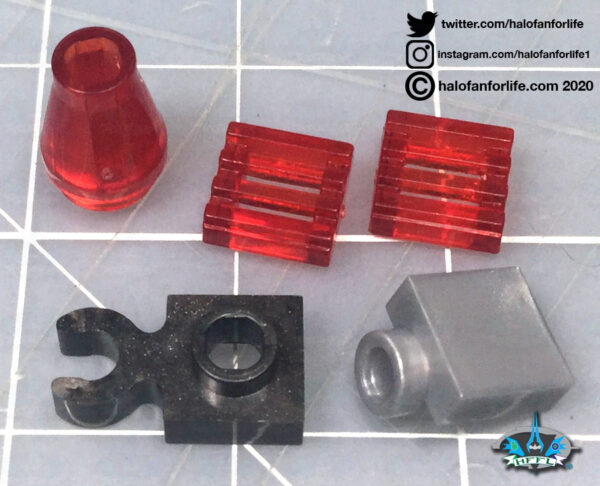
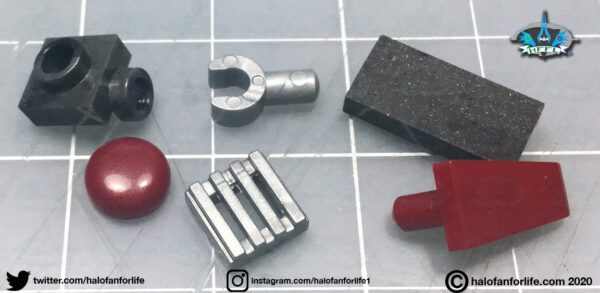
Here are the contents of the Orange Bar Bag.
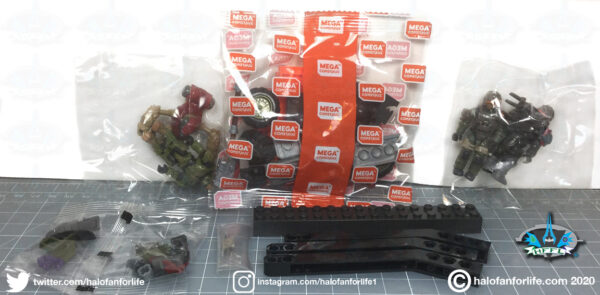
Further opened, we have the following: The four included figures, some large pieces, the multitool, various other pieces, including printed ones.

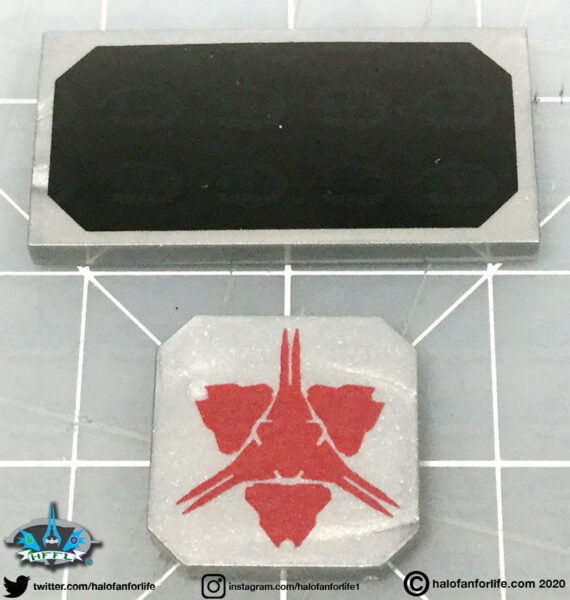
There are a few pieces with printing on them. The one with black printing represents one of the openings to the interior of the turret. It should be noted that this set is not to scale with the figures. If it were, it would be a LOT bigger as the printed doorway would be able to fit a standard figure through it.
Okay, let’s get into the build, shall we?
Bags 1 and 2 are the rest of the Mongoose parts as well as the figure stands.
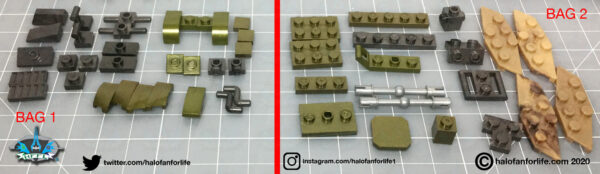
This mongoose is the very same build as the one that comes with the Recon Getaway set.
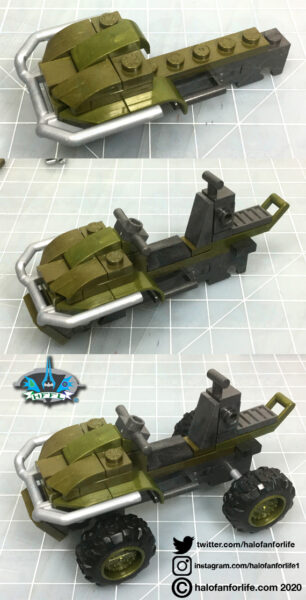
Here are the leftover parts I had from bags 1 and 2. (Mega has been putting in a lot of extra parts in their sets as of late and that will be reflected throughout the review of this set.
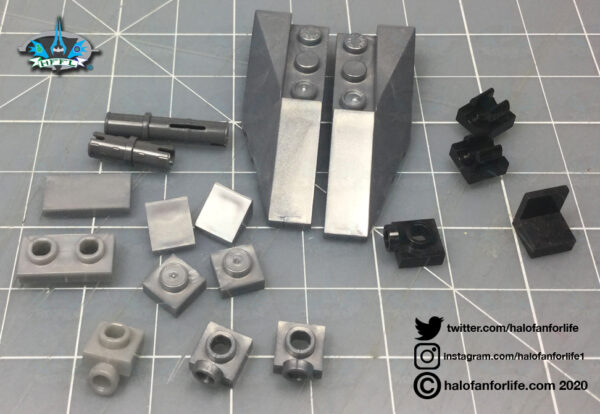
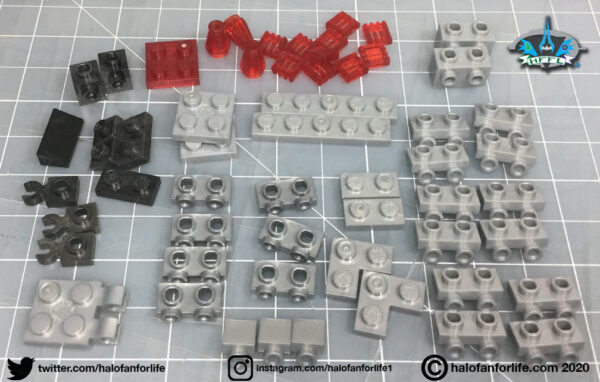
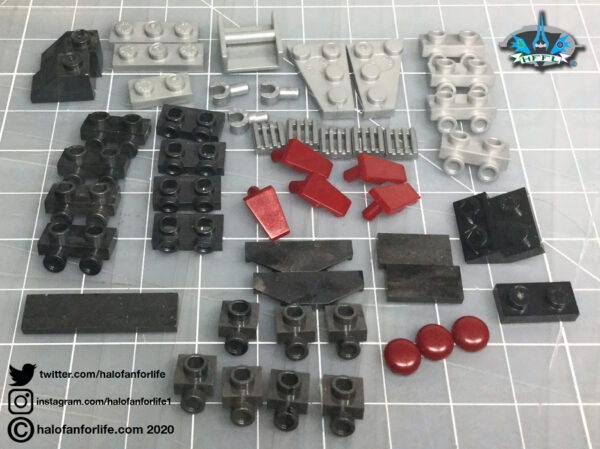
Bag 3’s pieces
Bag 4’s pieces
Bag 5’s pieces
We start the actual turret build with this odd looking assembly a few steps into the build. This will become one of the legs.
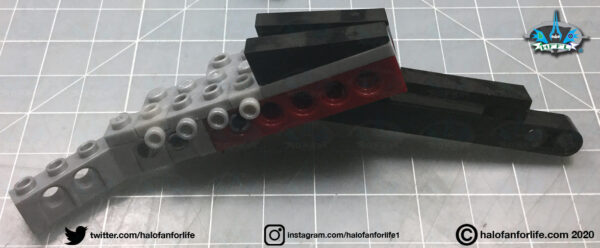
There will be quite a bit of “side building” done to the legs of the turret, as noted by the studs on the side of the assembly below.

This assembly is one of the two rear legs, not yet complete. On one side, there is a more angular side build, while the other has a more curved side build. I’ll explain why this is later in the review.
Mirrored builds of these legs are added to the start of the build of the front leg.
The reason why one side of each of the rear legs has a more rounded side build is due to how they come together with the front leg assembly. Simply put, they wouldn’t connect properly if they had the bigger angular build. In doing the more rounded build, they won’t rub up against one another, yet will still maintain the overall look.
The leg’s progress in building with more side building, armor and some top and bottom pieces added.
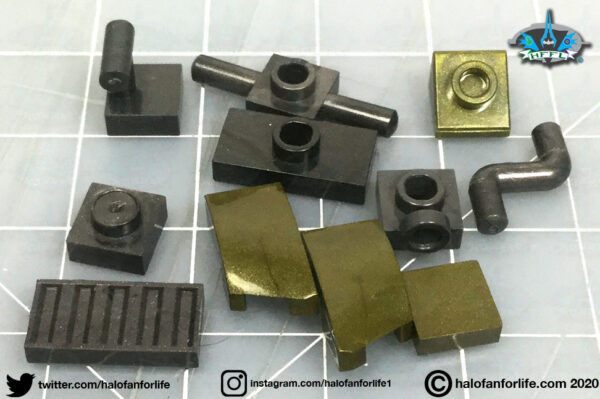
Here are the leftover pieces I had from bags 3, 4, and 5.
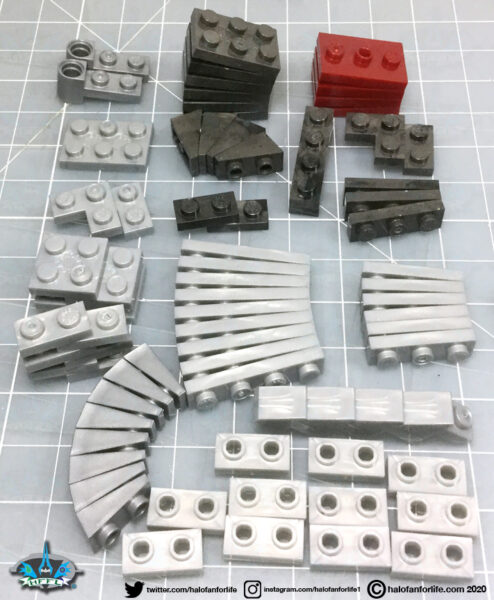
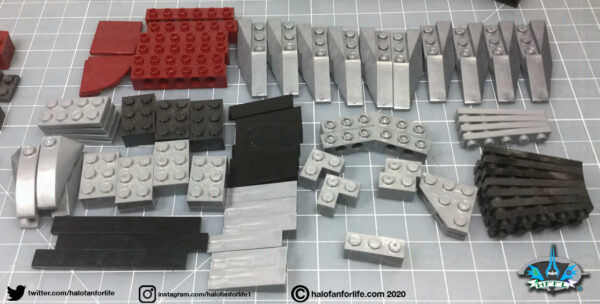
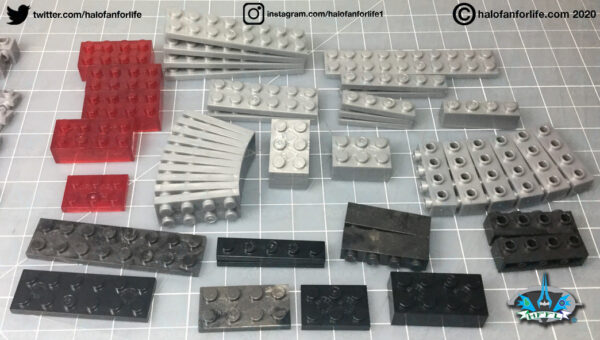
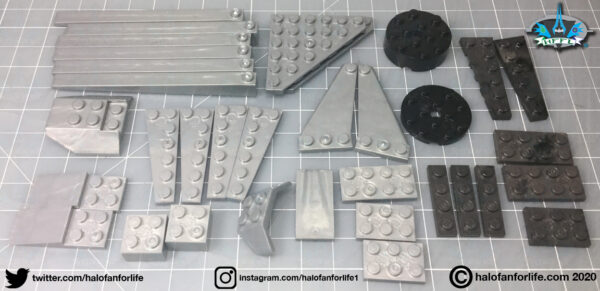
Moving along, we have the pieces from bag 6 sorted out. I really like those translucent red parts!
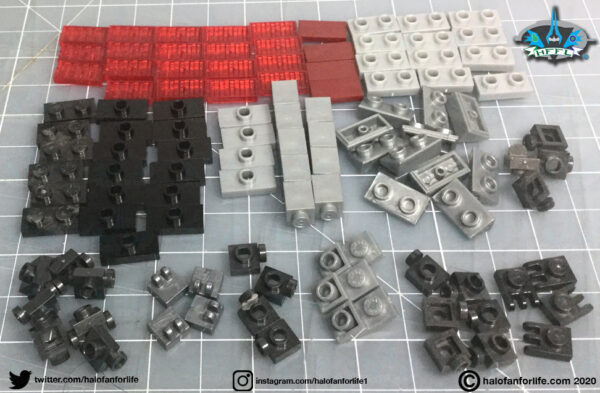
And bag 7’s pieces. Lots of dark red pieces in here, to give it that Banished color aesthetic.
With bags 6 and 7, we are introduced to a series of repetitive steps.
In fact, steps 61-73 require you to build 3 sets of the same thing. These will become the base of each leg along with what I’m assuming to be a power core.
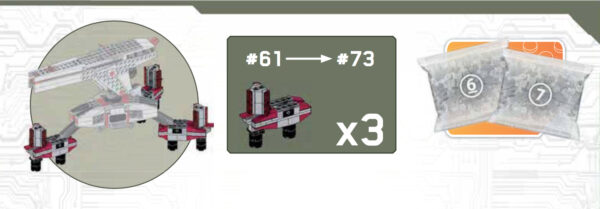
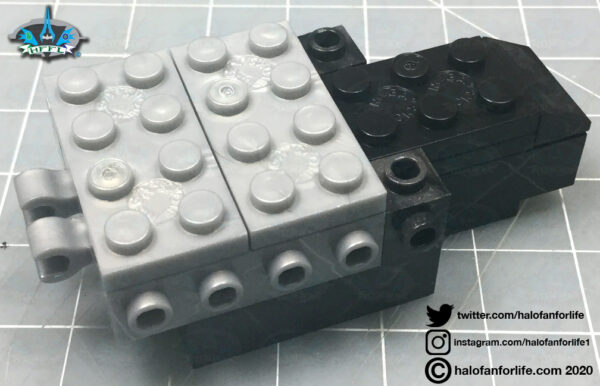
So we start by making this assembly three times. The hole on the top will be where the “power cores” go. The gap in the top is where the leg piece will be inserted later.
Black 2×2 rounded bloks are added to the bottom of each assembly.

Next we build those power cores. I’m assuming that’s what they are considering the Halo Infinite trailer we saw back in July (2020) and the need to take those turrets down. Also given how these sections has translucent pieces to them. That to me denotes energy. Taking those out would disable the turret.
At any rate, we build three sets of these. They start as a slim tall build with side building pieces on them, and then have slope pieces built on the sides to give this tri-sided look to them.

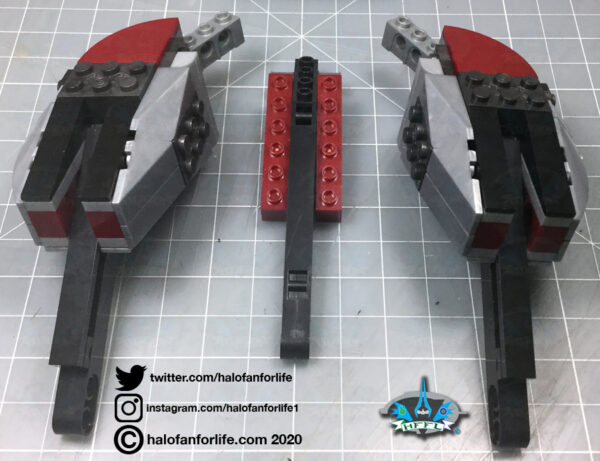
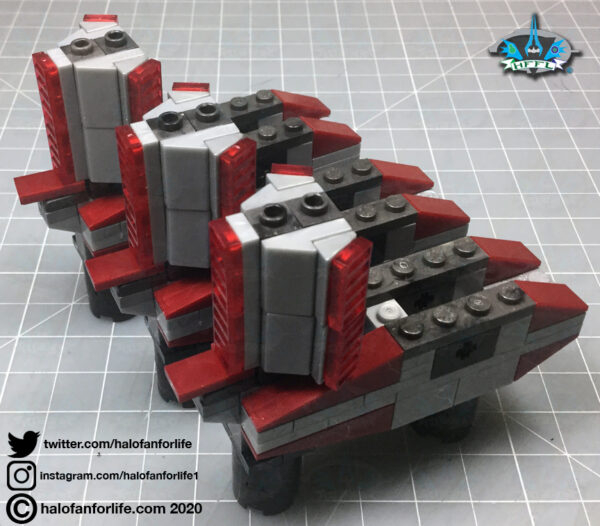
The leg base assemblies are finished. Those red “tabs” jutting out will allow for the cores to be popped off of the bases. This is one of the action features of the set. I’ll show that later.
We connect each of the bases to the legs. They are held in place with a “+” bar that runs through the base-leg-base. I didn’t circle that, but this is in the black rectangle piece below. You can see the “+” hole in the pic above, for reference.
Just a few leftovers pieces for bags 6 and 7.
Now we start building the turret itself.
Bag 8 has a lot of side building parts to it!
Bag 9 Has some of the more bigger parts to it.
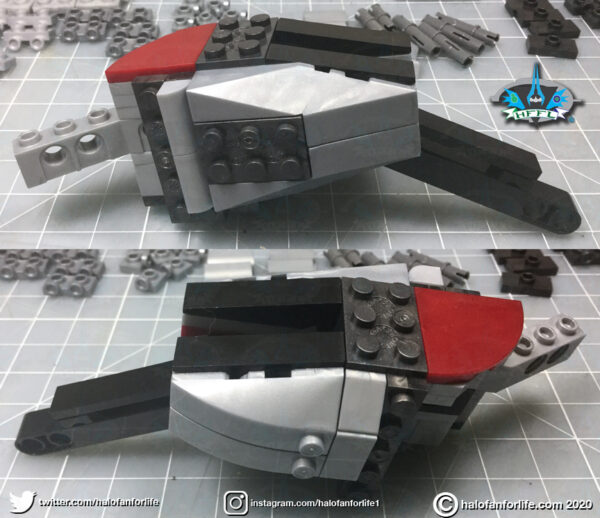
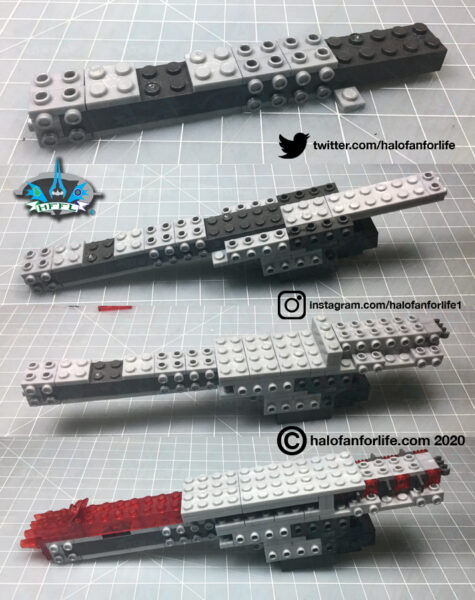
The first bulk assembly of the turret.
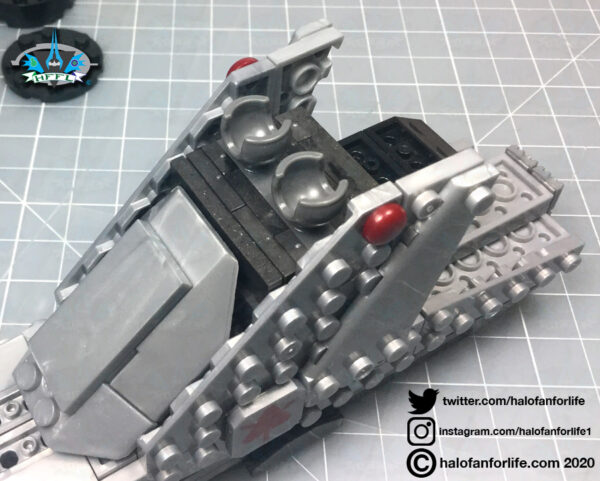
We then add on a rather long section and continue to build up the turret from there. Again note the amount of side building studs to this assembly. At the bottom of this graphic, you can see that we’ve added some translucent red parts. This includes the projectile launchers!
Just a few leftovers from bags 8-9.
We move on to the last 2 bags of the set.
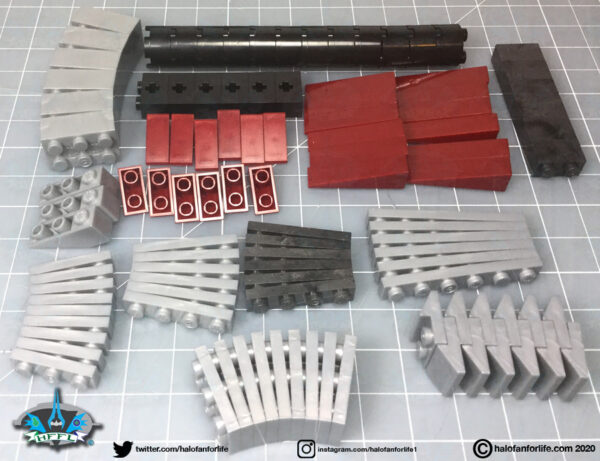
Bag 10 has a lot of greeblies and side building parts to it.
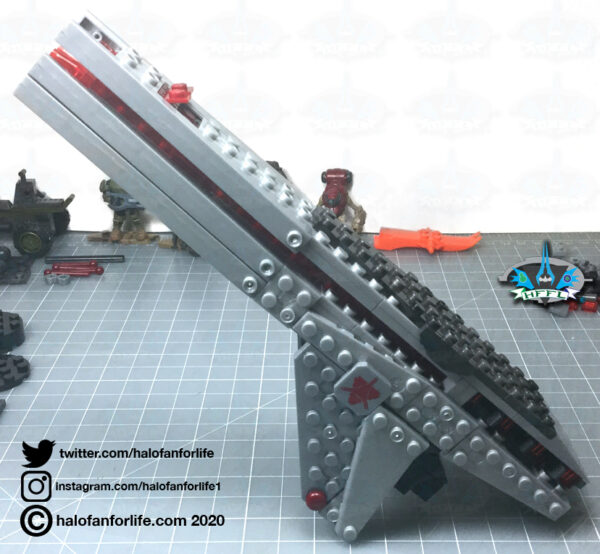
Bag 11 has some very cool wing and angled pieces with it, including some long thin slope pieces.
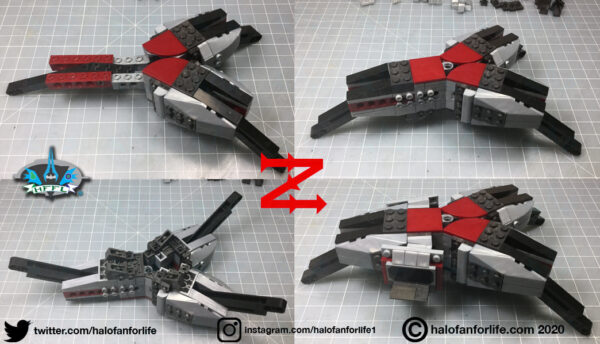
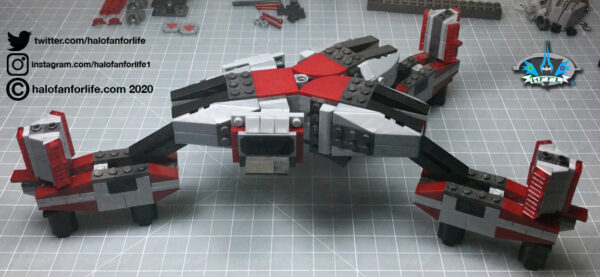
Adding those on really builds up the turret and armors it up! Also, this is where we finally add those Banished logo parts!
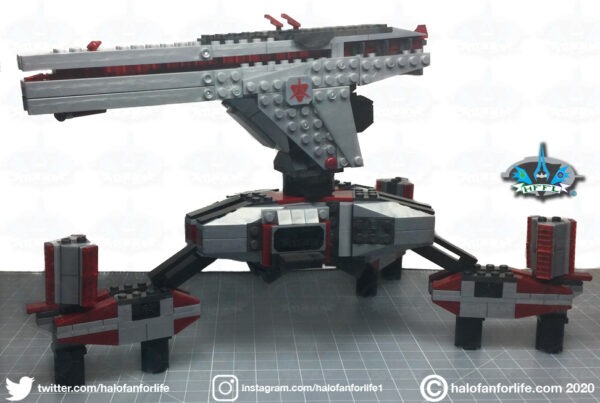
The turret is able to pivot up and down via this two-point ball joint assembly.
The turret is connected to the ball joints on the body of the turret, which in turn connects to a rotating pin (held in place and inside of the rounded black parts seen in the middle of the pic below).
At this point the turret is complete.
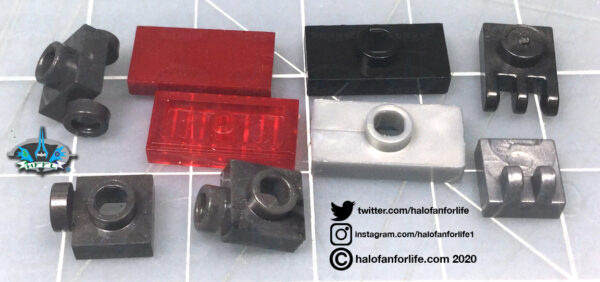
Just a couple of extra parts left from bags 10 and 11.
Here’s a quick video showing how the power cores pop off.
And below a quick video showing the articulation of the turret itself.
Alright, now it’s time to take a look at the figures in the set!!
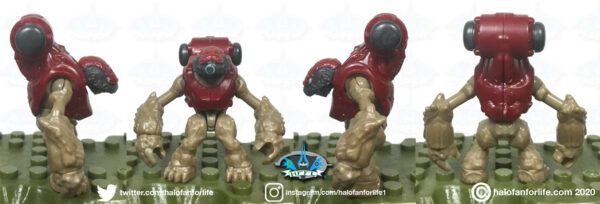
Grunt Assault
This grunt is very similar in style to the Imperial Grunt of Halo 4, though not quite as rounded in the methane tank at back.
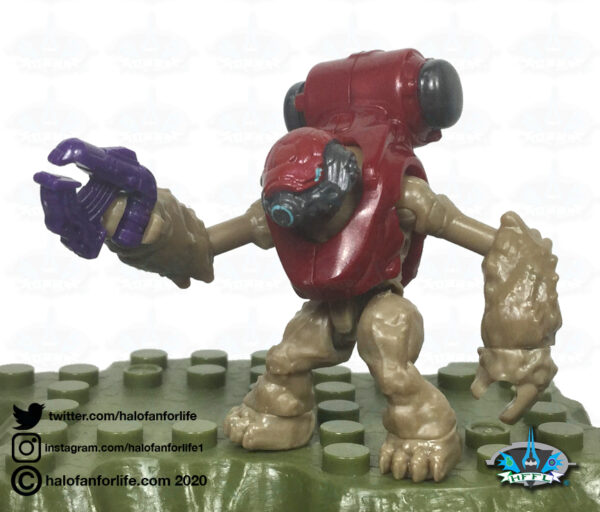
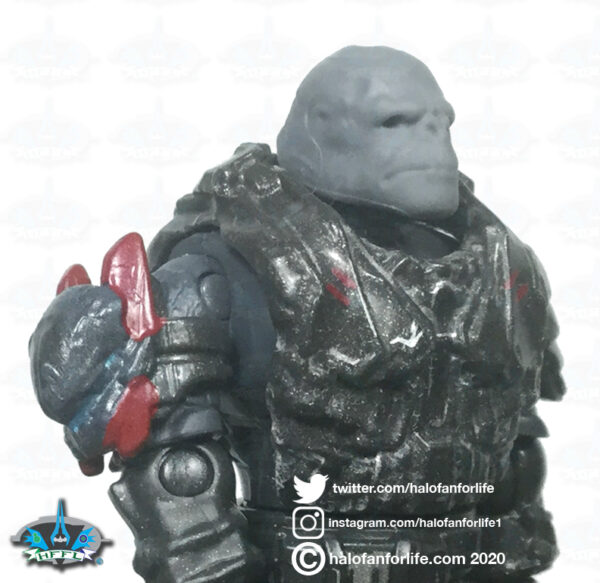
Next up, Hyperius! As of this writing, we do not yet know much about this Brute Banished leader. But his look is indeed menacing.
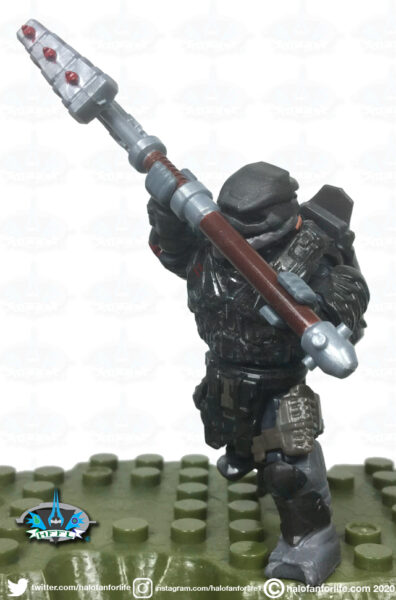
With various armor pieces, including what looks to be Spartan Locke’s helmet on his right shoulder, this Brute might possibly be a Spartan killer. His helmet might be that of Palmer’s, with an added piece of armor added to protect his jaw. The orange hair at the back is perhaps indicative of Palmer’s hair being still attached to the helmet. If so, that’s rather gruesome. Otherwise, this is the first “ginger” colored hair brute we’ve ever had.
The head underneath is giving off some very “Craig” vibes!
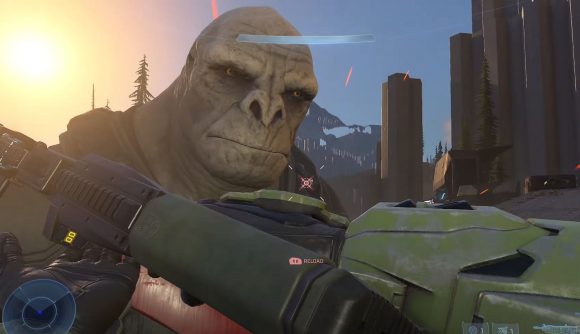
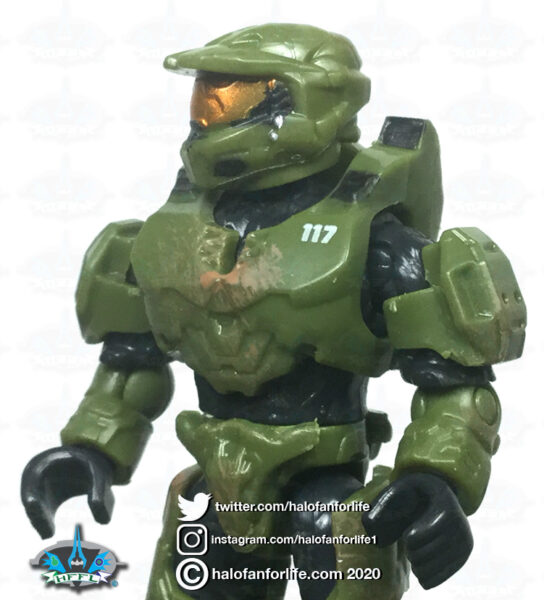
Next up is our ever stoic Hero, Master Chief. This time, his armor is a bit muddy.
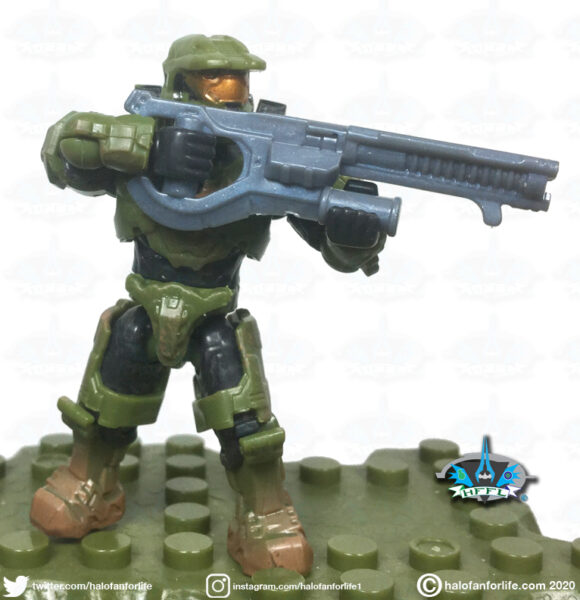

This close-up shot shows some of the “dirt” as well as the small printed “117” on his chest.
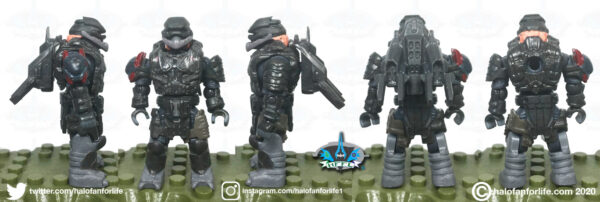
UNSC Marine
This marine has a LOT going for it!
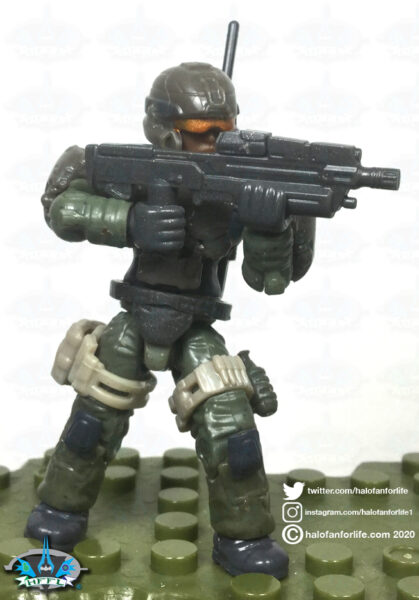
As we can see by the orthogonal series below, the marine has shoulder armor, leg straps with pouch and grenade accessories added to it, as well as a communications backpack. It really needs to be noted here that the grenade is not the standard one we’ve seen for years that the figures can hold in their hands. No, instead, this one is specifically made to attach to the leg strap via a thing rectangular hole on one side.
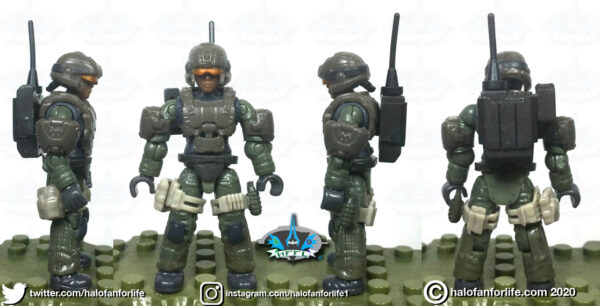
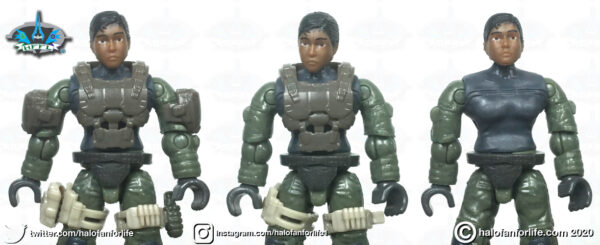
I wanted to show the marine closer up. For one, the marine is a female! And Mega has done a GREAT job with the figure. So far only the second female marine Infinite figure we have and it rivals that of the Sniper Marines from series 12. I say this due to the armor and removable accessories. The head is the standard version we’ve been getting. However, as you can see, this one has dark skin and dark hair. Definitely a first there. I’m VERY happy to see this!
And finally, the whole set, with figures in place, in attack positions!
Summary: The set’s build time is short and can be done in one sitting.
Overall Rating: I give this set 9 out of 10 medals.
Why did I give it a 9 out of 10?
• Since Halo Infinite isn’t out yet, I can’t really compare this model greatly to the in-game version, other than the trailer. So the only thing I would say is that this set isn’t to scale with the figures. Other than that, it’s a pretty solid set with a great choice of figures, a cool mongoose and a couple of fun action features with the set itself.
I’d liked to have see this at scale with the figures, but it really would have been HUGE. So perhaps Mega was right to do this at the scale they did. I just wish we’d have got an interior for the turret.
Of the alternate build, I will have a separate review for that at a later date.
Here’s my opinion on the break down of the value of this set. (In US dollars)
• The Mongoose I place at $8.
• Each figure with weapon and stand I put at $4 each for a total of $12.
• The turret consists of the remaining pieces. For that I put it at $50.
TOTAL: $70 (before tax and in U.S. dollars)
Given that the set costs between $60-80 US before tax, depending on where you get it from, I find this set to be right on par with the retail price, especially at the lower end. At $80, it is just slightly overprice.
Do I recommend it? Yes, at the lower end of pricing. I do wish the set were upscaled a bit and that there was an interior to it. Hyperius is definitely the gem of the set and I can’t wait to see how this character plays out in the game. The addition of the Mongoose adds to the playabilty of the set and is a nice bonus.
If you have any questions about this set that I didn’t cover in the review, please do not hesitate to ask me. Either reply below or e-mail me at [email protected].
If this review gives you an informed decision on whether to purchase the toy or not, please consider a small donation (50 cents) to the blog.You can donate via PayPal to [email protected]. Or just click the paypal link at the right on the main page of the site. It’s much appreciated and helps ensure that HFFL stays registered/active on the internet. Thank You.
-Sal