
![]()
Sprukits have been out for a little while. I just haven’t had the extra funds to get them. In fact I still don’t. However, when I went to New York Toy Fair, I talked with all of the manufacturers that had a license to make Halo toys and collectibles. BanDai is one of those. I won’t mention who I talked to so as to keep them from getting unwanted solicitations for these sets. Anyway… After New York Toy Fair, I was contacted by the person at BanDai. We exchanged pleasantries and reminisced about Toy Fair a little. They they did something incredibly generous. They ask for my address and said they wanted to send me some sets. I graciously accepted their offer.
There are four sets at retail currently. At level 2 there are Master Chief, Spartan Thorne, and Commander Palmer. There is a level 3 Master Chief as well. When the person said they would send sets, I thought, well, maybe I’ll get two of them since it was plural. It wouldn’t have mattered which I would have received. I would have been thankful for any. However, when I got the box from BanDai, it included one each of all four sets! As well, they included a Sprukits T-shirt! I was a bit gobsmacked by their generosity.
This review is the first of the four that I’ll be putting out over the next week and a half. In particular, this is the level 2 Master Chief. It’s the smaller of the two Master Chief Sprukit models.
Okay, without further ado, let’s get to the review.
Technical Specifications:
Build Time: 45 minutes building, Your time will vary as I was taking pictures along the way for this review.
Set Piece Count: 109
Weapons: Assault Rifle, Magnum
Accessories: Figure Stand
Special Features: Fully articulated at the following:
• Ball Joint Head,
• Ball Joint Shoulders
• Double hinge jointed Elbows
• Ball Jointed Wrists
• Ball Jointed Waist
• Ball Jointed Hips
• Double Hinge Jointed Knees
• Ball Jointed Ankles
As well, the model includes a set of fisted hands, a set of ‘trigger’ hands, plus a third left hand that is open. This can be used to help hold the AR included.
Cost: $20 at retail
And on with the pics! (Click pics to make BIGGER)
The box has a nice design to it, with elements such as the large Sprukits logo, Master Chief and the word “Halo”. There are two points though that might seem confusing to some. What is the level of difficulty of this model? Well, the bar at the bottom of the front shows 2 slots filled with red. I personally think having a number there instead of the bars would be an easier to understand representation of the level. 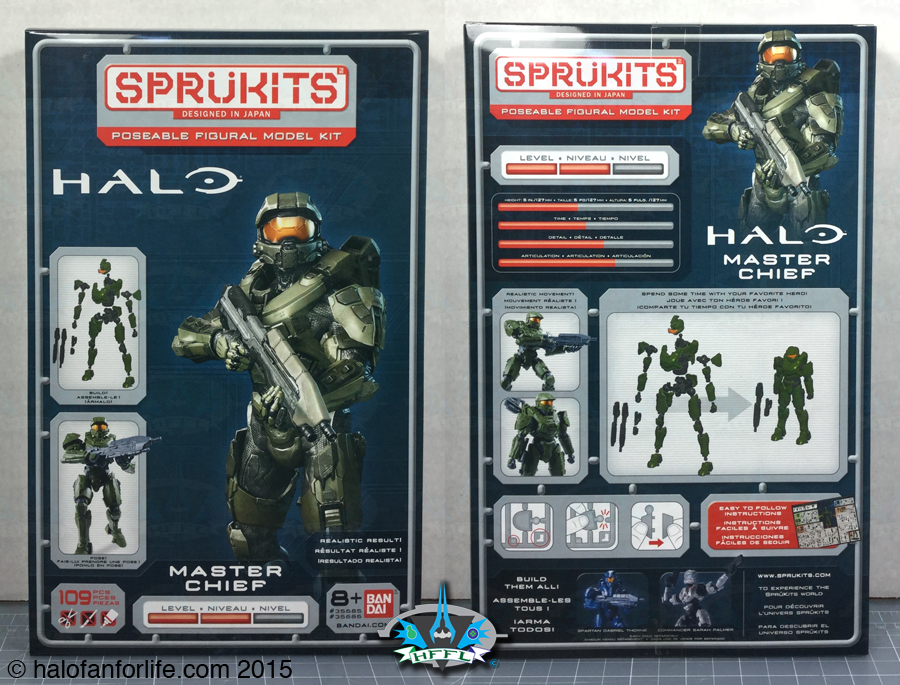
In a similar fashion, the bar denoting time on the back of the box doesn’t give a time equivalent. It shows it’s half full. How much time does that represent though? I do get that it’s supposed to mean it won’t take a long time. If I had a choice on this, I would have suggested not to put the time bar on there at all or to give an approximate window of time with numbers as to how long it will normally take to complete the model.
Below shows what you get in the box. Hidden behind the two bags is the instruction foldout. We’ll get to that in a second.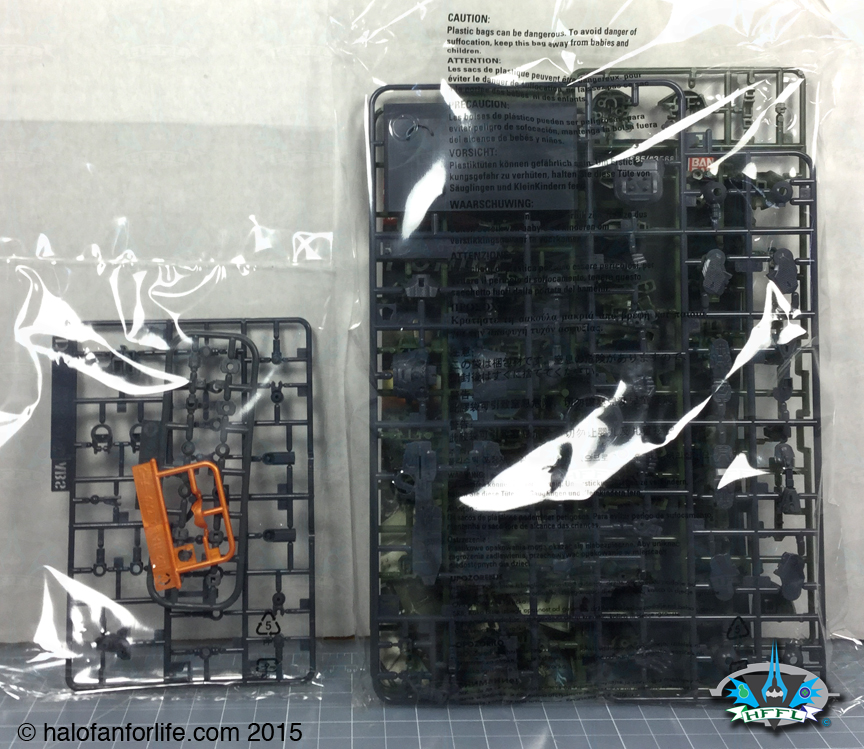
Here we see the contents out of the bags. There are 5 different spur sections. The grey one at bottom left is a rubberized one that is used for joint articulation. There are some cool things to note with these. Each section has a letter assigned to it that is handy for locating parts. As well, within some areas of each section there is a cutout of what part of the model the parts go to. For instance you’ll see a ‘hand’ cut-out for the arms, or a ‘boot’ cutout for the legs.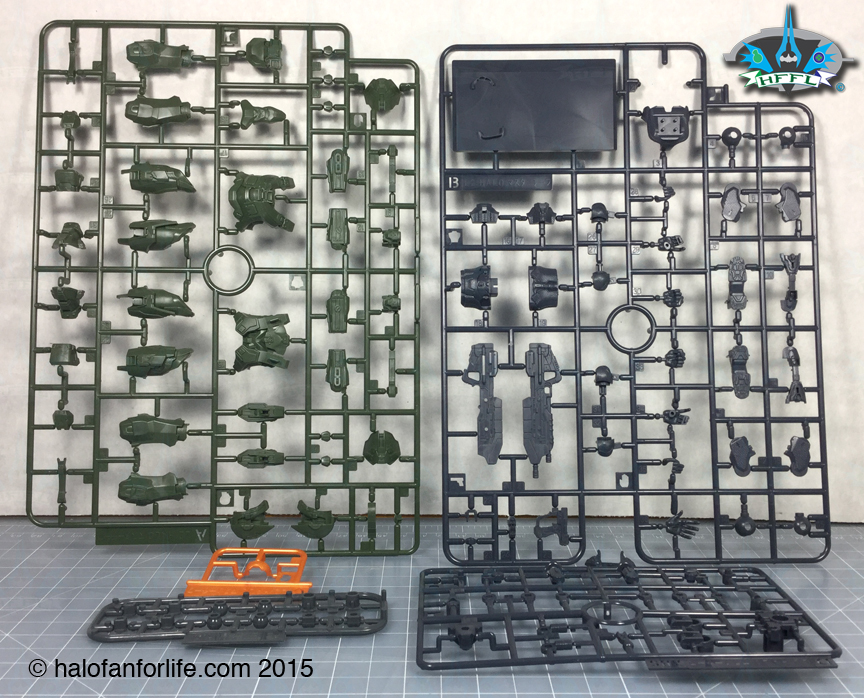
Here is the instruction sheet. As you can see it comes folded.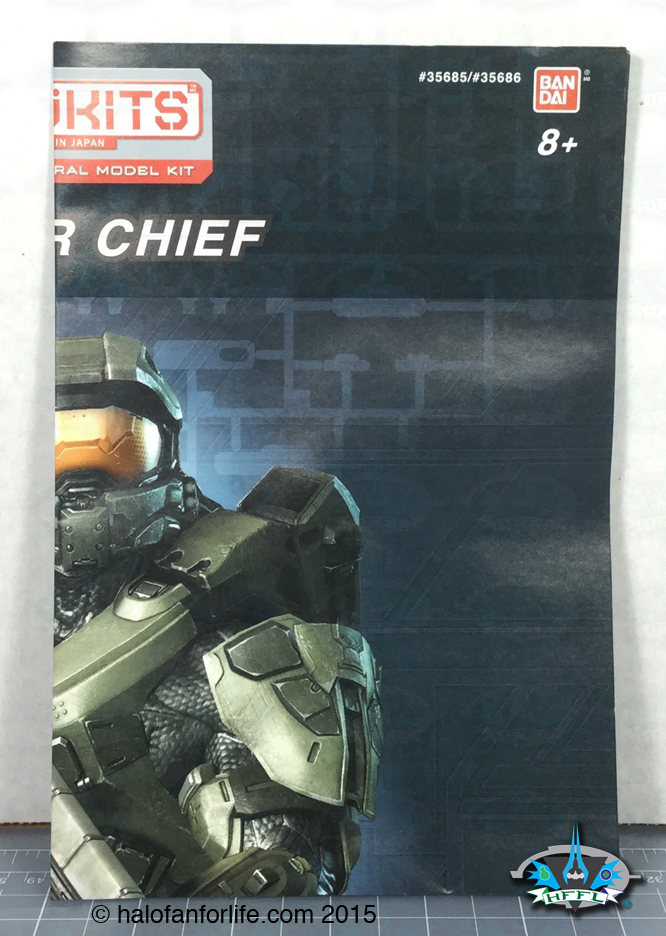
When you unfold half of it, you see this nice graphic of the Master Chief. It looks distorted in the photo because I didn’t have it perfectly flat. 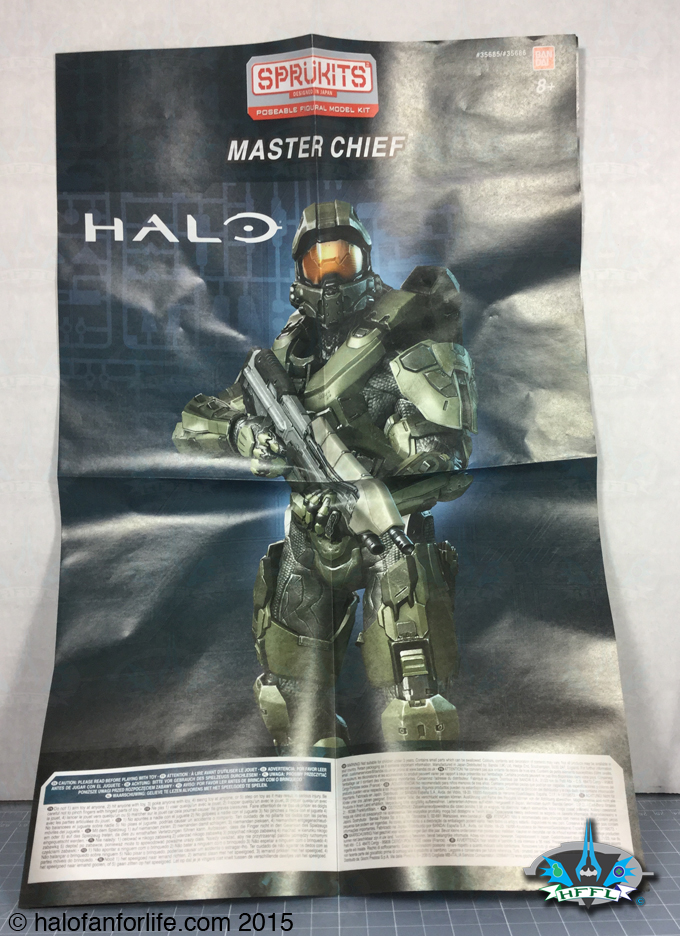
In more detail, the instructions show which pieces from which spur section you will need to complete parts of the model. On the left in each color section, you can see those cutouts I mentioned above. I REALLY like that BanDai did this with their instructions. It makes is so much easier to know which pieces go with what parts of the model.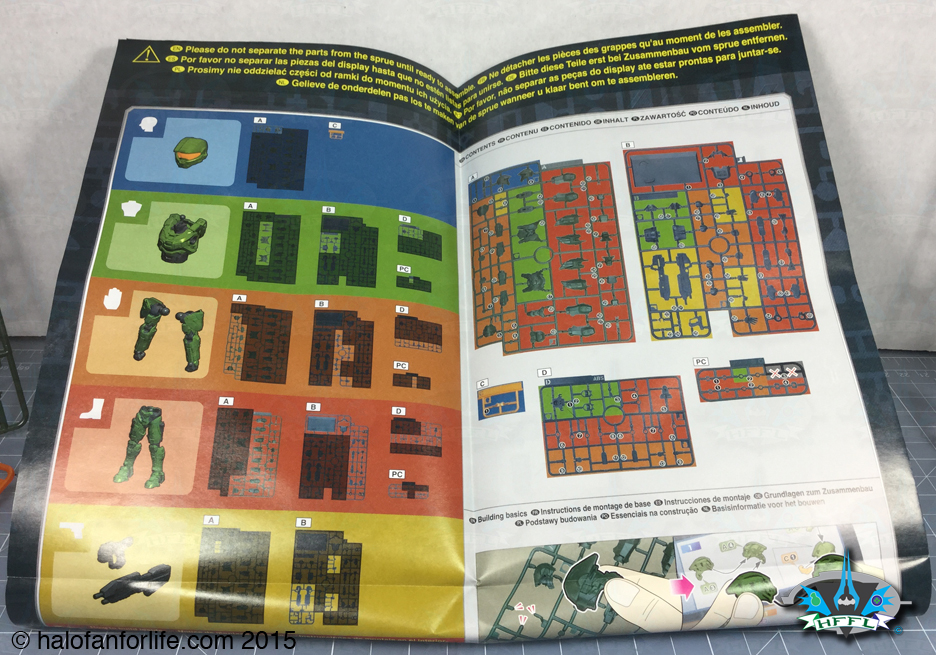
Okay, let’s get to building this!
I should note here that you can choose to build any section you want in any order. I basically went head first working my way down the model.
There are five parts to the helmet. (The one not shown is a top middle piece for the helmet.) The one in the blue box I specifically am calling out. This piece is smaller that what is shown here. I just made it bigger so you can see what it looks like. I had a little bit of a hard time fitting this into place. Not because it doesn’t fit. It does. But because it is so small. I had to use a pair of tweezers to handle it as well as put on some magnifying glasses to better see what I was doing. It took me about 3 minutes to put this piece in place. After that though, everything was smooth sailing and I didn’t run into any other building issues.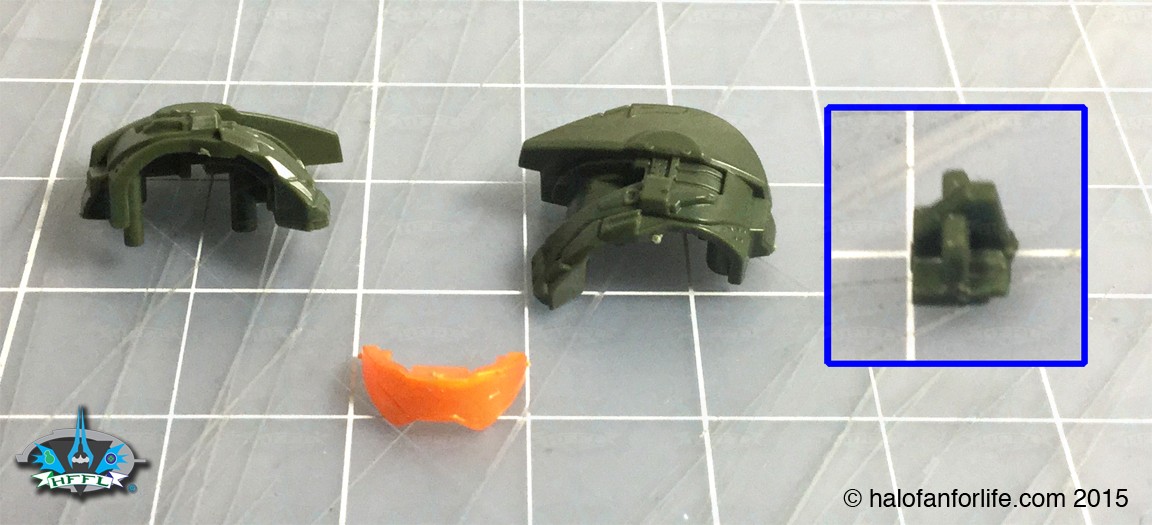
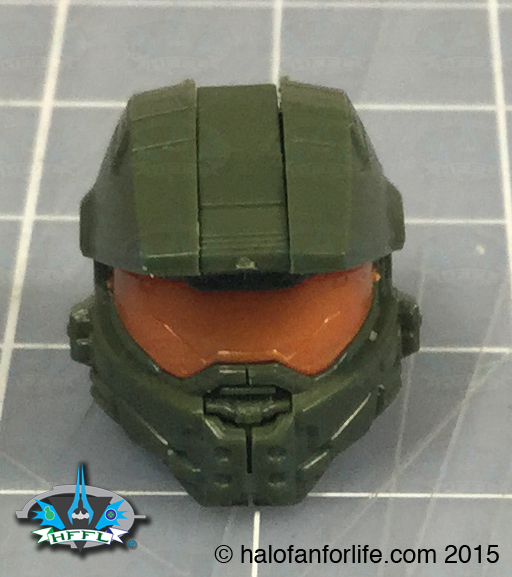
Here’s the helmet completed. I just needed to press it together a little more to fit it perfectly.
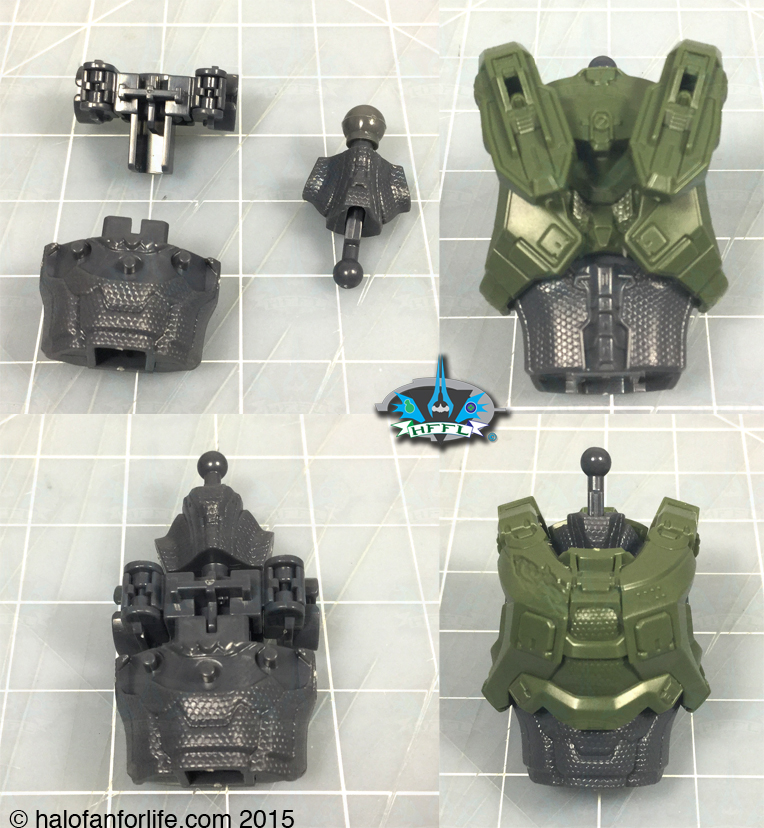
Next we move on to the torso. These are some highly detailed parts here.Even the grey undercut has some excellent detail to it!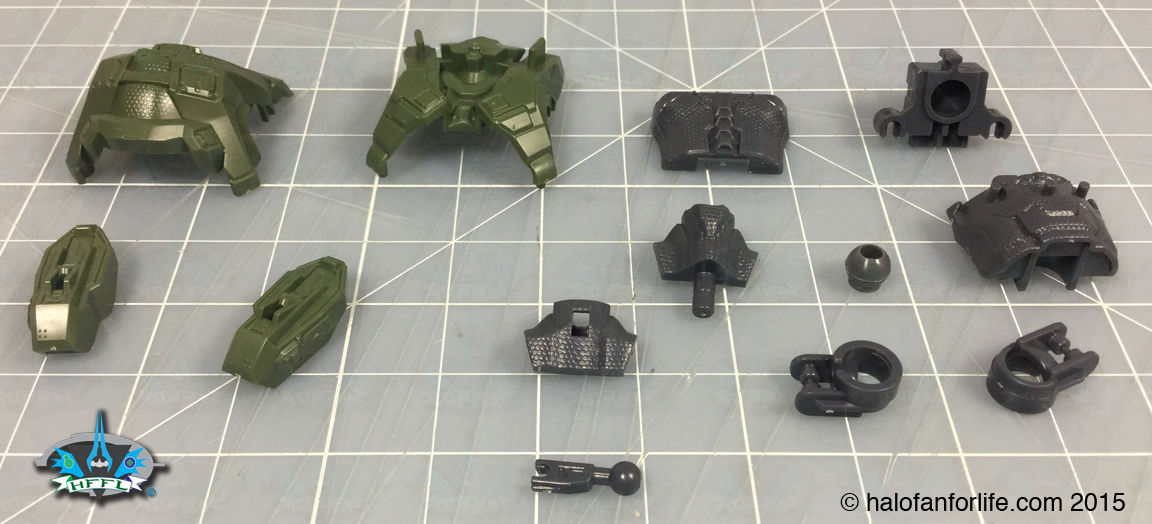
Sections of the torso are put together. Here you can see more of the detail of the parts. The ‘T’ section at top left will be the hidden shoulder assembly that allows for ball jointed articulation. The grey section just to the right of that is for the head and waist. The larger ball being the waist, the smaller for the head. Bottom left shows those grey sections assembled, while the right top and bottom show the torso armor fitted on to it.
Next up the arms. What is nice about this is that with exception to the hands, the arms are the same pieces. You will have to pay attention to the bicep armor, which I detail below.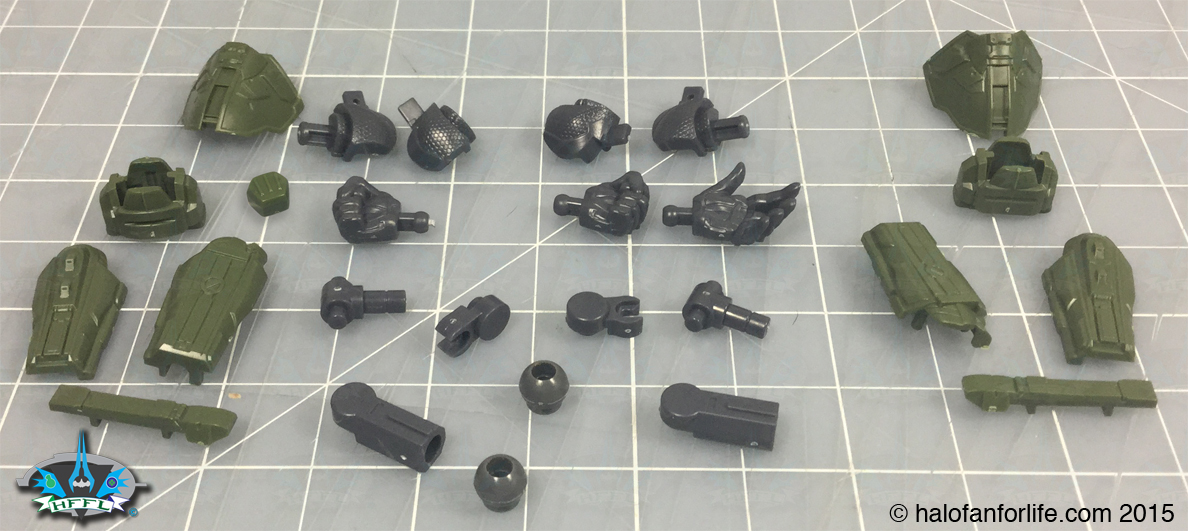
Here you see one of the arms finished, sans hand. The other is shown in a partial ‘exploded’ view to show the sections that are built for the arm. Within the blue box is the bicep assembly. I’m making note of this due to one side being flat and the other curved. You want to make sure the flat part is towards the body, while the curved side is away from the body. It’s there in the directions, but not specifically called out. I figured this out when I put one on the wrong way. Not a big deal though as the sections are easy enough to take apart and reposition.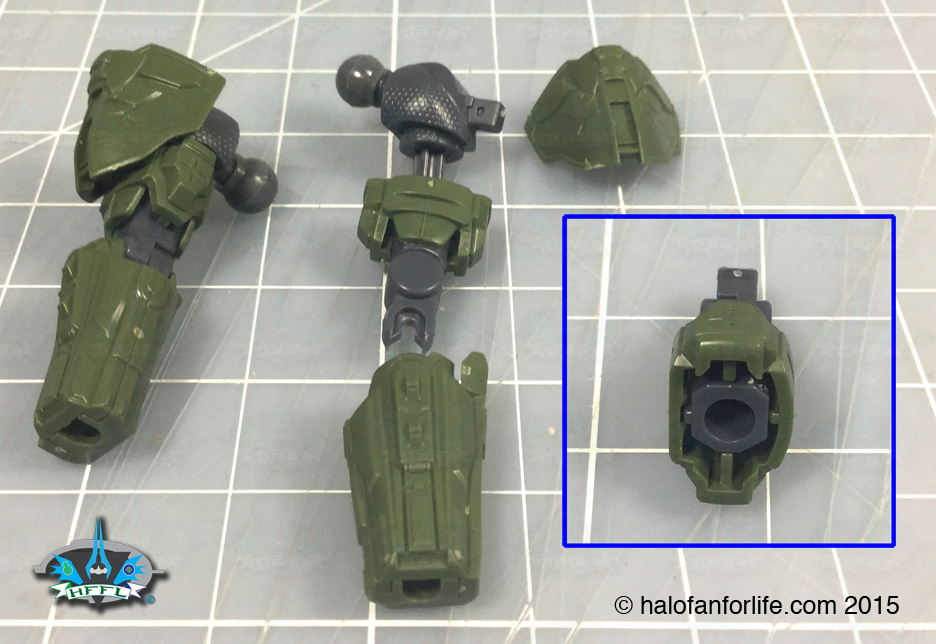
Here the arms show the hands as we. You get a set of fists, a set of trigger hands (not shown, but will be later in the review), and one extra left hand that is open. You’ll see what that is used for in a minute.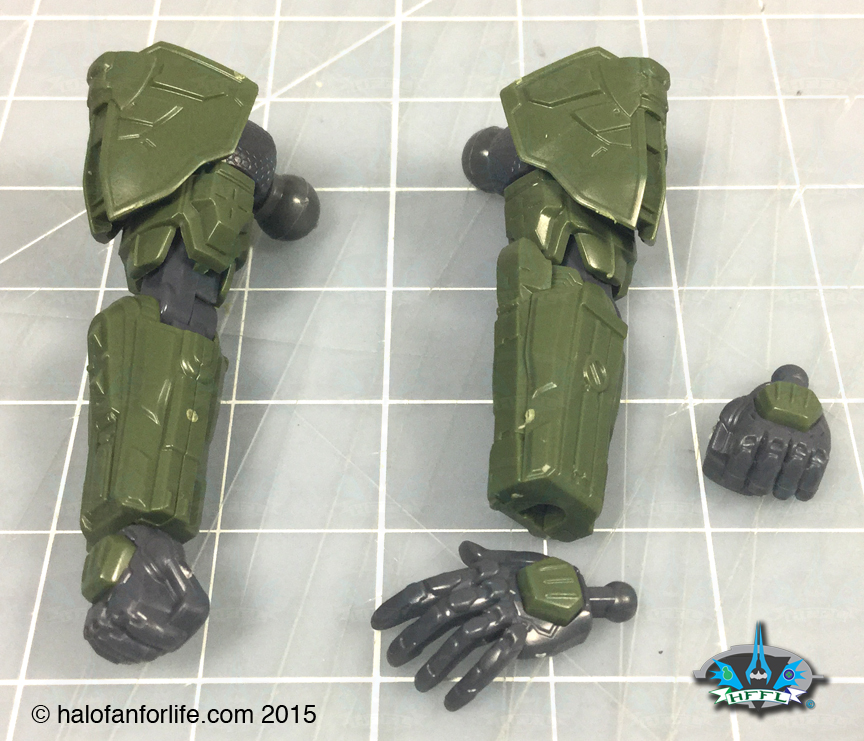
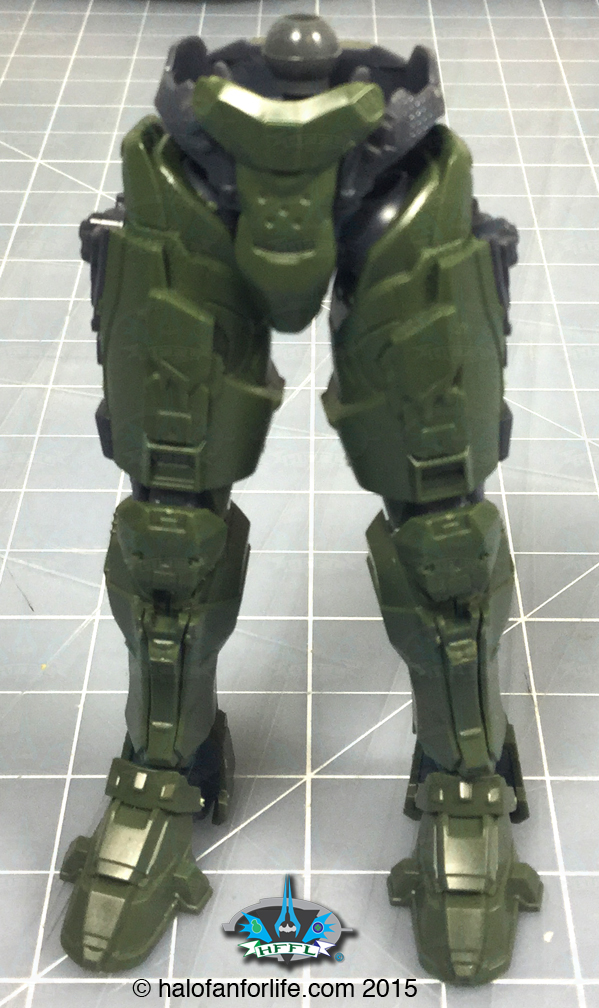
Lastly of the major sections are the hip and legs. Again, each legs is of similar design like the arms, though pieces are flipped for right and left legs.So be sure to separate one set from the other, as I did below, so you don’t try and fit the wrong leg part together with another part.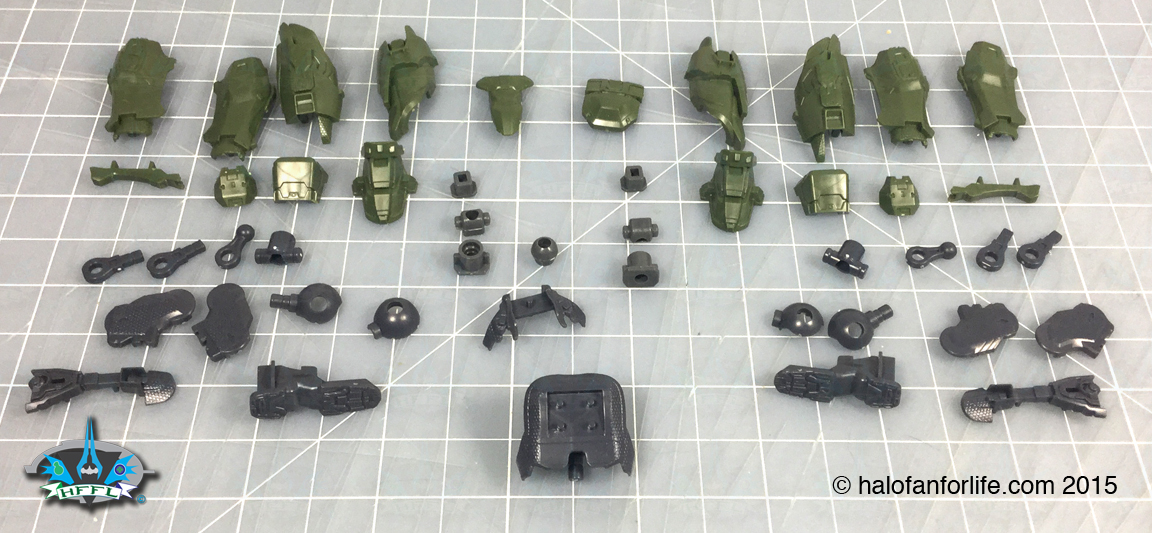
This pic shows the hip section (top right) complete and one of the legs in a partial exploded view. The parts of the legs from left to right are: thigh, knee, shin/calf, foot.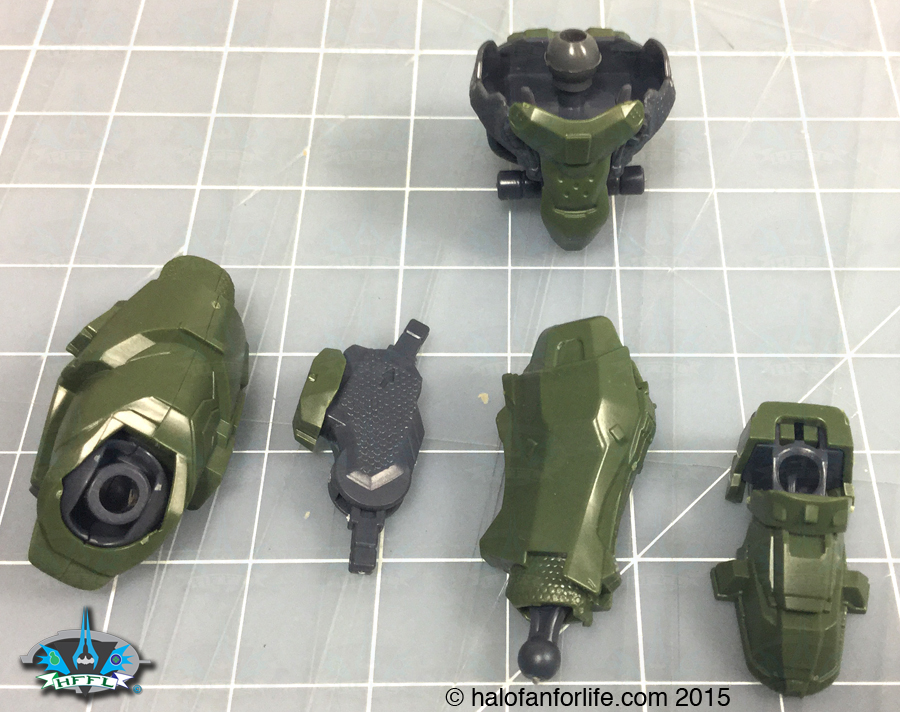
The legs have been assembled and are ready to be fitted on to the hip.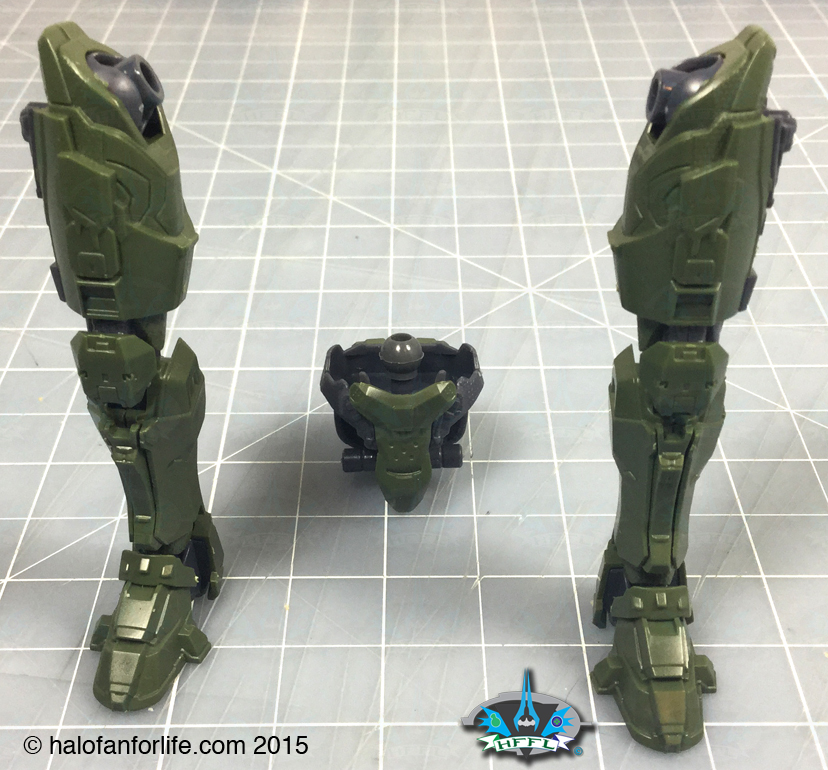
BAM!
Now we have all the major sections of the Chief built. We just need to put them all together. Before I go on, make not of the two little pieces near Master Chief’s head. They will be used to clip the weapons on to Chief. You’ll see this in place in a second.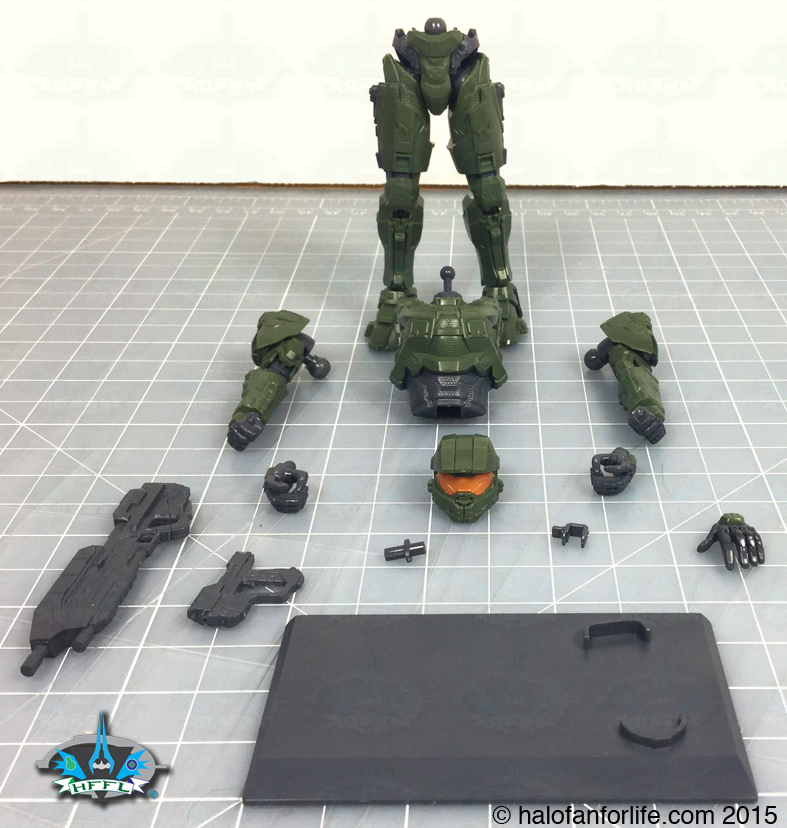
The model in orthogonal views.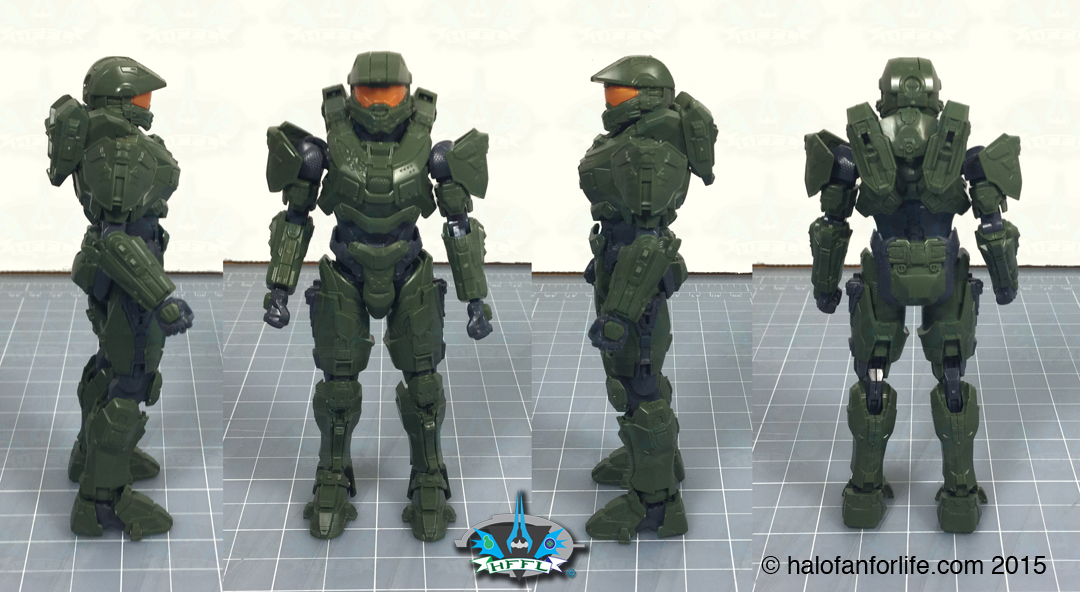
Now we get to the action shots!
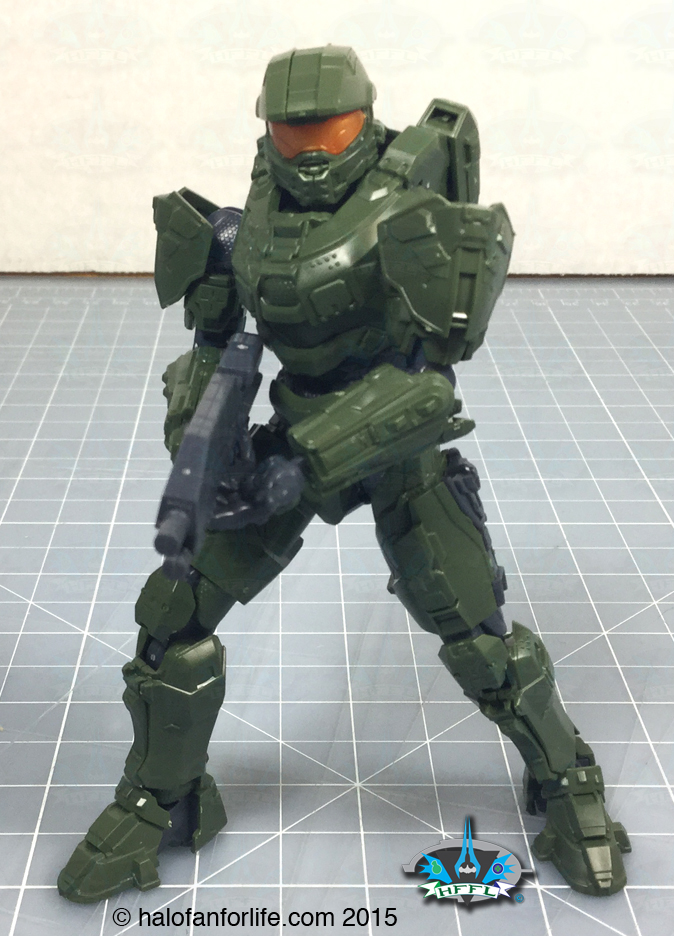
Chief is seen here holding his assault rifle in one hand. Note the open left hand.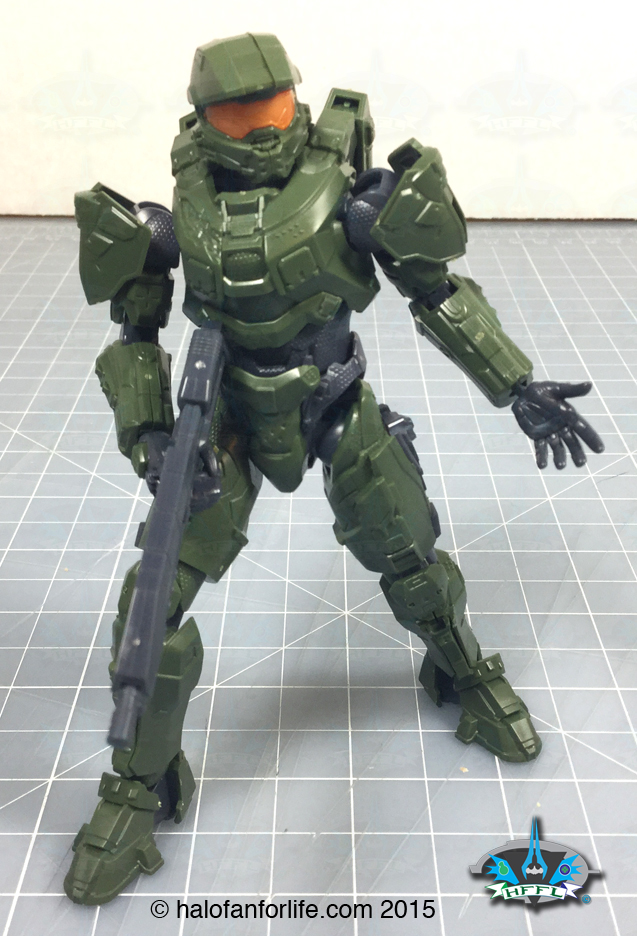
You use that hand to hold the assault rifle steady. Looks like Chief is ready to take down some Covenant!
Dual wielding weapons, OH YEAH!
You can swap the weapons to the other arms if you want to. The trigger hands come in two parts, so you need to disassemble those to switch weapons and reassemble with weapon in place to have Chief hold them again. It’s EASY to do, so don’t fret.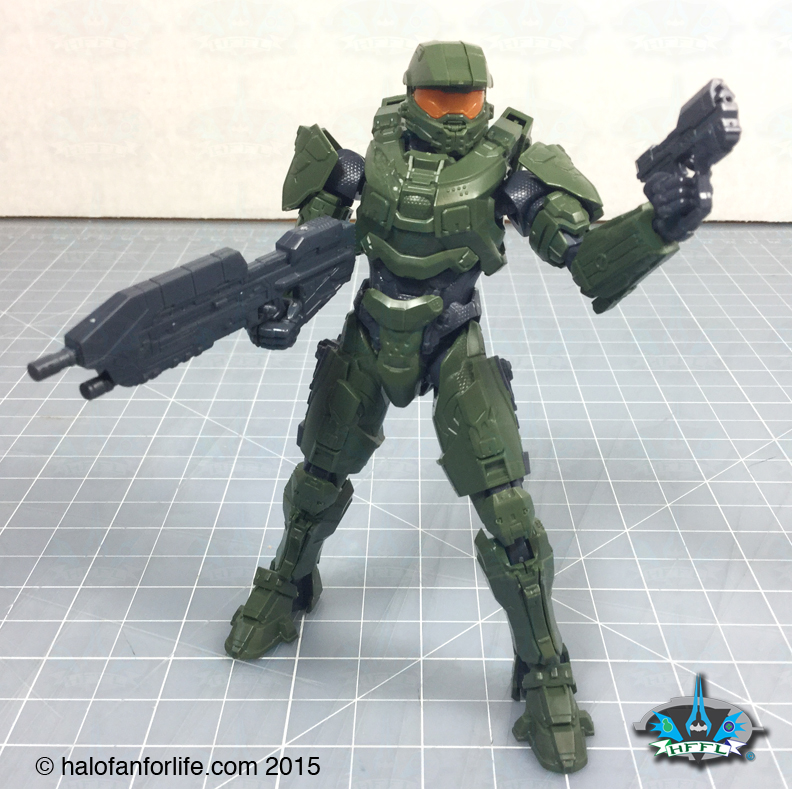
Okay, here are those clips. On the left you’ll see on Chief’s left thigh the ‘U’ shaped pin. This holds the Magnum in place. The pin for the assault rifle goes into the slot on the right back armor. These are easily removed if you want to show Chief holding his weapons instead of storing them. Just don’t lose those pieces. They are small. I suggest putting them into a small ziploc bag, marking the bag with what pieces they are and what model they go to.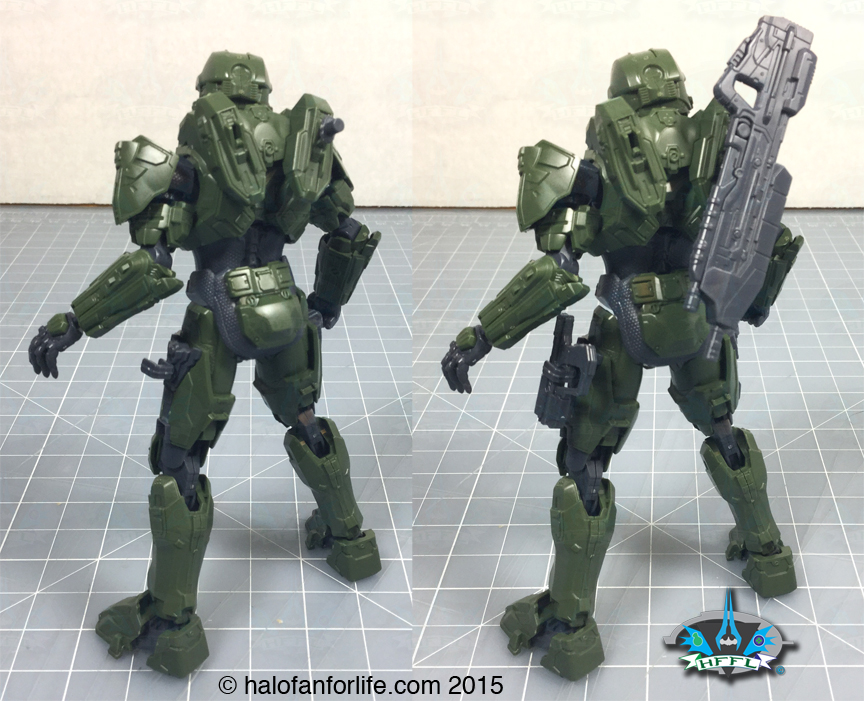
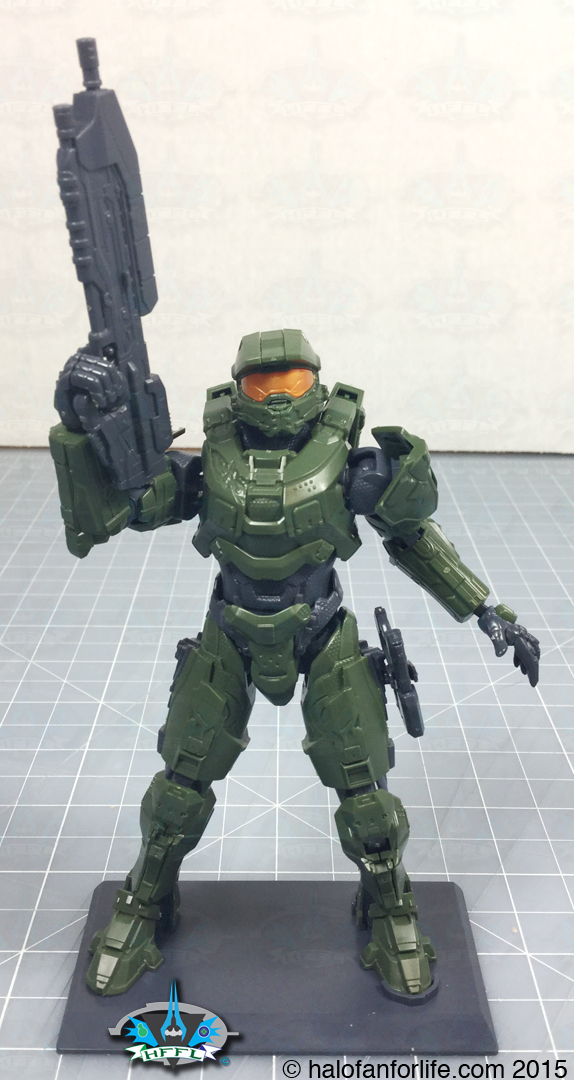
And for the final shot, Chief with the assault rifle raised, the magnum stored and the open left hand.
As you can see from the action shots, there is a tremendous amount of articulation with the model. There’s more that it can do, I just didn’t show it all in the pics.
Summary: The set is a quick build. If I had to estimate my build time alone, not including the picture taking, I’d guess that I could have completed the model in about 30 minutes.
The model is for ages 8 and up. I agree with that, so long as the young ones are patient. I do suggest adult supervision. Besides, it’s fun to build with your kids. A great bonding experience!
Now with building blok sets, I normally go by a 10 cents per piece guideline. However, this is not a blok set, but rather a model kit. There are a lot more details in the pieces here, so I don’t use the above guideline. With a fantastic amount of articulation, the model can be posed in many positions.
Overall Rating: I give this set 9 out for 10 medals. This set has great value for the price.
So why did I give this a 9 instead of a 10?
• The plastic is only in three colors. The armor green, the under suit grey and the copper visor. While the parts have great detail, without painting the parts, the colors may be seem dull/flat. Personally, I do plan to go back and paint mine. One note on that. If you do plan on painting your model, it’s MUCH easier to do so with the pieces still connected to the Sprues. I obviously can’t do that as I’m giving the raw product review, so you see it as it comes from the manufacturer, rather than a painted version that looks different from what’s inside the box.
• There is a small piece that was a bit tough to get into place. In particular, it was the helmet piece that I mentioned above. I had to use tweezers and magnifying glasses to get it to fit. So just be extra careful with that part of the assembly.
Those two points are a bit minor though. As I said, you can paint it yourself or choose to keep it as it is from the manufacturer.
Do I recommend it? You better believe it! This was a fun build. Everything went together relatively easy. With no glue needed, this made the building of it even better. It is a fantastic representation of Master Chief in plastic model kit form!
Other Halo Sprukit reviews:
Halo Toy Review: Bandai Sprukits Commander Palmer – https://halofanforlife.com/?p=20466
If you have any questions about this set that I didn’t cover in the review, please do not hesitate to ask me. Either reply below or e-mail me at [email protected]
Thanks for reading and let me know what you think of the review. If you get this set yourself, please let me know your thoughts on it too!
If this review gives you an informed decision on whether to purchase the set or not, please consider a small donation (50 cents) maybe. It’s much appreciated and helps ensure that HFFL stays active on the internet. Thank You.
-Sal
That was a very detailed review Sal. Nice job!
I keep seeing this set at my local target next to the mega bloks. Maybe i’ll pick it up sometime……….
Thanks. I appreciate that. Yeah, pick it up. It’s a cool bbuild and you get to see exactly how the articulation works from the inside.
This kind of building system is pretty much the same as the one used to make Gundam models (which Bandai also makes). You’re pretty much suppose to paint the model if you want it to look better (at least the cheaper models).