Custom block built Covenant SDV Corvette

In my ongoing series of custom Halo block built sets, I came across this one on AliExpress. It’s a small set at “midi” scale. Affordablility was very good. the build had a couple of issues, that I’ll talk about later in the article.

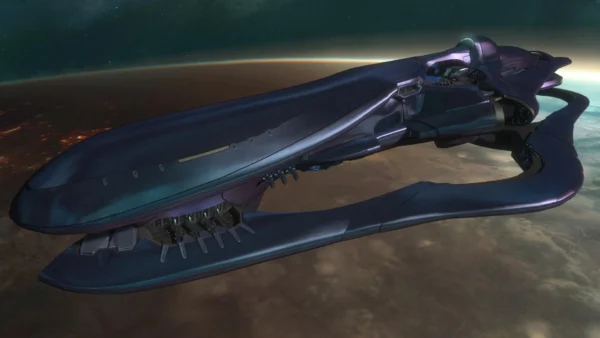
First, let’s look at the in-game model.
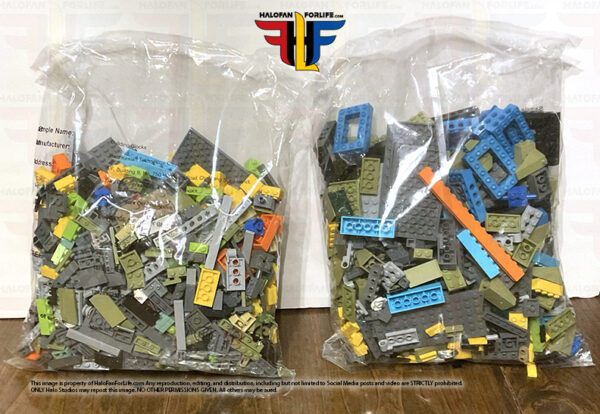
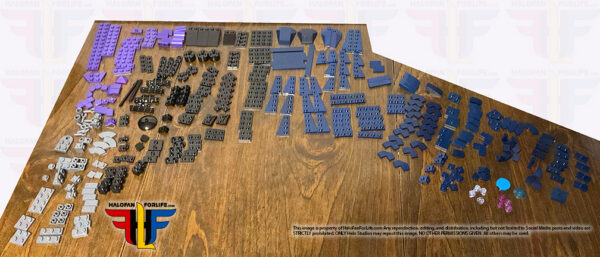
Okay, now let’s get into the build. This set comes in just one bag. You must sort them all out. No smaller bags for sectional building. Alas, such is the way with custom builds. They are not Brand name blocks.
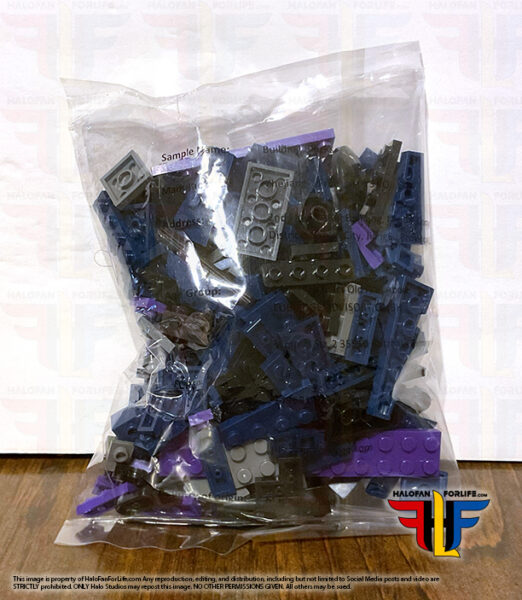
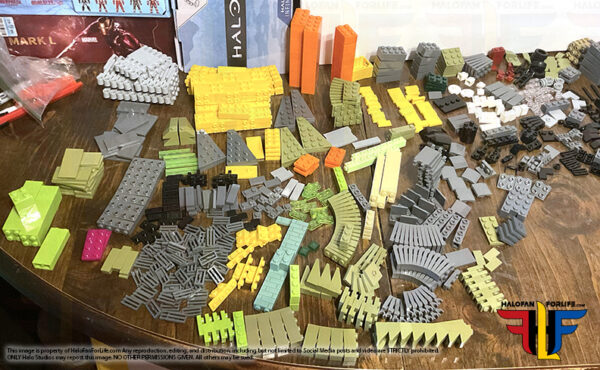
And here are the pieces sorted out. Yes, I blocked off that portion of my dining table that had other stuff on it that did not pertain to the build.
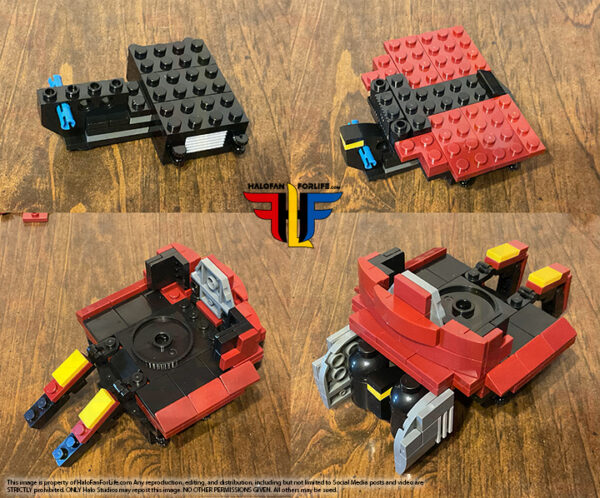
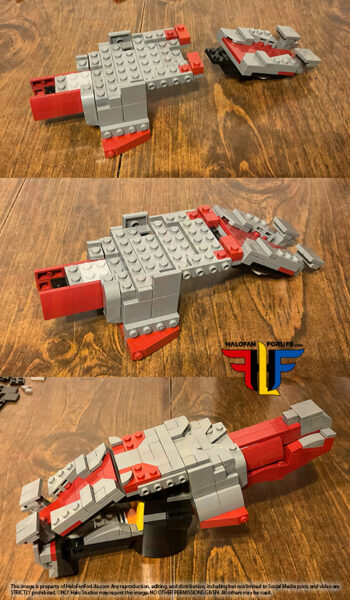
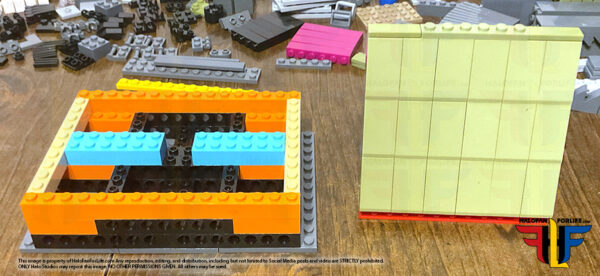
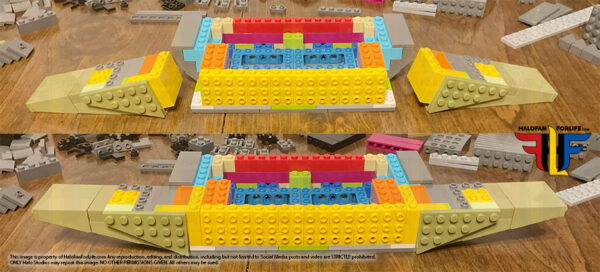
Now we get to building. In this first set of pieces, we start to build the spine of the SDV Corvette, See below is the mid, then, bottom front portion, then forward sections and middle spine.
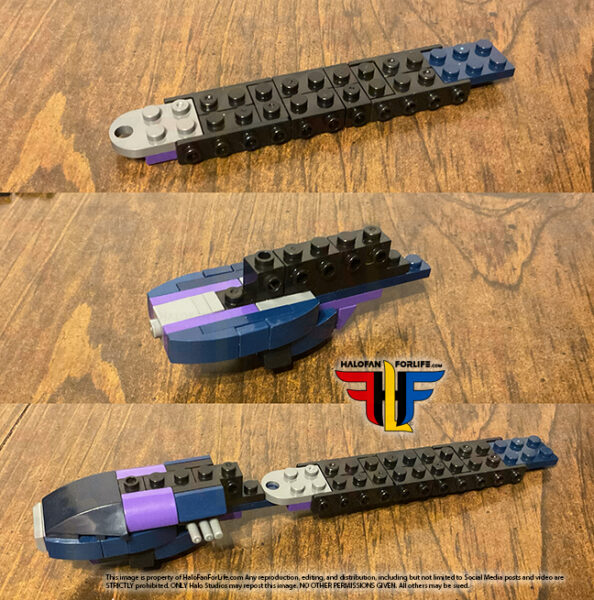
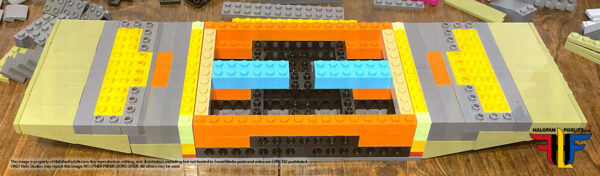
The main body is built, as are the side sections, the are the attached to the body.
Oh, I should make note that I’m NOT a fan of those light purple parts. I will look to replace those with as close as I can to that dark blue, in parts. If I do, I’ll try to remember to post an update at the end of this post at a later date.
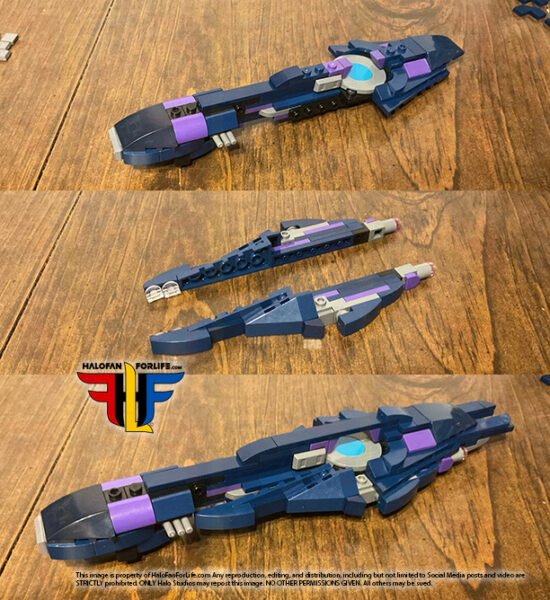
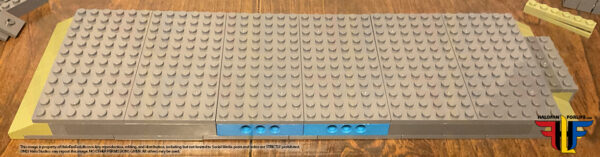
Next a small section of the underbelly Is built and added.
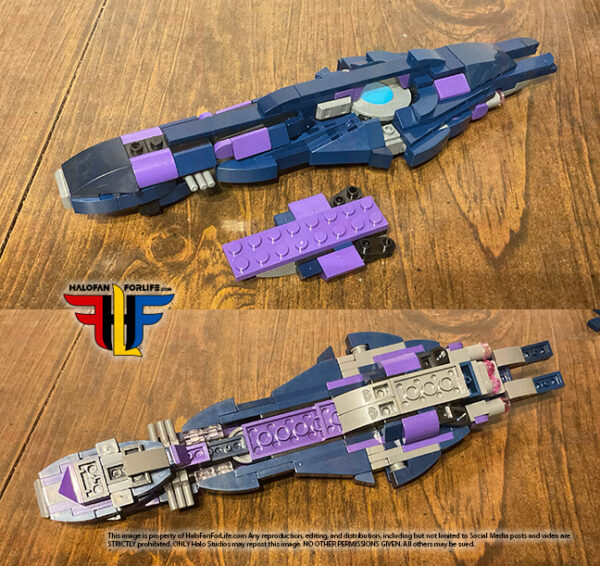
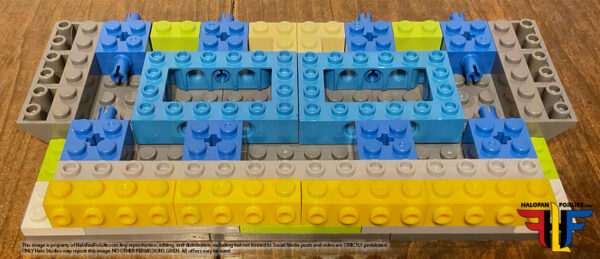
The thin bottom “ring” for lack of better wording, is built. There were issues with this, that I address next.
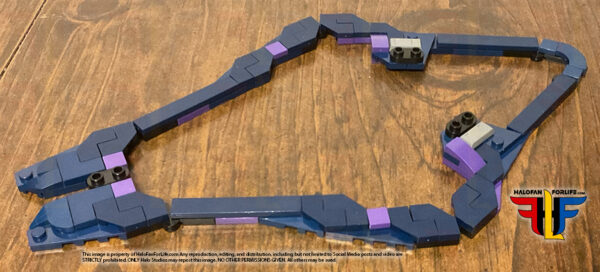
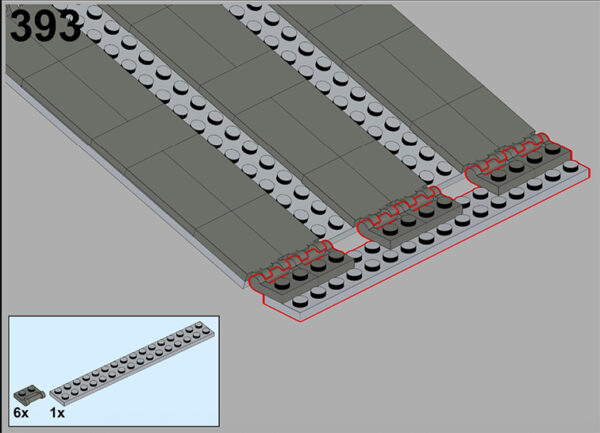
The instructions themselves call for a different way of building that what shows from the designer’s page of this section. It works fine as designed but, I think I’d rather have had it as is shown in the graphic above.
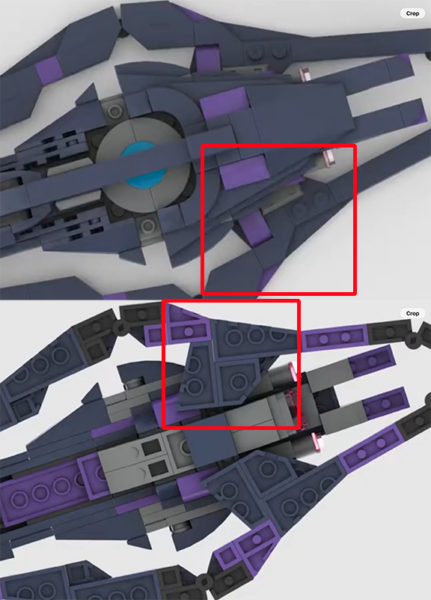
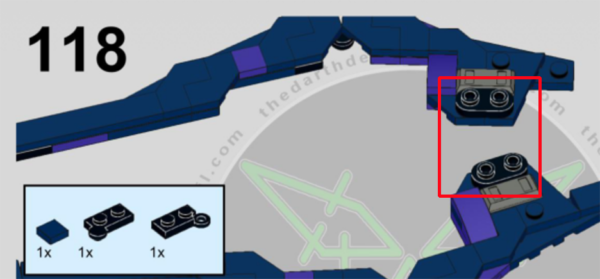
The real issue comes with those black pieces that are highlighted. Due to the shape of the angles pieces in the above picture, these black pieces are not able to stay in that position.
Instead, I had to point them 90 degrees inward and attach the ring to just the inner most studs, instead of both studs. This makes that portion of the build weak in connection. I used super glue here to make it a stronger connection.
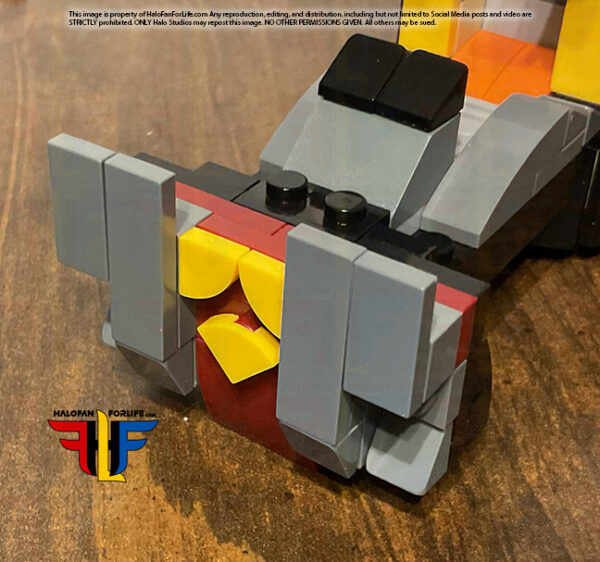
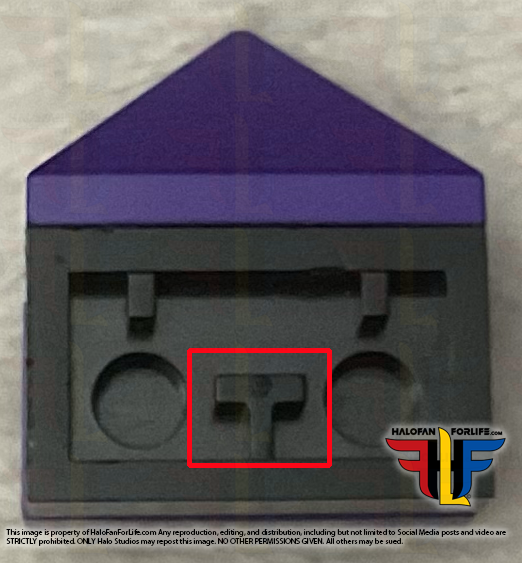
Another issue that can come from getting custom parts is that they are not the same as big brand name parts. In the case of the pic below, the “T” part of the underside of the black piece had to be shaved away, in order to allow for a stud to be attached at the middle.
This was not a flaw of the designer but, rather the manufacturer, for not seeing how this part was going to be utilized.
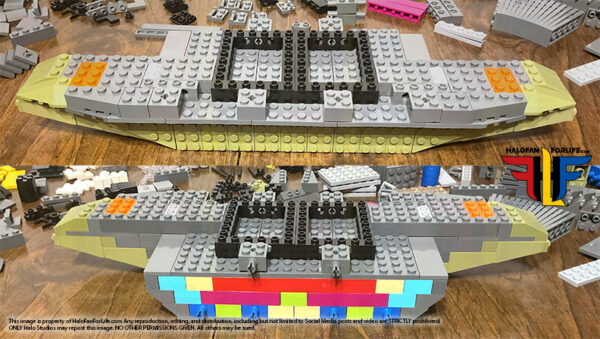
So…once I got those issue sorted out, I was able to add the bottom “ring” section to the body of the model.
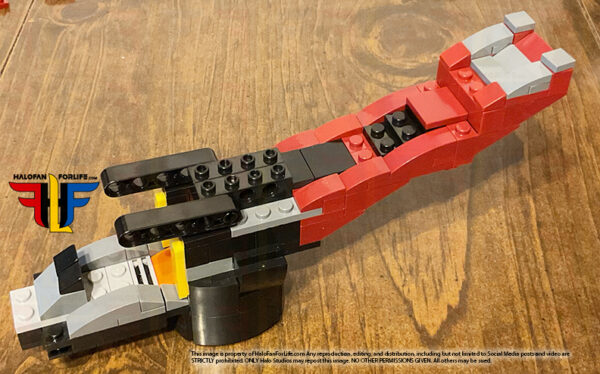
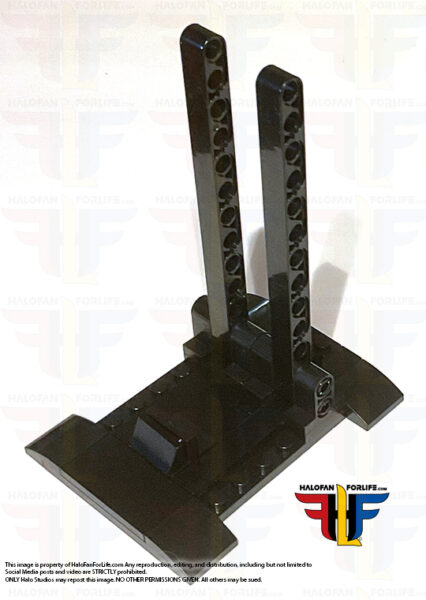
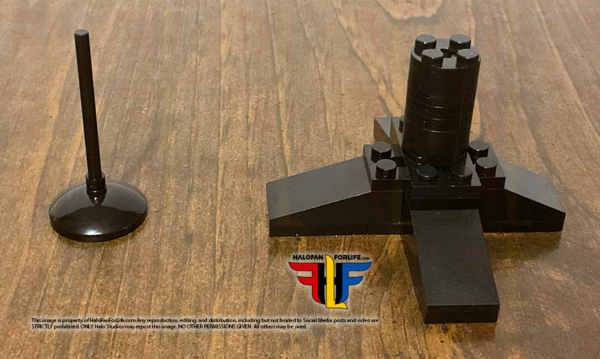
Thankfully, this model comes with two small buildable stands,
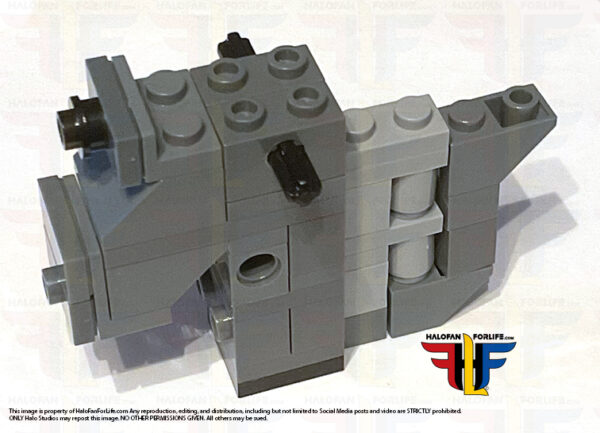
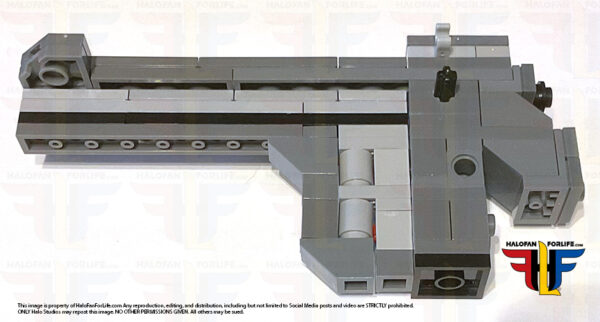
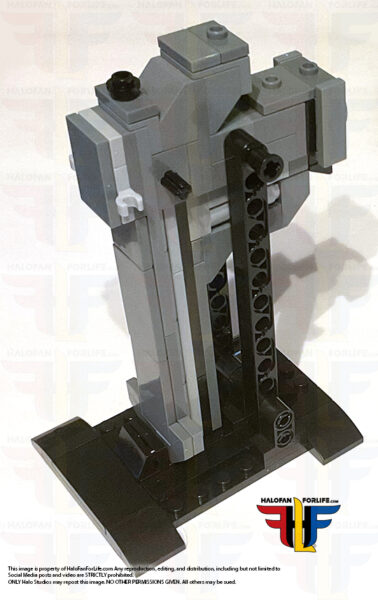
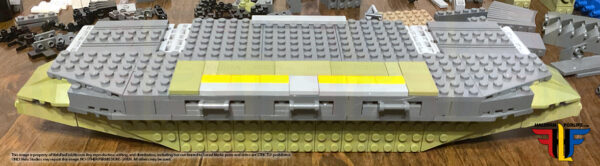
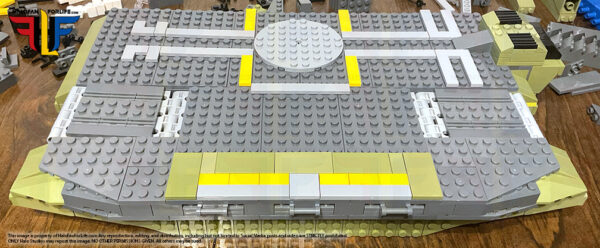
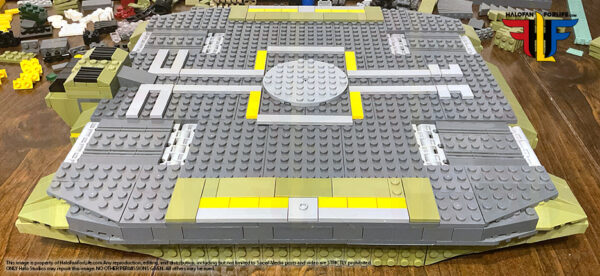
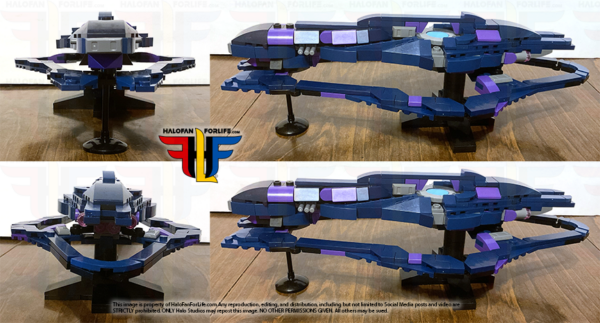
As per usual, here are my orthogonal views of the completed model, on it’s stand.
Here are ortho view of the in-game model to compare.
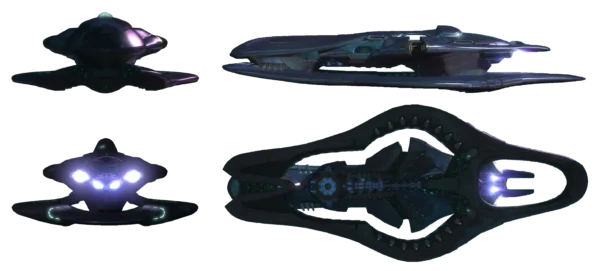
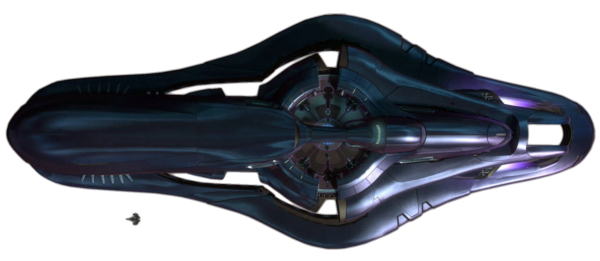
Note the Sabre at scale in the above pic.

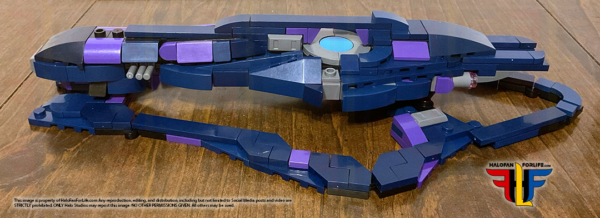
And below, the comp letter model in 3/4 view. It’s very nice, but for those light purple parts that really stand out, in a bad way, IMHO.
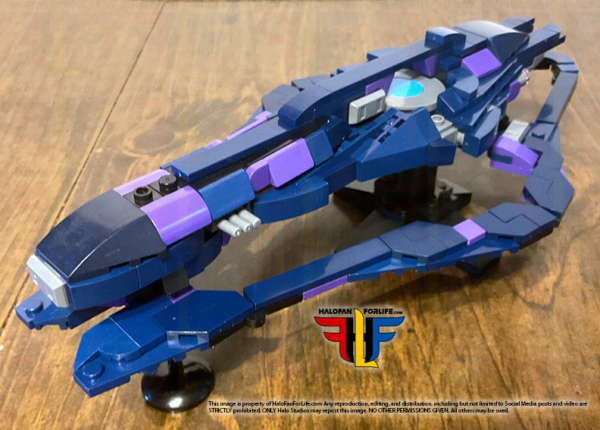
Overall, I’m fairly happy with this set. The final look is great, though again, I will look to change out those light purple parts..

At 325 pieces, and a cost of $21.71, the cost per pieces was fantastic. So the set is affordable. This makes the light purple parts palatable. Hopefully those will be cheap to buy and replace.

So then, do I recommend the set? Yes. My only complaint is with the light purple piece and the slight reworking of the underbelly. I really wish Mattel/Mega/Mattel Brick Shop, were making these sets. But, in their absence, I need to fill my desire to build Halo sets. Unfortunately, I do not see Mattel making sets for awhile, until the next main game.

If this review gives you an informed decision on whether to purchase the toy or not, please consider a small donation (50 cents) to the blog.You can donate via PayPal to jedisalpitt2002@yahoo.com. Or just click the paypal link at the right on the main page of the site.  It’s much appreciated and helps ensure that HFFL stays registered/active on the internet. Thank You.

-Sal
Custom block built Banished Locust

In my ongoing series of custom Halo block built sets, I came across this one on AliExpress. It’s a big set. Bigger than mining scale. Affordablility was great. the build had some issues, that I’ll talk about later in the article.

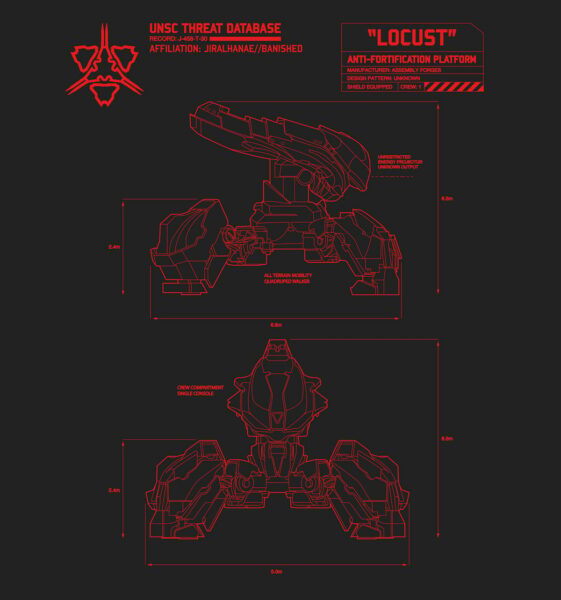
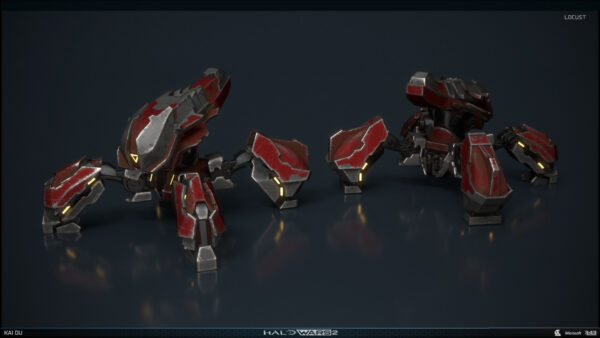
Let’s first look at the in-game Banished Locust.

As you can see a lot of angles and detail to the armor. This would seem hard to recreate in block form. But let’s just see how this model played out. Then you decide for yourself, how the outcome was.

As mention, I got this from AliExpress.com. This is where I’ve been getting the custom builds. Though many of them are based off of designs from rebrickable.com.

Ok, let’s start the build!
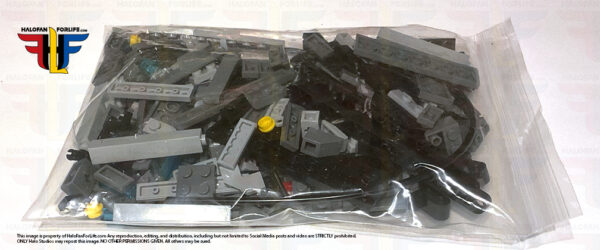
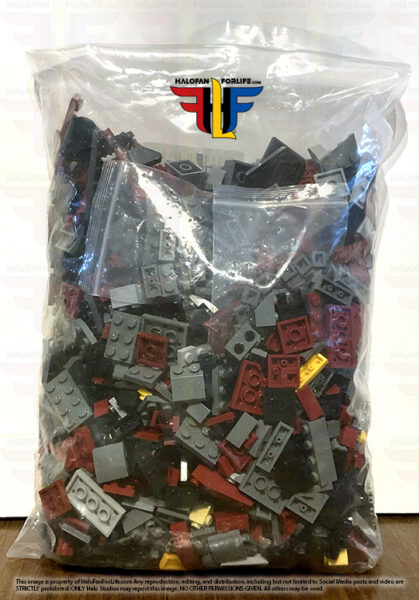
You get one bag of parts. All of them in one bag. No neat little bags for sectional building. This isn’t main brand stuff here folks. So expect this kind of treatment, when you buy custom block sets.

Here are the pieces dumped out onto my dining table. There were two small bags of pieces. Each containing a specific type of part. Thank goodness…. Those small parts can be a hassle and easy to lose.

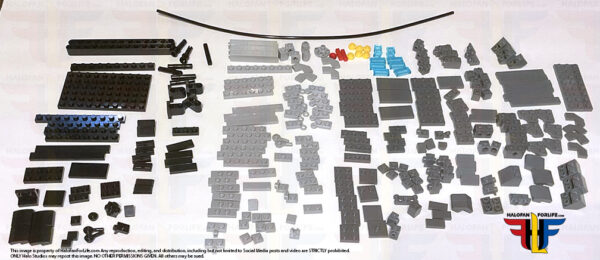
Here are all the parts sorted out. This took a little while. Thankfully, most of the parts are three colors, with a small smattering of other color parts. And yes, I blocked off other parts of my dining table in the edit in photoshop. It’s not messy, just not related to the build.

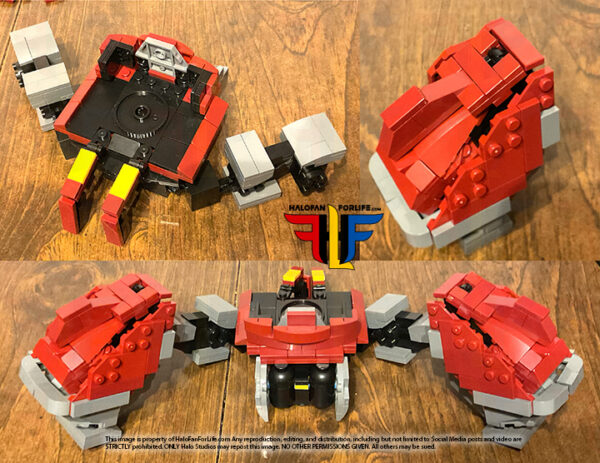
So we start with building the body. Pretty standard. Not the (fuel?) tanks at the back, at bottom right of this pic. Also, those little jutting black pieces in the top left are for the legs. Ugh….big issue there. Again, I’ll talk about this later.

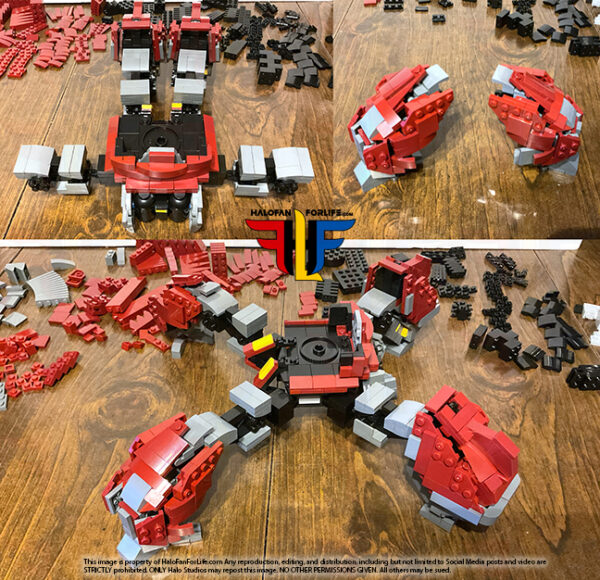
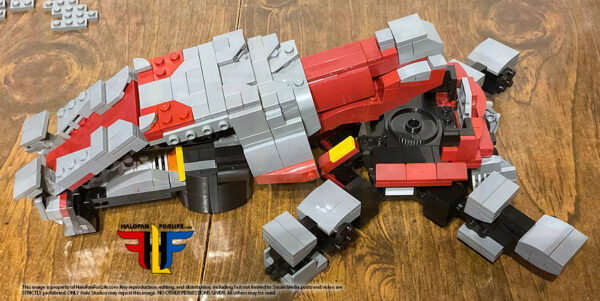
Next come the back legs and pincers. The side armor on the legs is not held well onto the legs. Frequently during the build, these would pop off. So where needed, I began glueing. It’s NOT something, I like to do. But with the custom builds, it often becomes a necessity.

Now the front legs. As with the other set of legs, side armor becomes an issue with staying on. And again, I had to glue it in place. At top left, the model looks more like a mech, than a Halo Locust.

Now starts the “Head” of the locust. This section was fun to build.

Instead of a clean triangle of yellow, the designer opted for these 1×1 curved tiles. Not accurate, but kinda neat.

The top of the head is built with a hinge joint, so it follows the shape of the head, without having to use a lot of heavier blocks to make the shape.

The main part of the head is done and ready to be attache to the body.
NOTE: At this point, I deviated from the build. The leg joints were so weak that trying to build side armor onto the head would have the legs popping off and random pieces coming off too So, I fixed those and then built the rest of the head separate from the body until it was done. THEN added it to the body. Trust me, this will save you a LOT of frustration, should you decide to get this for yourself.

Now, there IS room for a figure. The “cockpit” seems to be designed for this. Though I did not add a figure at this time. I know… I should have, just to show it.

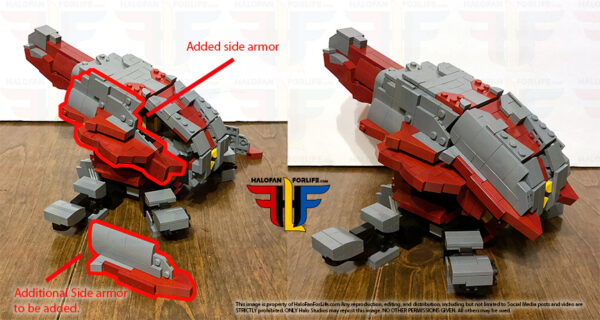
There are two sets of side head armor sections added. (Highlighted in red) These also do not stay well in place. Especially the one marked “Additional Side armor to be added”. So once again, GLUE.

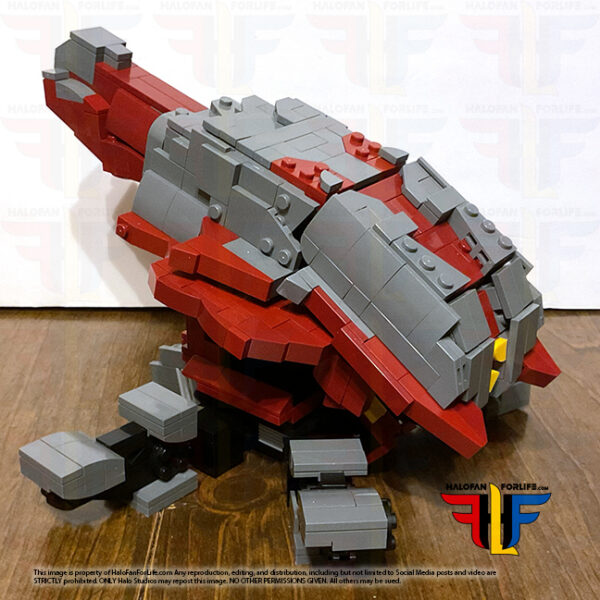
The head is now complete and ready for the rest of the legs to be added to the model. I very much like how this part of the model looks.

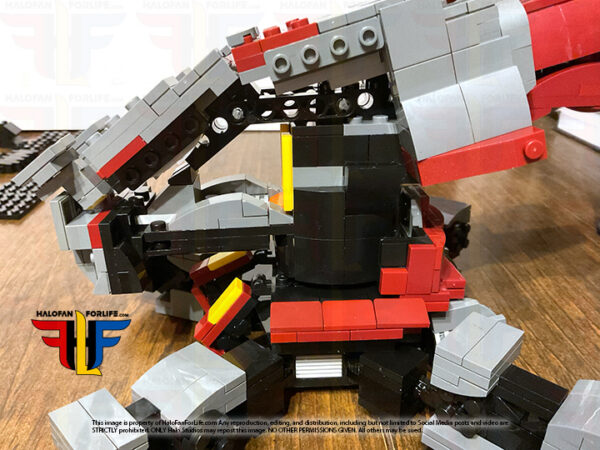
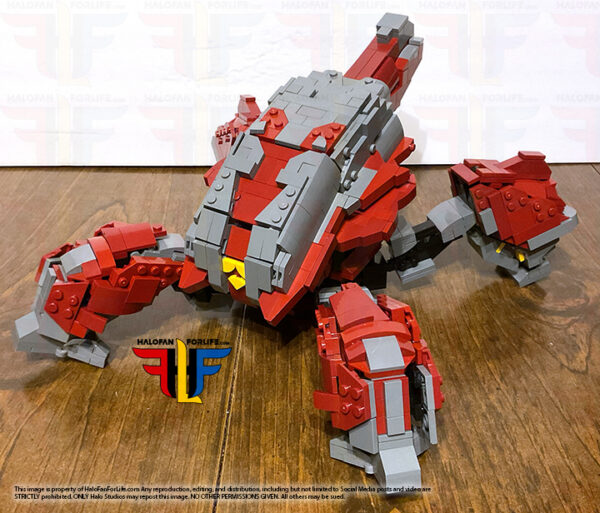
So, as you can see, when the legs are added, the whole model sinks at the middle, due to weight as well as very weak joints. THIS is my biggest issue with this model. It should be able to stand on its own. Especially without pieces falling off. This became my biggest frustration with this set.

So, I built a small stand with the leftover parts to prop up, underneath the main body and keep the legs in correct position.

Below is a graphic I found on one of the Halo wiki sites, related to the Locust. I figured, I show it here as well.

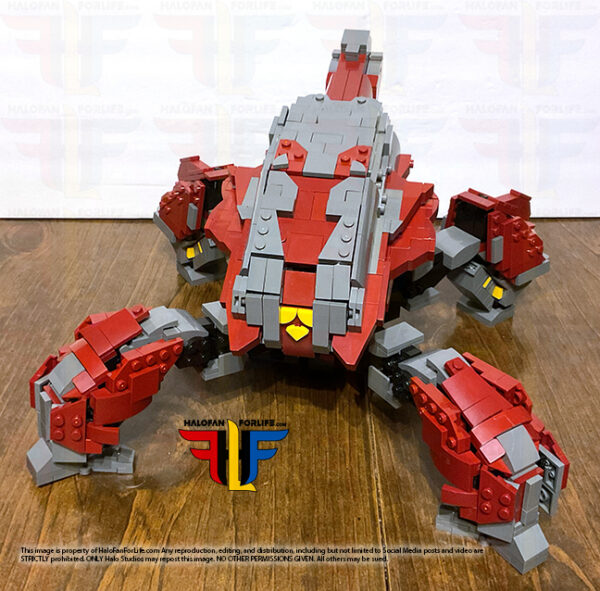
Overall, I’m not so happy with the leg joints of this set. The final look is great, if oversized for figures. But again, without it being able to stand on it’s own, that’s a big detractor for me.

Again at 1413 pieces, and a cost of $58.70, the cost per pieces was fantastic. So the set is very much affordable. This makes the leg joint issue slightly more tolerable. Because of the way this is built, I’m not sure if I’ll be able to redesign the legs to have better joints.

So then, do I recommend the set? No. The frustration I had at sections falling off and the leg joints jut being way to weak to hold of the model, without support from a stand underneath, just killed my enthusiasm for the set. I really wish Mattel/Mega/Mattel Brick Shop, were making these sets. But, in their absence, I need to fill my desire to build Halo sets. Unfortunately, I do not see Mattel making sets for awhile, until the next main game.

If this review gives you an informed decision on whether to purchase the toy or not, please consider a small donation (50 cents) to the blog.You can donate via PayPal to jedisalpitt2002@yahoo.com. Or just click the paypal link at the right on the main page of the site.  It’s much appreciated and helps ensure that HFFL stays registered/active on the internet. Thank You.

-Sal
Custom block built MONCTON class Orbital Weapon Platform

In my ongoing series of custom Halo block built sets, I came across this one on AliExpress. It’s a small set at Micro scale. Pretty affordable too. So, I know I had to buy it and build it, to show you all.

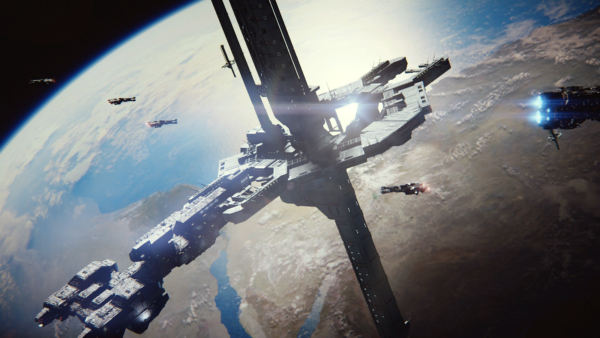
First, let’s take a look at Cairo Station, one of, if not the most famous Orbital platform! As you can see, it has a Frigate docked with it. this is from Halo 2.

Alright, let’s start with the build!
This set is small, with 273 pieces that come in only one bag.

Here are all the pieces sorted out. Take note of that long tube piece at the top. I’ll go over that more during this review.

We first start with the center core of the station. It’s a fairly complex build with side builds, holes and pins. This makes the center structure pretty strong.

The lower spire is built up. This kind of looks like a gun at this point, don’t you think? The build is pretty easy at this point.

Normally during these builds, the stand comes last. However, in this case, the stand is needed. Can you build it later? Yes. However, I recommend following the instructions as given.

Once the stand is built, you attach the lower spire. Now, I will say, I’m not fond of the holes showing and would have preferred them being covered up. But that’s a minor thing.

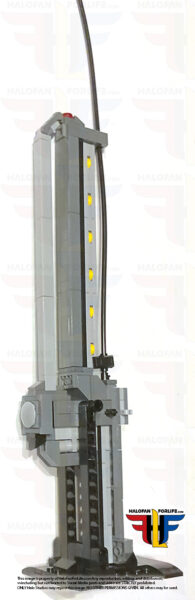
The upper spire is built. NOTE, here is where that long tube is inserted into the build. It’s way too long. However, that’s fine as it will be cut to the right size later. In the immediate pic below, only a portion of that tube is shown.

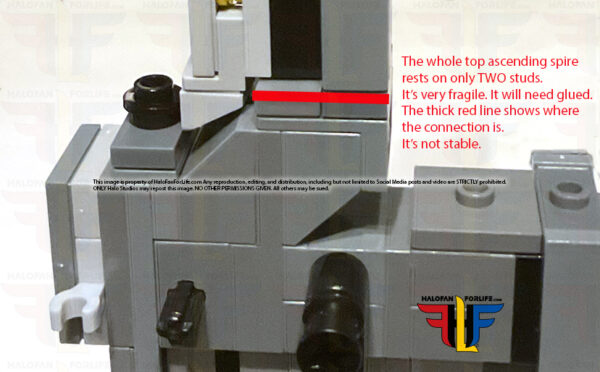
As you can see by the next graphic, the top spire barely sits on the build. And yes, I’m going to glue it down, to stay in place. I use krazy glue to keep parts in place. Be EXTRA CAREFUL if you do this too, to not stick your fingers together OR use too much glue and it shows on the outside of the pieces. You do not need much, so use it sparingly. It will hold tight fast!

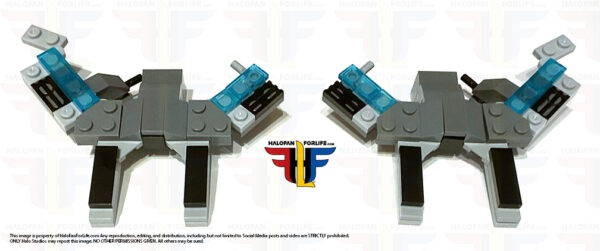
Next up is the middle docking sections. They are built in mirror of each other and connect around the middle core section. I think I’m going to see if the mini frigate from the Anchor 9 set fits in here. That would be pretty cool.

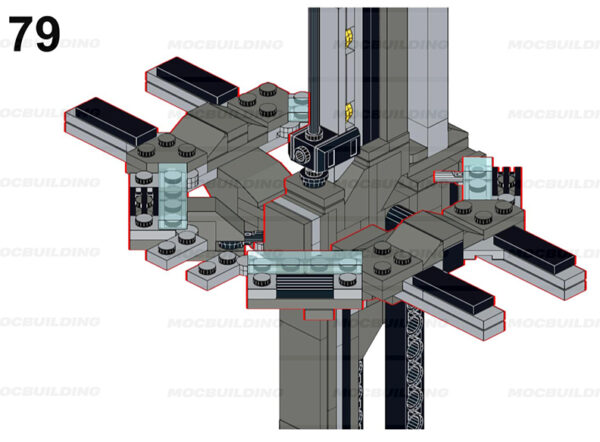
As per usual, there is always a step that is a real pain in the butt to add on. THIS is that step. The docking ring is fragile. And the way the directions call for attaching them can be frustrating. It took me no less than 10 minutes to get this right because the dock sections kept coming apart. Yes… I will be glueing those together too.

Screenshot

So here is the completed set, with the tube not yet cut. It’s pretty tall.

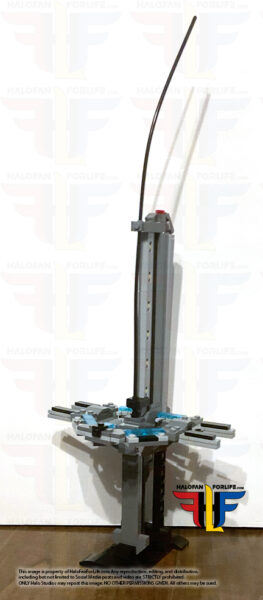
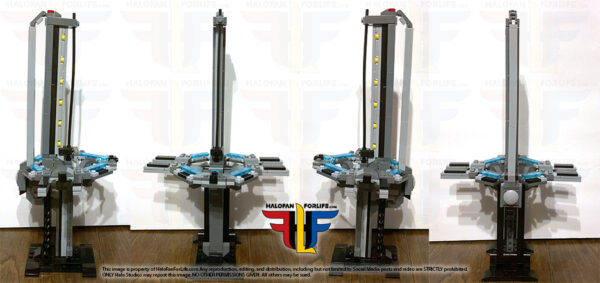
So, I cut the tube to size and as usual, show the model in orthogonal views.

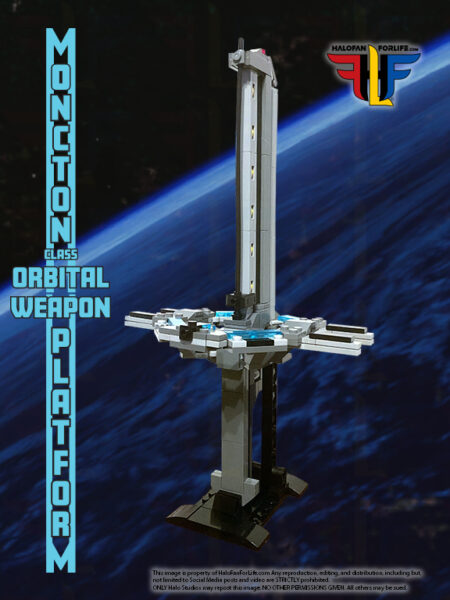
And finally, the set in 3/4 view. I’m choosing to do these last shots as the “hero” shot. Good background and additional graphics. As I was thinking about how to show the set of the model, the idea came to me to emulate the build itself. I think it adds a nice touch.

Overall, I’m pretty happy with this set. It’s simple, yes. But it’s effective as a background piece.
that one step aside, the build comes together easily.

Again at 273 pieces, it comes together quickly. I can’t recall how long it took me. I do know, it was under an hour.

The set cost $25 on Aliexpress. Shipping was very quick.

So then, do I recommend the set? Heck yeah! Again, I really wish Mattel/Mega/Mattel Brick Shop, were making these sets. But, in their absence, I need to fill my desire to build Halo sets. Unfortunately, I do not see Mattel making sets for awhile, until the next main game.

If this review gives you an informed decision on whether to purchase the toy or not, please consider a small donation (50 cents) to the blog.You can donate via PayPal to jedisalpitt2002@yahoo.com. Or just click the paypal link at the right on the main page of the site.  It’s much appreciated and helps ensure that HFFL stays registered/active on the internet. Thank You.

-Sal
Custom Halo Infinite FOB (Forward Operations Base) set

One of my most desired block built sets that I had hope Mega would make is the FOB from Halo Infinite. With Mattel/Mega not making sets currently, I’ve been looking elsewhere for sets I’ve wanted.

Thankfully, I found such a set on Rebrickable. However, that’s only for instructions. Purchasing the parts needed would be costly through either Lego or Bricklink. But, I did find the same set on AliExpress. When I found it originally, it was about $120. I wasn’t willing to pay that. SO I waited… And the sale came! I was able to get the set for just under $90. For me, that was a very good price.

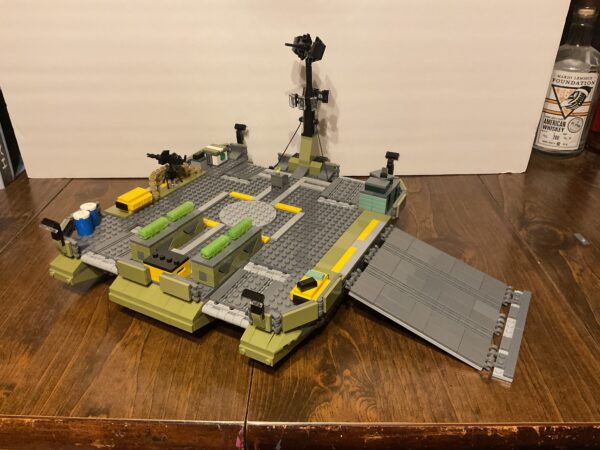
During this review, I’ll explain the differences between the in-game asset and this custom set.

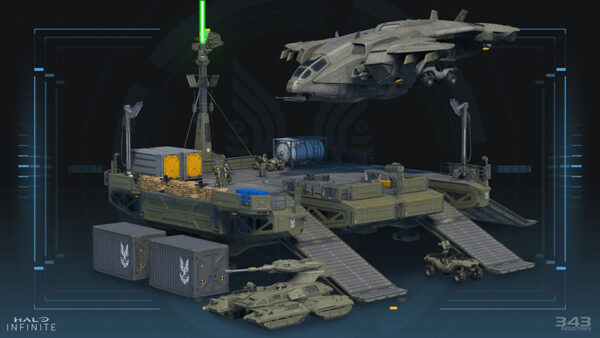
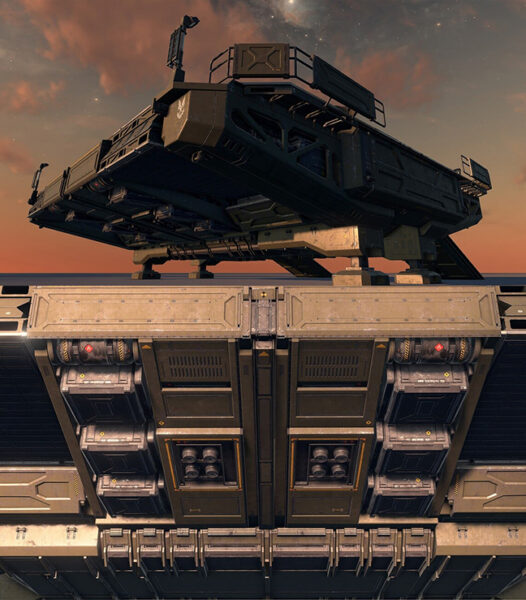
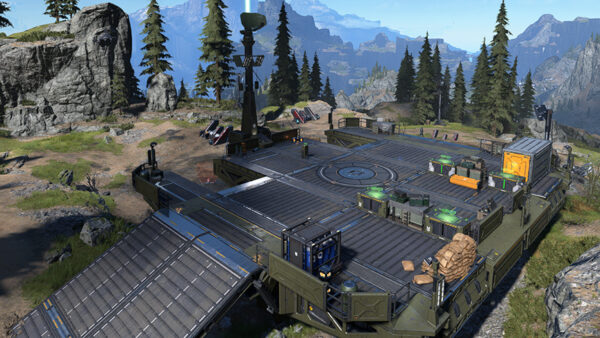
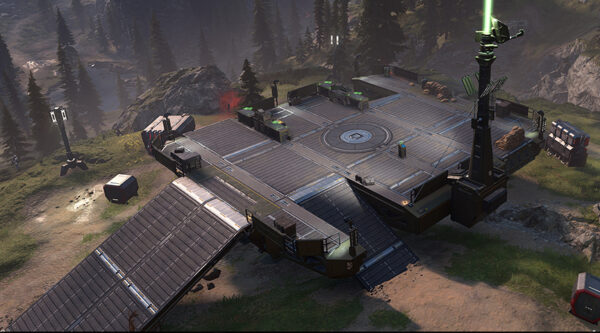
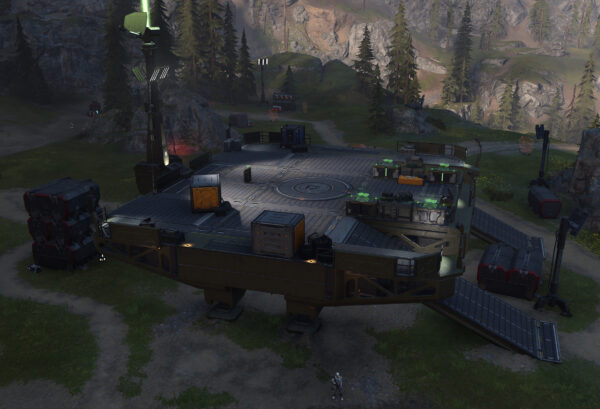
To start off, here’s a look at the official FOB from 343:

Of course, a block built set wouldn’t come with the Pelican, Scorpion and maybe not the Warthog either. that would exponentially makes the set more expensive. But I would think it would include the crates and a few marine figures.

So what did I receive? Well, the set came in a big bag that included two bags of parts. Unlike official sets, these do not have smaller bags so you can just open those up and build along the way. Instead, with these off-brand sets, you need to open and sort ALL the pieces out.

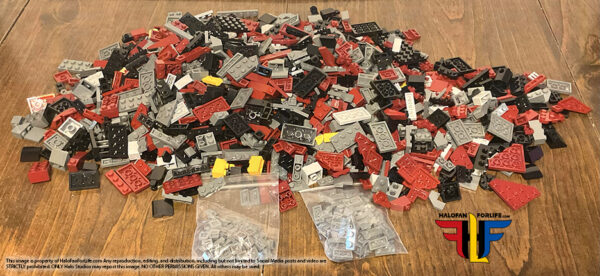
So…sort I did! The set includes 1,398 pieces. So it took up a lot of my dining room table.

I HIGHLY recommend sorting the pieces. It makes building go much quicker.

So now we begin the build. It starts off building the middle section of the FOB platform. On the left is the middle section of the middle platform. On the right is one of the wings of the middle platform.

Next, we build the second wing and insert both wings into the middle section. This is pretty much as long as the FOB will be, front to back. With just a little exception. So you get to see the size shelf you may need, to place it on.

After this, we build on top the deck. To the right is the back where the tower will be placed later in the build.

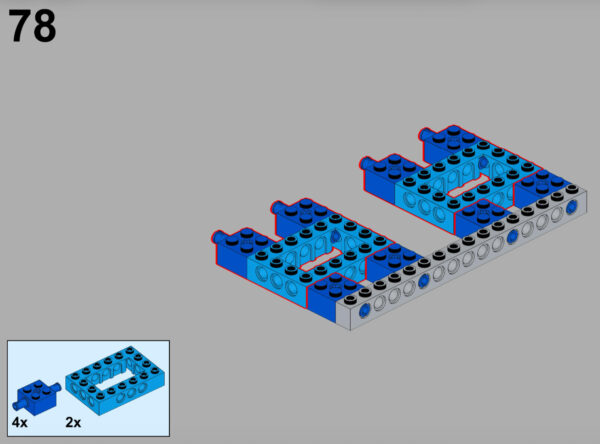
Now…there is almost always ONE step that’s a pain in the butt with these custom builds. This set is no exception. Below, at step 78, the light blue parts are supposed to have FIVE holes on the side. But they only come with three. So this step is wrong either in the instruction or the part. the seller does not have these parts, nor does bricklink.com. So…this is a big error.

Screenshot

However! I was able to adjust where the light blue pieces were placed by moving them 2 studs towards the middle. It was either that or cut off the insert pegs on the dryer blue pieces. I’m not keen on modifying parts. Especially if I do not have to. NOTE, I did look ahead in the directions to see if moving the parts as I did would destabilize the build in this section. Thankfully, it wouldn’t. So I went ahead with this minor alteration.

Here is one of the side sections. First with it’s own wings off, then assembled.

Next, the deck portion of the side section starts to come together.

More of the deck assembly is completed. As you can see on the bottom section of this graphic, pegs will be used to attach to the middle section.

This side section is complete, with just a couple of missing parts. I’ll get to that in a moment.

The side section is locked in place. the second pic shows the other side section as well, in place. NOTE, the first side section will take a little bit of effort to lock in place. However, the second side section will take considerably more effort as the FOB at this point will be at an angle if, you try to lock it in on its side. Do be EXTRA careful on this step!

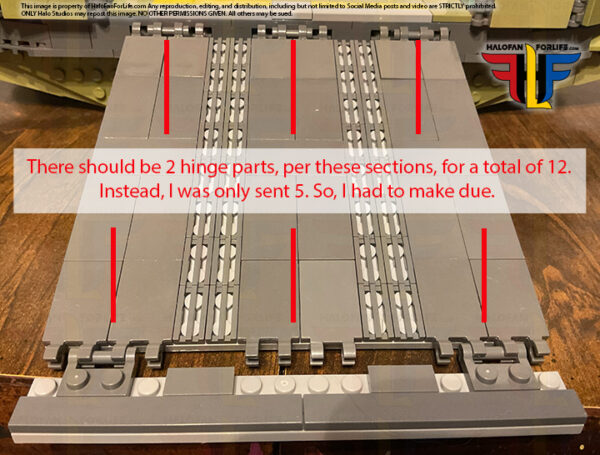
So here is where those hinge pieces should have been. The set calls for 12 of them, I only got 5.

Screenshot

I once again, made due for the time being. I placed three at the top and two below. You can se the glaring gaps though….ugh. I wish this would have been complete. But, at least they aren’t essential parts and are cheap to buy, if the seller doesn’t send them to me.

Now we add all the crates and tower. Most of these crates will be replaced with Mega Construx ones as those are more accurate. But I wanted to present this model exactly as it is, if you build it, without any modifications.

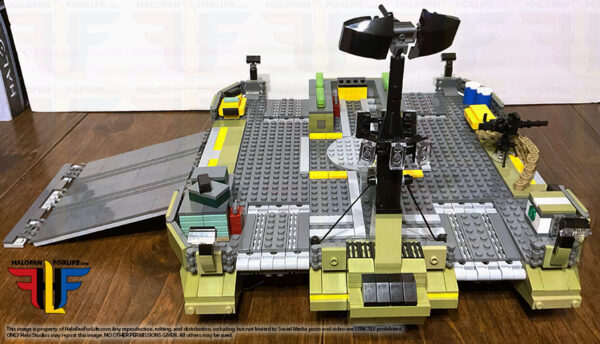
Here’s a shot from the back.

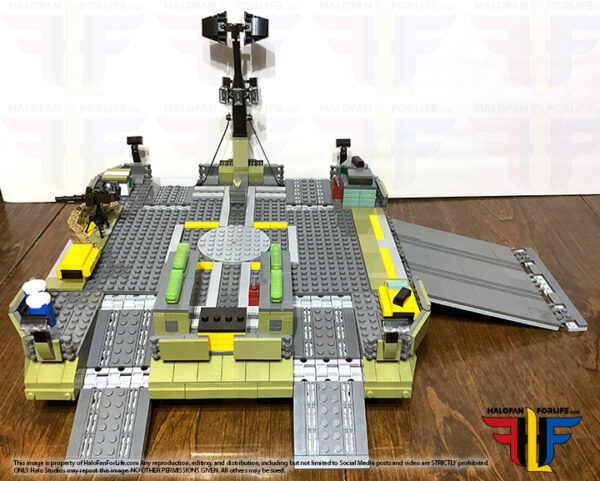
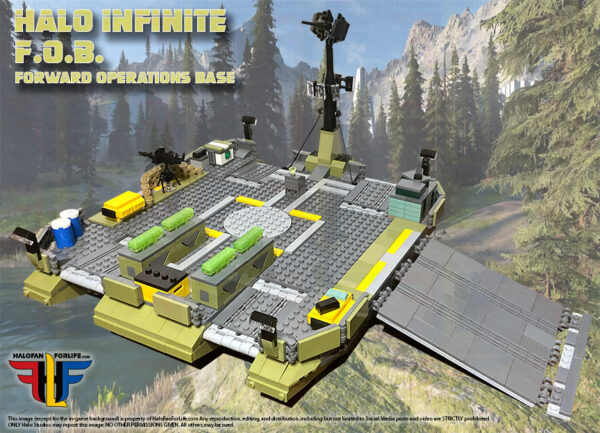
And here’s the final set, showing in 3/4 view.

Now, is this set perfect? No. Will it make do, until Mattel makes one? Yes. If Mattel never makes one, then this is quite good. With some modifications, this can be an even better set.

Of note, this set does NOT include the four legs that the in-game model has. The detail isn’t great on the underside either. So I’ll look to modify that to.

This is ultimately what is SHOULD look like. Size wise, the set is not long enough front to back. I can’t really fix that without a MAJOR upgrade. But, I’m okay with the set size as is.

You can see by this shot with the crates mostly cleared that the block built set doesn’t quite match up in width from large ramp to the other side.

Again though, I’m quite happy with the set and will add in as many reasonable modifications as possible. Once I do that, I’ll put a Warthog on it as well as plenty of Marines and then post that at a later date as an updated article for this set.

This set took about 5 hours to build. At 1398 pieces, it’s pretty hefty. As mentioned, I got this on sale for just under $90 on AliExpress.com. It’s currently anywhere from $120-150. So search for the best price or wait for a sale.

Was this worth it to me? Absolutely. Do I recommend it? You bet! Again though, buyer beware as it may be missing parts and you may have to either contact the seller or buy missing parts elsewhere. And again, for that I recommend bricklink.com.

Oh…and for anyone who thinks that last built image was taken from somewhere else? Here is the unedited pic I took of it! A bit of work went into sprucing it up!! LOL

Oh, how I wish Mega would have made this set though! I can’t state enough how much I wanted this set. It would have been a fantastic Signature series model for Halo Infinite.

I (we) can only hope that they will continue to make sets at a later date, though now under the “Mattel Brick Shop” branding. I just hope though that they do NOT go the route of static pose figures, like they did with their Master of the Universe line. Block built sets MUST have articulated figures!!

So, what do you folks think of the set? Would you be more apt to buying it, now that you’ve seen one built?

If this review gives you an informed decision on whether to purchase the toy or not, please consider a small donation (50 cents) to the blog.You can donate via PayPal to jedisalpitt2002@yahoo.com. Or just click the paypal link at the right on the main page of the site.  It’s much appreciated and helps ensure that HFFL stays registered/active on the internet. Thank You.

-Sal
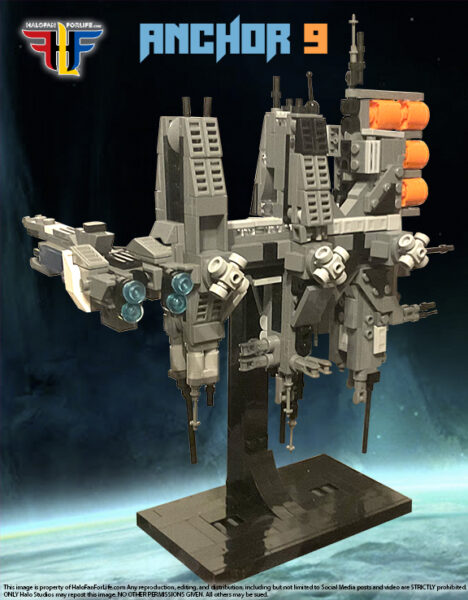
Anchor 9 Custom Building Blocks Kit!

Lately, I’ve been finding and buying custom Halo block kits. Why you may ask? Well, unfortunately, it seems Mattel is no longer making Halo, or (and hopefully this is the case), they are on a break until the next main game comes out.

Regardless, my desire to build Halo sets has never wavered. So I went searching. And… I found MANY out there. One site that I go to for directions is rebrickable.com. There are LOADS of Halo custom sets there. They do not have the bricks themselves, that you have to buy through bricklink.com.

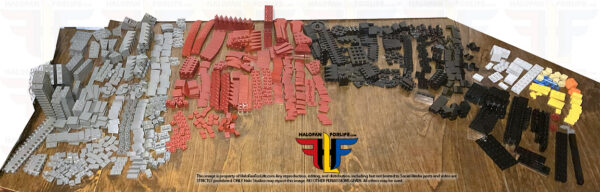
So, there I found this Anchor 9 set. However, I also found it online at AliExpress.com. They have the bricks and will send you the instructions via a QR code in an email, after you’ve received the set. The set was VERY affordable given the number of pieces in it. There are 626 pieces in all, including the model, the base, and the mini UNSC frigate. I paid just under $40 for this set. Normally as set with over 600 pieces would be between $65-70.

Fair warning, if you buy from AliExpress, expect a long time in shipping. Sometimes they are quick, other times, not so. This was one of those not so quick times. I ended up waiting almost 2 months for the set to finally arrive. I think in part, it depends on who they ship the items with. As the buyer, you do not have that choice. But then, it’s like that most everywhere anyway. And AE didn’t have an express order for this.

Anyway, enough of me talking, let’s take a look at the model. No progression pics this time folks, apologies.

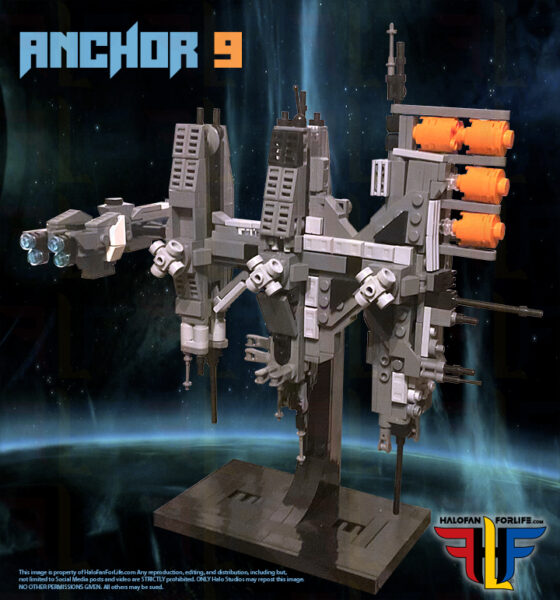
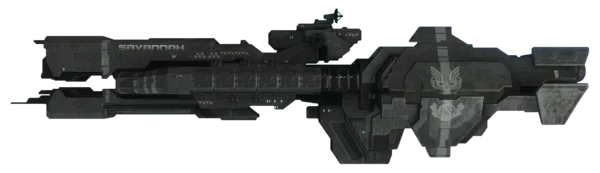
This is a wonderful set! Given the scale size (consider a mini), it’s pretty consistent with the in-game Halo Reach model. As you can see, there is a black base to put the space station on. To the left in the pic above, is the UNSC Savannah.

Now, I will say, the directions to this are a little wonky. I found I had to rebuild parts a couple of times. As well, there were a couple of times where the build was temporarily flimsy due to not much piece connection. Those were the most frustrating parts of the build. However, by the end of it, everything came together and locks in nicely.

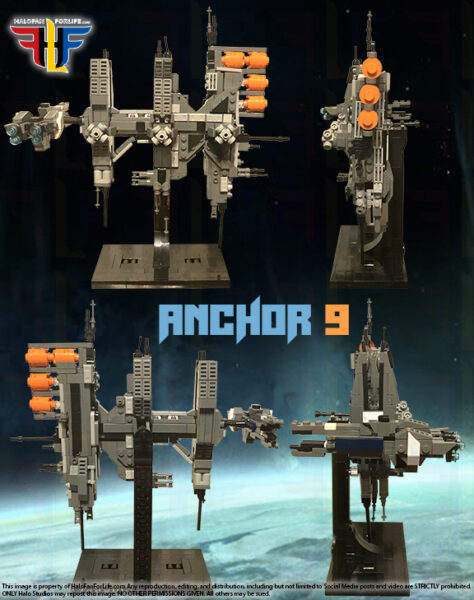
Here are my usual orthogonal views of the whole model:

The frigate is MUCH bigger than the official Mega one that came with the blind bags some time ago. This one is awesome save for one thing. I’m not fond of the big dark blue piece in the middle and may swap that out later.

The one in-game does NOT have that blue strip.

Other than that, again, given scale size, the frigate is accurate enough.

The build took me slightly under 6 hours to build. Mostly because I was building it late at night and was tired but wanted to get it done.

Here’s another 3/4 view from a different angle, showing the frigate better.

And yes, I spruced up the graphic with a Reach background and custom text.

As you can see, I now have to put disclaimers in my pics as people have been stealing them and using them for themselves, and especially on social media and YouTube.
Folks, it’s NOT nice to steal, let alone not even ask or give credit. So I’m done with sharing these without watermarks and the disclaimer. It’s not something I wanted to do, but had to, especially after a person within the Halo Mega community wanted to “scrub” my site of pics for their own use, YT channel and financial enrichment. Most of you know who it is, without me saying…

Anyway, I hope you like this model. Again, you can find it either on AE or Rebrickable. Just search for them. I can’t link to the seller because they no longer have it in stock, but others do on AE.

If you get this, shoot me an email with pics of your model. I always like to see other people enjoying these things! sal@halofanforlife.com

Also, soon I’ll be posting two other custom Halo block sets. One from Halo Infinite that is mining scale and one from Halo 2 that is micro scale but on the same size as Anchor 9.

Final note, before anyone gives me grief about “Brand Loyalty”. Folks, I didn’t leave Mega, they left us. Had they still been making sets, I’d still be buying them and reviewing them.

If they do so in the future, I of course will be getting them. For now though, these custom kits scratch that itch. It’s money Mattel/Mega could be getting instead. But without the merch to buy, well…

Official Halo Wars 2 Posters!

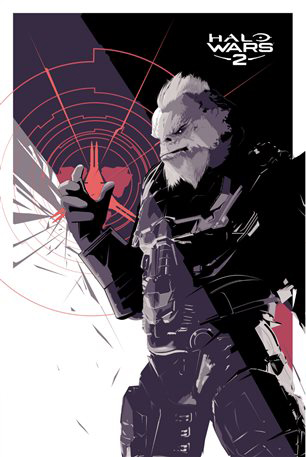
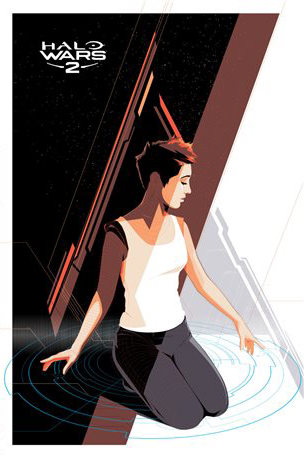
Microsoft commisioned three artists to make Halo Wars 2 posters. 2 each to each artist, one of a UNSC leader and the other a Banished leader.

These first two were created by Kevin Tong.HW2 Poster CutterHW2 Poster Atriox

The following two were created by Grzegorz ‘Gabz’ Domaradzki.HW2 Poster AndersHW2 Poster Shipmaster

And the last two were made by Craig Drake.HW2 Poster DecimusHW2 Poster Isabel

Which one do you like the best?

I think the middles pairing of Anders and the Shipmaster are fantastic! Use of a limited color palette with the striking reds and oranges really brings out the ‘WARS’ aspect of the posted.

No details yet on how these can be obtained. However, I’m told that they will be available at retail in some form. If that’s as a bonus at a Microsoft store or as individuals you can buy, I do not yet know. Once I do know though, you can bet I’ll post it here!

-Sal
Canon Fodder: Log of War

This is a reblog from Halo Waypoint:

BY GRIMBROTHER ONE
ISSUE 97

Greetings fellow lore-lovers! Thanks much for joining us again for another installation of your favorite fiction feature. Last issue, we unleashed a torrent of awesome art and accompanying background info as a deeper dive into many of the units available in the fast-approaching Halo Wars 2. Today, we take a look at a feature in the aforementioned RTS experience that regular readers of these particular pages will no doubt be intrigued by. Plus, we’ve extracted more awesome tabletop details from one of our BFFs (best fiction friend, obviously), Kenneth Peters – including some Deep Link-style lore for one of my personal favorite Sangheili ranks. And if that wasn’t enough, we’ve got some more behind-the-scenes Q&A with more of the folks behind Halo: Tales from Slipspace. So yeah, should be fun. Ready?
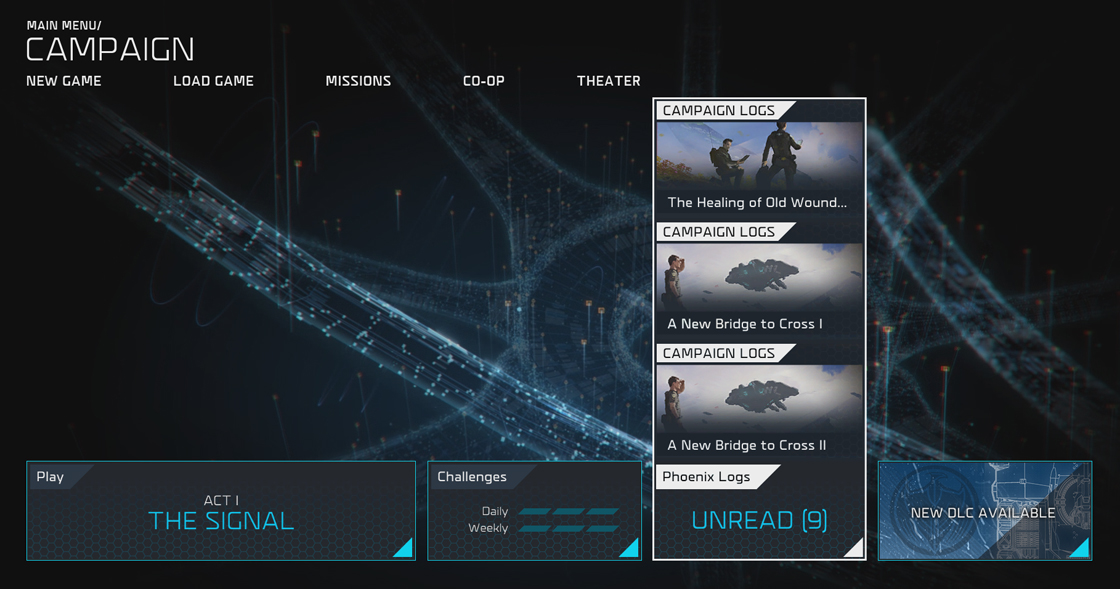
PHOENIX LOGS

One of my favorite unsung features in Halo Wars 2 is something that lore-leaning Halo fans have asked about for quite some time. Aside from a (admittedly really cool) Kinect-centric Library feature included with 2011’s Halo: Combat Evolved Anniversary, there hasn’t often been much in the way of a more comprehensive “codex”-style destination within a Halo game, which makes the new Phoenix Logs feature something I’m personally pretty stoked about.

cfphoenixlogshot2-e00c236073b347ffab48d190823f759d Continue reading

The 12 Days of Halo Toy Reviews: Day 6 Jinx Master Chief Figure

jinx-logo

Jinx is a relatively new licensee to Halo. Beyond the figure I’m about to review here, Jinx also has Halo t-shirts, hoodies, hats, accessories, eSports shirts, and more. Some of the items you can find on their site can also be found on the Halo Waypoint store.

Okay, let’s get on with the review, shall we?
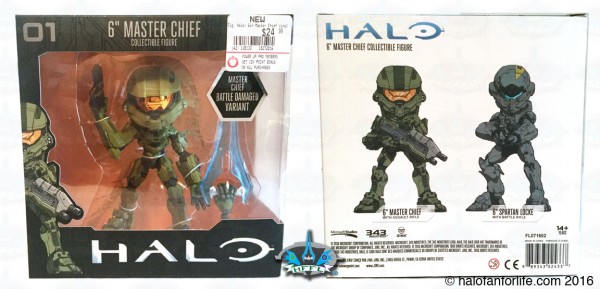
I got this from GameStop. As you can see by the price tag, it’s $25 (US). This is the battle damaged variant. Currently, the only other character is Spartan Locke.

The figure comes with a hand holding a magnum, already attached to the figure, plus a hand holding an energy sword that you can swap out.jinx-master-chief-bd-fig-box Continue reading

Halo Product Review: Dark Horse UNSC Infinity

I don’t just review toys ya know! LOL

DarkHorseComicsLogo I finally got my hands on the UNSC Infinity! Well, a scaled down replica of it, anyway…
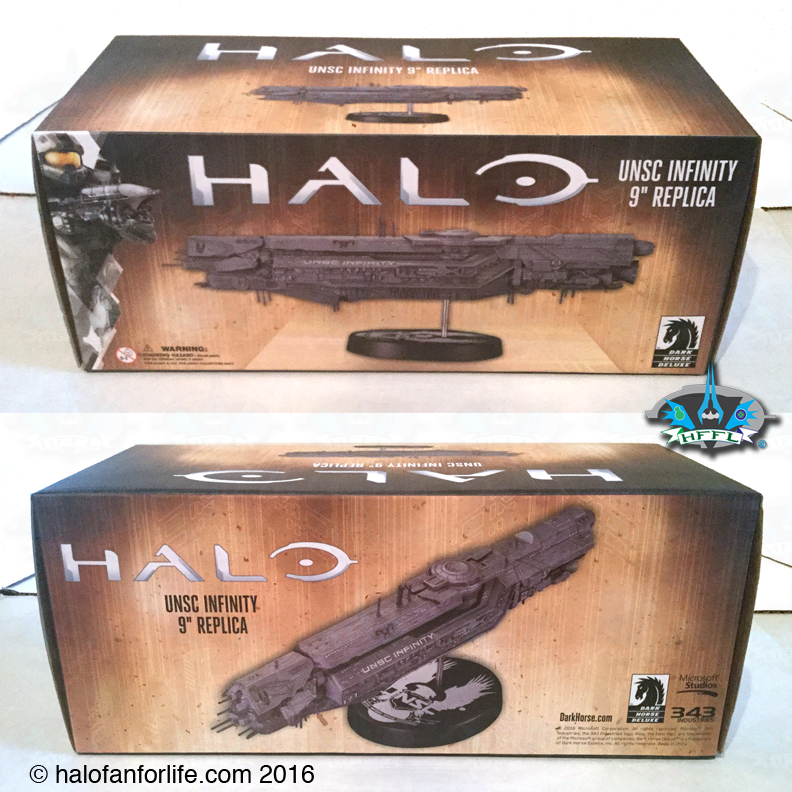

This model originally sold for between $50-60 depending on where you couild get it from. I was fortunate enough to find this at my local Target, on sale, for $35!!

The box art is nice. You see a view of the whole model.dh-unsc-infinity-box Continue reading

New Global Licensed Partners Coming to Halo

This is a reblog from XBOX.com:

Halo_Logo_Working

The Halo franchise is an award-winning collection of properties that has grown from video games into a global entertainment phenomenon. Beginning with the original Halo: Combat Evolved, the $5 billion franchise includes critically acclaimed games, multiple New York Times best-selling novels, a live-action digital series, comic books, toys and action figures, apparel and more.

In advance of the Licensing Expo 2016, a consumer products industry convention running from June 21 to 23, 343 Industries is excited to announce new global licensed partners coming to Halo, bringing exciting new Halo-themed products for years to come.

“The Halo Nation is built from the best fans in the world who have formed communities around everything from construction toys to dedicated cosplay and competitive esports,” stated head of Halo consumer products John Friend. “By expanding our consumer products line-up with new licensed partners around the world, we’re excited to offer even more options for everyone from families and new fans to our core collectors who have been with us for the past 15 years of the Halo franchise.” Continue reading