Jazwares Red Team Vs Blue Team Spartan Series 2 figure pack

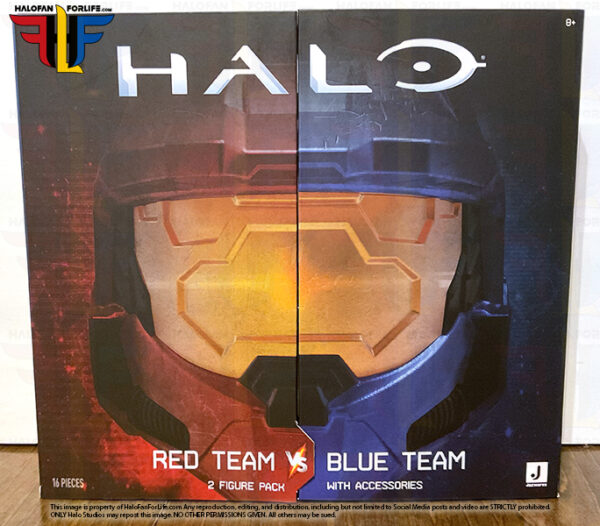
This newly released GameStop exclusive set from Jazwares is awesome! It’s been quite awhile since we last got figures from Jazwares. This set is very welcome and has nice packaging.
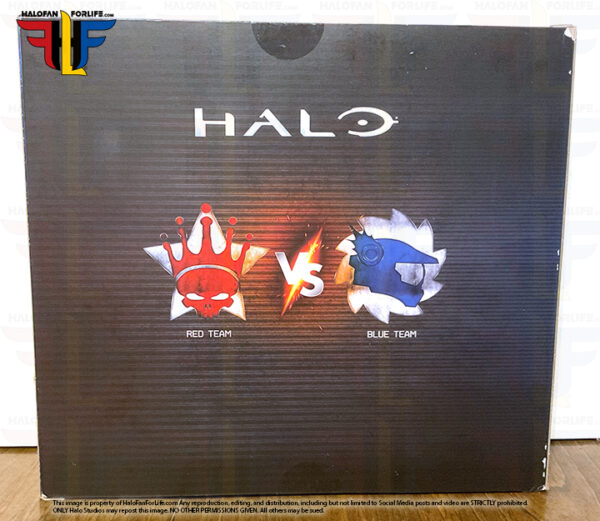
The back of the box has some nice graphics as well.
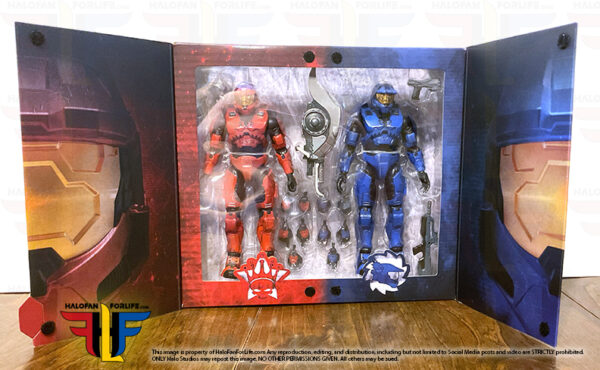
The front of the box has two flip open panels, that show off the figures nicely as well as have graphics on the inside of the flip panels.
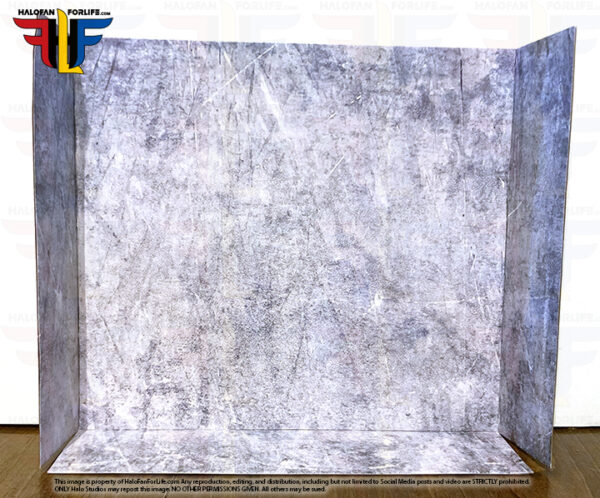
There is an insert background included. I would call this frost covered metal. But you can call it what you want. It’s a nice little addition to the set.
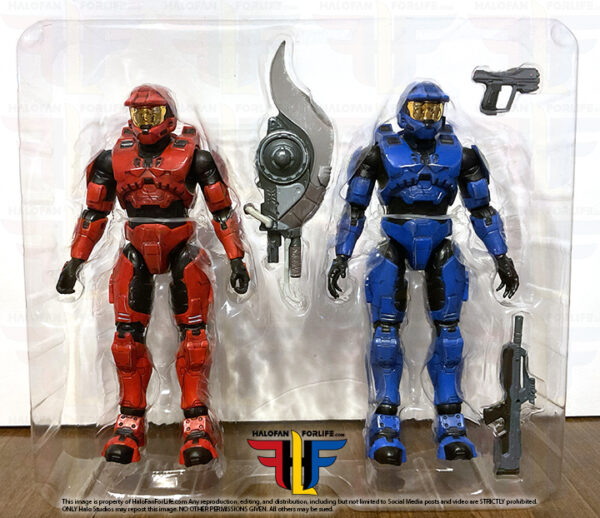
The figures come in a plastic tray as usual. Each figure is held in place by just one plastic strand. I’m thankful for that as other toy brands used to have too many of those and they were tight and often warped the figures. That is NOT the case here. As you can also see, this tray includes three weapons. A Brute Shot in the middle, magnum at the top right, and Battle Rifle at bottom right.
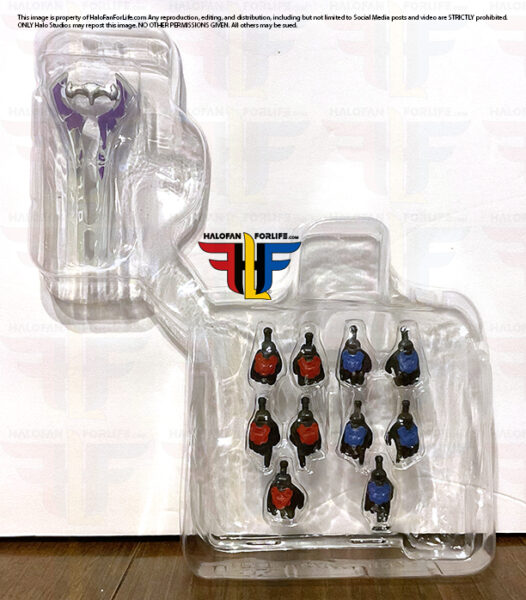
There is a second tray behind the figures that includes an Energy Sword and several hands for each Spartan.
Let’s take a closer look at weapons and extra hands.
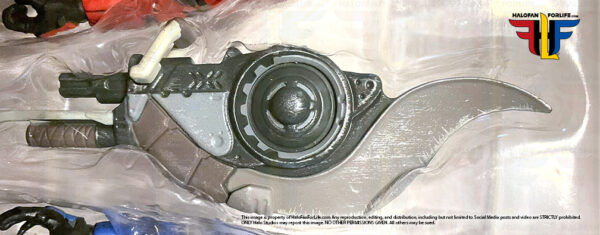
The Brute Shot has some great detail to it.Maybe a little blacki wash to bring out the details would have made it better. But then, that’s hard to replicate exactly. So it’s understandable why Jazwares didn’t do that.
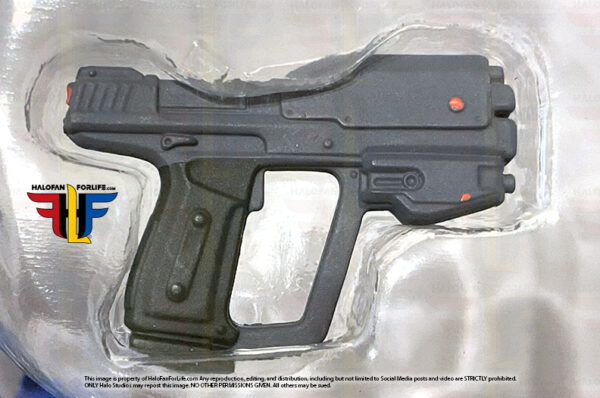
The Magnum is nice. Two-toned with added red highlights.
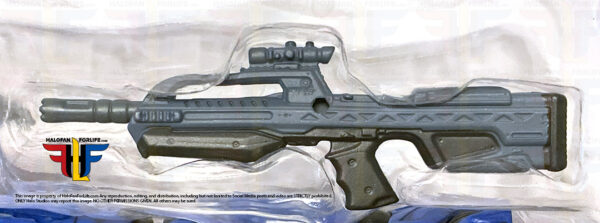
The battle rifle is also two-toned. One thing about this weapon. You can see the hole in the middle. Normally that’s to add a pin to and attach to the back of the figures. However, there were no added pins in this set.
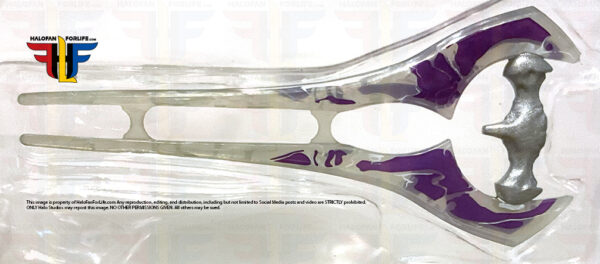
Now, I must be honest here, I’m NOT a fan of the deco on this energy sword. I’d rather it be all light blue. no energy sparks, just light blue. This clear version with purple marks just doesn’t do it for me. It’s only one of two critiques I have of this set though and since the set comes with other weapons, I can easily choose to display the figures otherwise.
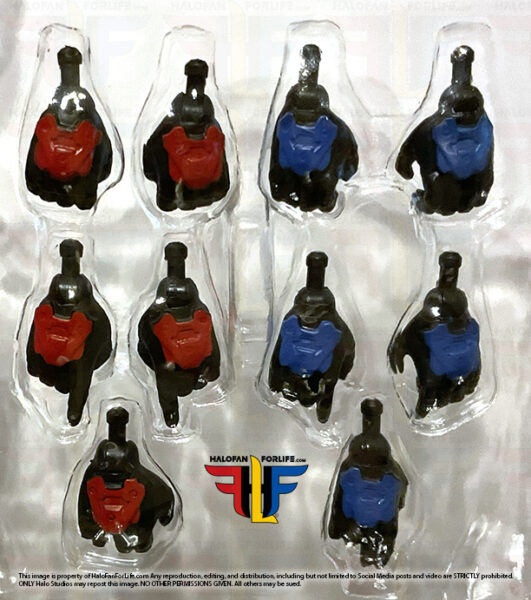
Now, when it comes to the hands, I found it strange that not the same hand pairings were with each figure.
For the Red Spartan you get:
* Left and Right Closed Fists
* Left and Right Pointing Hands
* Right Energy Sword clasping hand.
* And on the figure itself, Left and Right Gripping hands for weapons

For the Blue Spartan you get:
* Left and Right Gripping Hands for Weapons
* Left and Right Pointing Hands
* Right two-fingered pointing hand
* And on the figure itself Left and Right Flat-ish hands for palming weapons.
(I use the right one for palming the battle rifle. You’ll see that later.)
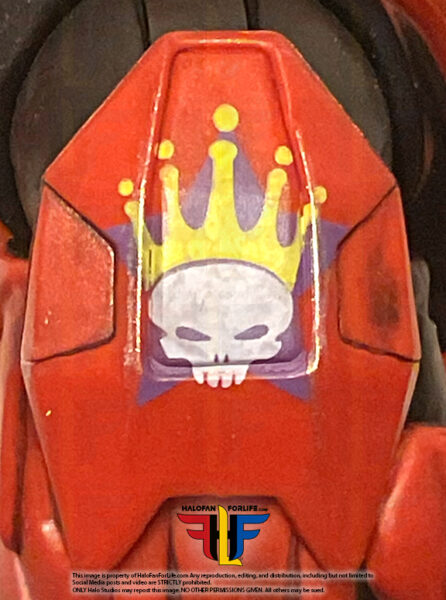
The emblem on the right shoulder of the Red Spartan is very cool! If I recall, it’s the Skull King emblem with the Star background.
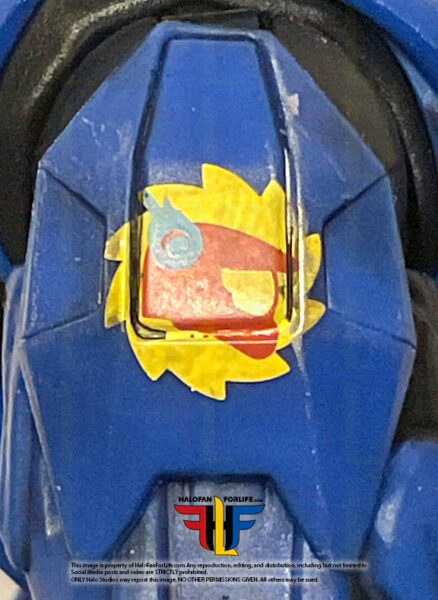
Likewise, the Blue Spartan has a great emblem also. This being the Helmet Stick emblem with Saw background.
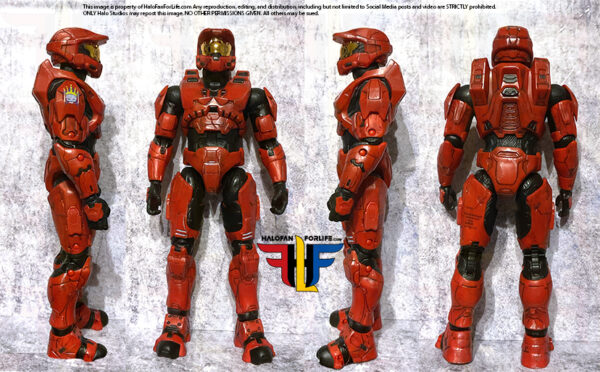
As usual, here is my orthogonal views of one of the figures. The Blue Spartan’s sculpt is the same. Only the color of the armor and emblem are different.
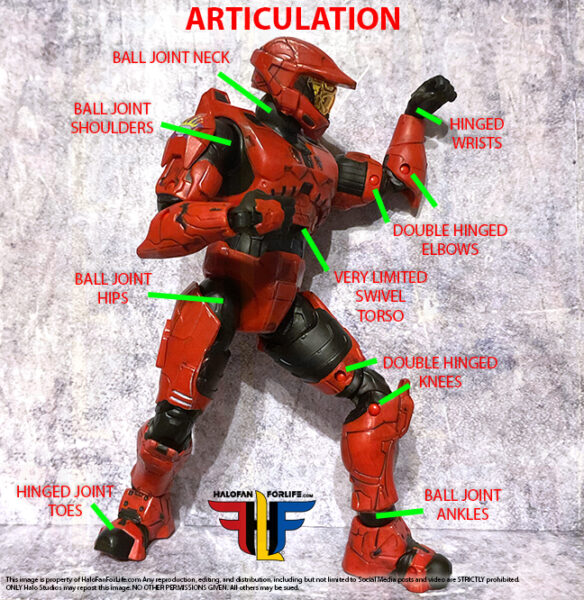
Each figure features the same articulation. My only minor complaint here is that I wish the torso swiveled more. Otherwise, STELLAR articulation!
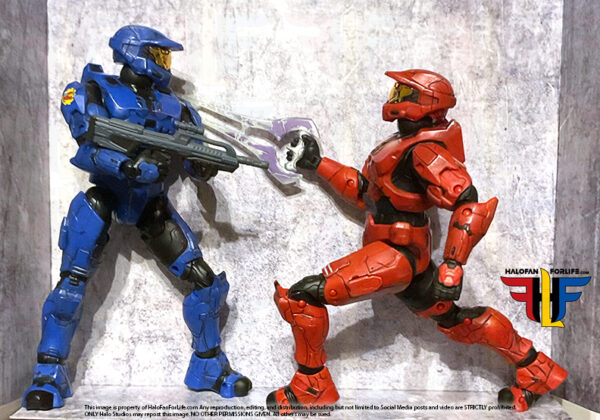
And a final action pose to round out the pics!
This set retails for $49.99 and again is exclusive to Gamestop. If you buy it in store, you’ll pay about $55 for it with tax. If you have a power up membership, you may be able to get a discount or if you have the monthly $5 coupon, you can use it for that. Same goes for if you buy it online and used codes. I didn’t have any, so I ended up paying $60 for the set, shipped to me. I tried to find this locally but, my local Gamestops didn’t have it in stock.

Is this a worthy purchase? Absolutely. I would have preferred to have paid less. However, this is an instant classic with the Red and Blue colors. The packaging having flip doors adds to the pieces.
Although I opened my set for this review, I put everything carefully back in the trays, then box. And that is where they will stay.

This is one of those few items I think is better left in the box.

If this review gives you an informed decision on whether to purchase the toy or not, please consider a small donation (50 cents) to the blog.You can donate via PayPal to jedisalpitt2002@yahoo.com. Or just click the paypal link at the right on the main page of the site.  It’s much appreciated and helps ensure that HFFL stays registered/active on the internet. Thank You.

-Sal
Custom block built MONCTON class Orbital Weapon Platform

In my ongoing series of custom Halo block built sets, I came across this one on AliExpress. It’s a small set at Micro scale. Pretty affordable too. So, I know I had to buy it and build it, to show you all.

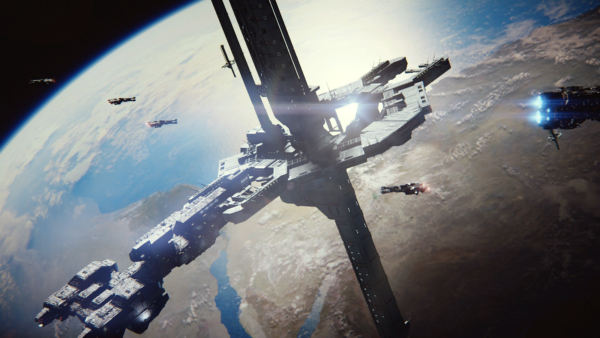
First, let’s take a look at Cairo Station, one of, if not the most famous Orbital platform! As you can see, it has a Frigate docked with it. this is from Halo 2.

Alright, let’s start with the build!
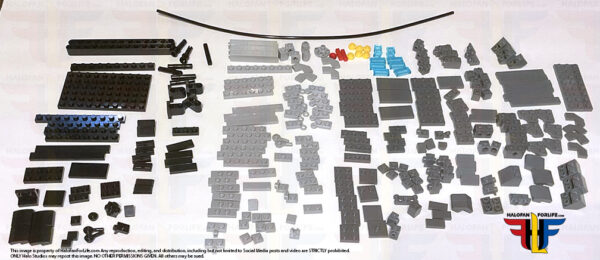
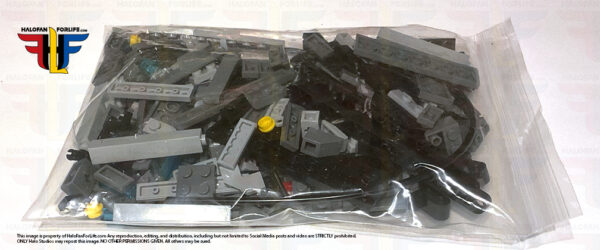
This set is small, with 273 pieces that come in only one bag.

Here are all the pieces sorted out. Take note of that long tube piece at the top. I’ll go over that more during this review.

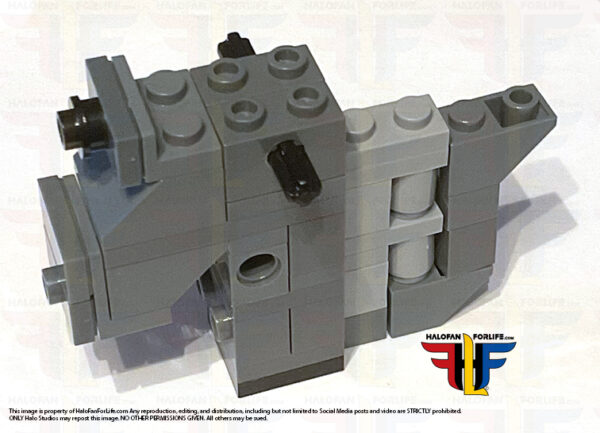
We first start with the center core of the station. It’s a fairly complex build with side builds, holes and pins. This makes the center structure pretty strong.

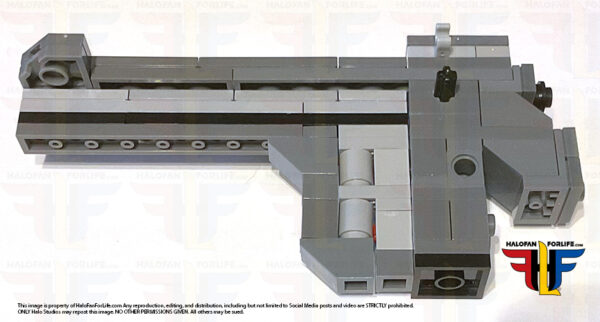
The lower spire is built up. This kind of looks like a gun at this point, don’t you think? The build is pretty easy at this point.

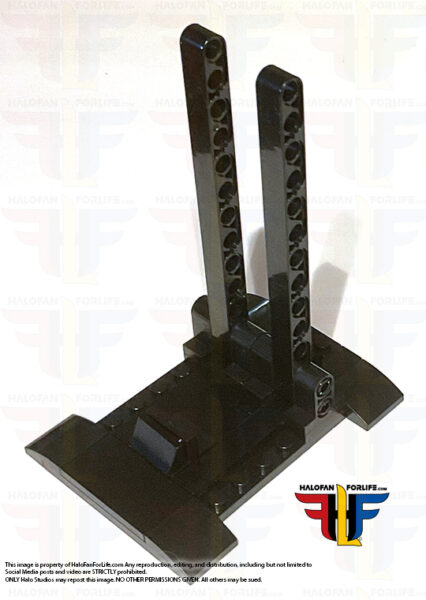
Normally during these builds, the stand comes last. However, in this case, the stand is needed. Can you build it later? Yes. However, I recommend following the instructions as given.

Once the stand is built, you attach the lower spire. Now, I will say, I’m not fond of the holes showing and would have preferred them being covered up. But that’s a minor thing.

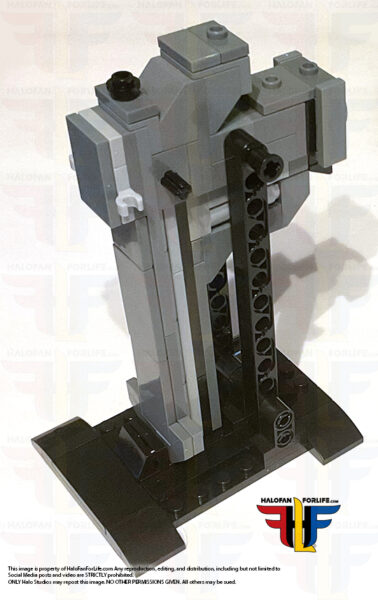
The upper spire is built. NOTE, here is where that long tube is inserted into the build. It’s way too long. However, that’s fine as it will be cut to the right size later. In the immediate pic below, only a portion of that tube is shown.

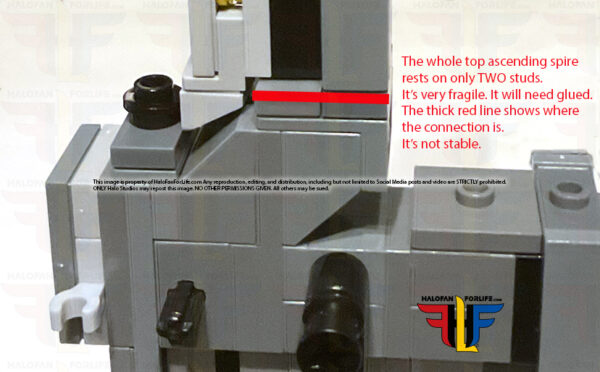
As you can see by the next graphic, the top spire barely sits on the build. And yes, I’m going to glue it down, to stay in place. I use krazy glue to keep parts in place. Be EXTRA CAREFUL if you do this too, to not stick your fingers together OR use too much glue and it shows on the outside of the pieces. You do not need much, so use it sparingly. It will hold tight fast!

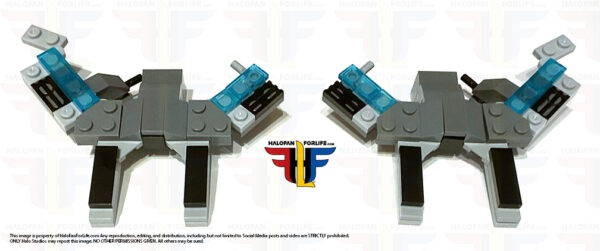
Next up is the middle docking sections. They are built in mirror of each other and connect around the middle core section. I think I’m going to see if the mini frigate from the Anchor 9 set fits in here. That would be pretty cool.

As per usual, there is always a step that is a real pain in the butt to add on. THIS is that step. The docking ring is fragile. And the way the directions call for attaching them can be frustrating. It took me no less than 10 minutes to get this right because the dock sections kept coming apart. Yes… I will be glueing those together too.

Screenshot

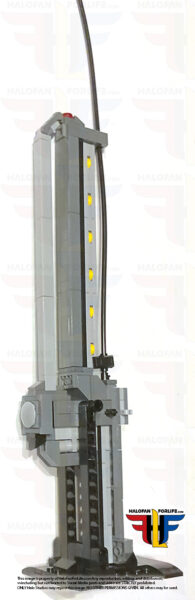
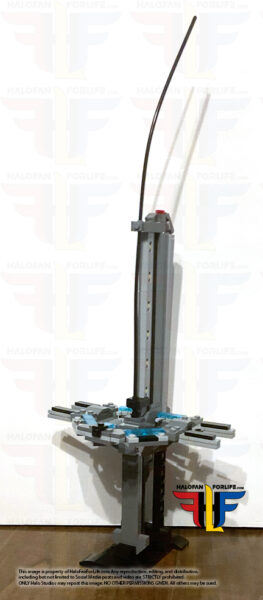
So here is the completed set, with the tube not yet cut. It’s pretty tall.

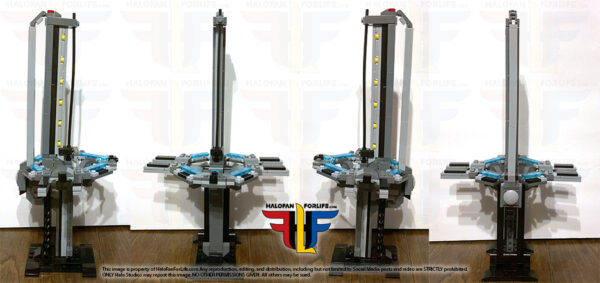
So, I cut the tube to size and as usual, show the model in orthogonal views.

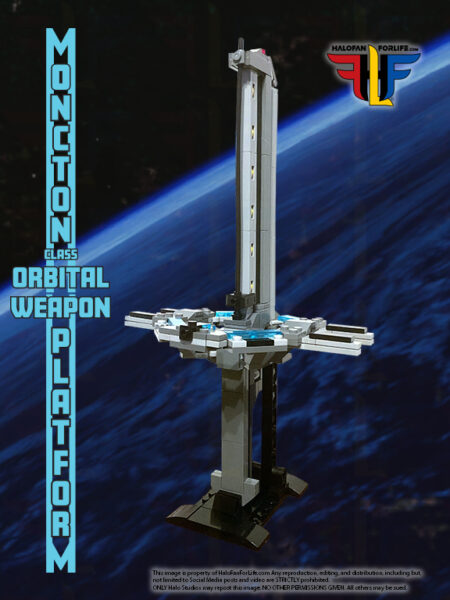
And finally, the set in 3/4 view. I’m choosing to do these last shots as the “hero” shot. Good background and additional graphics. As I was thinking about how to show the set of the model, the idea came to me to emulate the build itself. I think it adds a nice touch.

Overall, I’m pretty happy with this set. It’s simple, yes. But it’s effective as a background piece.
that one step aside, the build comes together easily.

Again at 273 pieces, it comes together quickly. I can’t recall how long it took me. I do know, it was under an hour.

The set cost $25 on Aliexpress. Shipping was very quick.

So then, do I recommend the set? Heck yeah! Again, I really wish Mattel/Mega/Mattel Brick Shop, were making these sets. But, in their absence, I need to fill my desire to build Halo sets. Unfortunately, I do not see Mattel making sets for awhile, until the next main game.

If this review gives you an informed decision on whether to purchase the toy or not, please consider a small donation (50 cents) to the blog.You can donate via PayPal to jedisalpitt2002@yahoo.com. Or just click the paypal link at the right on the main page of the site.  It’s much appreciated and helps ensure that HFFL stays registered/active on the internet. Thank You.

-Sal
Custom Halo Infinite FOB (Forward Operations Base) set

One of my most desired block built sets that I had hope Mega would make is the FOB from Halo Infinite. With Mattel/Mega not making sets currently, I’ve been looking elsewhere for sets I’ve wanted.

Thankfully, I found such a set on Rebrickable. However, that’s only for instructions. Purchasing the parts needed would be costly through either Lego or Bricklink. But, I did find the same set on AliExpress. When I found it originally, it was about $120. I wasn’t willing to pay that. SO I waited… And the sale came! I was able to get the set for just under $90. For me, that was a very good price.

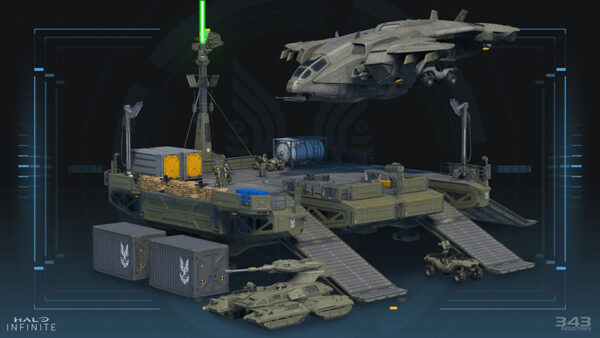
During this review, I’ll explain the differences between the in-game asset and this custom set.

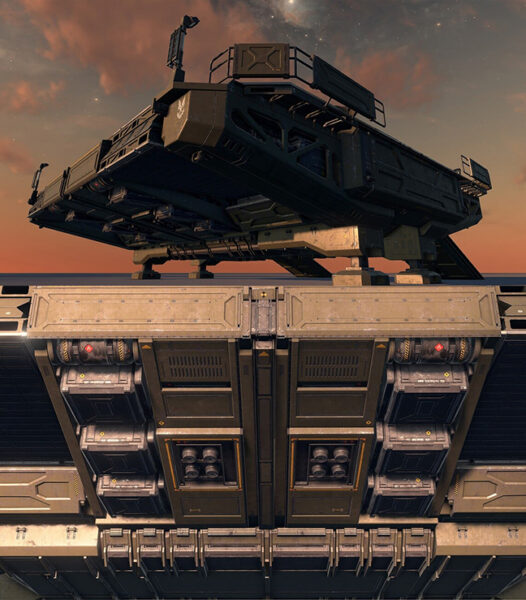
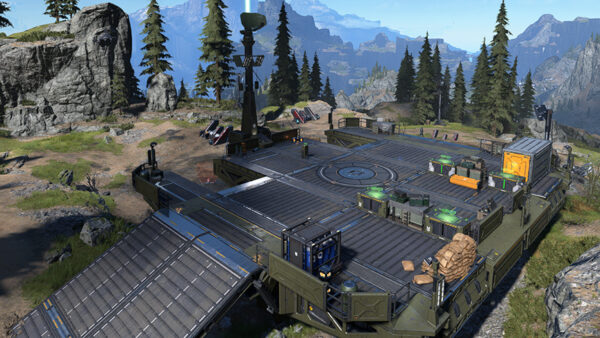
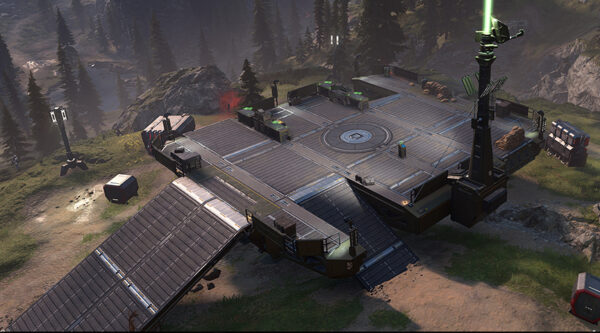
To start off, here’s a look at the official FOB from 343:
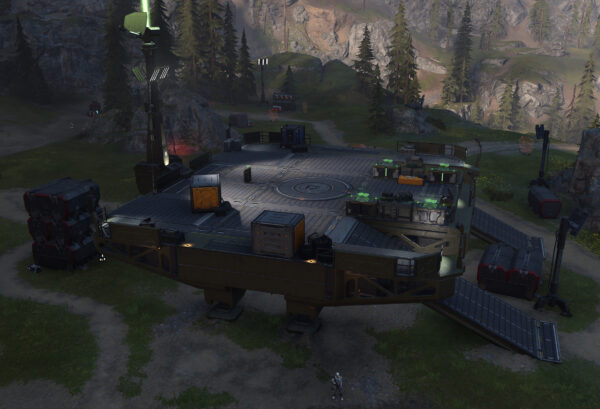
Of course, a block built set wouldn’t come with the Pelican, Scorpion and maybe not the Warthog either. that would exponentially makes the set more expensive. But I would think it would include the crates and a few marine figures.

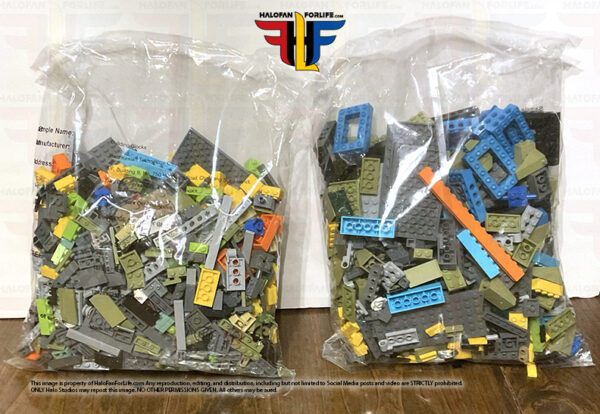
So what did I receive? Well, the set came in a big bag that included two bags of parts. Unlike official sets, these do not have smaller bags so you can just open those up and build along the way. Instead, with these off-brand sets, you need to open and sort ALL the pieces out.
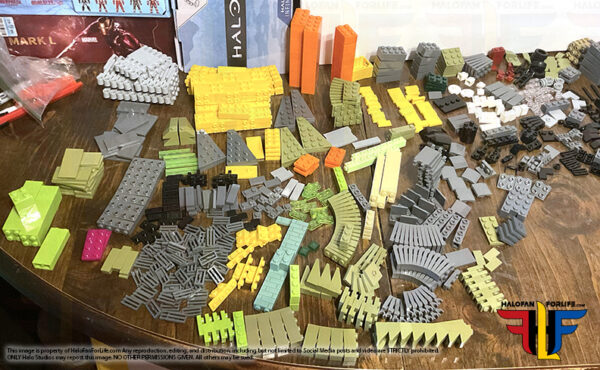
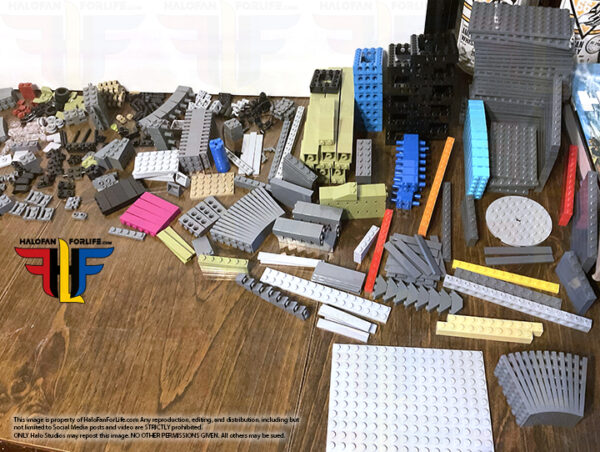
So…sort I did! The set includes 1,398 pieces. So it took up a lot of my dining room table.

I HIGHLY recommend sorting the pieces. It makes building go much quicker.

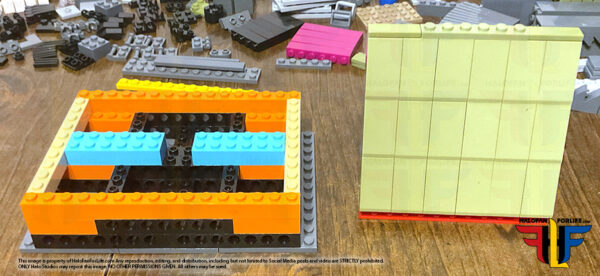
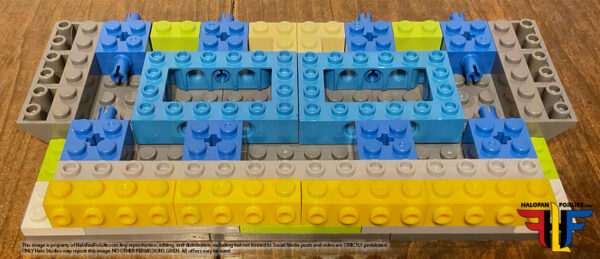
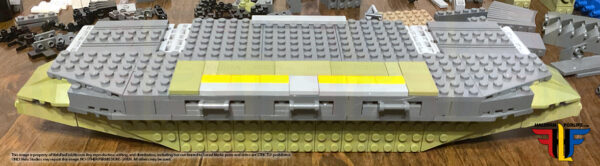
So now we begin the build. It starts off building the middle section of the FOB platform. On the left is the middle section of the middle platform. On the right is one of the wings of the middle platform.

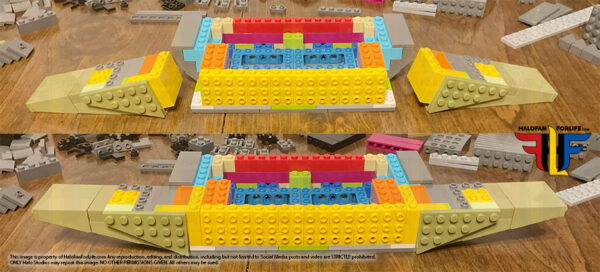
Next, we build the second wing and insert both wings into the middle section. This is pretty much as long as the FOB will be, front to back. With just a little exception. So you get to see the size shelf you may need, to place it on.

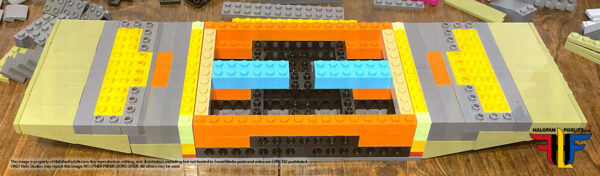
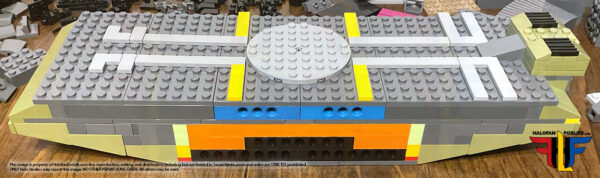
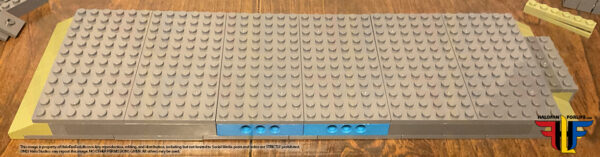
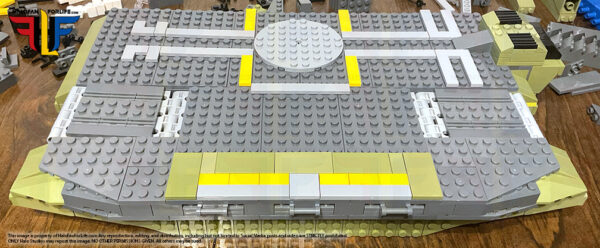
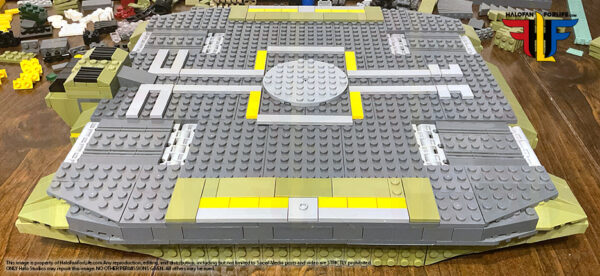
After this, we build on top the deck. To the right is the back where the tower will be placed later in the build.

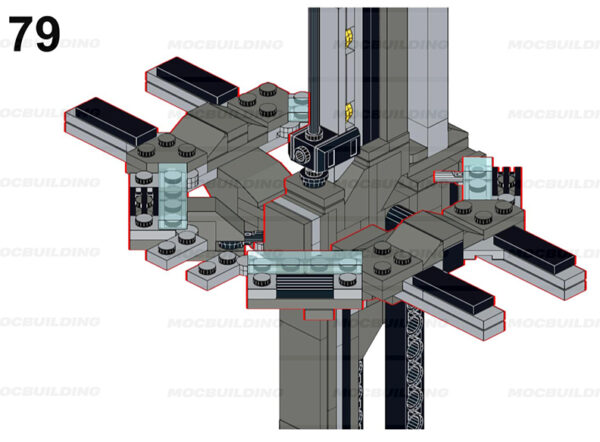
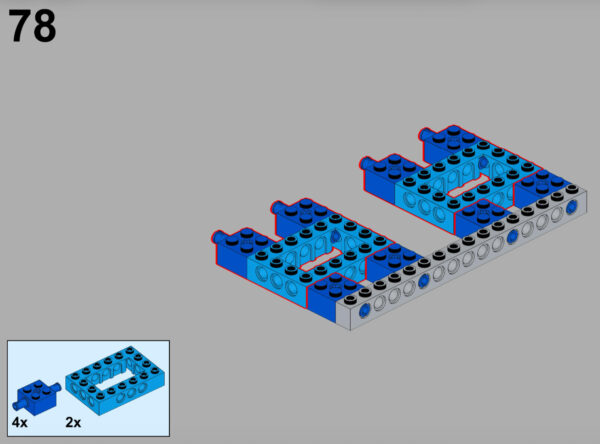
Now…there is almost always ONE step that’s a pain in the butt with these custom builds. This set is no exception. Below, at step 78, the light blue parts are supposed to have FIVE holes on the side. But they only come with three. So this step is wrong either in the instruction or the part. the seller does not have these parts, nor does bricklink.com. So…this is a big error.

Screenshot

However! I was able to adjust where the light blue pieces were placed by moving them 2 studs towards the middle. It was either that or cut off the insert pegs on the dryer blue pieces. I’m not keen on modifying parts. Especially if I do not have to. NOTE, I did look ahead in the directions to see if moving the parts as I did would destabilize the build in this section. Thankfully, it wouldn’t. So I went ahead with this minor alteration.

Here is one of the side sections. First with it’s own wings off, then assembled.

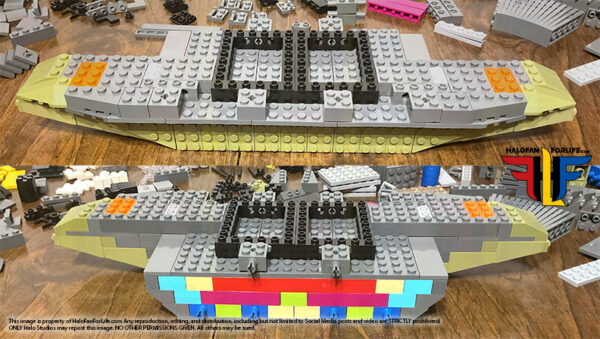
Next, the deck portion of the side section starts to come together.

More of the deck assembly is completed. As you can see on the bottom section of this graphic, pegs will be used to attach to the middle section.

This side section is complete, with just a couple of missing parts. I’ll get to that in a moment.

The side section is locked in place. the second pic shows the other side section as well, in place. NOTE, the first side section will take a little bit of effort to lock in place. However, the second side section will take considerably more effort as the FOB at this point will be at an angle if, you try to lock it in on its side. Do be EXTRA careful on this step!

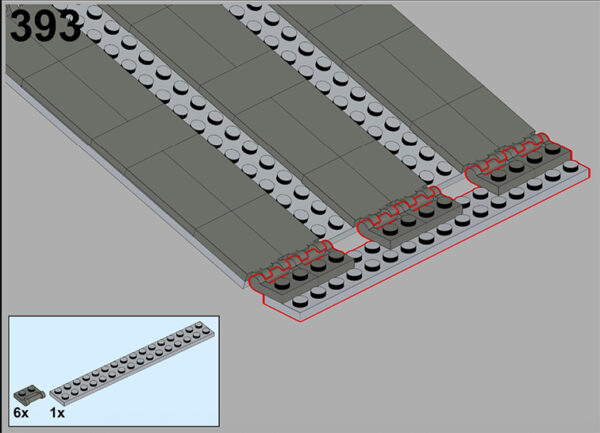
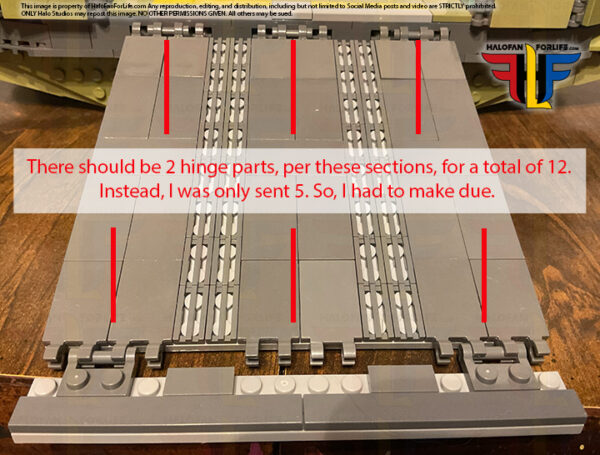
So here is where those hinge pieces should have been. The set calls for 12 of them, I only got 5.

Screenshot

I once again, made due for the time being. I placed three at the top and two below. You can se the glaring gaps though….ugh. I wish this would have been complete. But, at least they aren’t essential parts and are cheap to buy, if the seller doesn’t send them to me.

Now we add all the crates and tower. Most of these crates will be replaced with Mega Construx ones as those are more accurate. But I wanted to present this model exactly as it is, if you build it, without any modifications.

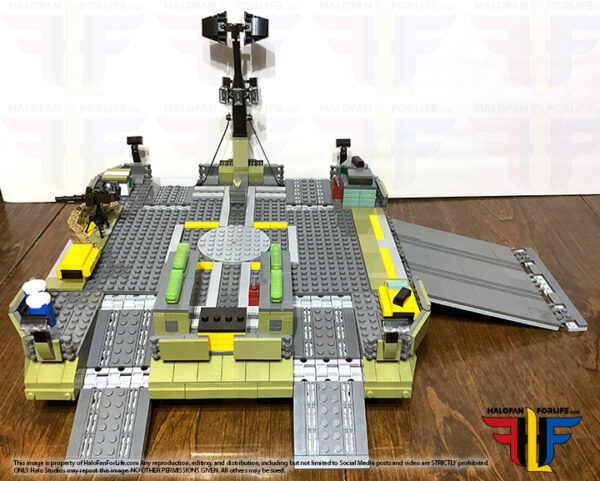
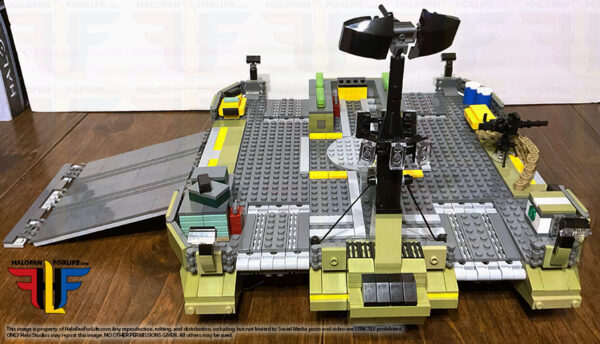
Here’s a shot from the back.

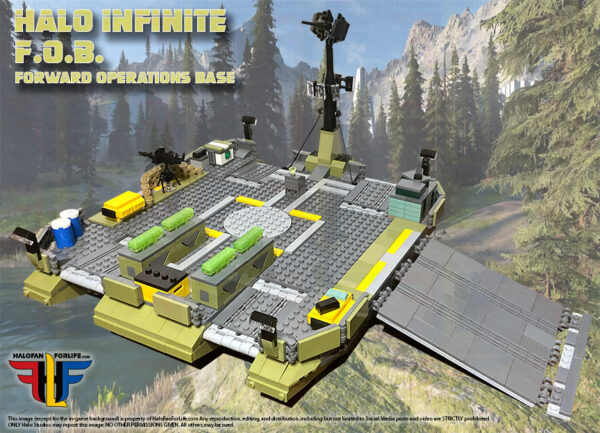
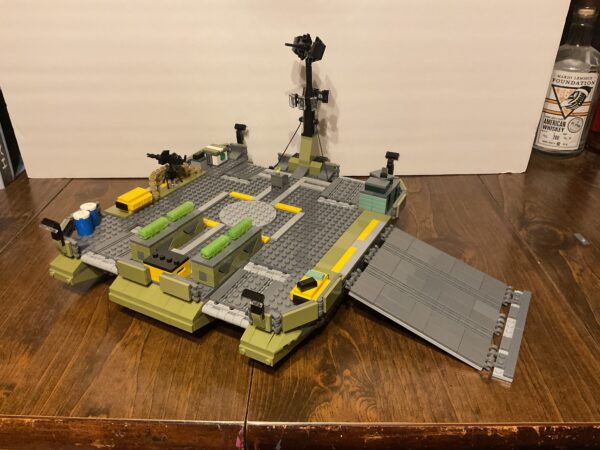
And here’s the final set, showing in 3/4 view.

Now, is this set perfect? No. Will it make do, until Mattel makes one? Yes. If Mattel never makes one, then this is quite good. With some modifications, this can be an even better set.

Of note, this set does NOT include the four legs that the in-game model has. The detail isn’t great on the underside either. So I’ll look to modify that to.

This is ultimately what is SHOULD look like. Size wise, the set is not long enough front to back. I can’t really fix that without a MAJOR upgrade. But, I’m okay with the set size as is.

You can see by this shot with the crates mostly cleared that the block built set doesn’t quite match up in width from large ramp to the other side.

Again though, I’m quite happy with the set and will add in as many reasonable modifications as possible. Once I do that, I’ll put a Warthog on it as well as plenty of Marines and then post that at a later date as an updated article for this set.

This set took about 5 hours to build. At 1398 pieces, it’s pretty hefty. As mentioned, I got this on sale for just under $90 on AliExpress.com. It’s currently anywhere from $120-150. So search for the best price or wait for a sale.

Was this worth it to me? Absolutely. Do I recommend it? You bet! Again though, buyer beware as it may be missing parts and you may have to either contact the seller or buy missing parts elsewhere. And again, for that I recommend bricklink.com.

Oh…and for anyone who thinks that last built image was taken from somewhere else? Here is the unedited pic I took of it! A bit of work went into sprucing it up!! LOL

Oh, how I wish Mega would have made this set though! I can’t state enough how much I wanted this set. It would have been a fantastic Signature series model for Halo Infinite.

I (we) can only hope that they will continue to make sets at a later date, though now under the “Mattel Brick Shop” branding. I just hope though that they do NOT go the route of static pose figures, like they did with their Master of the Universe line. Block built sets MUST have articulated figures!!

So, what do you folks think of the set? Would you be more apt to buying it, now that you’ve seen one built?

If this review gives you an informed decision on whether to purchase the toy or not, please consider a small donation (50 cents) to the blog.You can donate via PayPal to jedisalpitt2002@yahoo.com. Or just click the paypal link at the right on the main page of the site.  It’s much appreciated and helps ensure that HFFL stays registered/active on the internet. Thank You.

-Sal