
![]()
Mega Bloks UNSC Elephant Troop Carrier: Set #97381
Technical Specifications:
Build Time: 1 hours sorting, 5 hours building. You time will likely vary from mine as my time includes added time for taking pics for the review
Set Piece Count: 1311
Minifigs: Spartans Carter and Jun from Halo Reach’s Noble Team, Halo 4 UNSC Medic, 2 Halo 4 UNSC Marines-one pale skin, one brown skin, Halo 4 UNSC Marine Officer
Weapons: 2x Sniper Rifles, 2x Rocket Launchers, 3x Assault Rifles, 2x DMR, 3x Magnum, 2x Saw, 3x mounted machine gun turrets
Accessories: 3x Marine back pack (sand color), radioman back pack, Jet pack, micro Serina holographic A.I.
Special Features: Drivers hatch opens/closes, front main hatch open/closes, 4 top hatches open/close, rear hatch opens/closes, crane rotates and pulley moves up and down, large turret rotates 360° when display, also fits inside of Elephant
Cost: $100
And on with the pics! (Click pics to make BIGGER)

The front of the box is of course well done. The figures are not in a window this time, but are display on the front as part of the printed design.
The back of the box is equally well done. It shows much of the moving features that the set has and has a nice sampling of the current sets available.
The contents of the box are many bags of pieces. Some bags hold other bags of pieces. 
After a bit of time I got the pieces all sorted. I clipped of just a little bit on the left side in the pic above. As you can see I sorted green to one side with black and silver on the other side. The tread and crane pieces were at the top, as I knew I wouldn’t need those until midway into the build. 
And so I began the build. Above shows how the base of the Troop Elephant is put together. The struts continue this way throughout the rest of the base of the vehicle.
Next we see that Mega gives us many tan camo bloks to place on the underside to keep the Elephant steady as we build on top of it. From there, we see some of the frame of the vehicle built up. Note in the bottom right corner that the micro Serina figure is in place on her holo table. It’s fine there, however, since that is a potentially fragile piece, I suggest you set the micro fig aside and add it at the end of the build.
The treads and their covering pieces come together. Take note of the rubber treads themselves. I made sure to have them all going in the same direction. You don’t have to. That’s just me being a little particular about how the treads went on.
One thing I do want to note is that there are many stickers that go on the covering built sections. Those are shown until the end of the build. I would have rather had these show to me during this phase of the build as it would have made it much easier to place the stickers. So, when you get yours, you might want to flip to the end of the instruction manual to see where the stickers go on the sections above and place them then.

Here we see treads and their coverings attached to the Elephant and some more of the walls of the frame built up.
Above is a section that bridges the vehicle making it much more sturdy. As you can see, it also includes stickers on it. Those were shown at that time of the build.

The folding stabilizing “feet” are added. These on are there for when the top main turret comes out to help keep the vehicle from tipping over. Mind you, that’s if the vehicle were real. It’s not needed on the Mega Bloks vehicle. However, they kindly included them for better game accuracy.
The top side cannon turret in stages of being built. It rotates 360° and it has to rear sections that pivot in/out.
Here we see how the turret is housed. Note the top two green pieces are ones that have the holes in the sides. The pivot pins are attached within. You’ll see how this works later in the review.

Next the top rear hatches are assembled and put into place. Each have two pivot points. This will make it easier for the cannon to come out as well as give you access to the rear area of the Elephant to place your figures within.
The front hatch is built and put into place. The red arrow above shows where it’s attached so that it makes it a ramp for the marines to board the ship or come out of.
The drivers windshield attaches in a similar manner as the front hatch was. I kept this piece in it’s plastic bag until this very step. I always worry about pieces like this getting scratched up, so I don’t take them out of the plastic until they are needed.
The rear hatch/ramp is built. I have to say, I like the design of this very much. Nice bit of flair that was added to it.
Above we see the ramp flipped down and the top hatches pivoted out. This allows us to see the troop are much easier. I think this looks very neat from this angle. 
The crane and machine gun turrets are assembled and attached. I still don’t understand why the ship needs the crane. That’s not a Mega Bloks thing though, it’s a Halo Wars thing. Still,it came in handy at the end of the build. (You’ll see that later too!)
So now we come to the point where we take the stabilizing pieces off. You have a decision to make here. You can leave these on. In doing so, you make it ale to be display on a shelf with many more contact points to the shelf. You also help to preserve the treads more with those pieces on. If however, you choose to play with the set, then by all means, take them off. I took them off during the build to show the vehicle as it is intended.
So now we come to how the cannon comes out. I suggest you open the pic above in another window so you can see better what I’m talking about here. The red circles on the left show the contact points for the cannon when it’s in place topside. Those parts are part of the build of the middle top hatches. The extend slightly and that’s all they need to do. They are quite enough to keep the cannon in place. You flip the cannon out (carefully), put the hatches back in place, then rest the cannon on those pieces. That was a great bit of design on Mega’s part to figure out how to make that all work.
Now we move on to the orthogonal views of the vehicle and mini figures.
The back 2/3 of the vehicle are symmetrical with just slight exceptions to weapon pin placements.
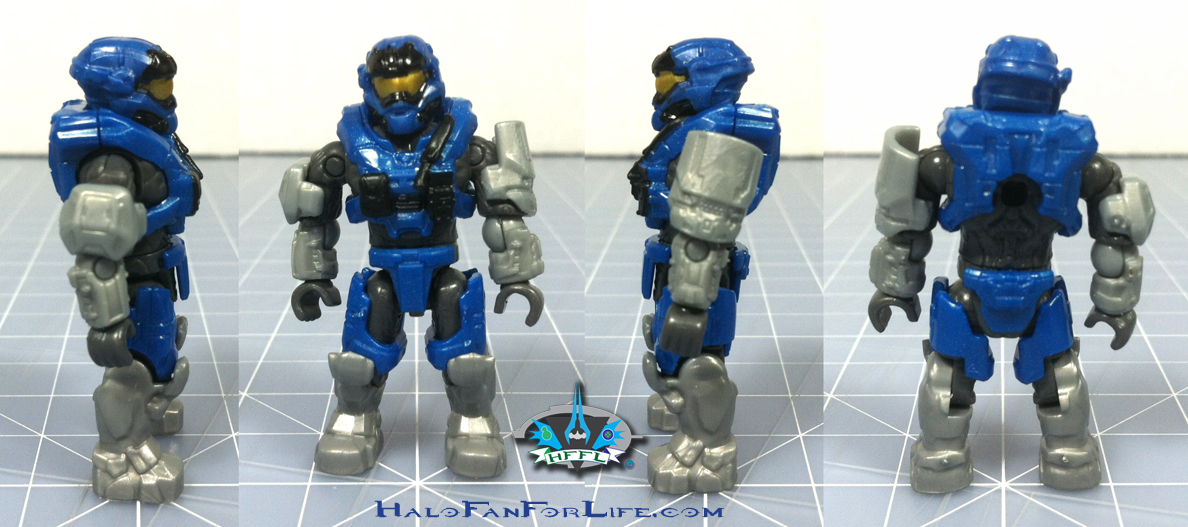
The Carter figure looks pretty good. The only thing I don’t like is how low the smaller shoulder armor is seated on the arm. I might move that up and (carefully) glue it into place.
The Jun figure is outstanding. Perhaps a little more paint detail on him. Still a very fine mini figure.
The marine officer is done nicely. With exception to the chest piece and the head, it’s exactly the same as the other two marines included in this set.
And the other two marines. Only difference here is skin color.
I was greatly looking forward to the medic figure in this set. I had a slight disappointment with the head of the figure. As you can see, it’s got s tinge of yellow to it. No, that’s not the lighting, it does have that tinge. See below…
Here I’m showing the comparison between the original medic (left) and the new removable armor medic (right). See the discoloration?
Just for the heck of it, I swapped the heads to see what each would look like. I quickly swapped them back as I didn’t like the way they looked. Also note that the new medic does not have the thigh stripes as the older one does.
There are plenty of weapons included in this set. More than what the mini figures need. Apologies on the washed out marine back packs.
This odd piece came with my set. It’s not listed at all, so I know it was included by accident. I just wonder which set it was supposed to come with?
Here are the tan pieces left over. That’s 29 pieces. I’m SO glad Mega went this direction with supporting pieces instead of the older solid red or yellow pieces.
I made a little bunker with them, see in two views above.
These were the pieces letter over from the build. You know, with all the cool features that are in this set, it has everything but the kitchen sink…
BAM! The kitchen sink! LOL. The grey tile would be the basin of course. It even has hot and cold knobs and the faucet, plus a small drying rack to the left!
What’s great it that the section just rear to the drivers area fit the sink in perfectly!!! And here we have the completed set with stickers, figures, (and sink)!
Summary: The set is a long build. I didn’t do it in one sitting. That was due to my right arm hurting at the time (still hurts as of this writing). However, you can do it in one night, just be prepared for several hours of sorting and building. The build is pretty accurate to the in-game source.
Overall Rating: I give this set 8.5 out for 10 medals. This set has excellent value. Given that the price is $100, you get 1311 pieces. That’s WELL over the piece count for 10 cents a piece. That’s actually 7.6 cents (US) a piece. With six mini figures that account for $18-21 of the set, that leaves roughly $80 for the vehicle. It’s totally worth that, IMO.
So why did I give this a 8.5 instead of a 10?
• The directions often made me make a mistake in the build. Two times I had to go back and replace black pieces with green. At those times is was hard to tell that it was a green piece needed, not black. Also, I made a mistake with one black piece, again due to the directions. It called for a 1X4 books with the side holes on it. It’s nearly impossible to tell that from the directions as what is printed does not show those side holes. So I had to go back and fix that a few steps later. That was the most frustrating part of this build.
• Most of the stickers were placed at the end of the build. As mentioned earlier, many could have been applied earlier in the build to make it easier to apply them, rather than having to flip/turn the completed model around.
• And specifically for my set, the right hand on my Carter figure is too small and can’t hold a weapon. It’s why you don’t see him holding one in the final shot. 🙁 I seem to be having a run of bad luck when it comes to figures as of late.
I think that’s due to the new style figures. It might possibly be due to a new manufacturing plant. Though I don’t know if that’s the case.
Do I recommend it? Yes. The issues I had with the build are far superseded by the end product. Lots of moving parts. I love that in a building blok toy! It’s pretty game accurate, which is important to me. With 6 figures, two of which being named Spartans, it takes this over the top.
If you have any questions about this set that I didn’t cover in the review, please do not hesitate to ask me. Either reply below or e-mail me at [email protected]
Thanks for reading and let me know what you think of the review. If you get this set yourself, please let me know your thoughts on it too!
If this review gives you an informed decision on whether to purchase the set or not, please consider a small donation (50 cents) maybe. It’s much appreciated and helps ensure that HFFL stays active on the internet. Thank You.
-Sal
I did find I was having the same issue, sometimes it is very hard to tell the green and black apart. I woukdhave rather them print a lighter, inaccurate green for the instructions just to get more colour differences.
One of my marines (and a Spartan from Crimson team) have now had hands too big. They can hold a weapon, but its too loose for any one handed grips.
Yes, that’s my thought too on the colors in the instructions. Go lighter in the green. We can figure that out. As for the black pieces, Mega could use some 3-d shading to let us know that the piece isn’t flat. As for the figures, I’ve had several issues over the last few sets. I’ve gotten it straightened out with Mega and the sent me replacements. I hate to bother them again less they think I’m trying to take advantage of them or something. It’s not the case, but I don’t want them to even consider it.
Nice review. Lots of details and pictures. Looking to pick this up on sale or after the holidays. Gotta hold on to my money for the Scarab. This would look great next to my old Elephant and my mammoth.
Indeed it will look great next to them. I meant to post a comparison shot of the three. Perhaps I’ll still do that?
Nice Sal! I am hoping that I can get some time back to start building the sets you have shown. There’s no rest for the wicked I guess…
As always, great job on the review. The pics are top notch!
Thanks kindly. I took 85 pics of this. I didn’t use about 5 or so. The rest were trimmed, lightened as needed, aligned with others and so on, to be posted in the review. The photo editing alone took me 3 hours. I put a lot more into these reviews than just a few minutes worth of video.