On Facebook, Mega Bloks released a pic of their 2014 convention exclusive figure. Feast you eyes on a newly articulated, removable armored Cyan Spartan Mark VI (Halo 4 style) Continue reading
Category Archives: Halo Mega Bloks/Construx
New Halo Mega Bloks Minifigures soon!
Mega Bloks let know via their Facebook page that the new articulated mini figures will be available in stores soon. Here are some shots of those. They also have removable armor. Continue reading
Halo Mega Bloks 2014 poster!
Every year, Mega Brands (parent company of Mega Bloks) makes a poster showing many of the new sets coming out for that specific year. This year they’ve put together a very nice one. See below. Continue reading
Fan Made Ragnarok Diorama using Halo Mega Bloks
I came across a thread on a Halo Mega Bloks fan site that showed a Ragnaok diorama.
The following was made by “Scott ‘warmaster’ mckie“. From here, I’m going to let him use his own words as they were in the original thread.
Hi guys, i started this project for bloksfest2014. I never thought it would get to the size or quality that it turned out, its was massively liked at the show and won me first place in the diorama competition and won me a pelican set signed by mega themselves!
The build.
Time: 6 weeks
Weight: 45kg
Length: 5ft
Width: 2ft
Cost: around £100, £200+ inc figs.
So heres the start
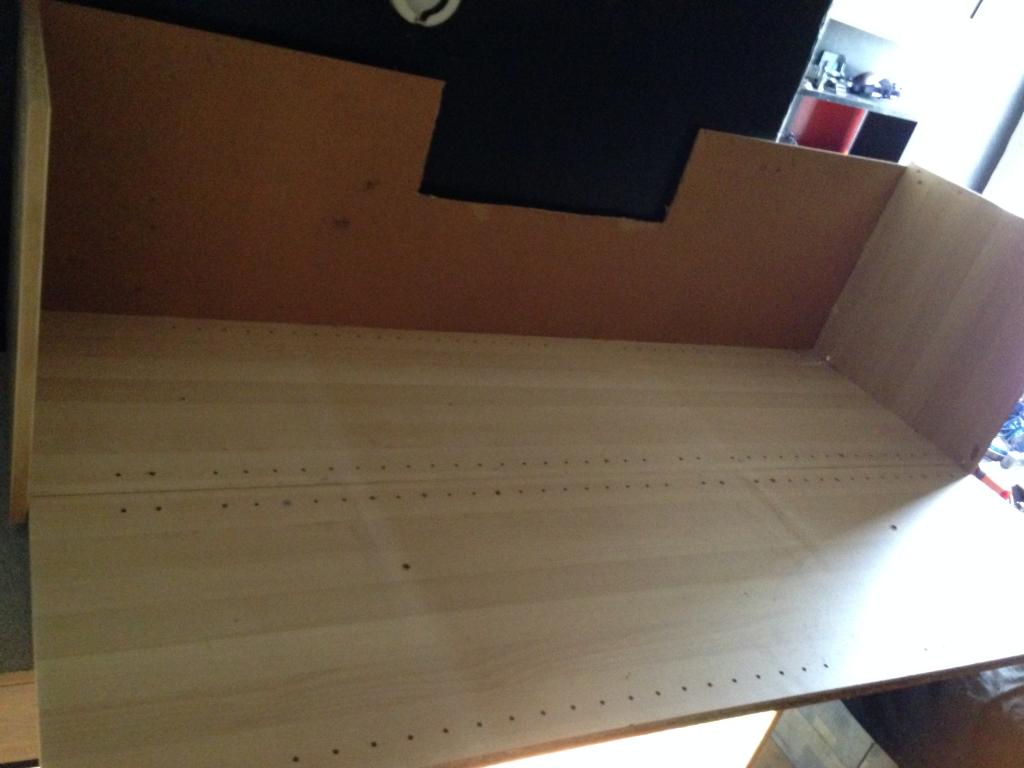
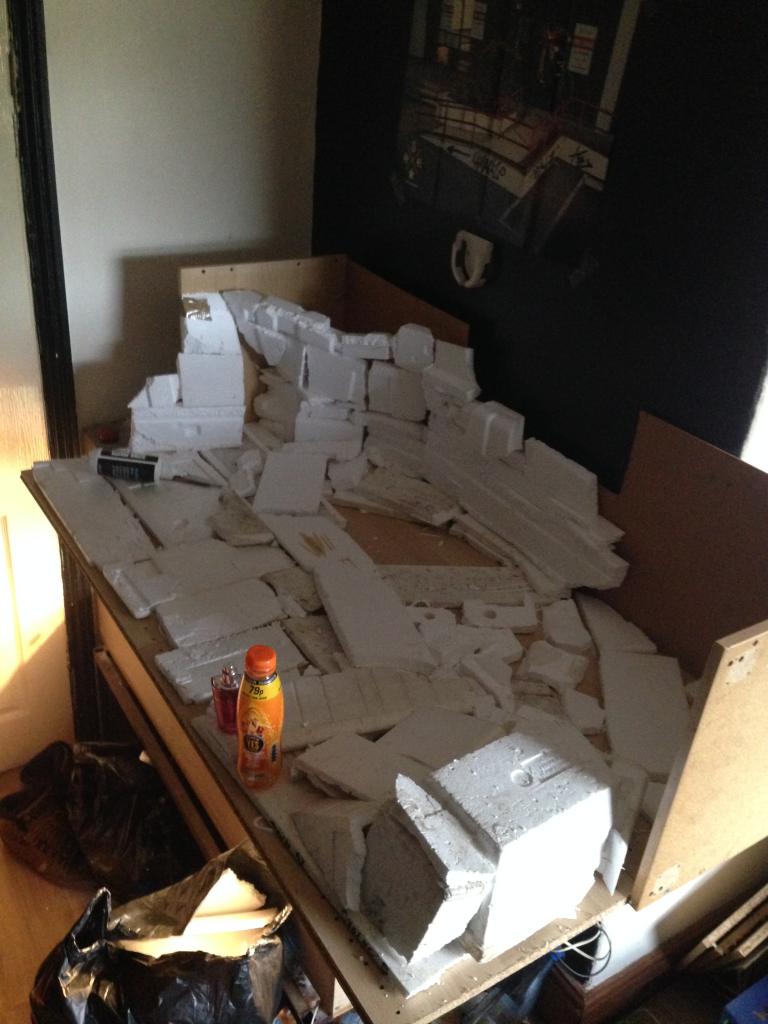
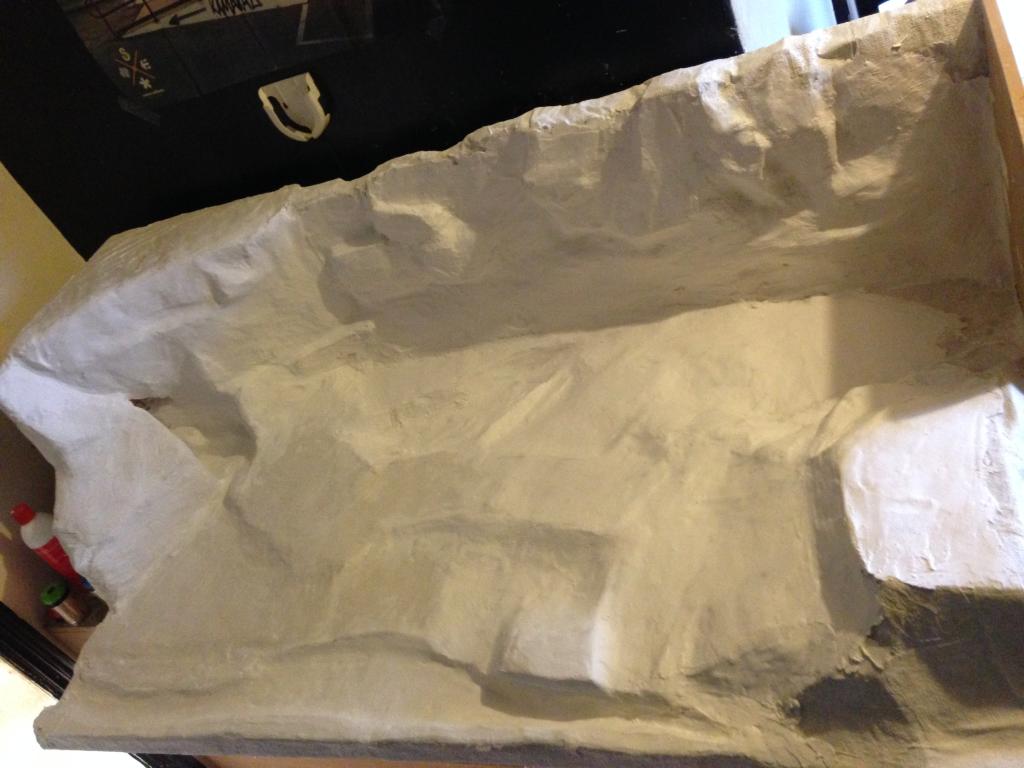
I then added paint and details
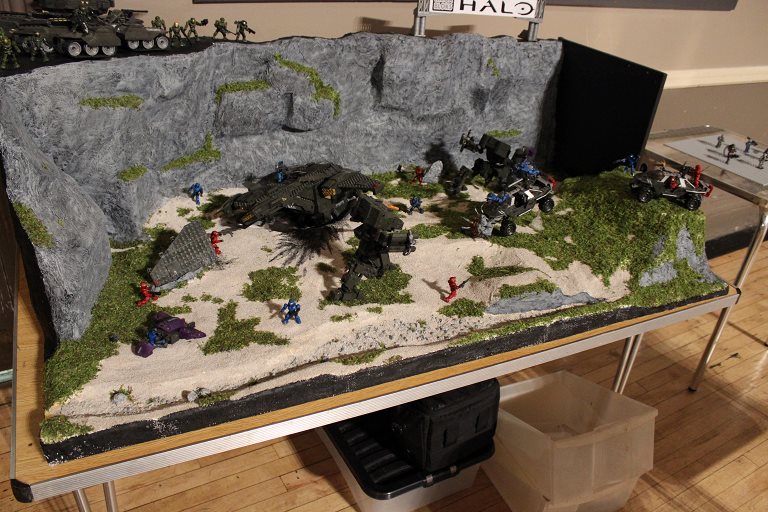
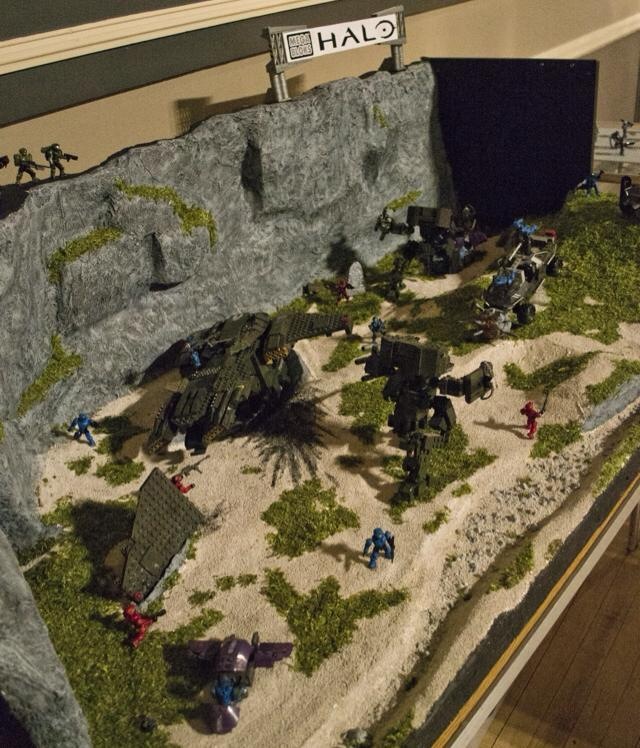
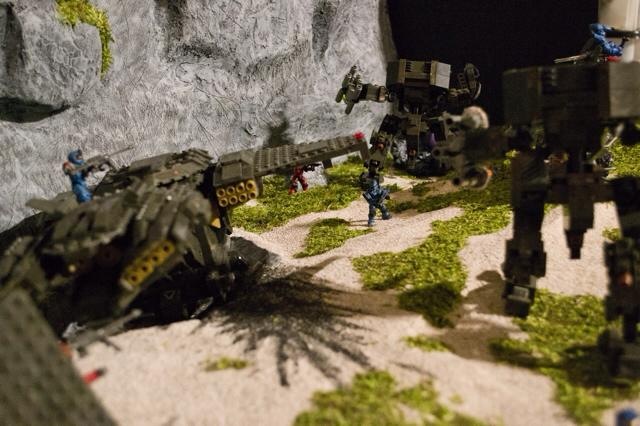
HFFL: From here he doesn’t give any more text, so I’ll fill it in.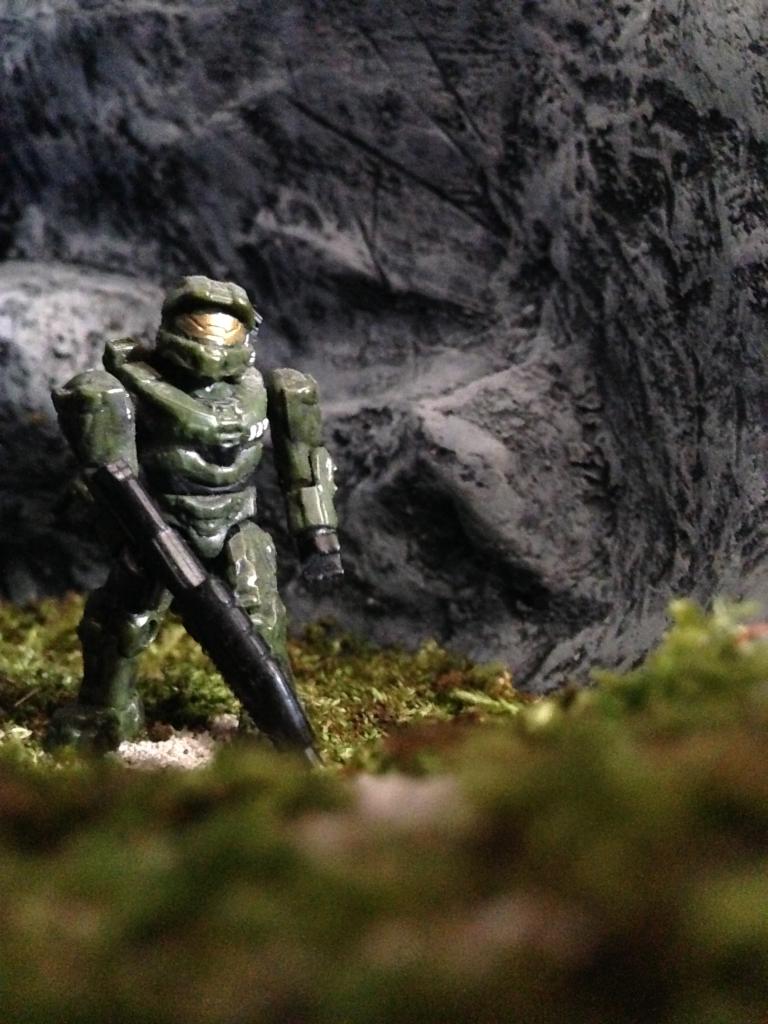
Above a close-up of Chief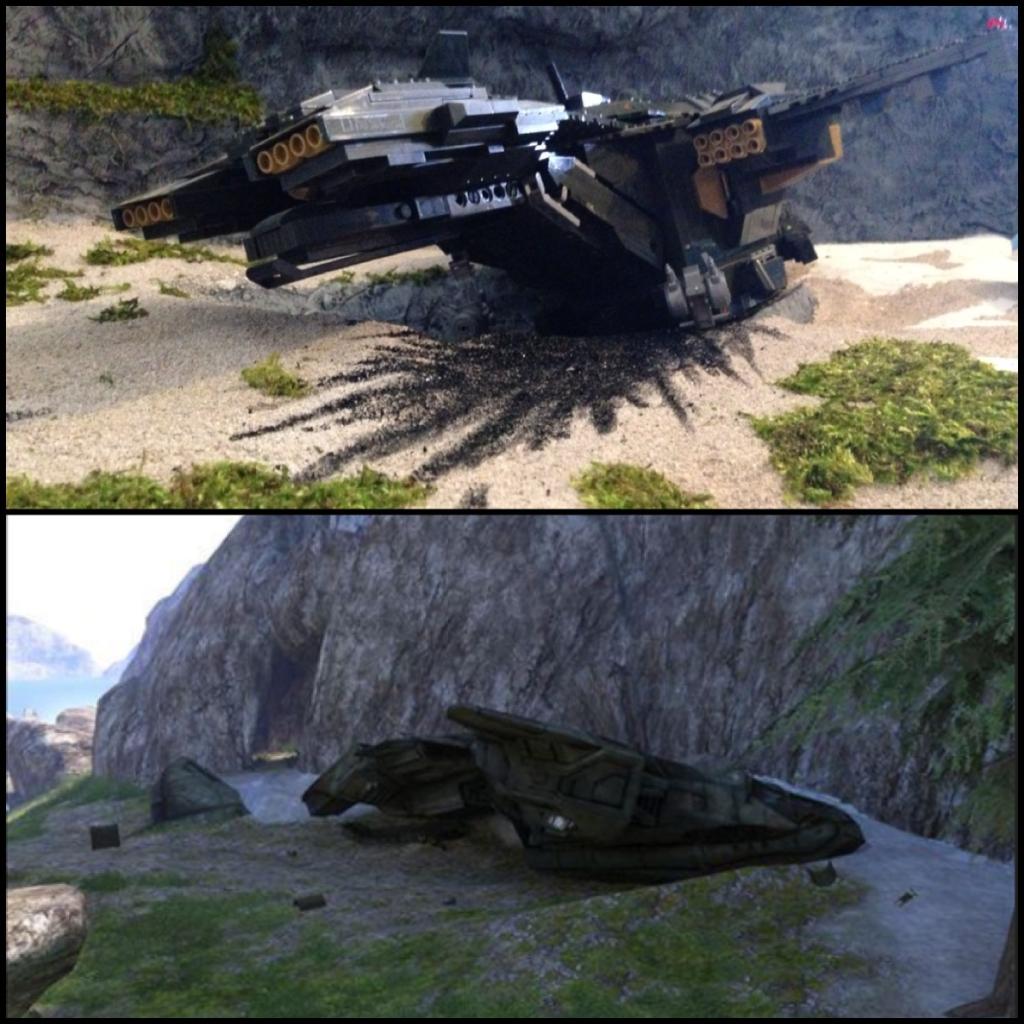 A comparison of the diorama pelican scene with the actual scene from the in-game map.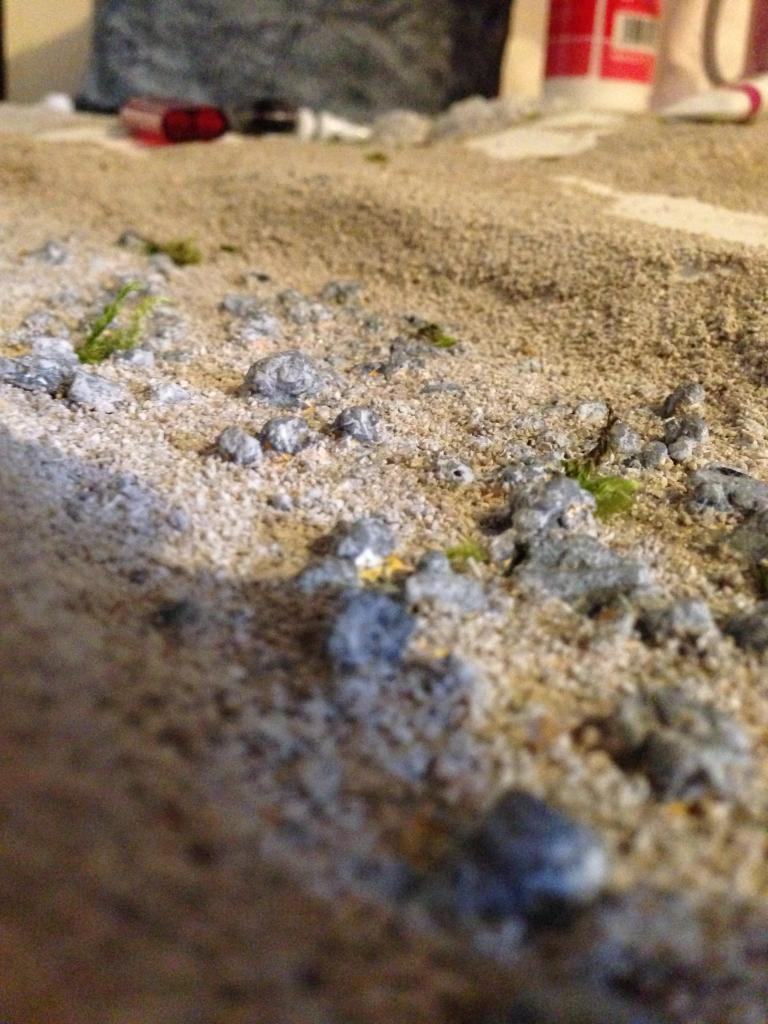
Above shows the detailing of the ground very nicely.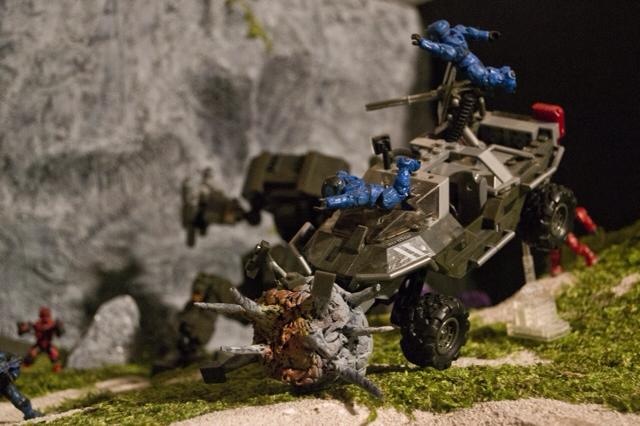 A very cool scene of a warthog being hit and taking damage.
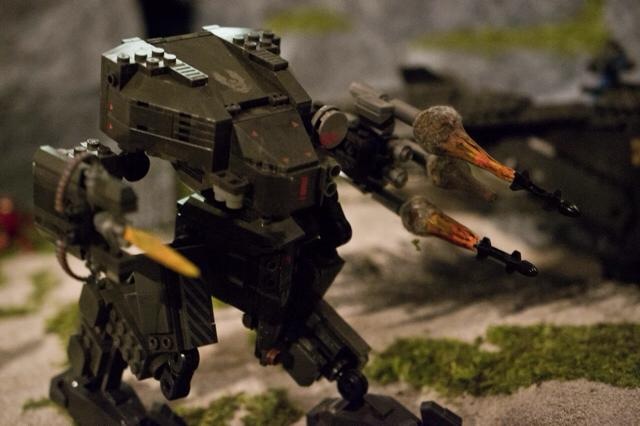 Some added firing effects on the Mantis.
This is a nicely done diorama using realistic element with Mega Bloks as well. Being a diorama builder myself, though it’s been some time, I can certainly appreciate the work and detail that went into this project.
So what do you folks think of this? Did you like the diorama? Do you like the mix of realistic and Mega Bloks? Would you have preferred it to be all realistic or all Mega Bloks?
-Sal
Halo Mega Bloks Cryo tube sets revealed
During last month’s BlokFest in the UK, TheSSMotion revealed three new Halo Mega books sets. All of which appear to be two-part cryo tubes, similar to how we got the two-part drop pods from last year. The look of the pods is a sparkly metallic. However, the Spartans shown with each set do not appear to have metallic ink, like the ODST counterparts did in the drop pod series.
First up is the GREEN Cryo-tube
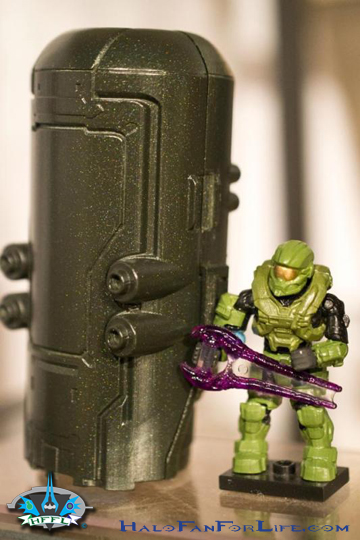
The tube looks great. Again, noting that it appears to be a two-part mold, instead of a build able set. The Spartan shown is a HAZOP Spartan from Reach. It’s missing it’s left shoulder armor though. I’m hoping for a different weapon. Or at least a blue energy sword instead of purple. I’m just not a fan of any energy sword that isn’t blue. But that’s me. Not the figure has the new articulation. So the shoulder, chest, and thigh armor are removable. I’m looking forward to this set. The HAZOP from Reach was one of my favorite armor designs from that game. The Cryo tube isn’t a bright free like the figure, for which I’m grateful.
Next up, the BLUE Cryo-tube
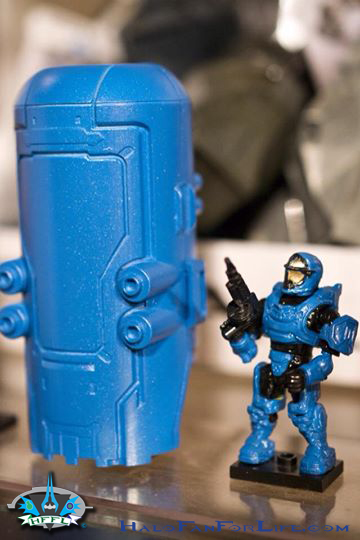
Now this Cryo-tube is a bright blue. That actually looks pretty good though for it’s color. The exciting part though is the figure. It’s an Oceanic armored Spartan. The armor that comes with this very cool. Note how the shoulder armor resembles that of the EVA from Halo 3. The helmet itself is a nod to the Bioshock franchise’s Big Brother. The set comes with a SAW as well.
And lastly the RED Cryo-tube
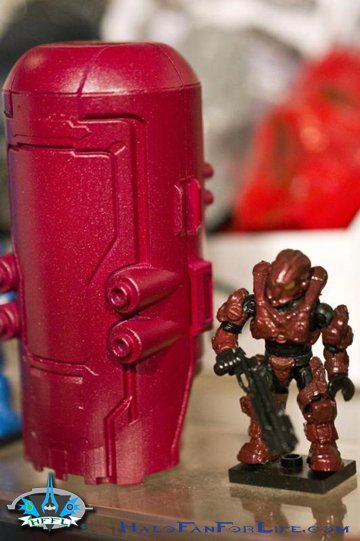
Heh, now that is a BRIGHT red! It will look great with my planned Halo themed Christmas tree. (Seriously!). The Spartan is an Aviator armored spartan from Halo 4. I really dig the helmet. Heh, I’ve never been a fan of then “drum kit” shoulder armor though. That’s no fault of MEGA though as they are designing from 343’s files. The color of the tube and spartan don’t match, but I’m totally okay with that. I like this color on this spartan.
I haven’t heard official word on when these are due out. Though if they follow the same path as the Drop Pods did, then expect to see them in the last quarter of 2014.
Having seen these, might you get them when they come out? Reply below!
-Sal
Halo Toy Review: Mega Bloks UNSC weapons pack II (Halo 4)
Mega Bloks UNSC Weapons Pack II: set #97207
Technical Specifications:
Build Time: 1 minutes sort time, 2 minutes build time
Set Piece Count: 28
Minifigs: Halo 4 Space Marine
Weapons: Assault Rifle with skin, DMR with Tiger skin, Grenade Launcher, Shotgun, Mounted Turret
Accessories: Fusion Coil, Sand Bags X4
Price: $8
Special Features: N/A
And on with the pics! (Click pics to make BIGGER)
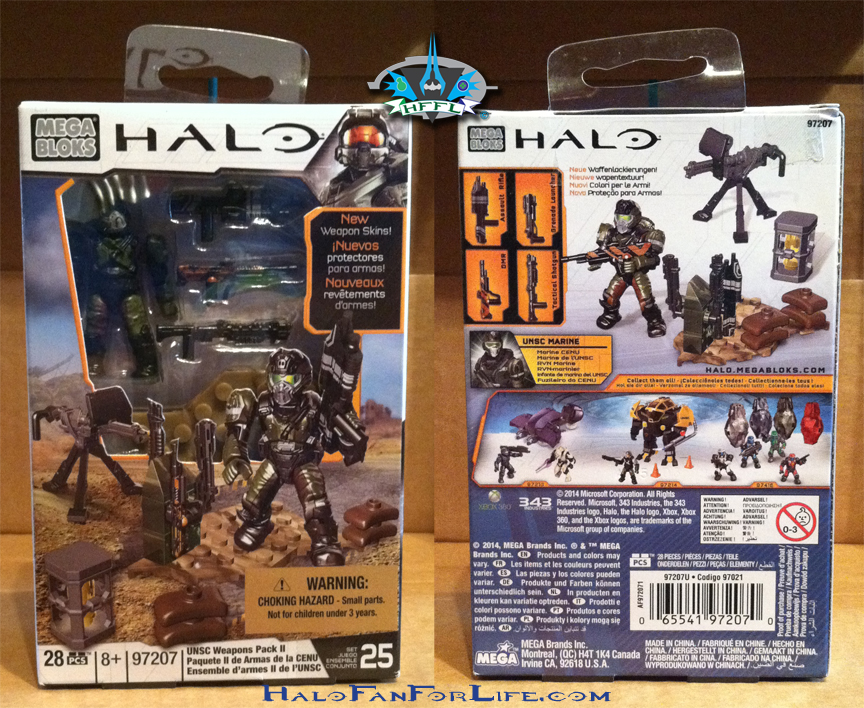
For a small package, the box shows the contents nicely on both the front and the back.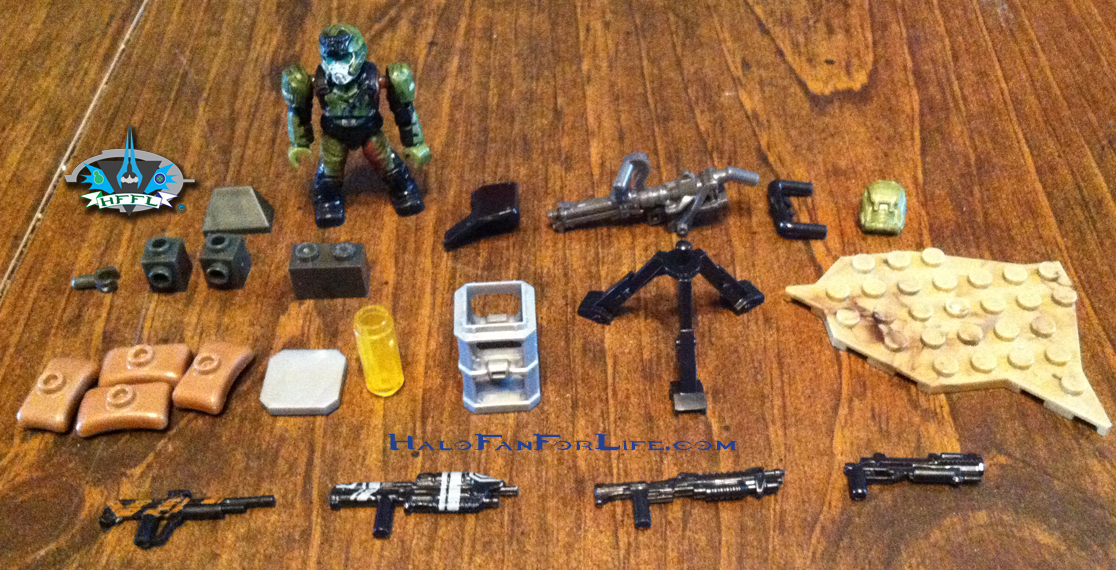
Here are all the pieces sorted out.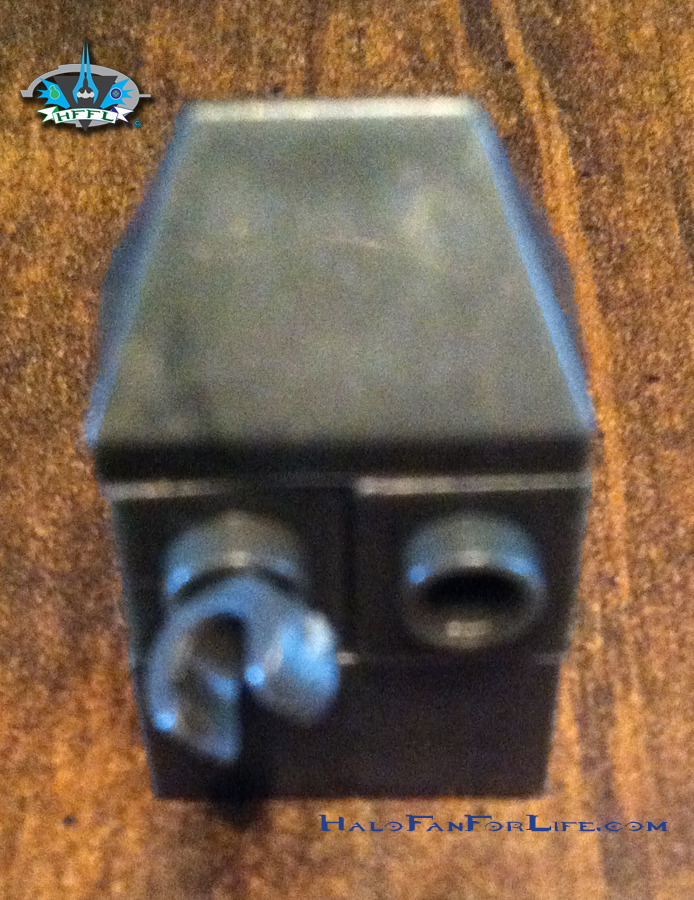
The small weapons rack. The handle is for the DMR.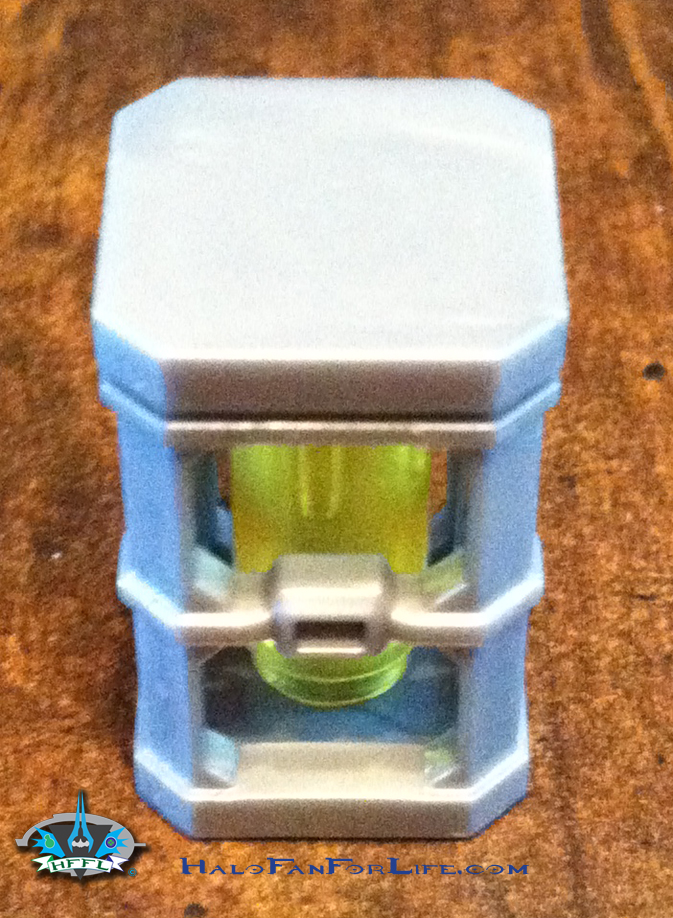
A fusion coil. I’d like to see one come with a RED inner core. We’ve had both green and yellow. That’s ever so minor though and does not at all take away from the set.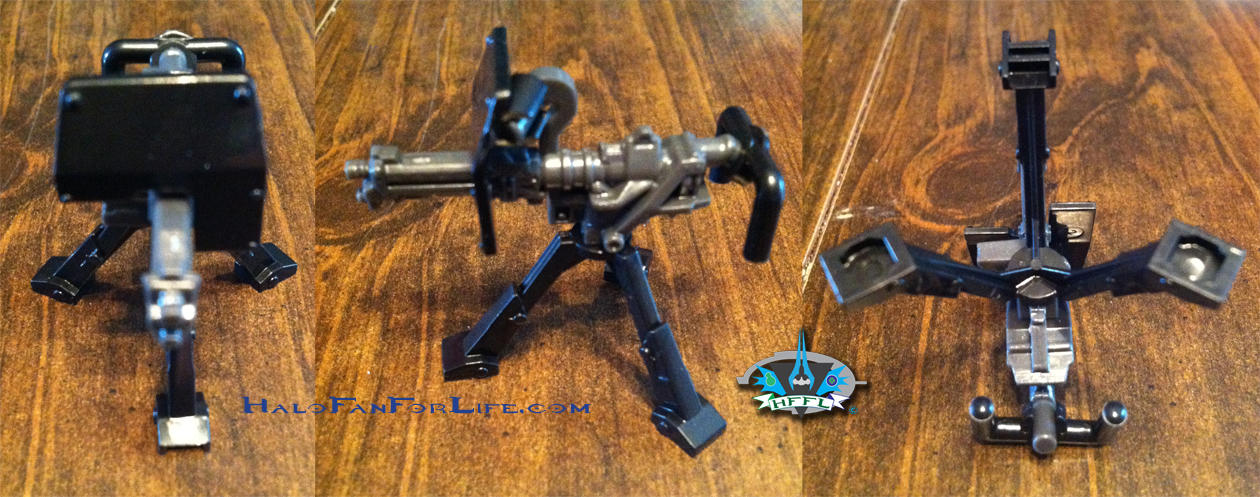
Above is the turret. It’s made of 4 pieces. Note the right most pic showing the bottom of the turret. It shows that the two rear legs have stud holes while the front has notches. 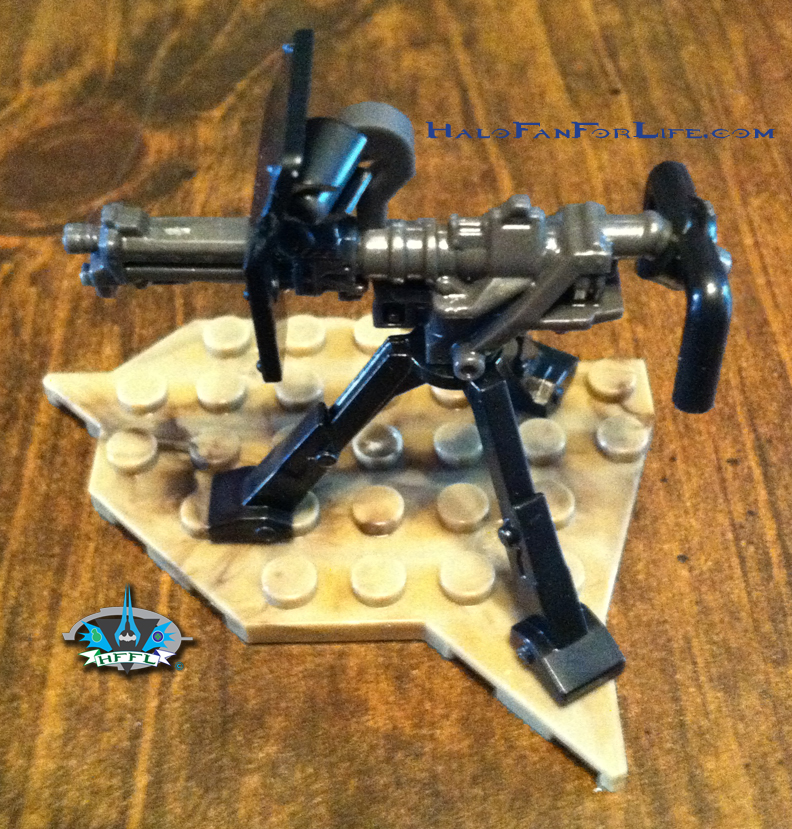
Above shows why the legs are made as such. The two rear legs fit onto studs while the front one fits in between them. It’s a great design for the turret base.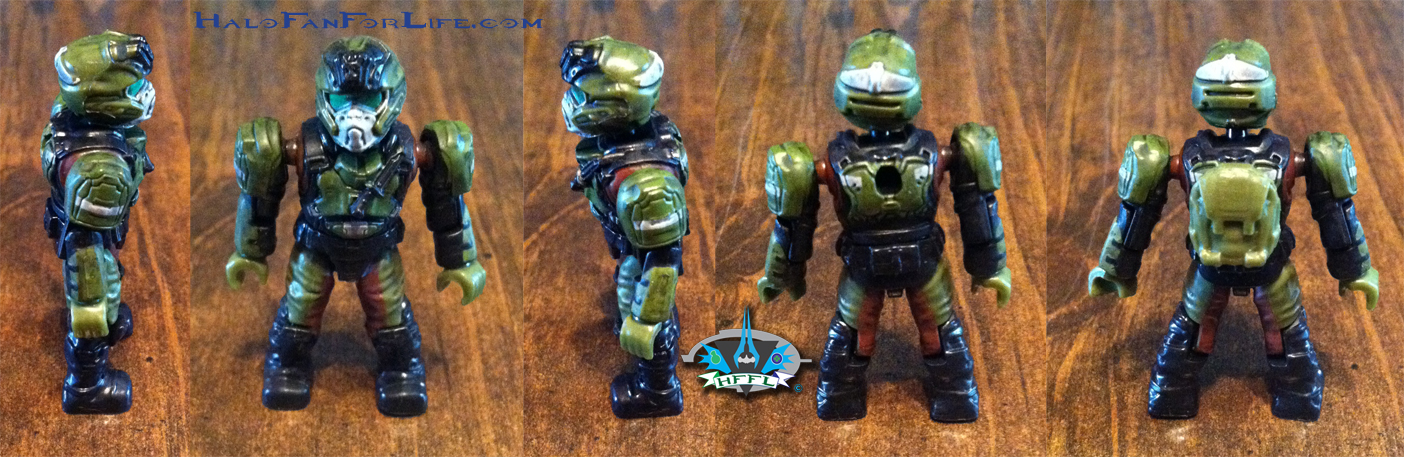
Be sure to click on the above pic to see it bigger. This Halo 4 Space Marine (yes, that’s it’s title) is highly detailed. It has no less than 5 colors to it. To the furthest right, I show it with it’s backpack on. This is an army building figure for sure!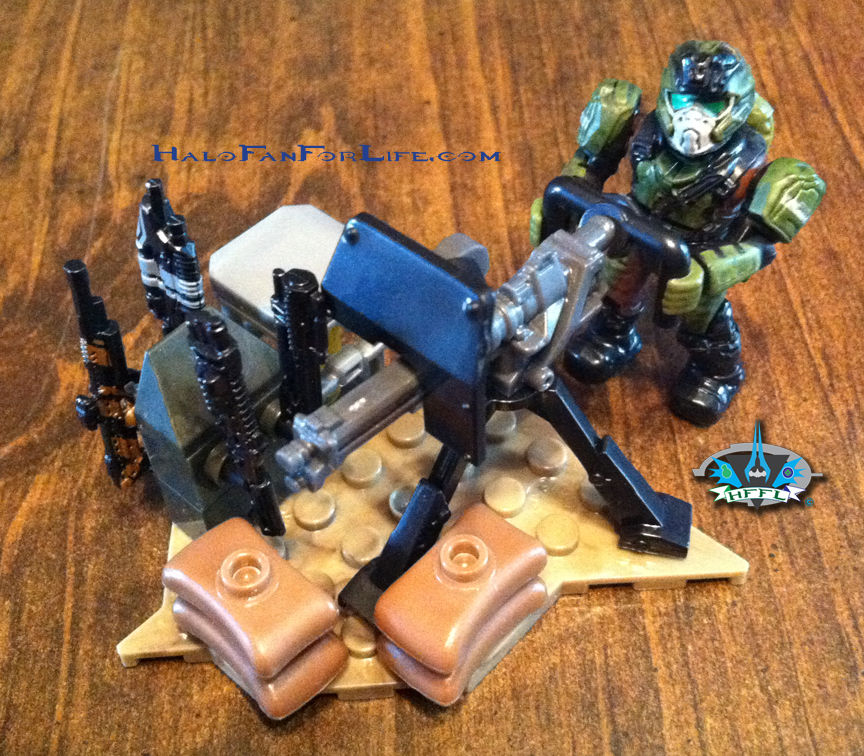 The finished set can all be placed on the small baseplate, while the mini fig attaches to the turret. Four sandbags round out the rest of the set. No leftover parts.
Summary: This set is virtually build free. The weapons rack, fusion coil and turret take less than 2 minutes to build. (Likely even less than a minute). The inclusion of 4 weapons, a turret, a fusion coil and four sandbags really make this a set to own. The skins on the AR and DMR are fantastic and I hope we see more Halo 4 skins in the future on Mega Bloks Halo weapons.
The price is $8, though you might be able to find it for $7 if you look around. I do NOT expect this set to stay on shelves. So buy it when you see it. The set says it has 28 pieces to it. Now normally I use a 10 cents per piece formula. However, in the case of weapons packs, it’s a little different. First the figure accounts for $3-4 of the total. Each weapon is 25 cents, the turret would be at least $1. That leaves the fusion coil, weapons rack pieces and the baseplate to make up the rest and I think they definitely do. So what I’m saying in a nutshell is this set is perfectly priced for what you get inside! If you score it for less than $8, count yourself lucky!
Overall Rating: I give this set 10 out for 10 medals. I cannot find any flaws with this set. It’s just that good!
There will be a revision of this set later in the year. The main difference between the sets will be the mini figure having the new articulation in the revised set.
Thanks for reading and let me know what you think of the review. If you have this set yourself, please give me your thoughts on it too!
-Sal
Halo Toy Review: Mega Bloks Flood Hunters’ UNSC Falcon
Mega Bloks Flood Hunters’ UNSC Falcon: set #97173
Technical Specifications:
Build Time: 20 minutes sort time, 60 minutes build time
Set Piece Count: 460
Minifigs: Covert Ops (Dark Grey) Spartan Mark V [B], Covert Ops (Dark Grey) UNSC Pilot; 2 Flood Carrier forms, 3 Flood Infection forms (chocolate brown)
Weapons: Assault Rifle, SMG
Accessories: N/A
Price: $55-72 depending on where you get it from at retail. I got mine for $51 on eBay. (Thanks to my wife for purchasing it for me.)
Special Features: Cockpit opens/closes; spinning and rotating rotars; front mounted gun pivots and rotates; side mounted guns have multiple pivot points; slight forward landing gear pivot; fits 5 mini figs comfortably
And on with the pics! (Click pics to make BIGGER)
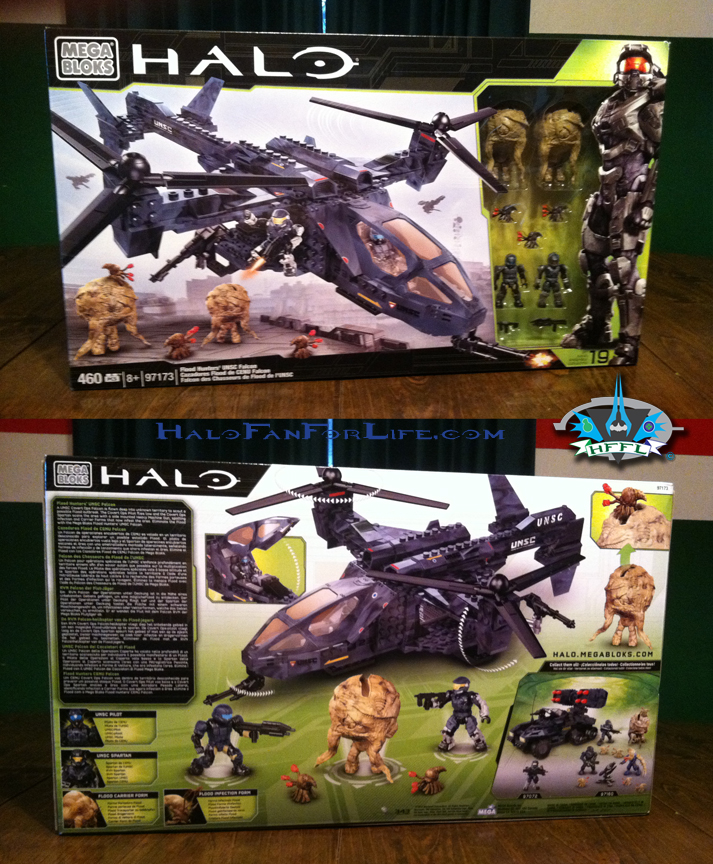
The front and back of the box. Nice representation of the set on both sides.
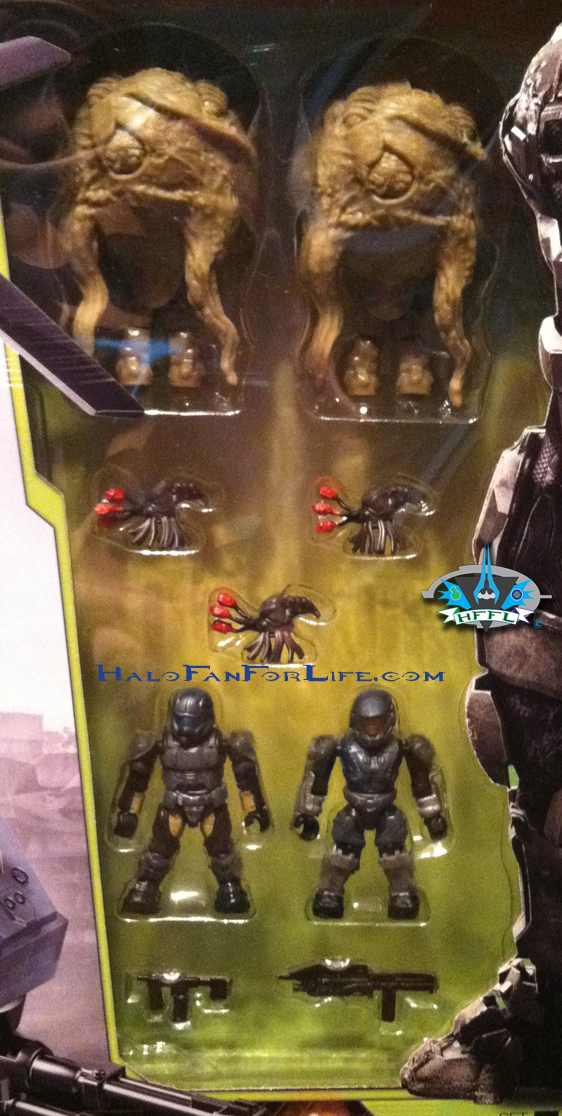
The window for the box lets us know what minifies are included.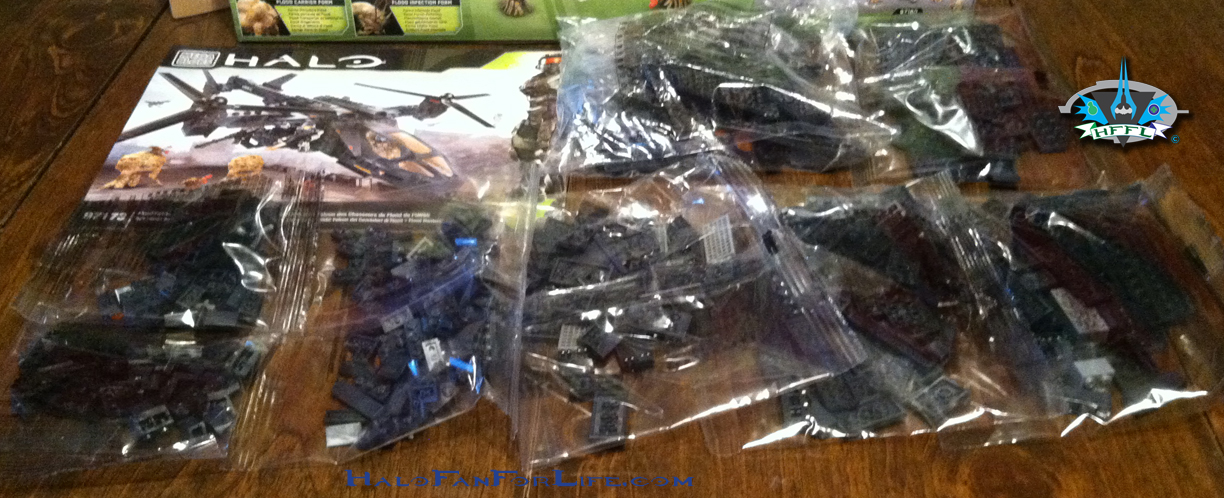
Set contents.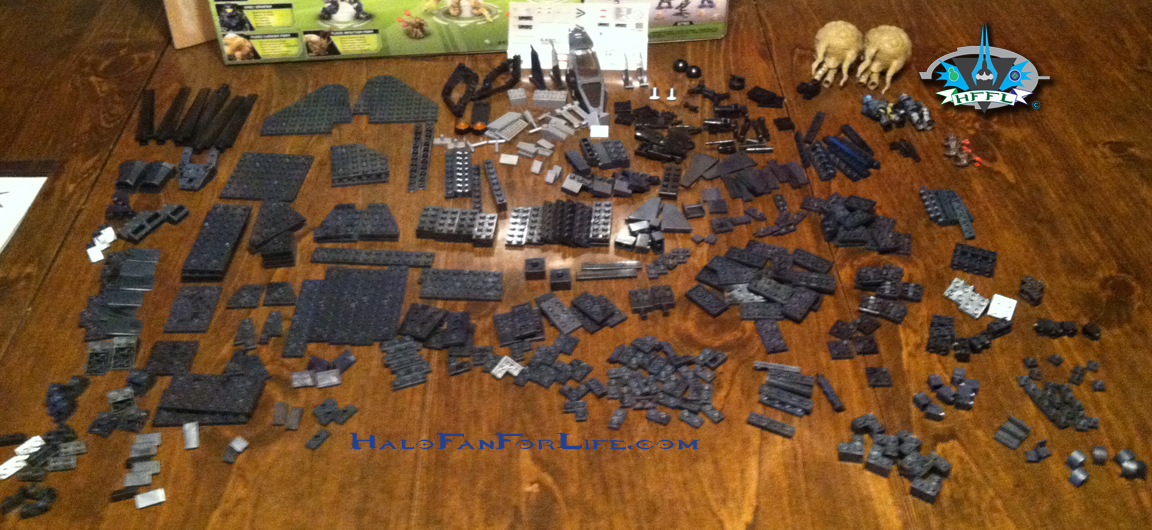
All the pieces sorted out. This took about 20 minutes to do.
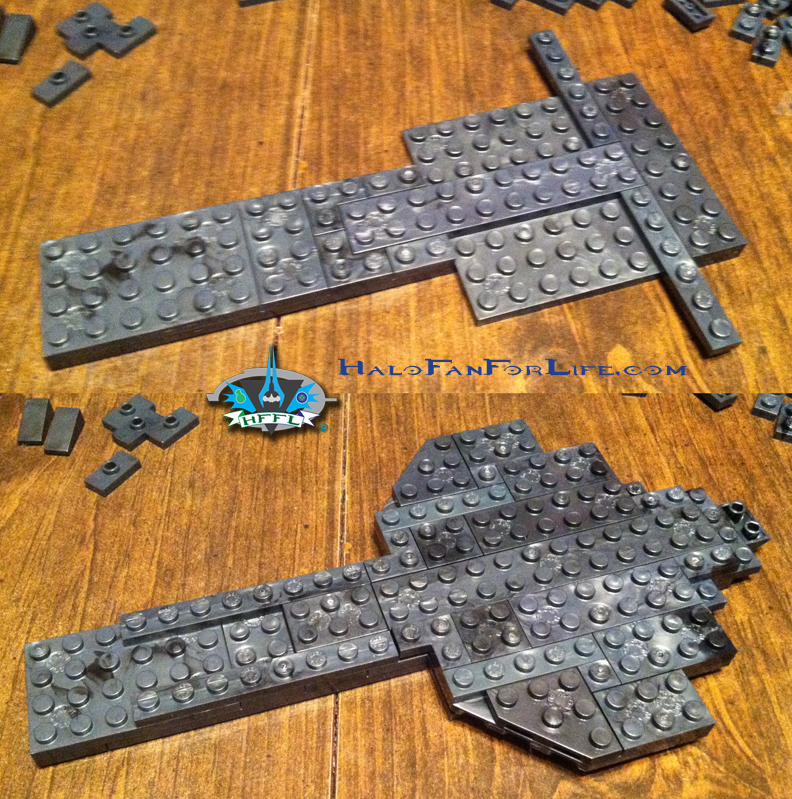
The first 10 or so steps of the base of the Falcon.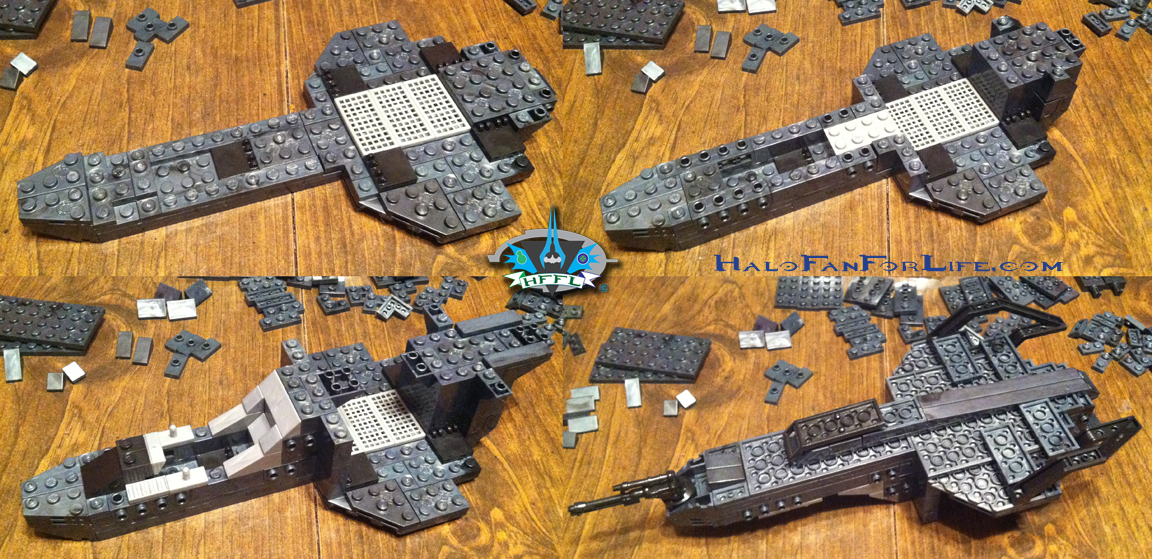
Many steps ahead the Falcon’s lower half is really taking shape.
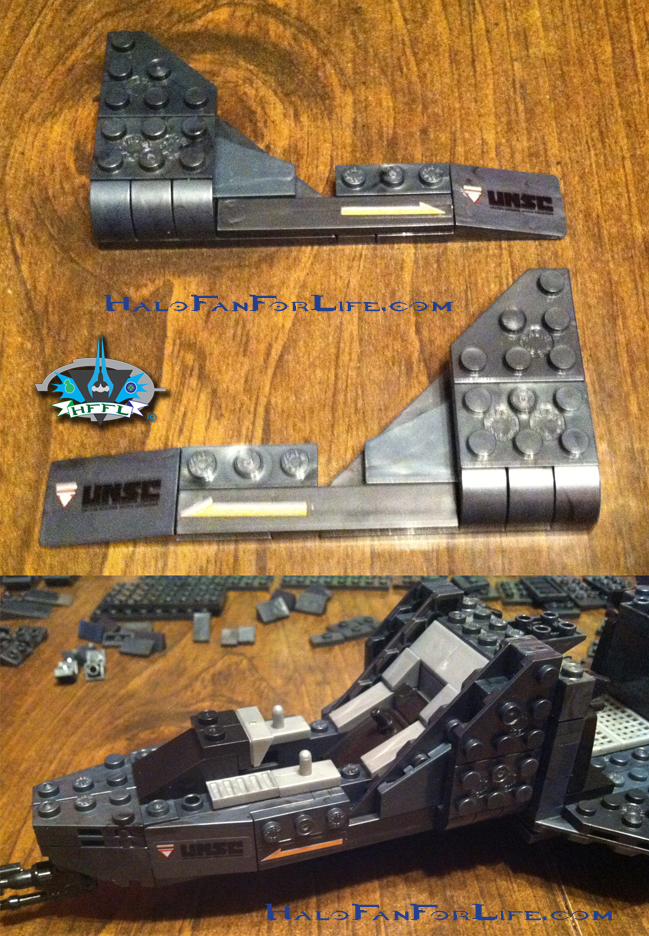
Side panels are built and attached to the forward section of the Falcon.
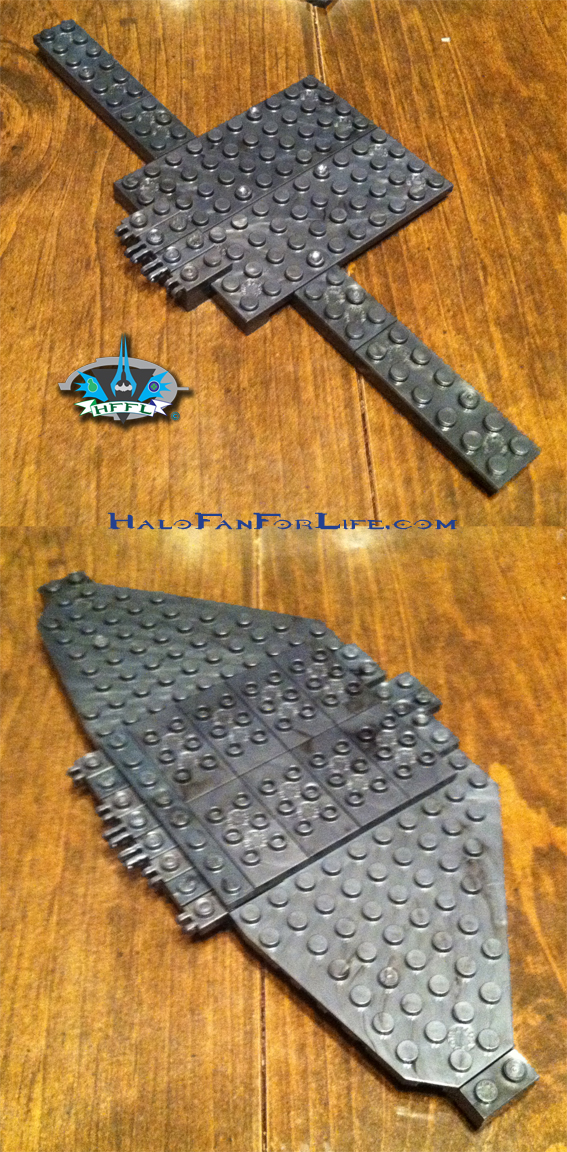
We move on to wing assembly.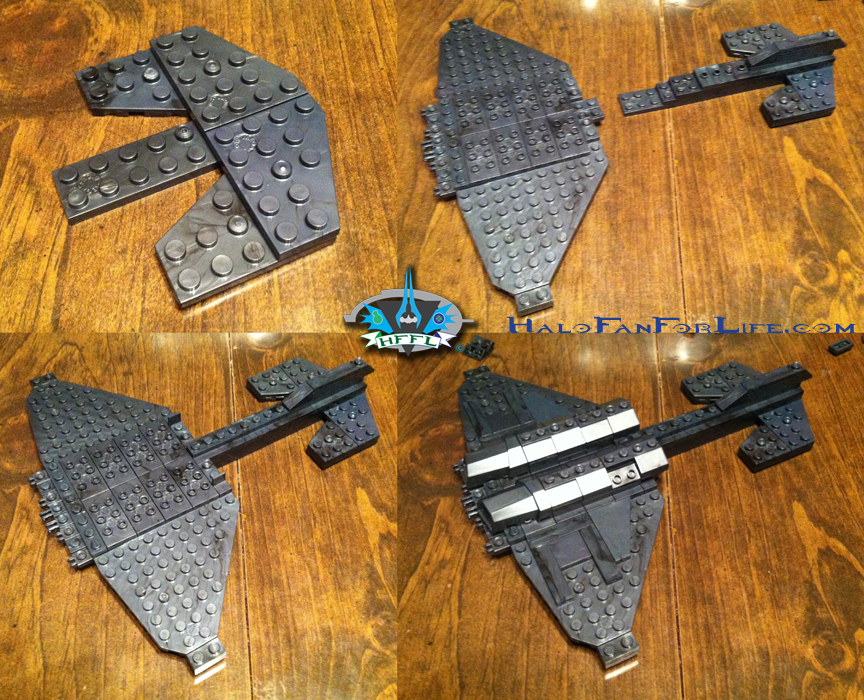
Adding the tail section to the wing section.
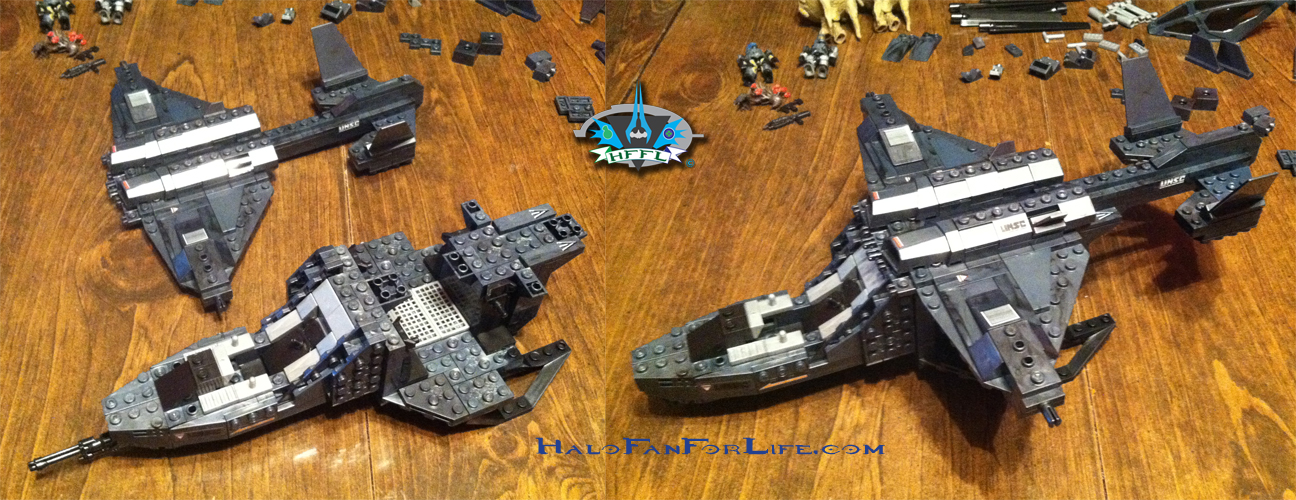
Now here is the toughest step in the Falcon build (it’s the same for the previous versions as well). The “marrying” of the top and bottom sections can be a little tough. Take your time, don’t try to force them together as you might pop off some pieces. Once you’ve got it lined up correctly, I suggest to start pushing the back section together, then move on to where the wing meets the body near the front. 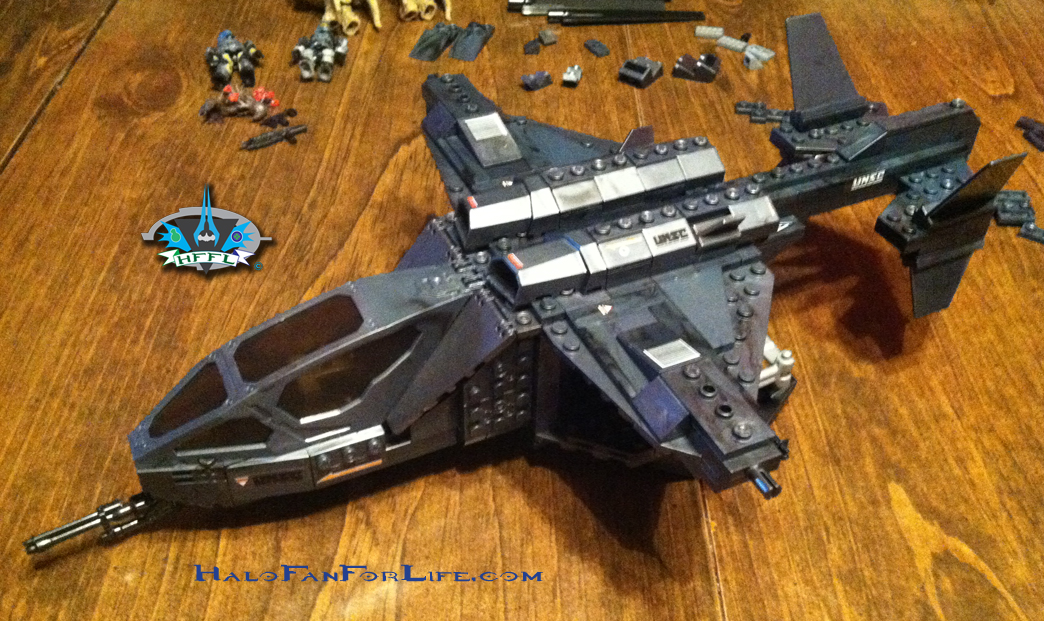
Added the cockpit and some other details. Be careful here too. The prongs on the cockpit that adjoin to the body do not easily snap it. Don’t force this either as you don’t want to break those prongs. Once you’ve got it in place, you should here a satisfying “CLICK”. Then you know it’s in place.
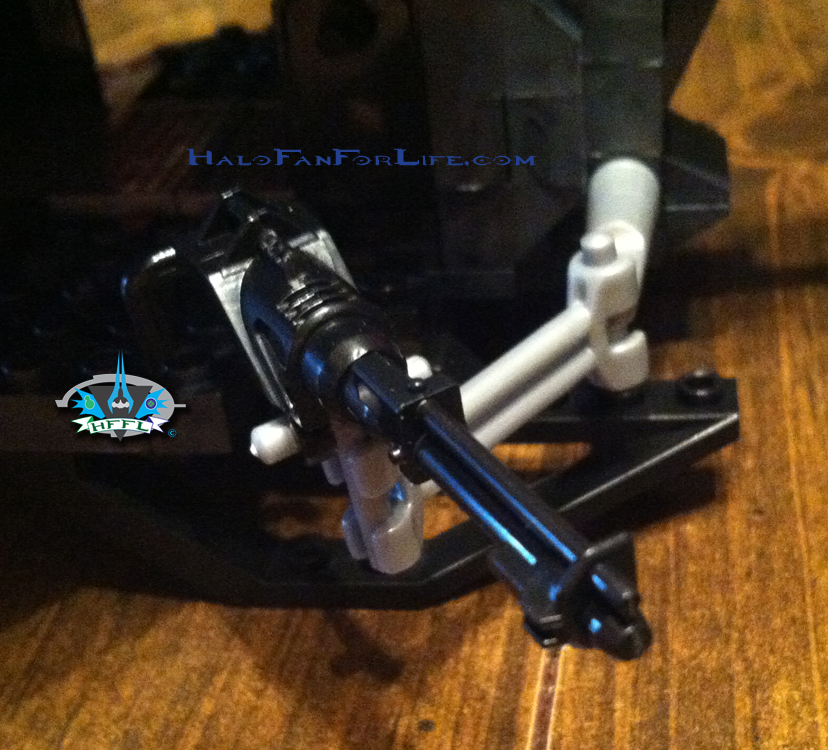
The side mounted gun is a great display of articulation with limited pieces. This was designed VERY well.
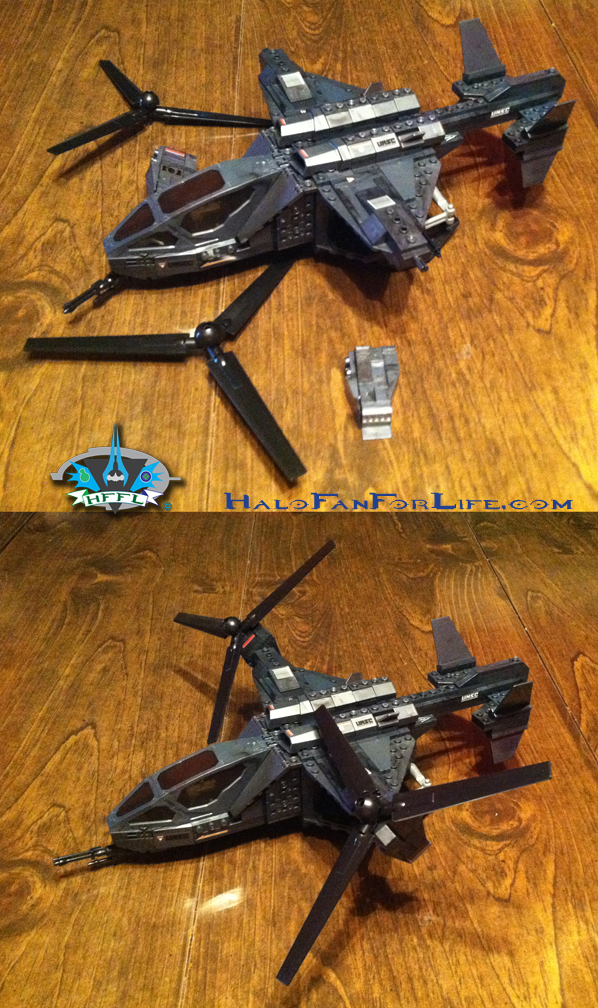
Adding the rotors to the ship. And it’s done.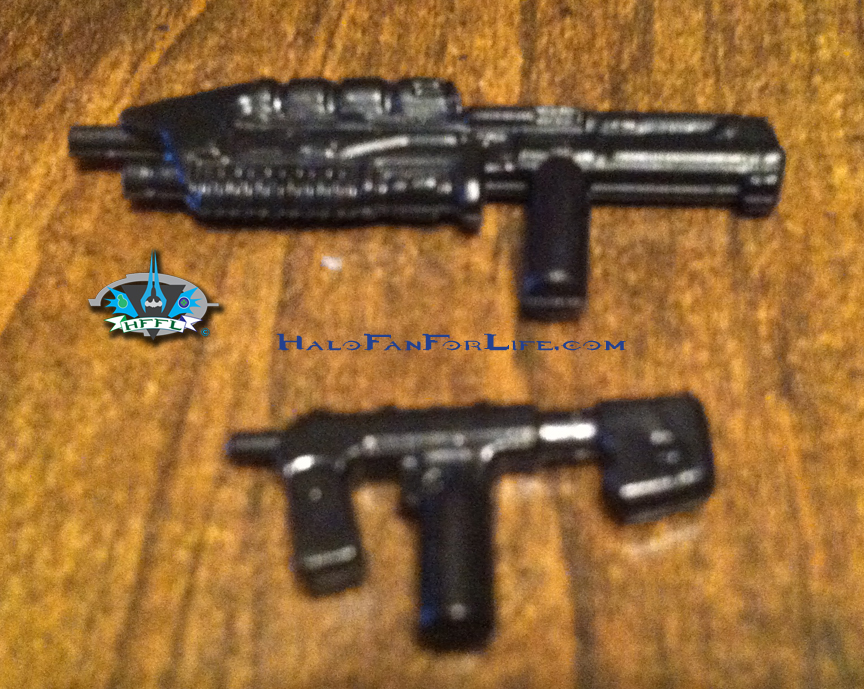
We get an assault rifle and SMG with our UNSC figs.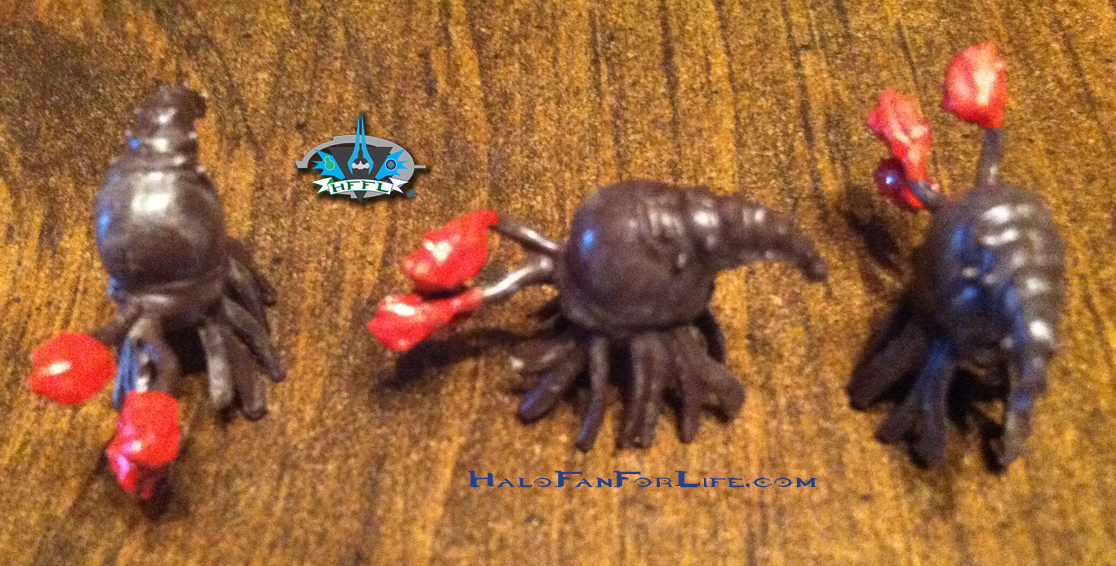
Here we have 3 infection forms. Why they are chocolate brown, I do not know. Still, it’s good to have more infection forms.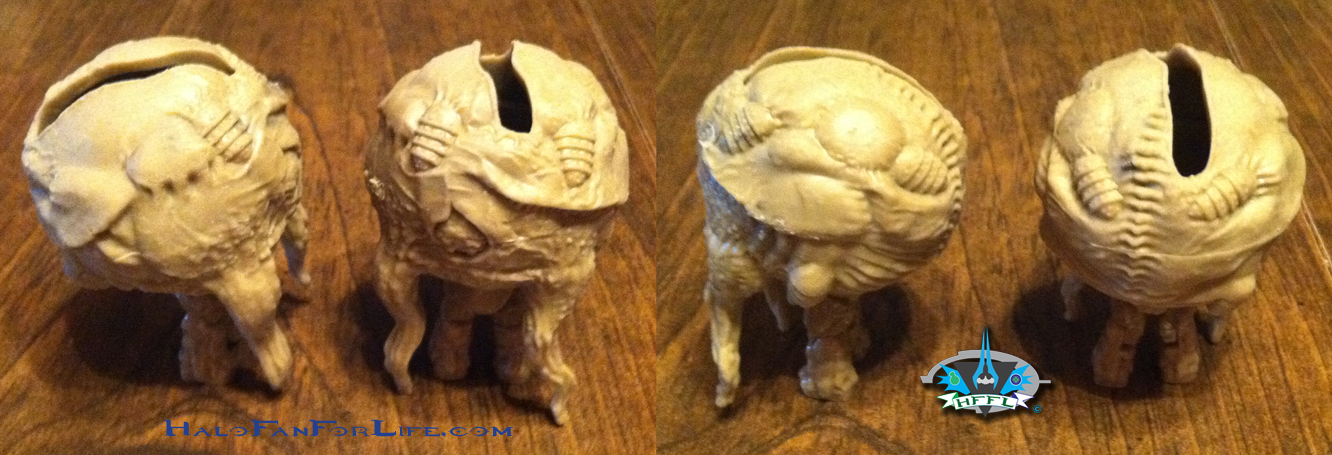
The carrier form. I still think the shape is funny. It should be a little more pointed at the top. That cut in the top is a little too big, IMO. I suppose it was done that way though for ease of getting infections forms in and out of it.
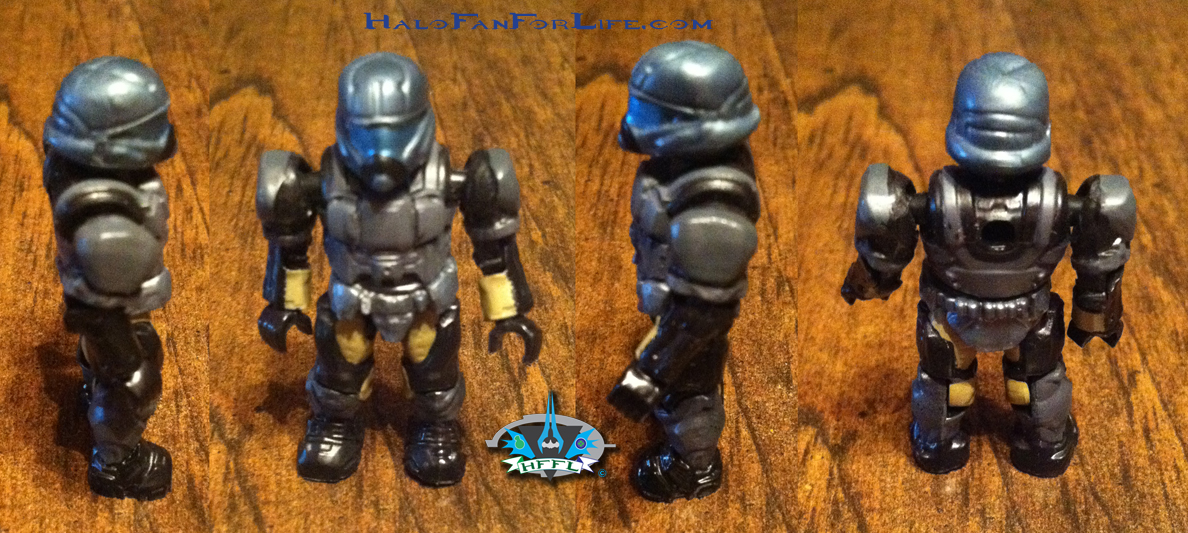
The UNSC Pilot included. Man, I just LOVE this dark grey color scheme!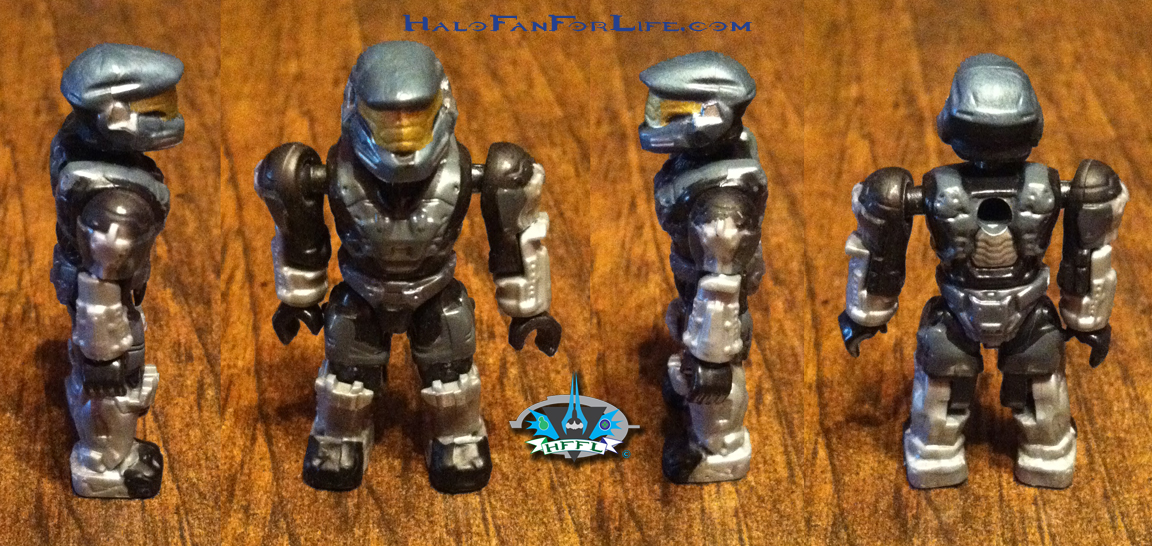
The Spartan included. Definitely one of the better painted figures as of late. The detailing on the back is awesome!
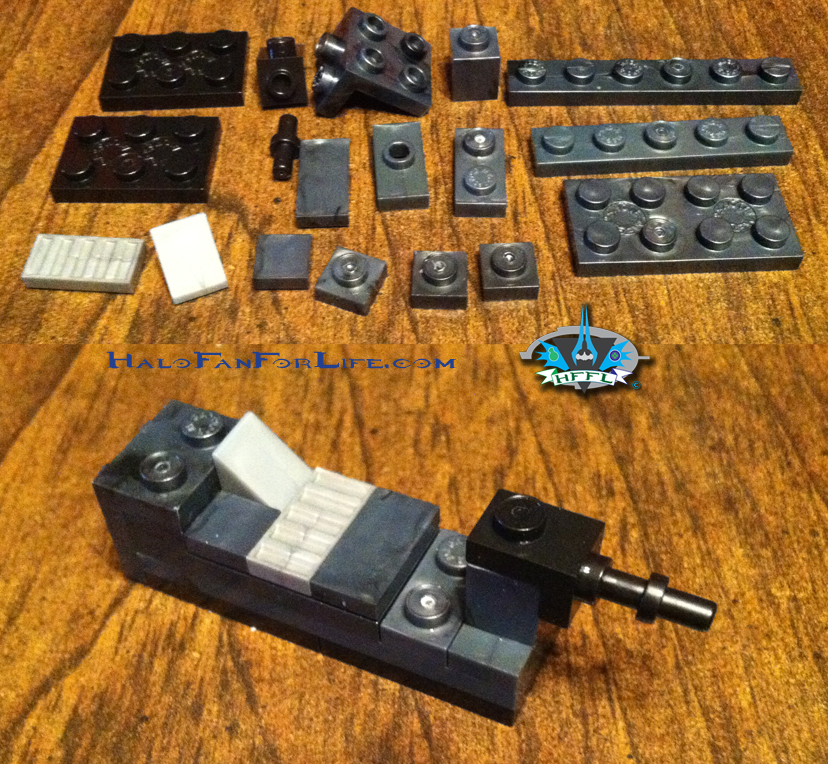
Here are the leftovers. I couldn’t really make anything significant out of them. So I’m calling this a refueling cart.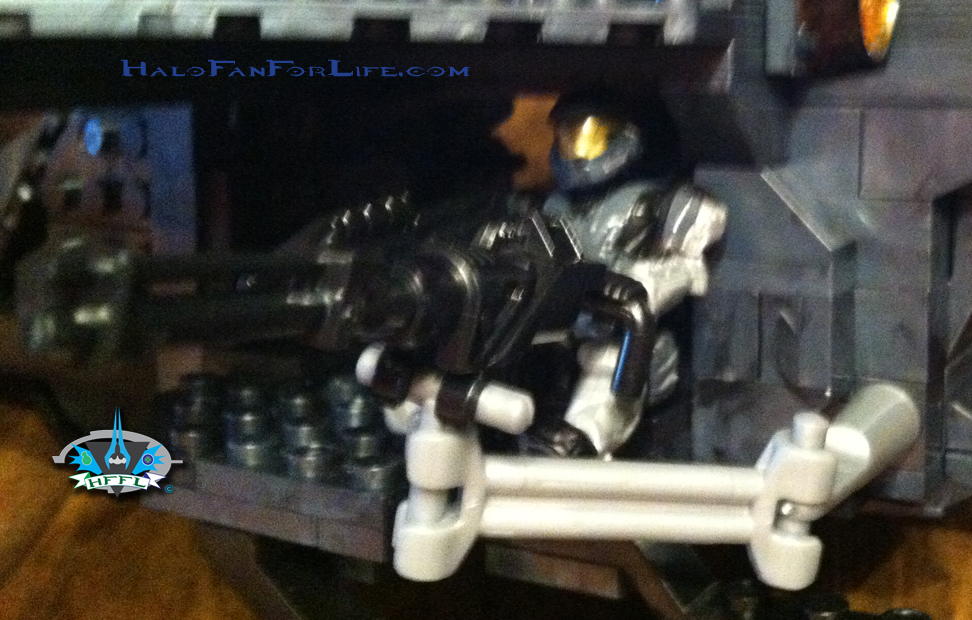
Here we see the Spartan in one of the side gunner positions. His hand is clipped on to the handle, while the seat has a nub that fits nicely into the figs back. This makes for a good fit and the figure won’t fall out of the ship.
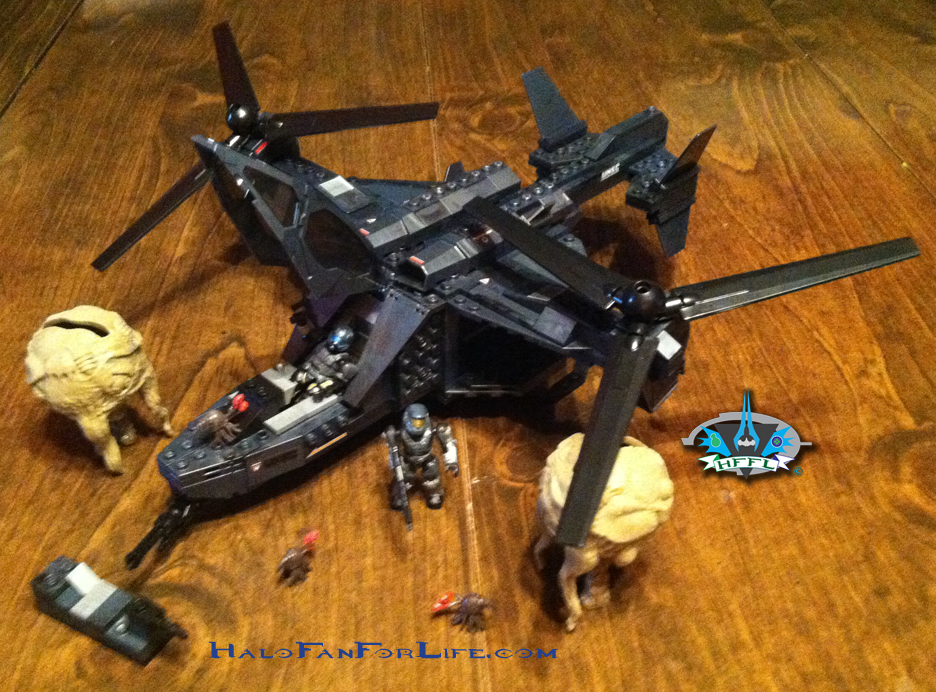
Here is the completed set with figs and the leftovers. One thing to note, I actually put more of the stickers on this time. This Falcon just looks SO much better with the stickers on them.
Summary: This set is a moderate build. It can easily be built in one sitting if you’ve got about an hour to an hour and a half. The set has nice amount of minifigures with the set, including the infection forms. If you haven’t bought a Falcon yet, I HIGHLY recommend this one!
Overall Rating: I give this set 9.5 out for 10 medals. This is a nice color variant of the Falcon. I’m a fan of the Covert Ops dark grey color. The reason I took off the scant 1/2 of a medal is for the brown color of the infection forms and the price. Otherwise, this set is STELLAR!
The price for this set is a little high, given the piece count. It’s hard to find in stores now, so you’re likely going to have to find it on eBay. I lucked out and won this from an auction there for $51. You’ll be just as lucky if you can find it for that price. Most are going for $75-80 now. ToysRUs had this priced at $72. That is WAY too much, IMO. Other locations had it for $55. Not too bad, but still about $7 more than it should have been.
Thanks for reading and let me know what you think of the review. If you have this set yourself, please give me your thoughts on it too!
-Sal
Halo Toy Review: Mega Bloks Red UNSC Spade
Mega Bloks Red UNSC Spade: Set #97158
Technical Specifications:
Build Time: 10 minutes sorting time, 30 minutes build time. You time may be less. Mine includes taking the pictures and setting up the set for action poses at the end.
Set Piece Count: 212
Minifigs: Sand color Spartan Mark V [B], Sand color Spartan ; 2 Jackals; 2 Spec Ops (Black) Grunts (Halo Reach style)
Weapons: Assault Rifle, Grenade Launcher, Pistol, Beam Rifle (Halo Reach style), Plasma Rifle, Needler, Plasma Pistol, 2 sticky grenades (translucent blue)
Accessories: 2 Jackal Shields (translucent blue)
Price: $35 in-store, $32 online plus shipping Wal Mart Exclusive!
Special Features: Wheels roll, allowing vehicle to roll along a surface
And on with the pics! (Click pics to make BIGGER)
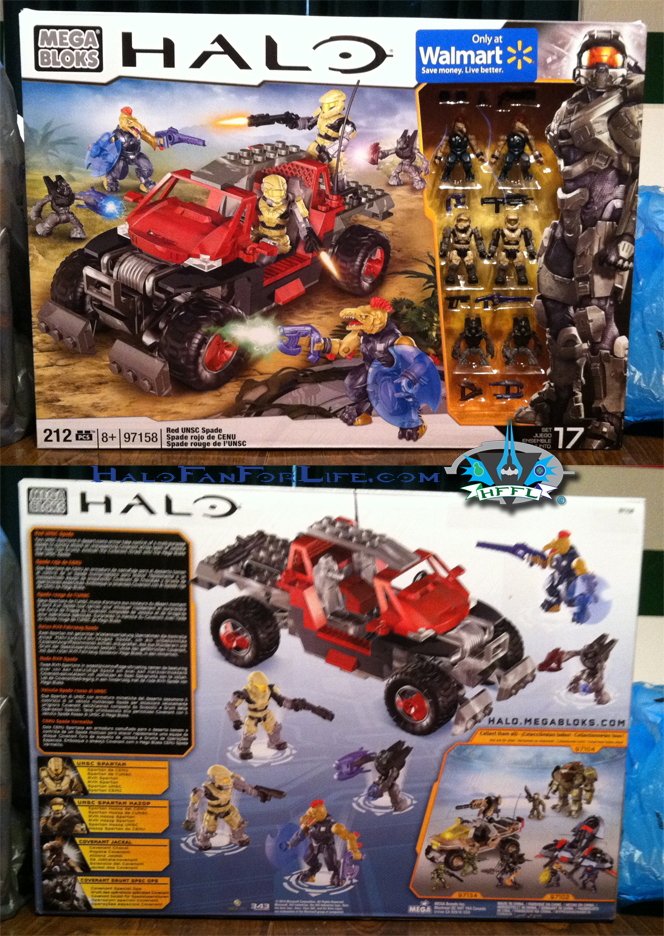
The box as always is neatly designed. The front shows the set in a fantasy view, while it also has a “window” through which to see the mini figures. The back once again shows the sets and figures with some explanations of the spade and figures. 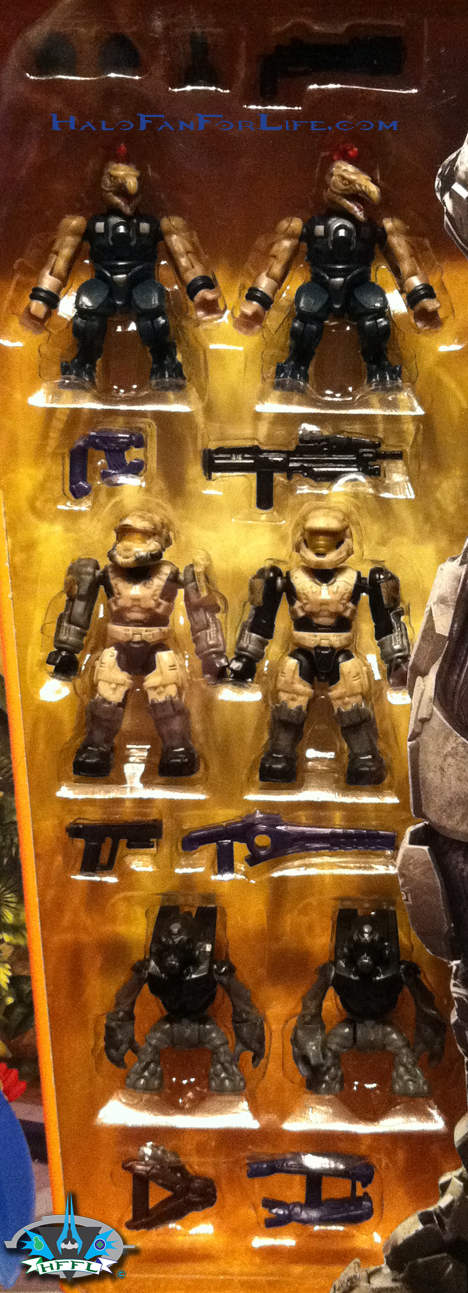
Here’s the front window close up. You can see all of the figs and weapons through the window. The Jackals shields are inside the box, however.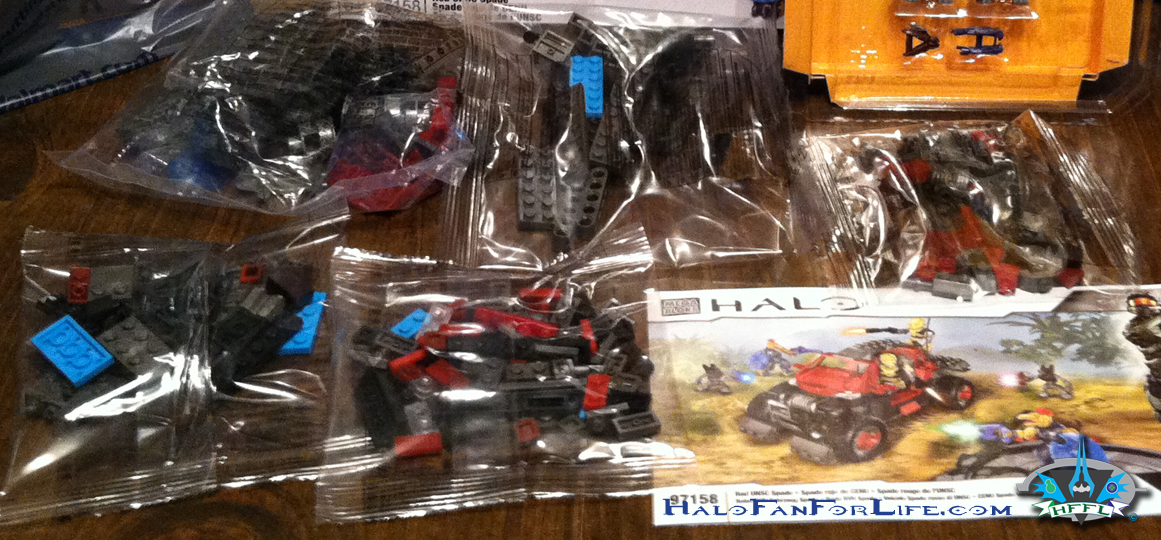
Here is what you get inside of the box.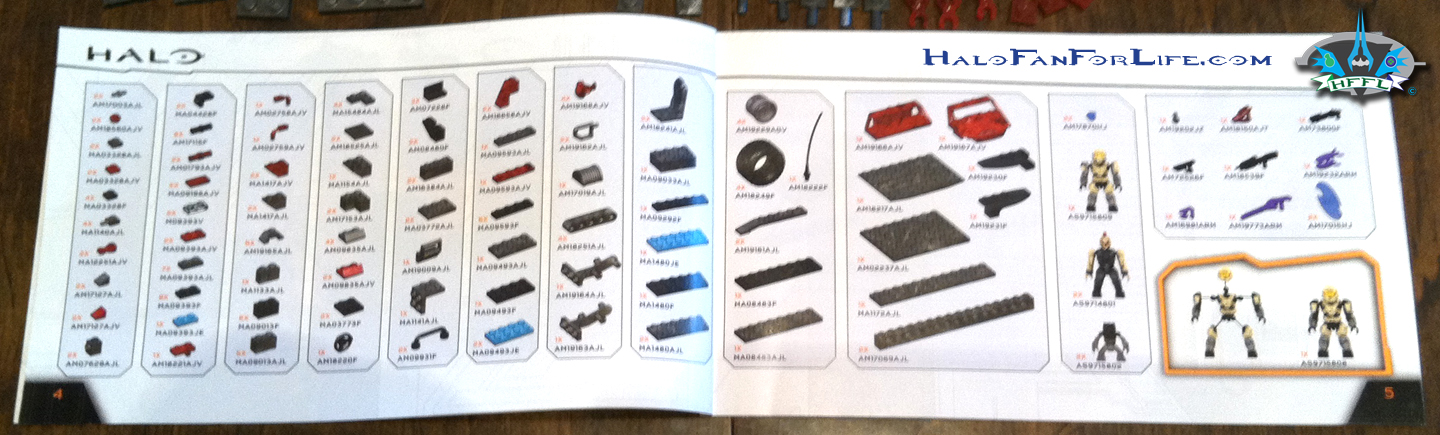
I checked my parts inventory list against the parts as I sorted them out. All were present and accounted for. As usual, there were extras that Mega Bloks tend to include.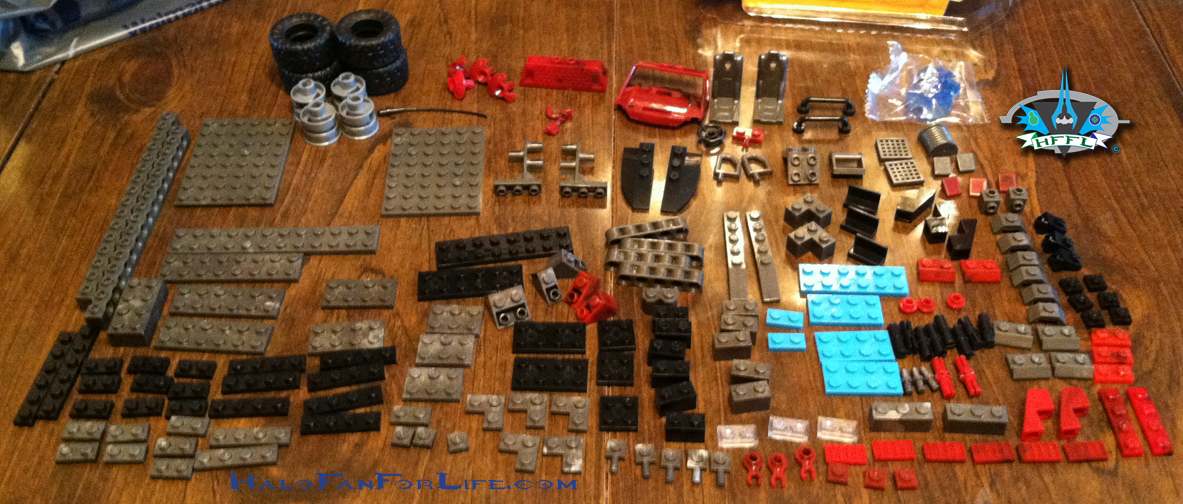
Above shows the pieces sorted out. If you have the orange spade, this will be extremely familiar to you as they are the same parts, just in different colors.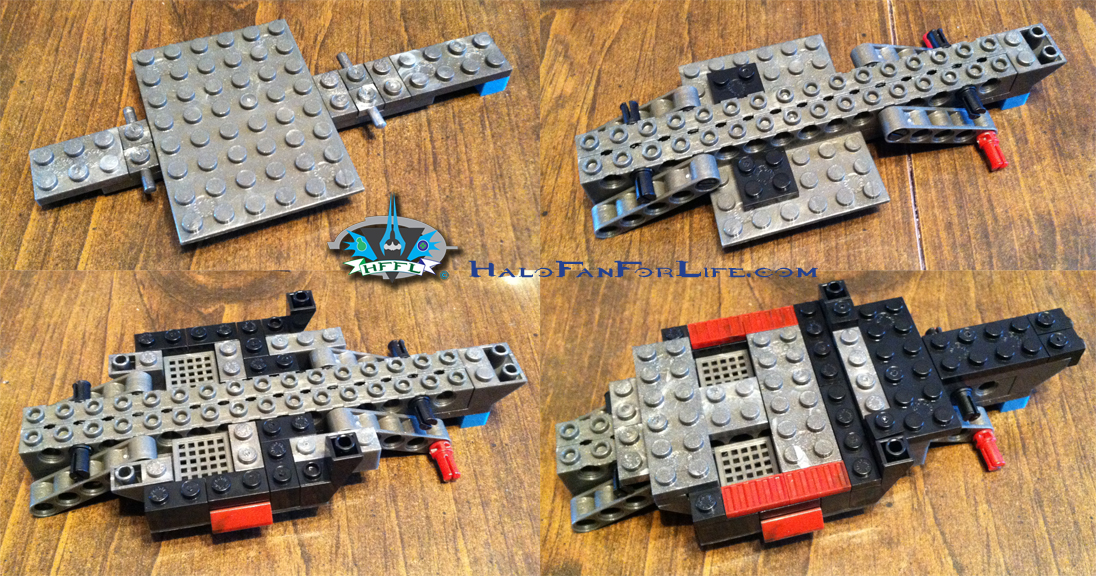
We begin with the build of the chassis and the “motor”. Not an actual motor, just pieces that fit into place where there would be a motor.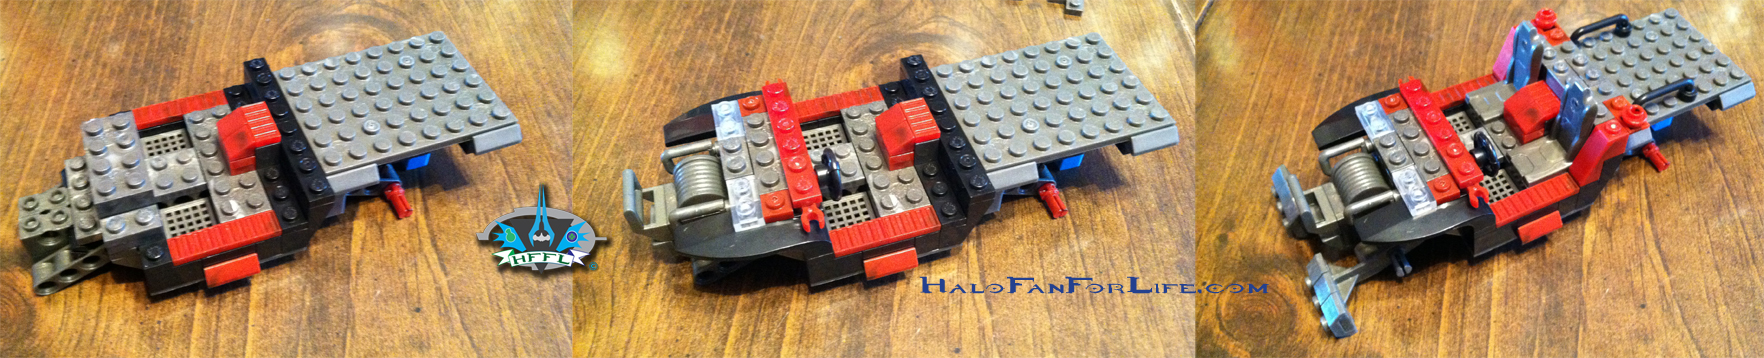
The front fenders and bed of the spade are built up.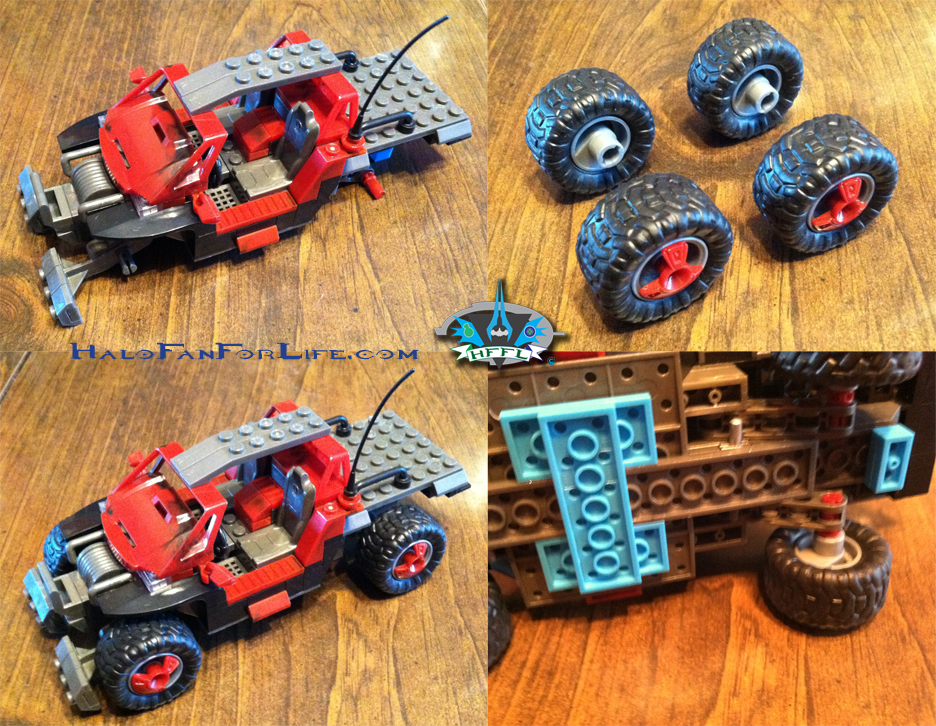
Above we see the spade almost done. I’m showing the wheels specifically in the view to show how they are properly added to the vehicle. If you look on the box, you can see the way the treads go. It’s a minor thing, but I like consistency. At this point the vehicle is done. So don’t forget to remove those powder blue parts underneath, that were used for stability while building the spade.
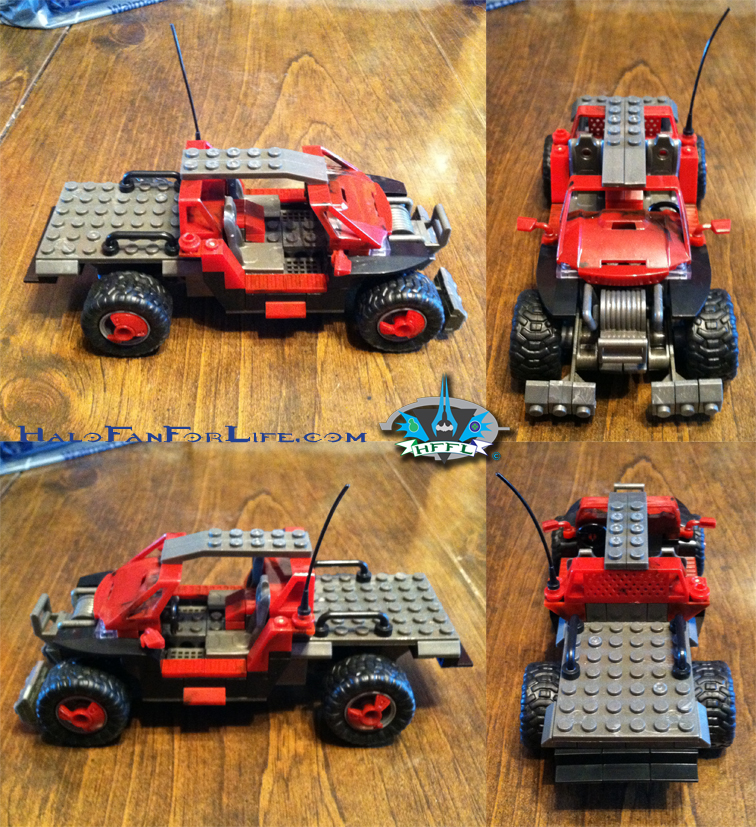
Orthogonal views of the spade.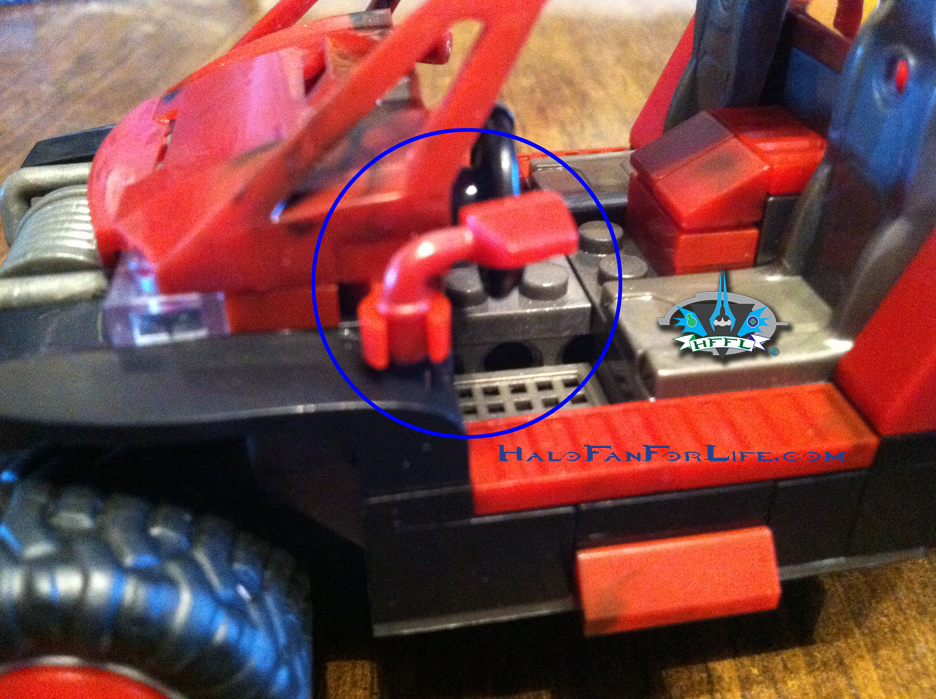
Above, I wanted to point out that when not in use, you may want to consider pointing the side view mirrors inward. Those pieces are tiny and might possibly be lost if they snag on something. Pointing them inward makes that less likely.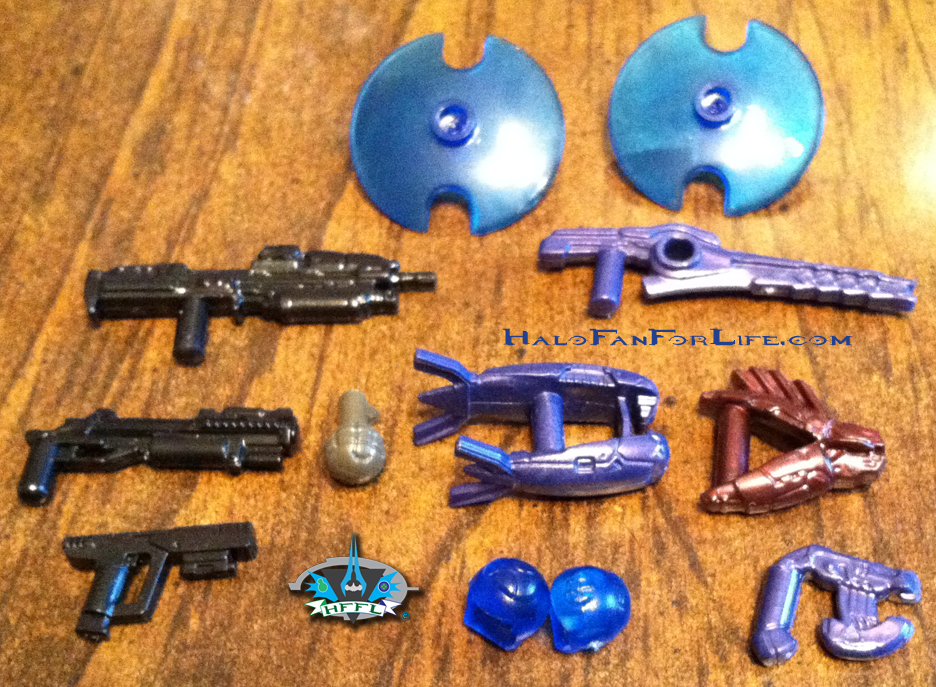
Here we have a nice selection of weapons. The Spartans get an Assault Rifle, Grenade Launcher, a pistol and a frag grenade. The Covenant get a “Reach” styled beam rifle, plasma rifle, needler, plasma pistol and two sticky grenades. I like that those are translucent blue. That means they are armed and ready to blow up something! Also note the two Jackal shields.
Be sure and click on the picture above to make a whole lot bigger. You’ll be able to see much more of the detail to these figures. We have had these all available before, however, the Spartans and Grunts have not been available in those colors. 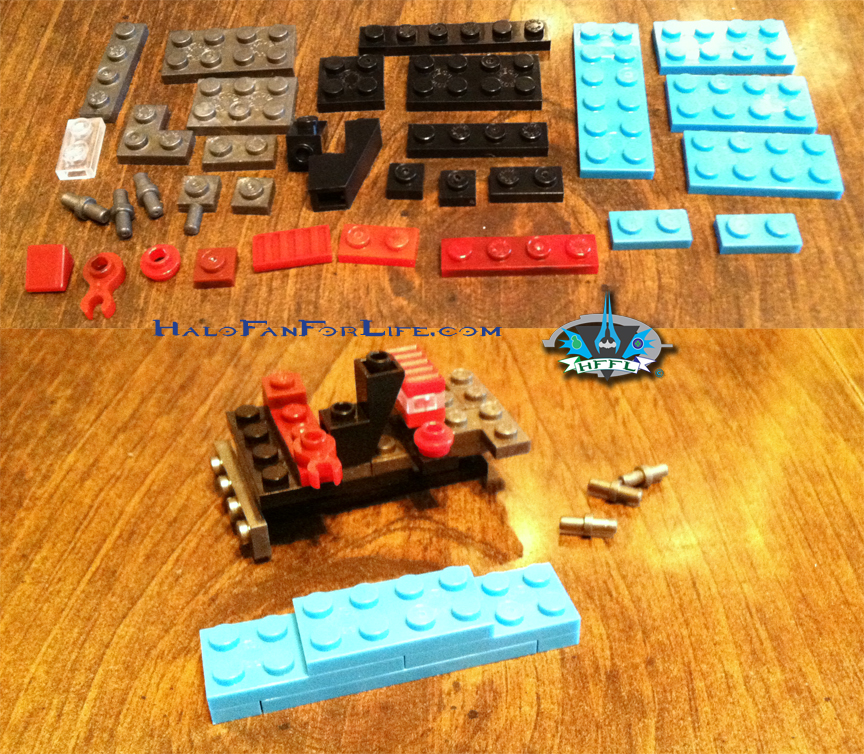
In the pic above you see the pieces left over. As per usual, I try to make something of them. If I can, I try to make as close of a mini model of the set. I think you can see the spade in the mini build. No wheels or roof, but still…LOL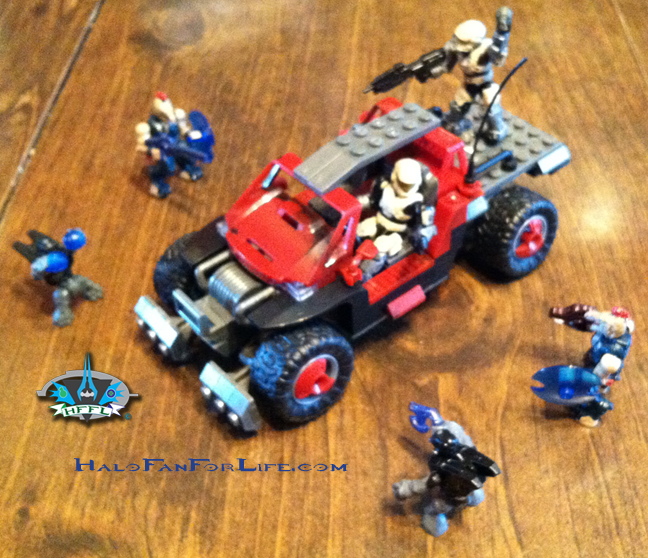
Oh no! The Spartans are ambushed! Will they survive the Covenant Assault???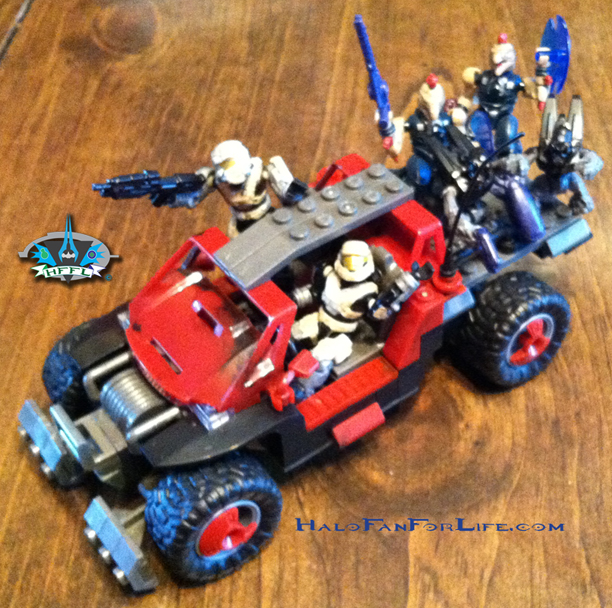 Oh wait, the Covies just needed a ride to Toshi Station to pick up some power converters. Happy Trails!
Summary: This set is a VERY quick build. Having already had the orange spade, there were no surprises for me. Red happens to be my favorite color, so I was happy to see this one made. The inclusion of TWO Jackals is VERY much appreciated as they’ve been rather under-represented in Mega Bloks sets, until recently. I’m always happy to have more grunts and with those being “Spec Ops” black armored grunts, even better! The Spartans have a nice sand color to them. I bet they’ll look great next to all of my other “Desert” troops! This set does not come with stickers. I’m actually okay with that. It looks factory fresh and not field tested like the orange one does.
Overall Rating: I give this set 9.5 out for 10 medals. This is a nice color variant of the spade. While I would have enjoyed a blue version that is game accurate, red is fine by me. No complaints with the set. I might have had the Spartans in a different color and I’d have liked to have had painted weapons. But those are minor. For me, the big draw was the two Jackals.
The price for this set might seem steep. However, if you factor in that it includes SIX mini figures, then the price is much more reasonable. Using the single blind pack figures as a model for price, those being on average $3 each, the figures alone in this set make up $18 of the $35. That means the Spade is $17. Now if you also factor in the typical 10 Cents per piece formula (this is what I always use), and the set having more than 200 pieces, you’re definitely getting your monies worth.
This is a Wal*Mart exclusive. I couldn’t find any local to me and had tried once before to buy it on Wal*Mart’s website. They sent me the wrong set. That discouraged me from ordering online again. ‘Lo and behold though, this weekend being Easter…Yeah I know…I’m a big kid… my wife got this for me at a Wal*Mart that we stopped at over the weekend.
Thanks for reading and let me know what you think of the review. If you have this set yourself, please give me your thoughts on it too!
-Sal
Super Massive Custom UNSC Mammoth!
My friend Vince is a Mega Bloks customizer who is very detail oriented and loves things to scale. So he took on the task of making a UNSC Mammoth that was closer in proportion to the in-game model, rather than the stock Mega Bloks model. Below are his results. The text included below is his. My thoughts will be included in BLUE text as normal.
Vince starts off by giving us some tech specs of his model:
4x Mammoth Signature sets + other asst. bloks + 4 months effort = 1 realistic looking REALLY BIG Mammoth.
HFFL: Folks this already is a costly model. Even if Vince got a couple of the Mammoths on sale, I’d venture to guess this cost him around $500 to complete.
This is my first really large blok build. While I admired the MB Forward Unto Dawn set, it just didn’t lend itself to realistic mini-fig play due to the ridiculous discrepancy between it’s external scale size and the mini-fig friendly interior. We bought a F.U.D. on sale but after stripping the exclusive figs out, I eventually sold it on unbuilt. I remember thinking at the time that the Scarab and the Mammoth held the most promise of all the potential candidates for realistic mini-fig scaled Signature builds. So when I heard about the upcoming MB Signature Mammoth I was like, “Yeah!” But then I saw the first publicized pics of the MB Mammoth set and following that, the first user reviews came in… Well I was like, “Bummer!” The model was simply too small to capture the Mammoth’s elephantine grandeur. The MB Mammoth model wasn’t significantly larger than the (absolutely perfect) v1 Elephant model. I was really hoping for something epic (like the prototype MB Scarab Signature set just revealed at the NY Toy Fair)! Well if MB wasn’t gonna step up and deliver an epic sized Mammoth model, then I would take up the challenge.
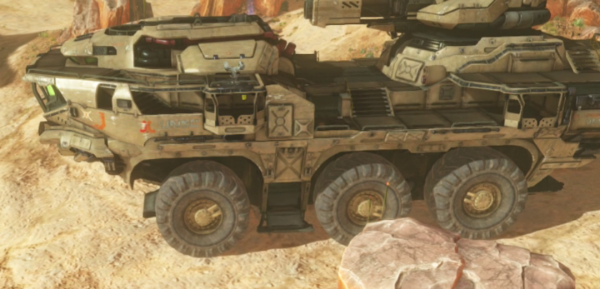
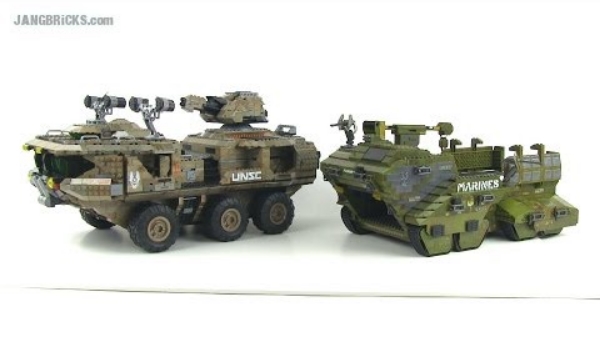
Hmmm… Methinks we have a wee bit of a size discrepancy here…
HFFL: Ya think? LOL
My goals for this build were:
- Scale up from the stock build until the model had sufficient headroom at front and rear for Warthogs to drive up the loading ramp at one end, through the interior, and down the ramp at the opposite end.
- Simultaneously accommodate several Warthogs inside.
- Retain the stock model’s easily removable upper deck sections to permit play access to the vehicle’s interior spaces.
- Add additional game-accurate interior & exterior walkways, stairs and ramps, doorways between the interior and the exterior, and mechanical details.
- Source and adapt some much larger balloon tire wheels to scale properly to the vehicle’s much increased size and weight.
- Really improve the vehicle’s “playability” by creating tons of realistic details for the figures onboard to interact with.
HFFL: Great goals to shoot for! The Mega Bloks build already takes a long time. Vince’s time spent on this blew that time out of the water.
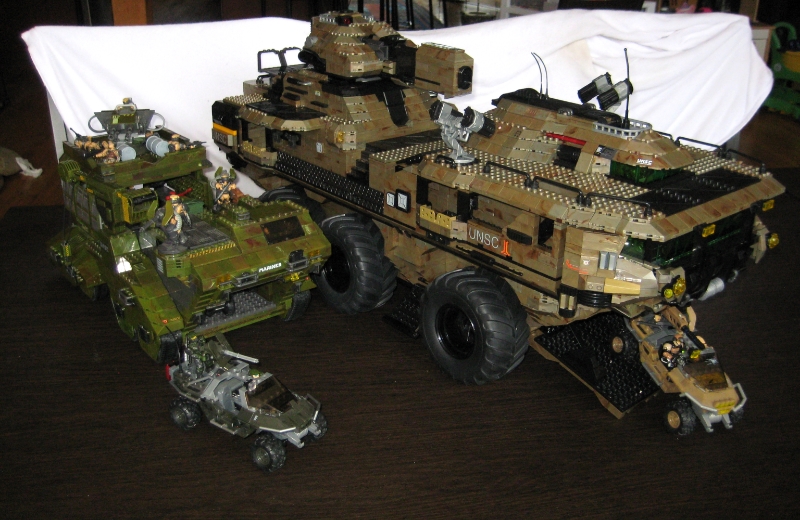
This one is just for you HFFL!
HFFL: Why thanks Vince!
The build began with two Mammoth sets along with our pre-existing fairly extensive inventory of spare bricks in both desert camo and black colors. I began by loosely following the original design. Once I had the hull tub scaled up to a reasonable size and then got to work on the similarly upscaled superstructure, I began to run low on the large desert camo plates used for decking and both the standard and inverse slopes used pretty much everywhere else. I got pretty creative trying to make do with just the two Mammoth sets and our spares inventory but I wasn’t happy with some of the compromises that this was necessitating. If I had been willing to reduce the model’s size by a few inches in length and a few studs in width and I wasn’t such a detail freak I could have got away with just the two sets. But I’m clearly a bit obsessed when it comes to our blok creations so it was off to Ebay for a 3rd set (at a considerably higher price than what I paid for the first pair at a pre-Xmas TRU sale event). After a couple weeks of re-working different parts of the model I thought I had the Mammoth largely complete. While I had followed the original MB designer’s lead insofar as the clever hinged side cheeks on either side of the cockpit, the modular sectioned build, and easily removable superstructure- there was next-to-nothing left of the original build. Once you had the freedom of a larger more game accurate build, the model really evolved into something cool.
Obtaining, adapting, and mounting the much larger replacement wheels and tires was to be the last thing I dealt with. However I had researched replacement wheel ideas prior to even purchasing our first Mammoth donor sets. I had decided that the balloon tires and matching rims used on 1:10 scale RC Monster trucks were good candidates. I figured a large paddle tire in the 5″ to 5 1/2″ diameter range would provide a perfect substitute and confirmed this with a local RC specialist hobby shop owner before hand.
HFFL: Getting the wheel size right is one thing that stopped me from attempting a project of this scale. (Not to mention, not having the money for it…) Vince found a great work-around.
So even though I didn’t have the wheels on hand during the majority of the build, I knew approximately how large they would be and thus could build to accommodate them. When I finally did acquire a set of suitable wheels and axle stub parts, they proved to be straight forward to adapt to the model. I made use of a bunch of stock old MB 1×2 modified bricks that had larger holes in them than the current standard versions. The RC axle stubs fit snugly through pairs of the 1×2 bricks. I ended up grinding a few millimeters off the bell shaped end of the axle stubs for a better fit and simpler build of the axle supports. I think the big wheels are pretty much perfect.
Of course while waiting on the last pair of tires (the RC Hobby shop only had four on hand initially), I had a lot of time to obsessively compare the model thus far to the in-game render from all angles. Well the result of this was a huge tear-down and rebuild to further widen the exterior and permit the addition of game accurate exterior stairways up front. There was 6-8 hours spent in total just repeatedly reworking the grill and headlamps, another few days in total optimizing the tail end, etc, etc… Long after the final pair of tires arrived I was still futzing about custom fabricating and painting additional parts and going through endless revisions to perfect areas of the build I wasn’t quite satisfied with. I decided to patiently wait to reveal the model until either the revision compulsion petered out or I was truly satisfied with the build. Somewhere in that process I purchased a 4th Mammoth to acquire 75-100 set-specific parts I’d decided the model couldn’t live with out making this project by far the most expensive custom build I’ve tackled.
HFFL: Wow, buying another model just for 75 pieces? Folks, THAT is dedication to your craft!
Macro Views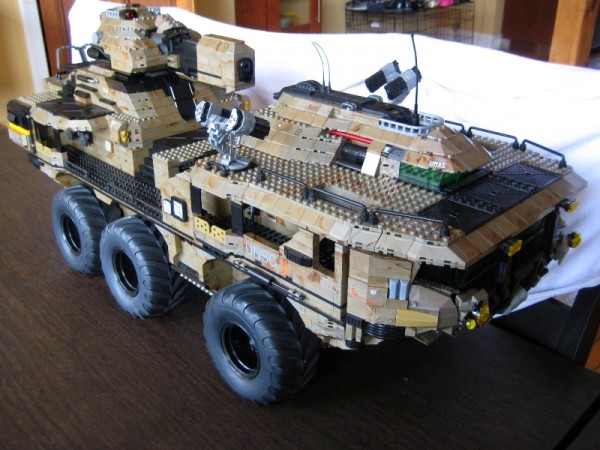 HFFL: I can already tell this is MASSIVE!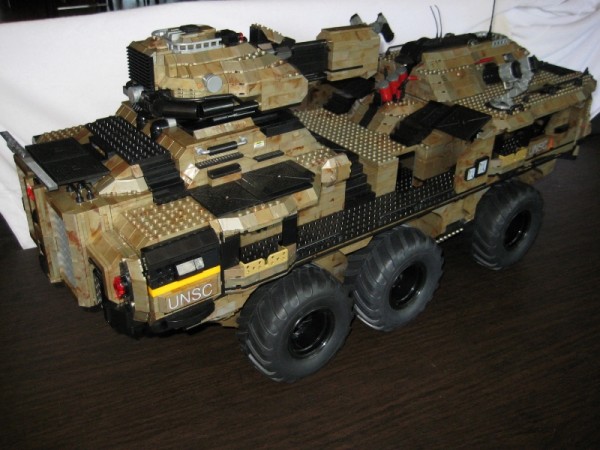
HFFL: Just look at all the detail!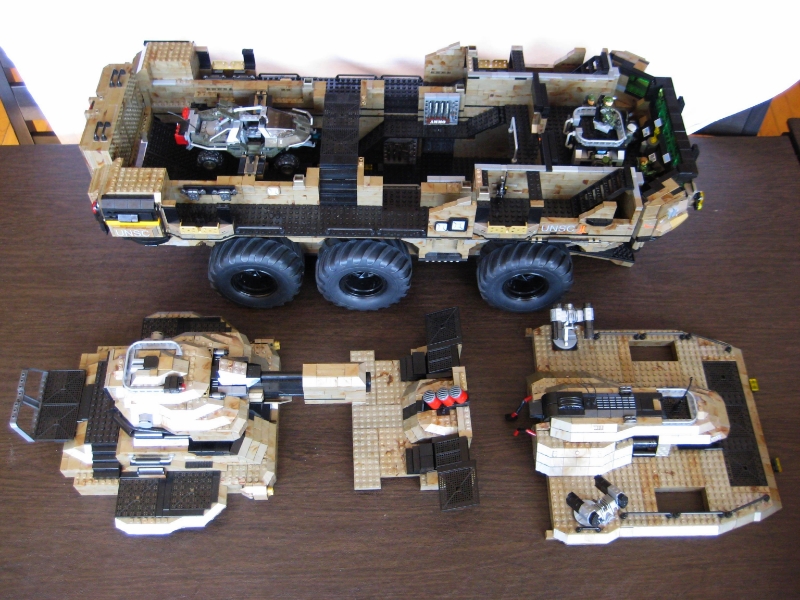
Exterior Views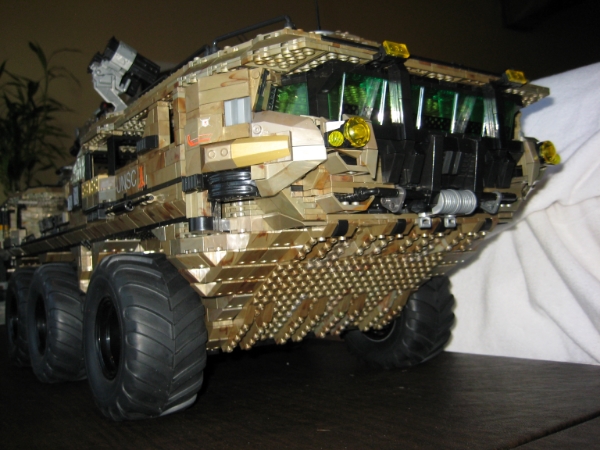
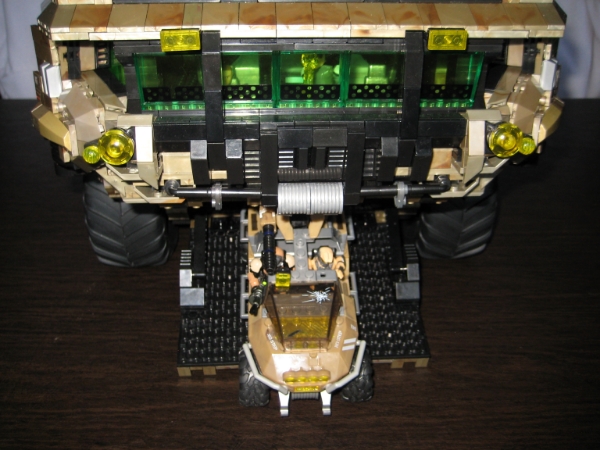
HFFL: Now THAT’S what I’m talking about! A ramp large enough, with height to spare to fit a mini figure sized warthog coming down it!
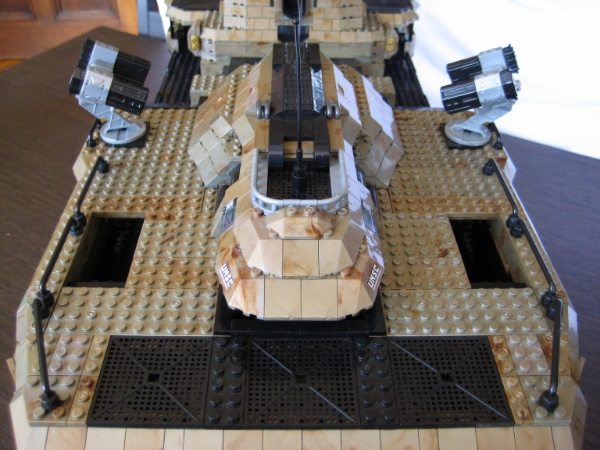

The red arrow points out the pilothouse “dashboard” and steering wheel through the windscreen.
HFFL: Okay, now THAT is a cool addition that the Mega Bloks model does not have.
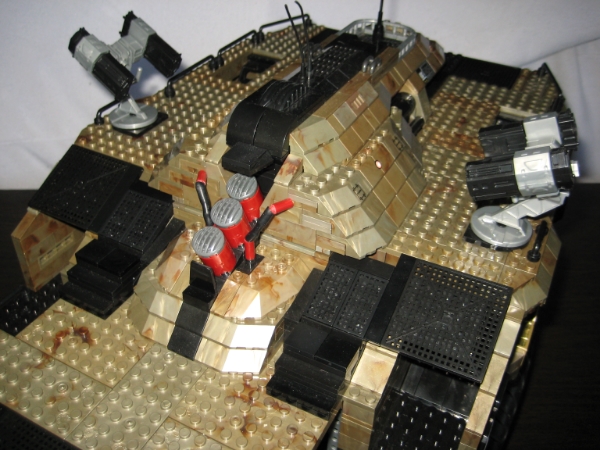
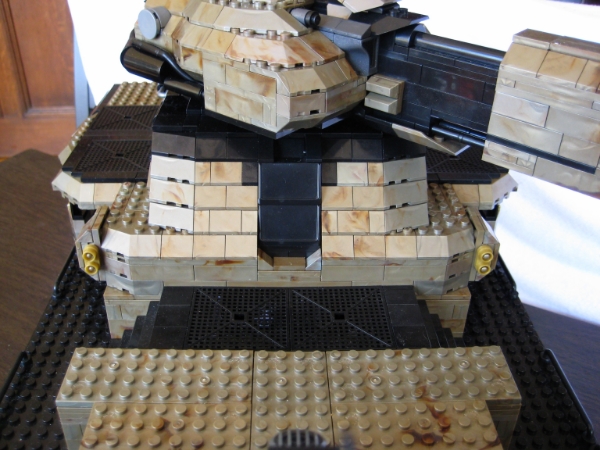
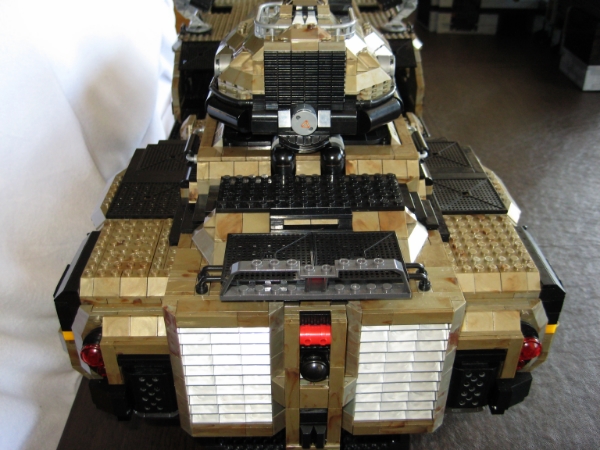
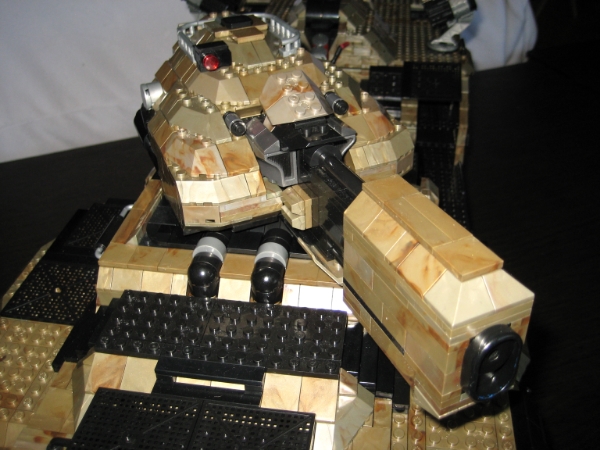
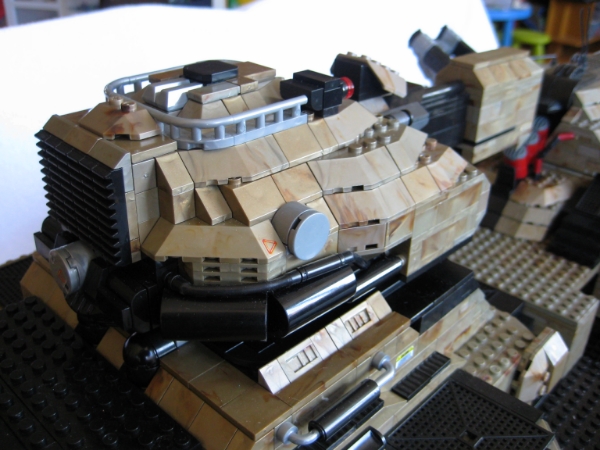 HFFL: Man, that MAC cannon looks like it’s got some POWER!

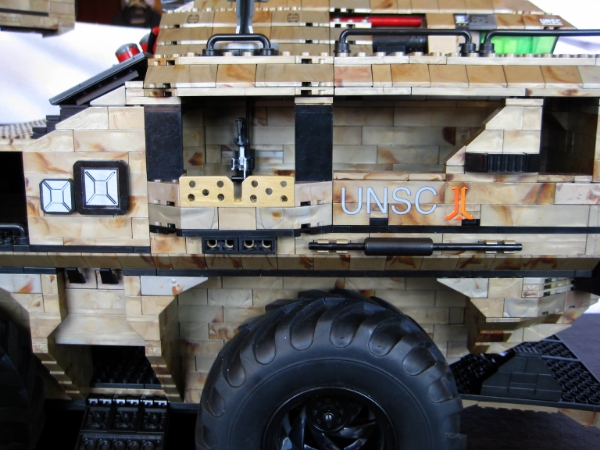
HFFL: I’m just loving’ all those “greeblie” all over Vince’s model!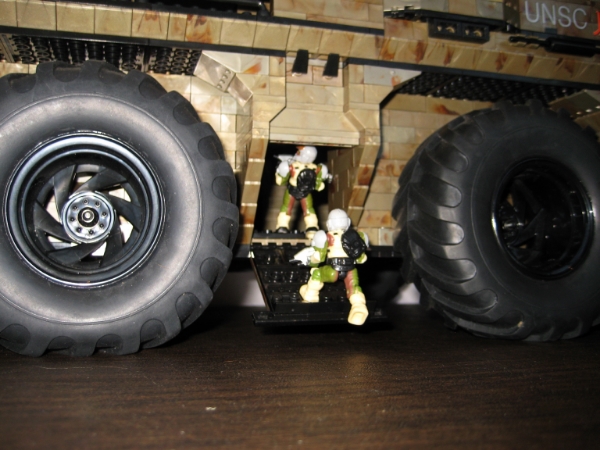
HFFL: The side hatch is well done. I’m also happy to see that Vince didn’t miss the additional wheel well angles. That’s something I think Mega could have included.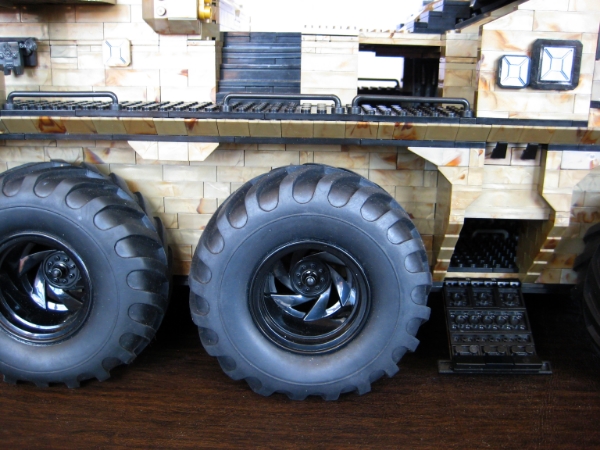
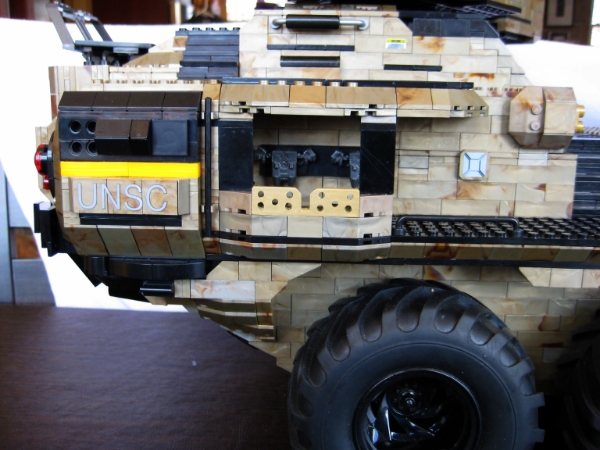
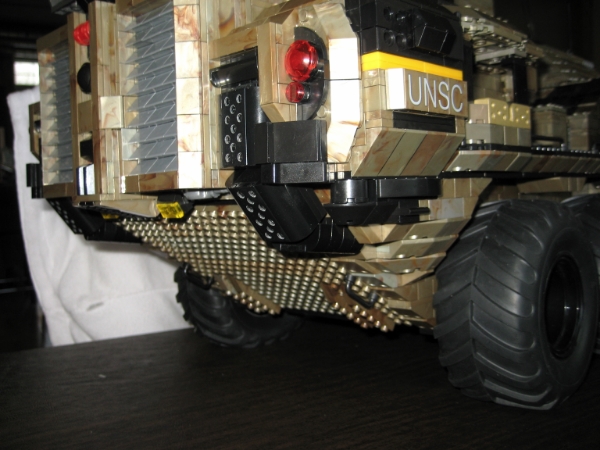
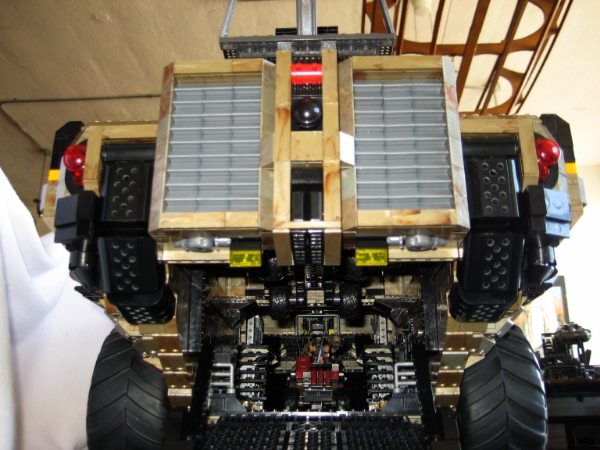 HFFL: Just look at that rear! LOL
As the pics suggest, our Mammoth possesses that genuine sense of gravitas missing in the stock Mammoth. So yes, it is substantially larger than the stock build- LOL! The finished model used about 5000 bloks. The model weighs about 16 pounds with the Warthog bay empty.
HFFL: 5K worth of bloks! The Mega Model is considerably less, by thousands.
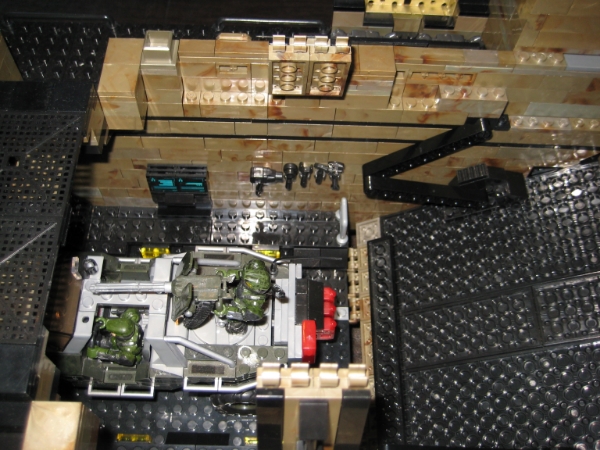
While increasing the size and level of detail over the stock model, I followed MB’s lead where possible and kept the dead air spaces beneath subassembly structures hollow to keep the weight under control. Considering just how much air volume the model encloses and the minimal attachment of nearly the entire superstructure, it is remarkably solid and stable. It was built with 99.8% stock Mega Bloks but eagle-eyed folks will note a few spots where I either custom fabricated and/or custom painted a part or where a specialty block from a competing brand simply worked better than anything from the MB catalog. The vehicle bay comfortably accommodates three H4 Warthogs (one on the overhead hoist in game accurate fashion) and three Mongooses. And that is after I fully detailed the interior of the vehicle bay adding staircases, weapon storage racks, elevated platforms, and workstations for the crew. I actually considered lengthening the model to the 36+ inches required to accommodate four ‘Hogs but the requisite increases in width and height as well would have increased the blok count to a point where it was clear that the pneumatic RC monster truck tires could not have supported it.
Interior Views
The Bridge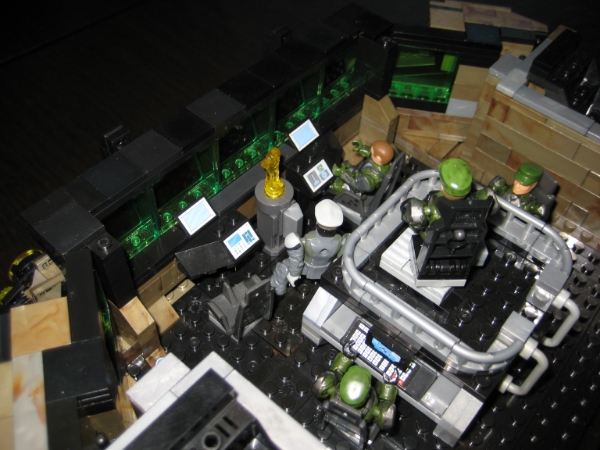
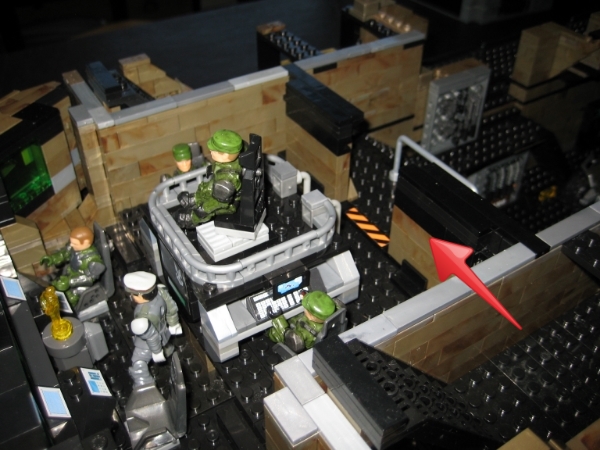
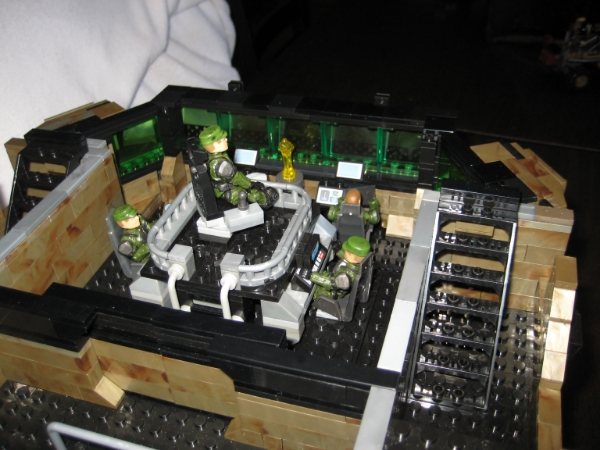
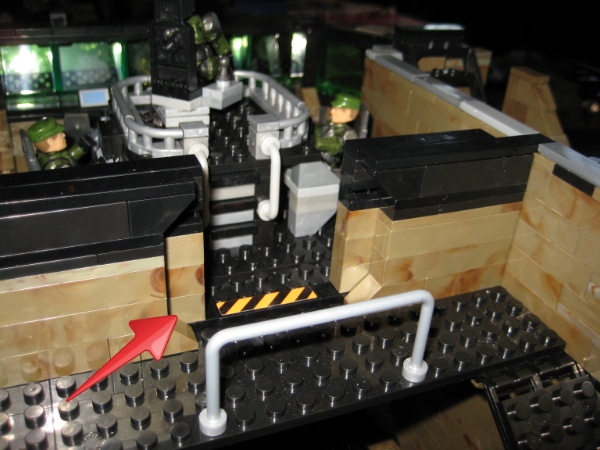
The red arrows highlight the sliding doors.
HFFL: Vince’s Mammoth bridge is just so much better detailed. That extra space made by enlarging the model really pays off here! Sliding doors? AWESOME!
The catwalks and vehicle bay.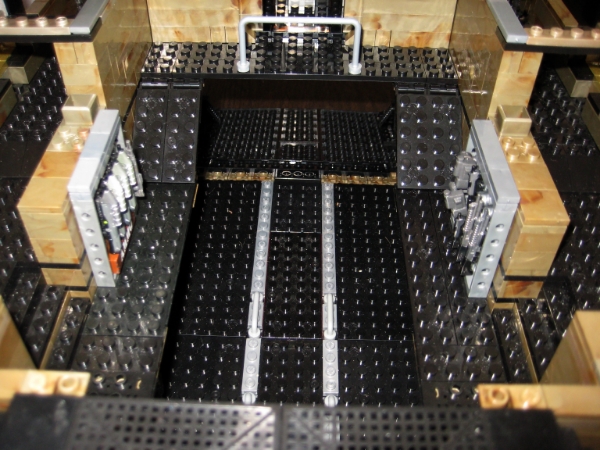
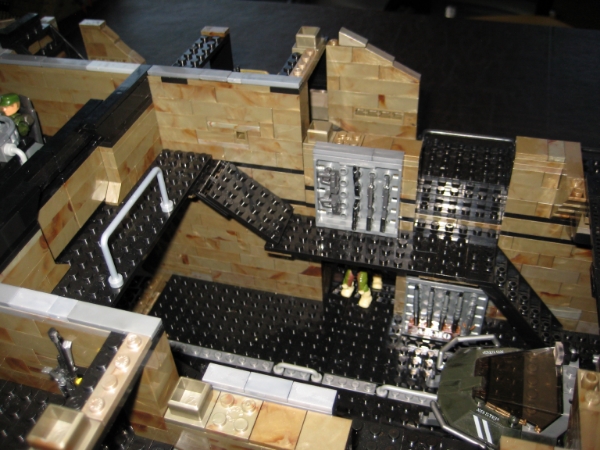 HFFL: Now I noticed right away that Vince’s ramps to the catwalks were pointed in the wrong direction. However, he explains that later in the article.
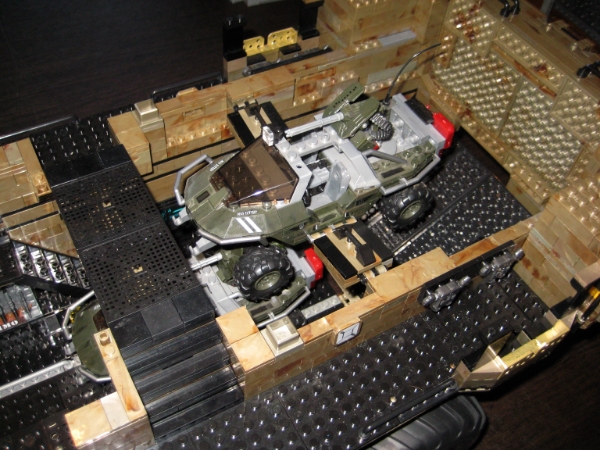 ‘Hog stored suspended above the vehicle bay floor in game-accurate fashion with sufficient headroom for another ‘Hog to pass beneath unimpeded.
Covered exterior walkways.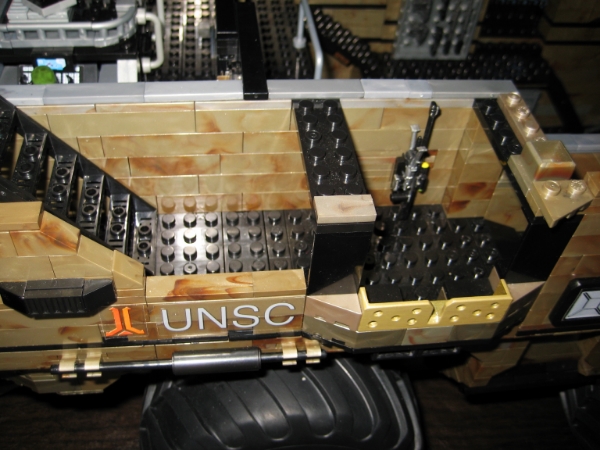
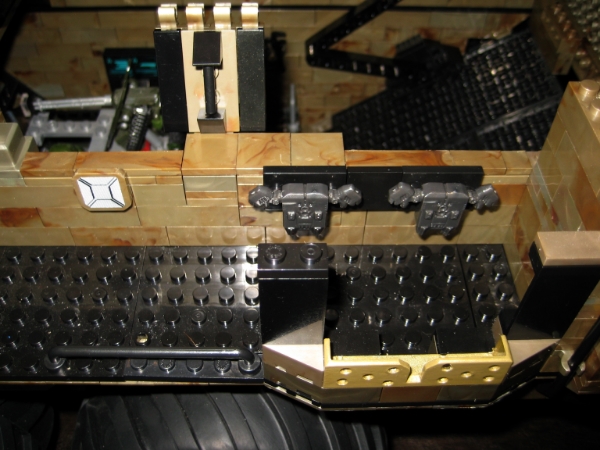
Despite being approximately half the size that a properly HMB mini-fig scaled Mammoth should be, the exterior of my model stands up really nicely to close-up comparisons between in-game renders of the Mammoth.
HFFL: What? It’s only HALF the size it should be? DAY ‘UM!
However the interior was trickier due to the reduced scale. The interior 2nd floor is largely absent, replaced with a split level arrangement of catwalks, ramps and stairs (the latter of which unfortunately had to face in the wrong direction). As a 5′ long model wasn’t in the cards, this will simply have to do- LOL! On the positive side, there is now game-accurate mini-fig scaled access between the interior and external walkways and both the top floor “wheel house” and the main deck command & control center are much better represented than in the stock model. Besides the expense, this was by far the most effort I’ve spent on a blok model. I began the build three and a half months ago and have worked on some part of it pretty much nonstop since.
So I hope you all enjoyed. Normally I invite constructive criticism at this point in my build threads. However with so much of my blood, sweat, and treasure invested in this puppy I might up and hang myself if someone was to find something seriously amiss with this build- LOL! So best to stick to compliments then… As always, I’d love to see others attempt a properly sized Mammoth so clone away.
Happy Trails!
MTB Vince
HFFL: This is just an awesome model. Man, if I had the money, I’d SO make a proper scale one. Given Vince’s specs, that would put it at 64 inches long (5’4″) and 27 inches tall…WOW!
I took it upon myself to create a comparison shot between Vince’s model and the Mega Bloks stock model. I took the side on view pic from and super-imposed it, to scale with Vince’s. It’s partially transparent with a blue outline so you can see it better, but still see where things line up with Vince’s creation.
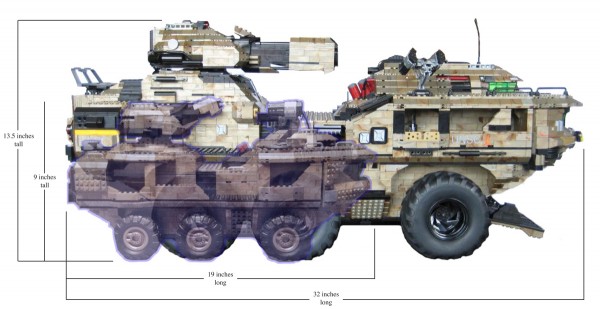 Vince’s claim of using 4 Mammoths to make his behemoth is quite believable. Let’s not forget that his model is also several inches wider too (not shown).
Just amazing! So what do you folks think about Vince’s model?
-Sal
Awesome custom resized Halo Mega Bloks Brute Chieftan!
My friend and fellow Halo Mega Bloks collector “Yrkane” customized one of his Halo Mega Bloks Brute Chieftans to be taller. It’s MUCH more in scale with the human minifies now.
His words about his custom are below:
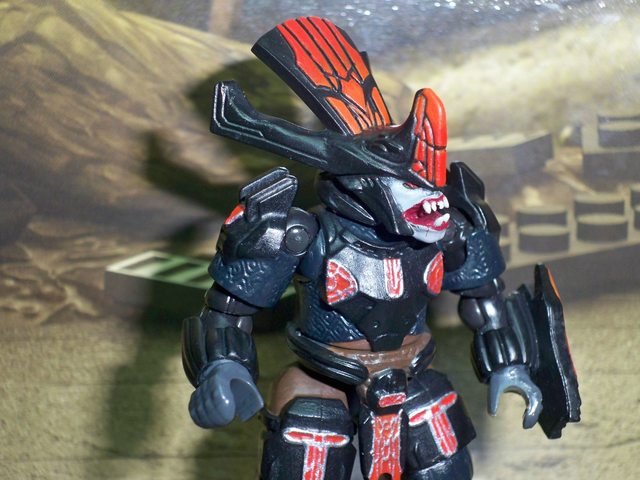
He came out great, the pose-ability added by the CoD arms is too fun.
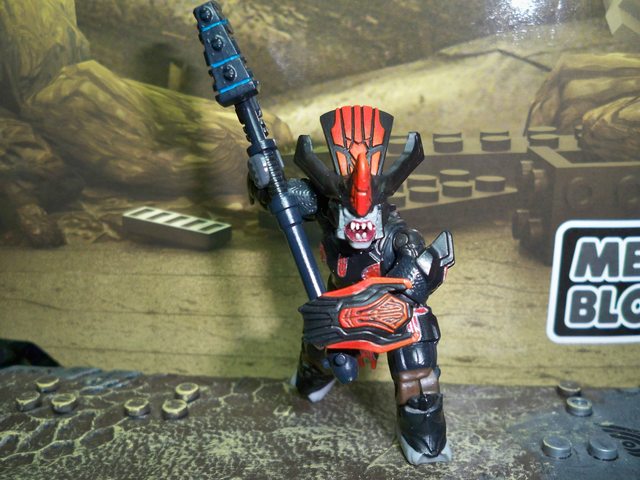
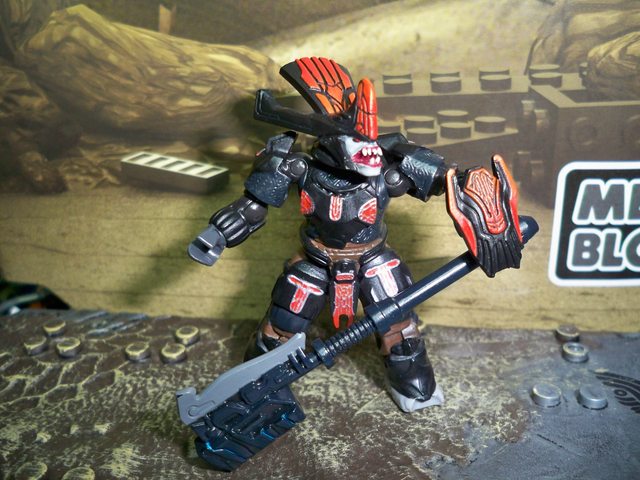
The upper and lower arm armor is removeable, just hollowed out pieces; I tried to emulate the upcoming revised figures armor.
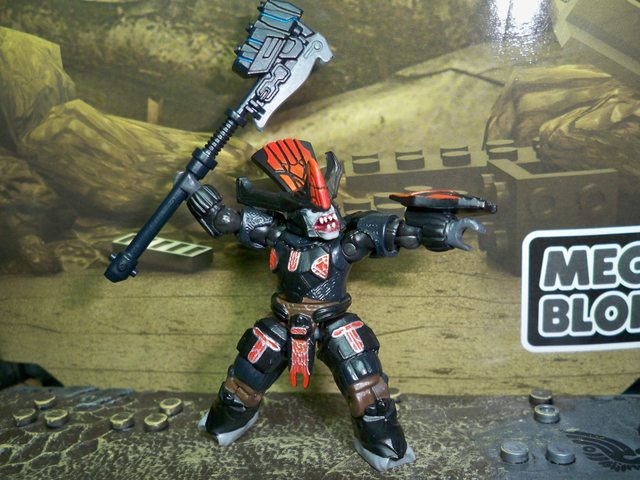
I can’t wait for the official MEGA version.
HFFL: Finally, here is a comparison shot of his custom next to another untouched Halo Mega Bloks Chieftan:
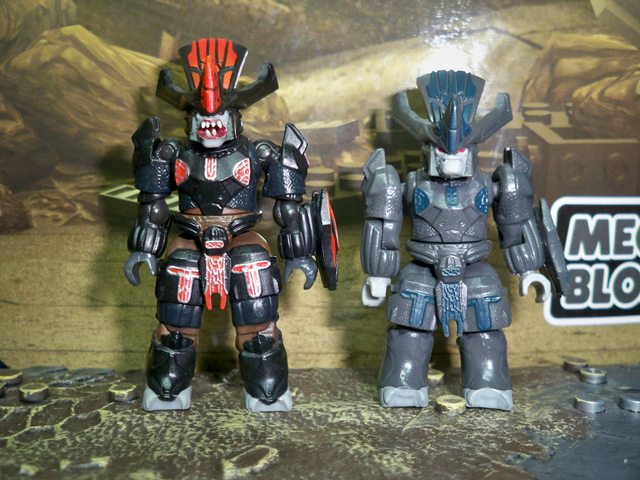 HFFL: I’d say that’s damn fine work there! The extension of the limbs and the added teeth really make this figure SO much better. I hope Mega Brands takes a hint from this wonderful custom and gives us Brutes (and Elites for that matter) in the taller, better articulated variety.