
When I went to New York Toy Fair this year, I had the pleasure to meet not only the designer, but the owners of Fascinations as well. While taking with both of them about their Halo line, we discussed possible new models to come. During this conversation, the designer was kind enough to offer me one each of their Halo models to review on the blog. This is the first of 4 planned reviews for Fascinations line of Halo Metal Earth models.
![]()
![]()
Now before I get started, I need to say that this is the first time I’ve worked with laser cut models at this scale. I chose the Master Chief Helmet set to start with since I thought it might be the easiest one.
I learned very quickly that this is the kind of model you MUST take your time with. As such you can see below that it took me 3 1/2 hours to build.
Technical Specifications:
Build Time: 3 1/2 hours
Special Features: N/A
Cost: $13-15 retail
And on with the pics! (Click pics to make BIGGER)
Here are the fours sets available now: Warthog, Peican, Mantis, Master Chief Helmet
Each Halo Metal Earth packet has a similar design. The front showing the product inside with a window showing a portion of the laser cut metal sheet. I like the design as it’s a good contrast between the shiny silver metal model and the dark color design.
Within awaits a laser cut and scored sheet of metal. The over all sheet isn’t very large, which in turn makes some of the pieces tiny. With such small pieces and only one sheet, you need to be very careful not to lose pieces once you’ve removed them from the main sheet. If you intend to get this for a young child, I HIGHLY advise against it. The packaging states ages 14+ for a reason and I agree with that.
There is a sheet of directions included as well. I however found it easier to go to the Metal Earth web site and view the PDF of the instructions instead. Doing so made it available to blow up in size and focus on the step at hand.
Now, before you get started, the directions recommend that you have a pair of tweezers handy. I am going a couple steps further to show you what I used in building this model. Starting from 12 o’clock and going clockwise.
• Thick tweezers: Used for holding larger pieces
• Small metal clipper: used to remove doe of the excess metal sheet as the model was being built.
• Thin tweezers: used for bending smaller pieces at their score line. Often used in conjunction with the larger tweezers. Also, the small tweezers were used to turn or bend the ‘tabs’ (you’ll see this later)
• Exacto knife: I used this to help guide the tabs into their slots.
• (Not shown) magnifying glasses. Not the hand held type, but the worn on the head type. (you can pick up cheap ones at Target for $1-3.)

Okay, so let’s begin. Below is the visor piece. It’s one long piece that you gently curve to a circle. Not at right of pic there is an additional piece. This is one of the smaller pieces attached to add depth to the model. At top left (inside) you can see a couple of the tabs have been inserted and twisted. Twisting the tabs locks the added pieces in place. With these models you either twist the tabs or bend them over, depending on whatever the directions call for.
Below is the jaw portion of the helmet. The upper pic shows it with a couple of small pieces attached, while the lower pic shows many more pieces attached. Note the dotted lines along the edges of the added pieces. These are the score lines that aid in bending the pieces to the desired angles.
Showing the back side of the jaw piece, you can see the various tabs have been inserted and again twisted to lock the pieces down. BTW, let me state that when twisting these tabs, I made sure to take it slow and not try to rush twisting them. I didn’t want to chance snapping them off. The sheet is a little more durable than I thought, but again, this is the first time I’ve ever attempted a laser cut model and at this scale to boot.
Here we see the visor and jaw sections mostly joined fro the side.
A front view. Forgive the blurriness as these are really small parts. Oh, I should also say that you are seeing fingerprints on the metal. Don’t worry about that until the end of the build. At that time, you can clean off the prints and make the model shine. (You see that at the end)
The top of the helmet is shaped and ready to be attached to the rest of the helmet.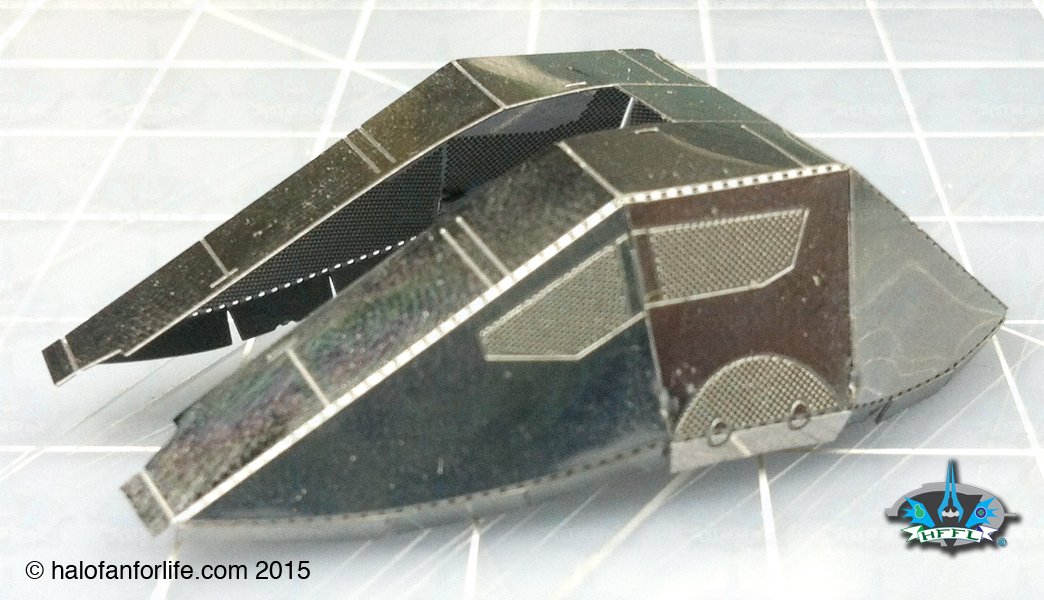
At this point, I need to let you folks know that I made a couple of small mistakes when building this model. Nothing major and nothing I feel detracts from the model. Just me misreading the directions. On the top center of the helmet, the lined piece should have been the other side up. It doesn’t really affect much. Also, at the back, I tried to attach the jaw piece to a rear piece on the helmet a little to quickly and broke it off. Thankfully, the piece was still easily able to be attached and with no soldering. So again, not a big deal, but it certainly made me redouble my efforts not to rush the project.
Let me add that any green glints you see from here out are just the reflection off of my wife’s iPad holder and are not part of the model color itself.
With the helmet done, I moved on to the display stand. This is mostly made of one bigger piece that has a series of folds to it, then a few smaller pieces that are attached.
Here we see the completed model in orthogonal views.
The helmet in comparison to a US Quarter. This helps to give it proper scale.
Once again the model, with stand, a quarter and a dime for scale comparison.
And finally, the finished model cleaned of fingerprints and shined up. 
Despite my being a beginner at this type of model and the couple of mistakes I made, I am VERY happy with the outcome. I can say this, once you’ve completed one of these models, you really appreciate the effort it takes to build models of this size.
I probably took much longer than needed, but again, I would rather err on the side of caution. This was definitely an exercise in patience, one that I was willing to take the challenge for.
This model now sits proudly on one of my Halo collectibles shelves and will eventually get a plexiglass case to display it in to keep dust off of it.
Do I recommend it? Yes, for ages 14 and up. Again, I stress that you must have patience when building this.
Here is some information about Fascinations themselves.
Fascinations was founded on June 1, 1985.
Part of Fascinations mission statement is:
Our goal is to captivate the imagination and inspire wonder. Designed to illustrate many magical aspects of our world, our products will cause you to react with amazement and ask “How can they possibly do that?” or “What creation will they think of next?” By working with engineers, scientists, magicians and most importantly, kids young and old, Fascinations® is proud to bring you the best in truly unique Gifts and Toys.
For more about Fascinations products go HERE.
Fascinations Facebook page
Instagram
Twitter
If you have any questions about this set that I didn’t cover in the review, please do not hesitate to ask me. Either reply below or e-mail me at sal@halofanforlife.com
Thanks for reading and let me know what you think of the review. If you get this set yourself, please let me know your thoughts on it too!
If this review gives you an informed decision on whether to purchase the set or not, please consider a small donation (50 cents) maybe. It’s much appreciated and helps ensure that HFFL stays active on the internet. Thank You.
-Sal
Wow, this models is tiny! But despite this, it has a lot of detail packed into it.
And for being a beginner at this, you did EXTREMELY well IMO.
Great review Sal.
Thanks.