
In my ongoing series of custom Halo block built sets, I came across this one on AliExpress. It’s a big set. Bigger than mining scale. Affordablility was great. the build had some issues, that I’ll talk about later in the article.
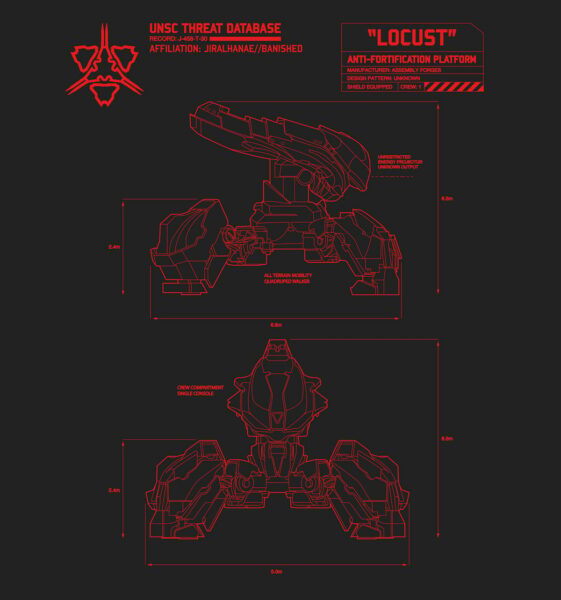
Let’s first look at the in-game Banished Locust.
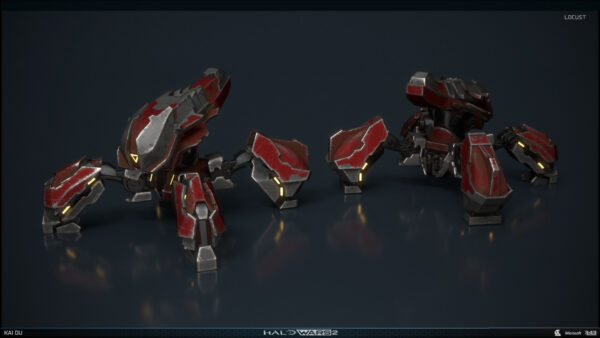
As you can see a lot of angles and detail to the armor. This would seem hard to recreate in block form. But let’s just see how this model played out. Then you decide for yourself, how the outcome was.
As mention, I got this from AliExpress.com. This is where I’ve been getting the custom builds. Though many of them are based off of designs from rebrickable.com.
Ok, let’s start the build!
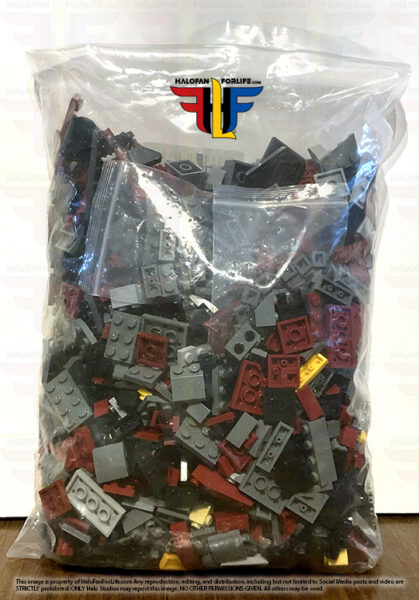
You get one bag of parts. All of them in one bag. No neat little bags for sectional building. This isn’t main brand stuff here folks. So expect this kind of treatment, when you buy custom block sets.
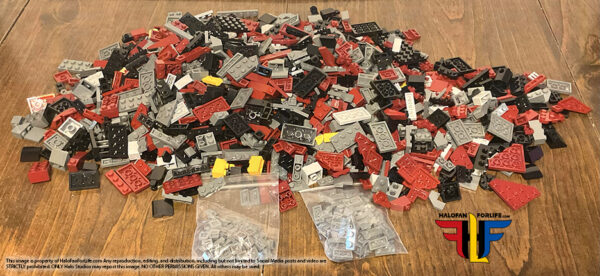
Here are the pieces dumped out onto my dining table. There were two small bags of pieces. Each containing a specific type of part. Thank goodness…. Those small parts can be a hassle and easy to lose.
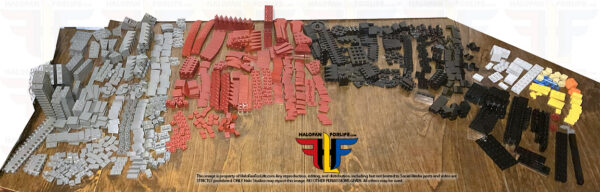
Here are all the parts sorted out. This took a little while. Thankfully, most of the parts are three colors, with a small smattering of other color parts. And yes, I blocked off other parts of my dining table in the edit in photoshop. It’s not messy, just not related to the build.
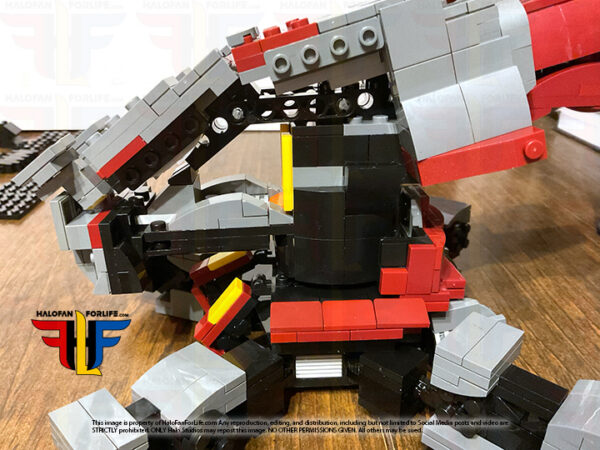
So we start with building the body. Pretty standard. Not the (fuel?) tanks at the back, at bottom right of this pic. Also, those little jutting black pieces in the top left are for the legs. Ugh….big issue there. Again, I’ll talk about this later.
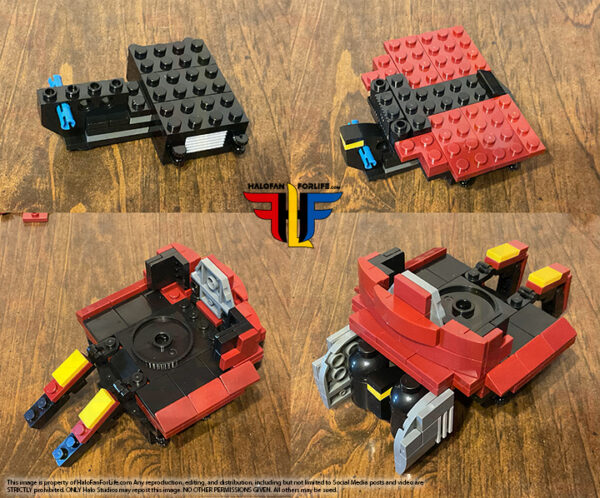
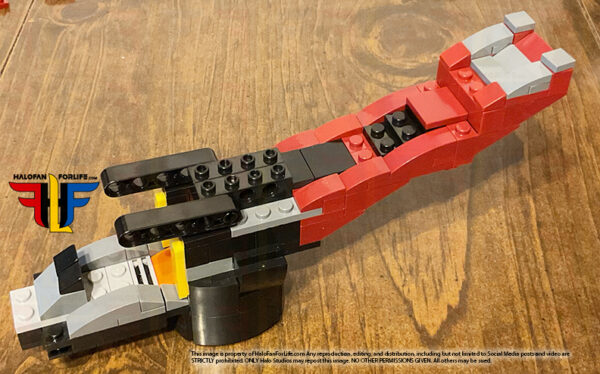
Next come the back legs and pincers. The side armor on the legs is not held well onto the legs. Frequently during the build, these would pop off. So where needed, I began glueing. It’s NOT something, I like to do. But with the custom builds, it often becomes a necessity.
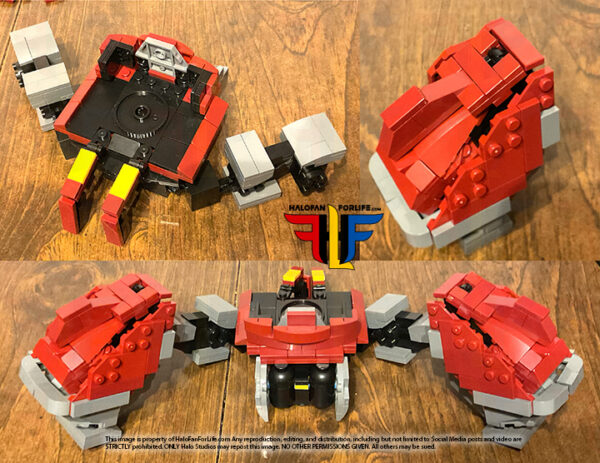
Now the front legs. As with the other set of legs, side armor becomes an issue with staying on. And again, I had to glue it in place. At top left, the model looks more like a mech, than a Halo Locust.
Now starts the “Head” of the locust. This section was fun to build.
Instead of a clean triangle of yellow, the designer opted for these 1×1 curved tiles. Not accurate, but kinda neat.
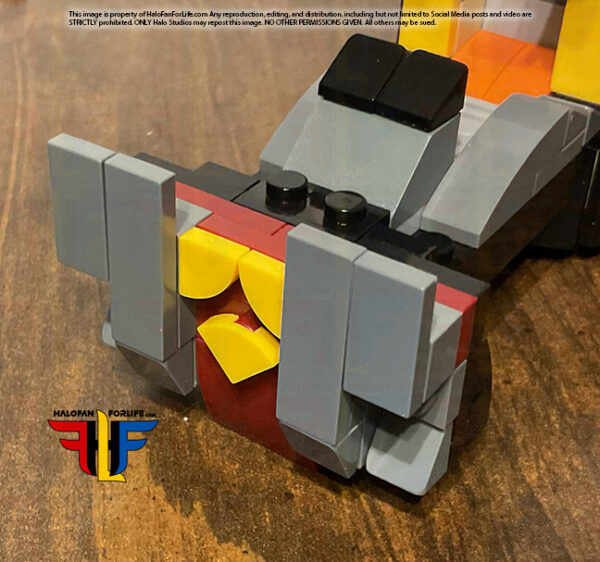
The top of the head is built with a hinge joint, so it follows the shape of the head, without having to use a lot of heavier blocks to make the shape.
The main part of the head is done and ready to be attache to the body.
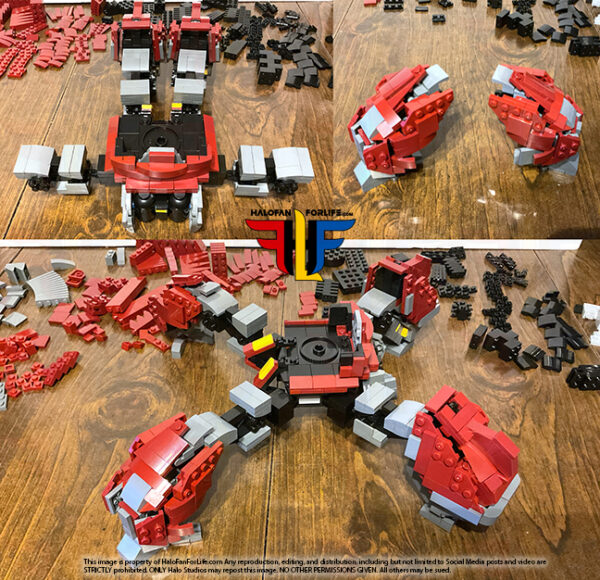
NOTE: At this point, I deviated from the build. The leg joints were so weak that trying to build side armor onto the head would have the legs popping off and random pieces coming off too So, I fixed those and then built the rest of the head separate from the body until it was done. THEN added it to the body. Trust me, this will save you a LOT of frustration, should you decide to get this for yourself.
Now, there IS room for a figure. The “cockpit” seems to be designed for this. Though I did not add a figure at this time. I know… I should have, just to show it.
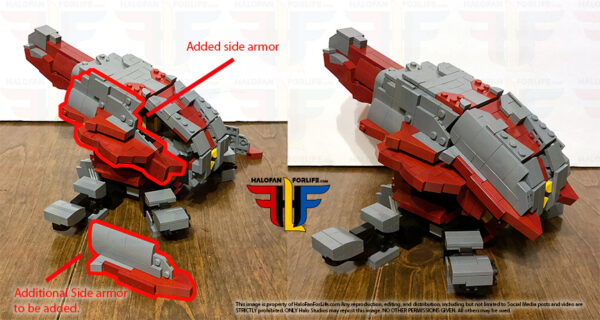
There are two sets of side head armor sections added. (Highlighted in red) These also do not stay well in place. Especially the one marked “Additional Side armor to be added”. So once again, GLUE.
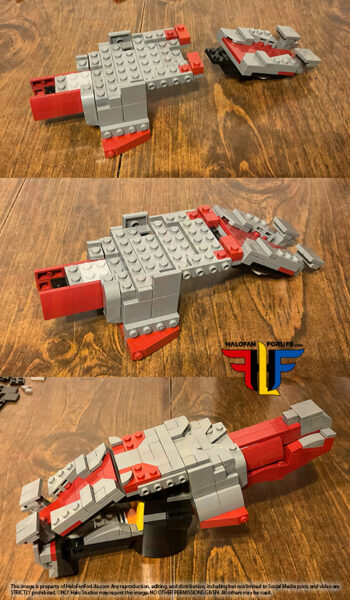
The head is now complete and ready for the rest of the legs to be added to the model. I very much like how this part of the model looks.
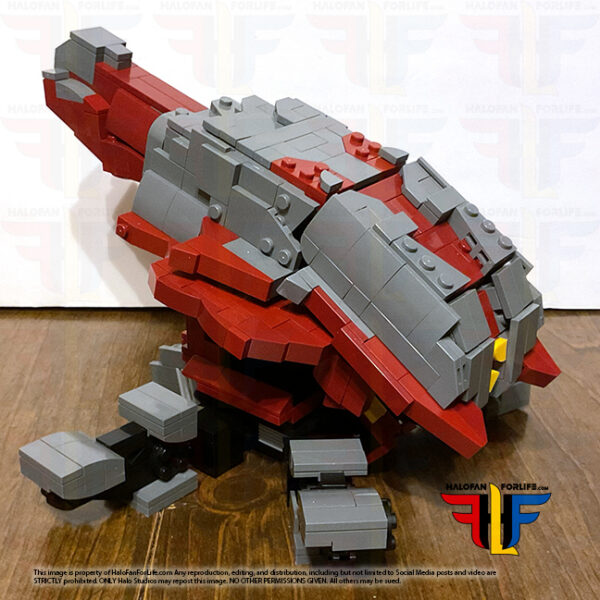
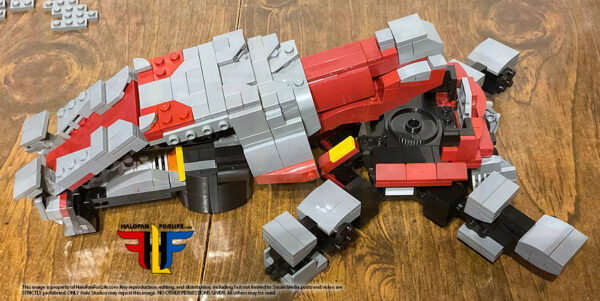
So, as you can see, when the legs are added, the whole model sinks at the middle, due to weight as well as very weak joints. THIS is my biggest issue with this model. It should be able to stand on its own. Especially without pieces falling off. This became my biggest frustration with this set.
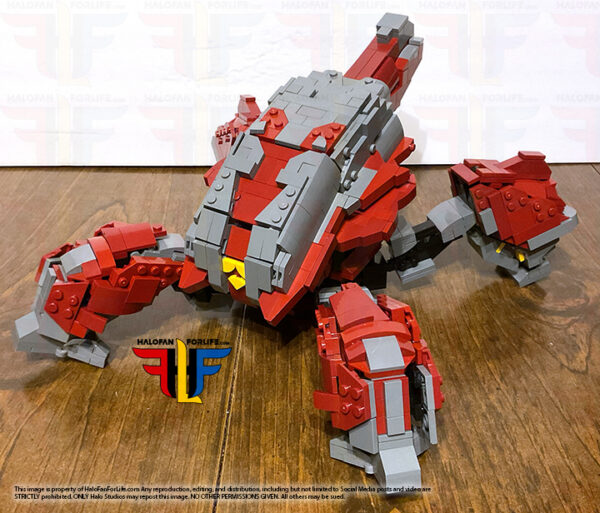
So, I built a small stand with the leftover parts to prop up, underneath the main body and keep the legs in correct position.
Below is a graphic I found on one of the Halo wiki sites, related to the Locust. I figured, I show it here as well.
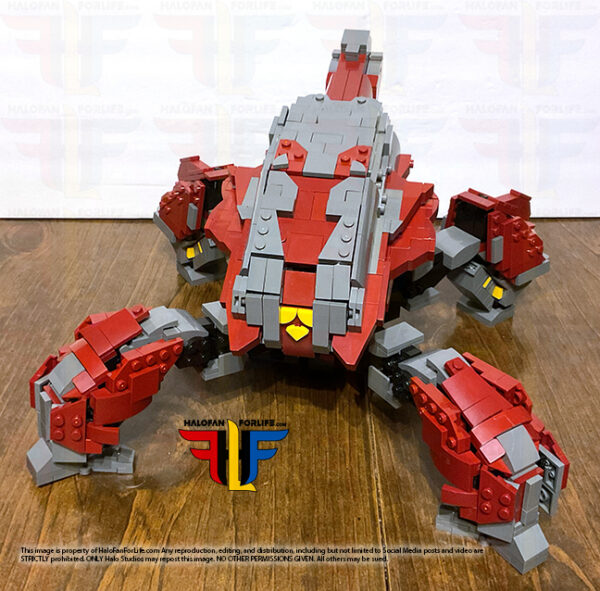
Overall, I’m not so happy with the leg joints of this set. The final look is great, if oversized for figures. But again, without it being able to stand on it’s own, that’s a big detractor for me.
Again at 1413 pieces, and a cost of $58.70, the cost per pieces was fantastic. So the set is very much affordable. This makes the leg joint issue slightly more tolerable. Because of the way this is built, I’m not sure if I’ll be able to redesign the legs to have better joints.
So then, do I recommend the set? No. The frustration I had at sections falling off and the leg joints jut being way to weak to hold of the model, without support from a stand underneath, just killed my enthusiasm for the set. I really wish Mattel/Mega/Mattel Brick Shop, were making these sets. But, in their absence, I need to fill my desire to build Halo sets. Unfortunately, I do not see Mattel making sets for awhile, until the next main game.
If this review gives you an informed decision on whether to purchase the toy or not, please consider a small donation (50 cents) to the blog.You can donate via PayPal to jedisalpitt2002@yahoo.com. Or just click the paypal link at the right on the main page of the site. It’s much appreciated and helps ensure that HFFL stays registered/active on the internet. Thank You.
-Sal