 Other than the text and my logo, everything else was done in Halo 4’s Forge.
Click pic to make bigger!
-Sal

Other than the text and my logo, everything else was done in Halo 4’s Forge.
Click pic to make bigger!
-Sal
Well here we are at the third of a four part review for the Mega Bloks UNSC Mammoth. It came together nicely in part two with the body being built. Now we move on to the removable roof panels.
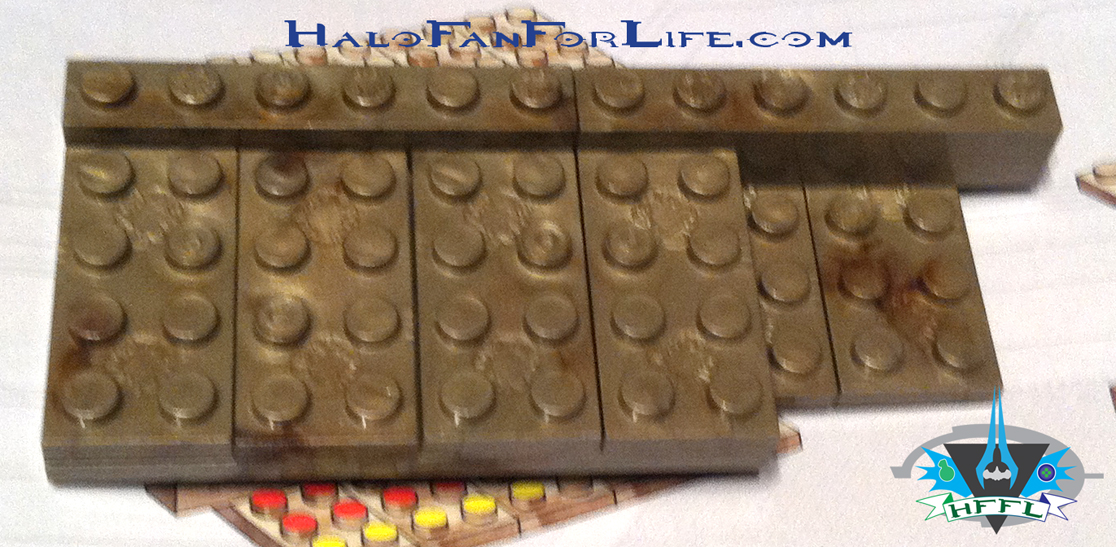
First up are a couple of pics showing the build for what will become the back flap of the rear roof. This enables a minifig sized warthog to fit into the rear of the model.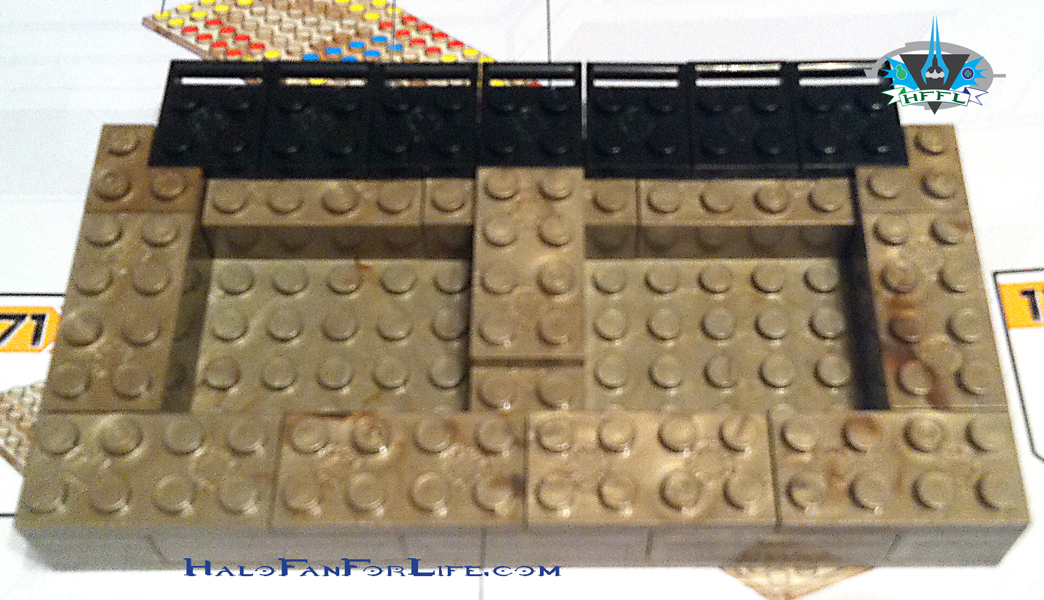
 I love all of those little greeblies on the back. BTW, if you didn’t already know, “greeblies” are a term meant for those little extra bits and parts that add depth and character to a piece.
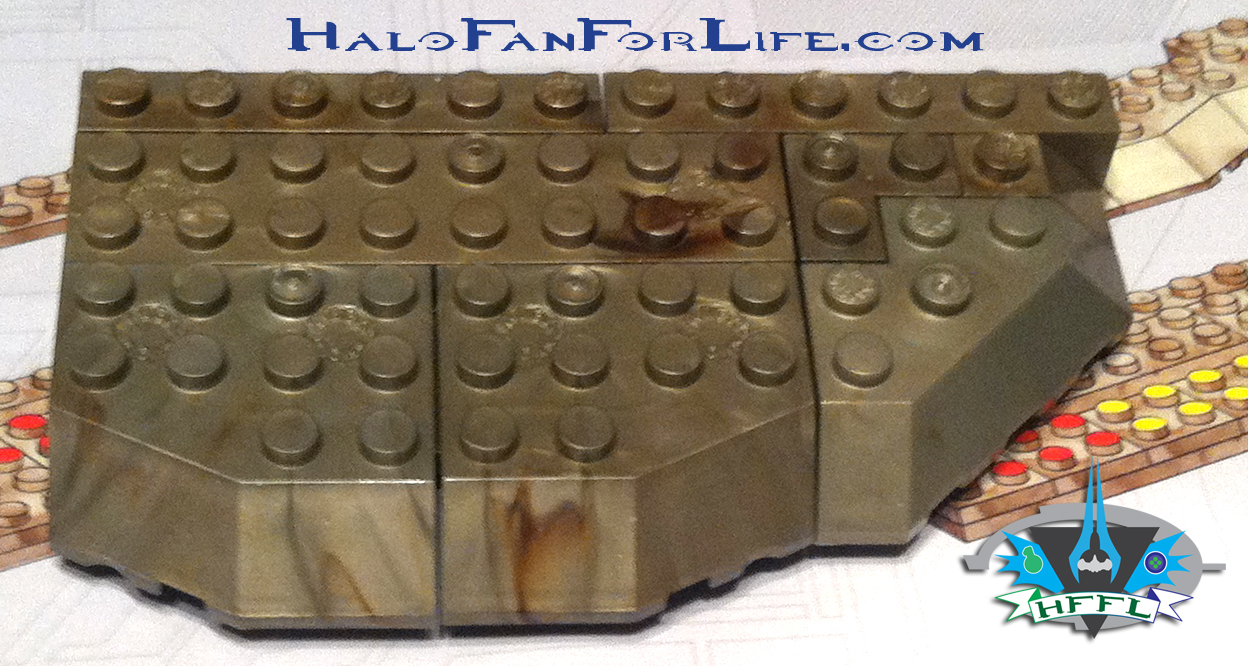
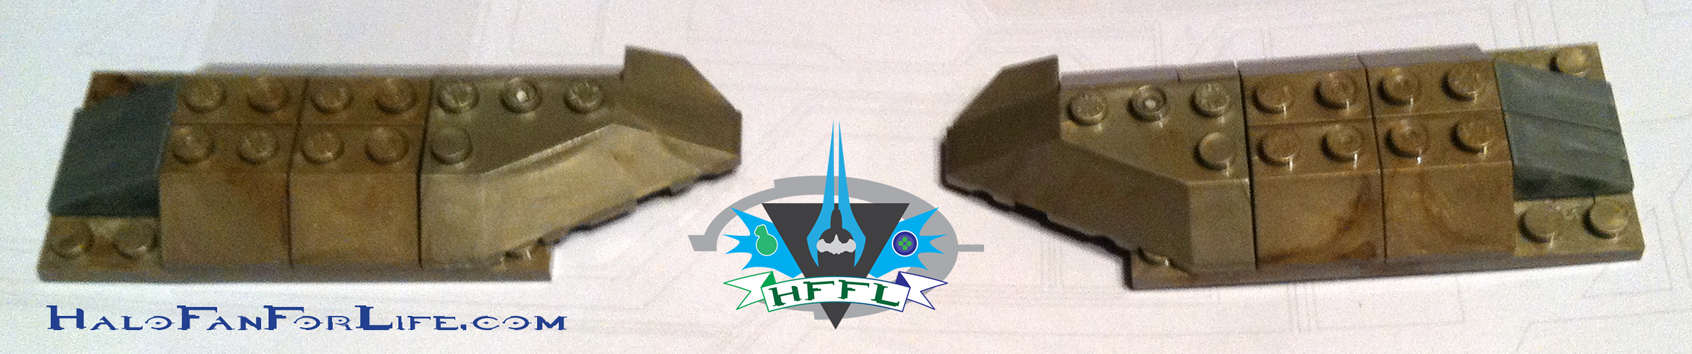
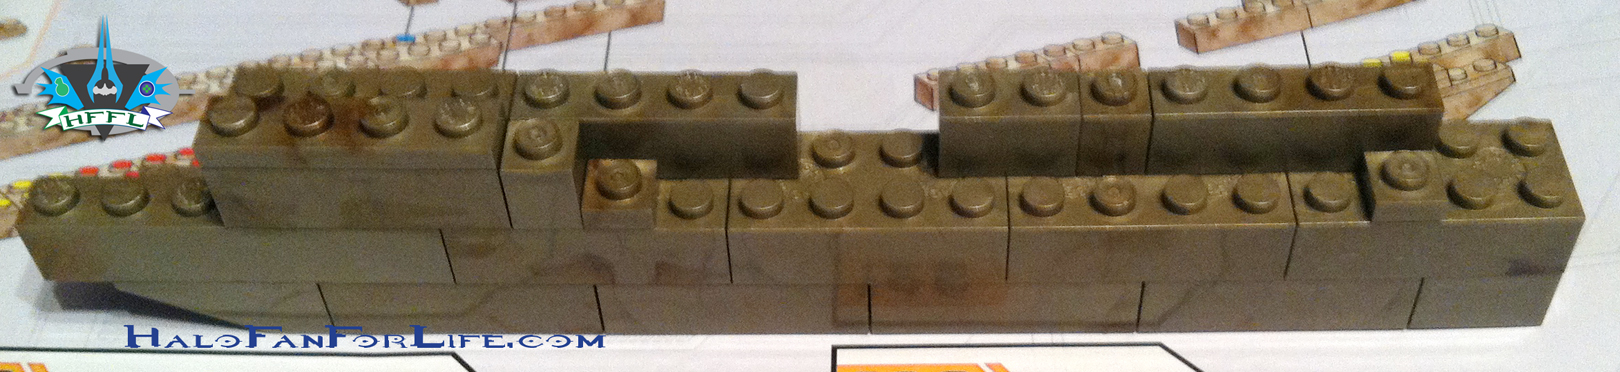 The above pic is of one of the side walls of the rear roof. The other side is the exact same but flipped. So as before, no need to show it as well until later, when it gets attached.
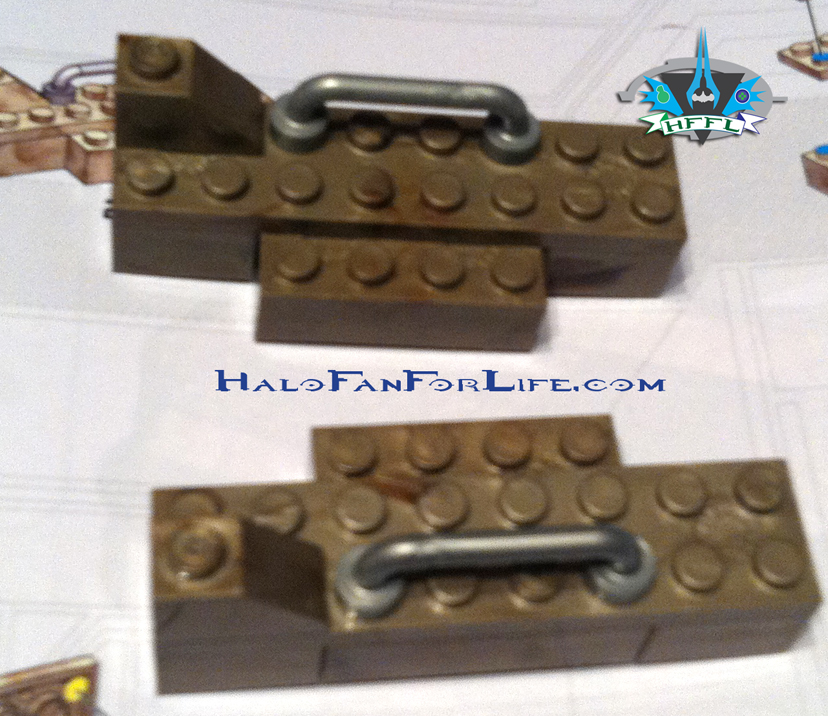
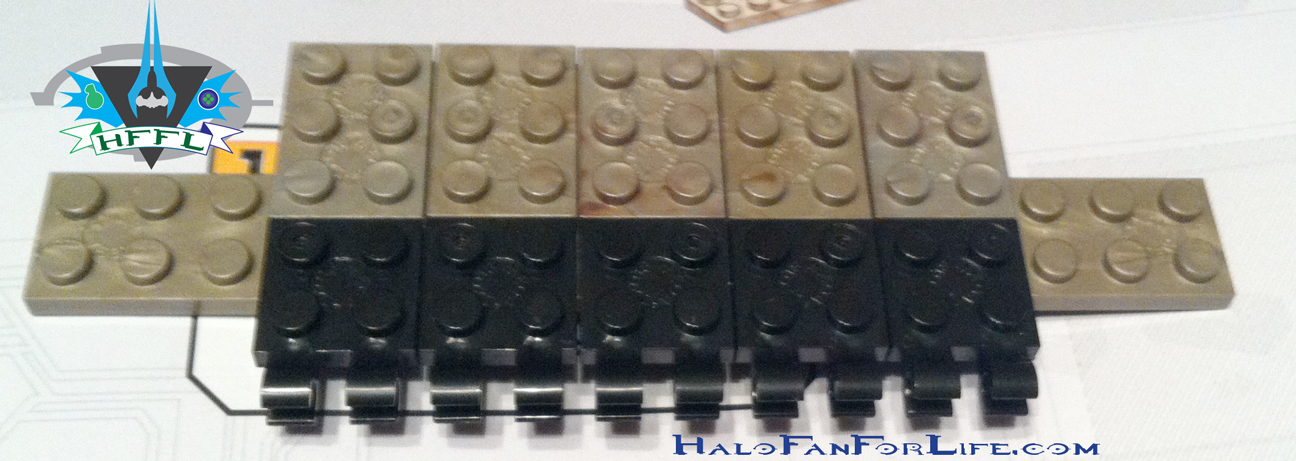 Here is the start of the back hinge that will be attached to the rear roof panel.
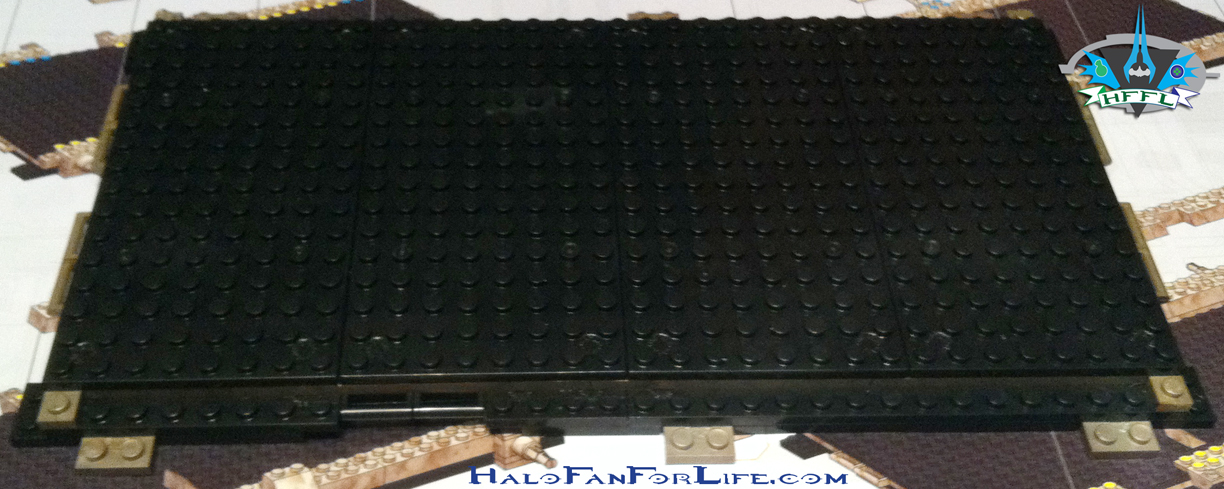
Here it is finished.
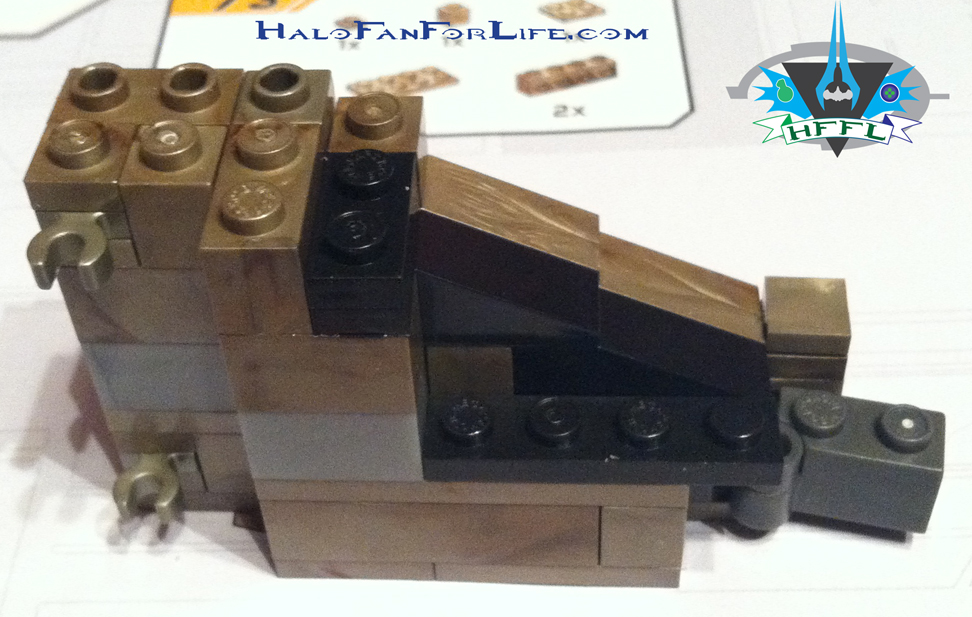
The next few pics are of the construction of the front wall of the rear roof panel.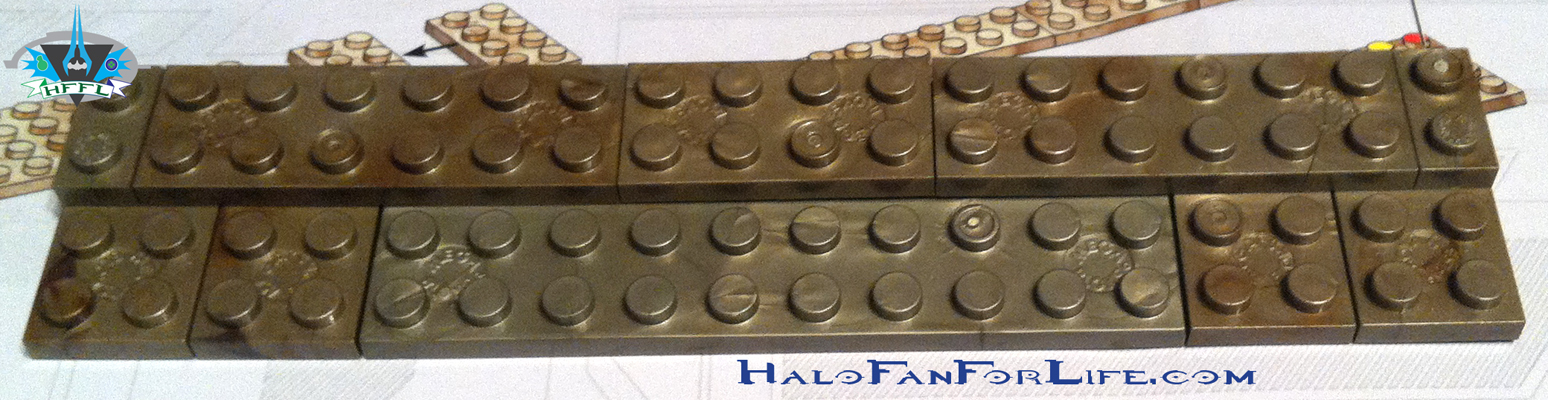
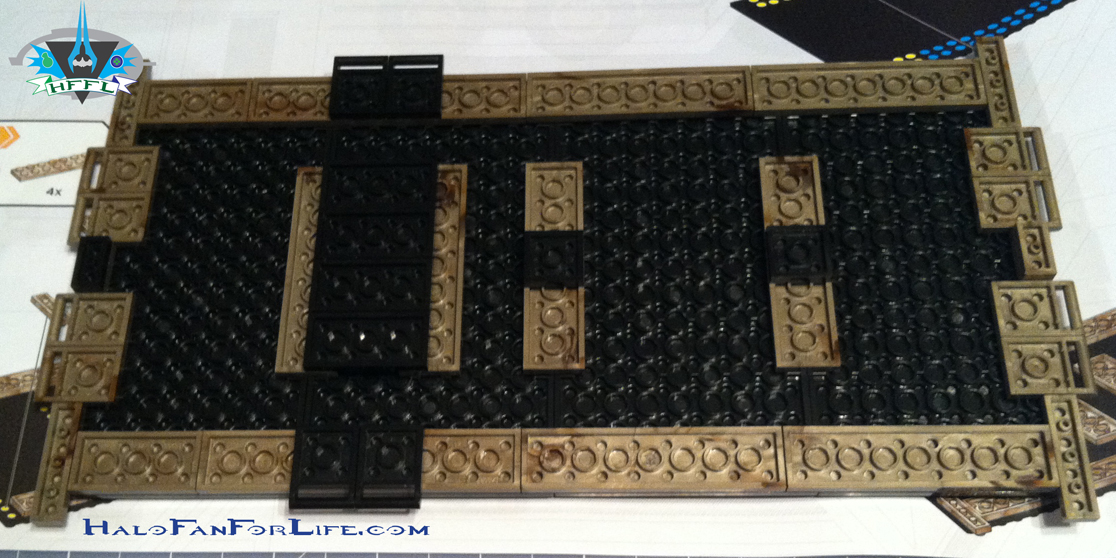
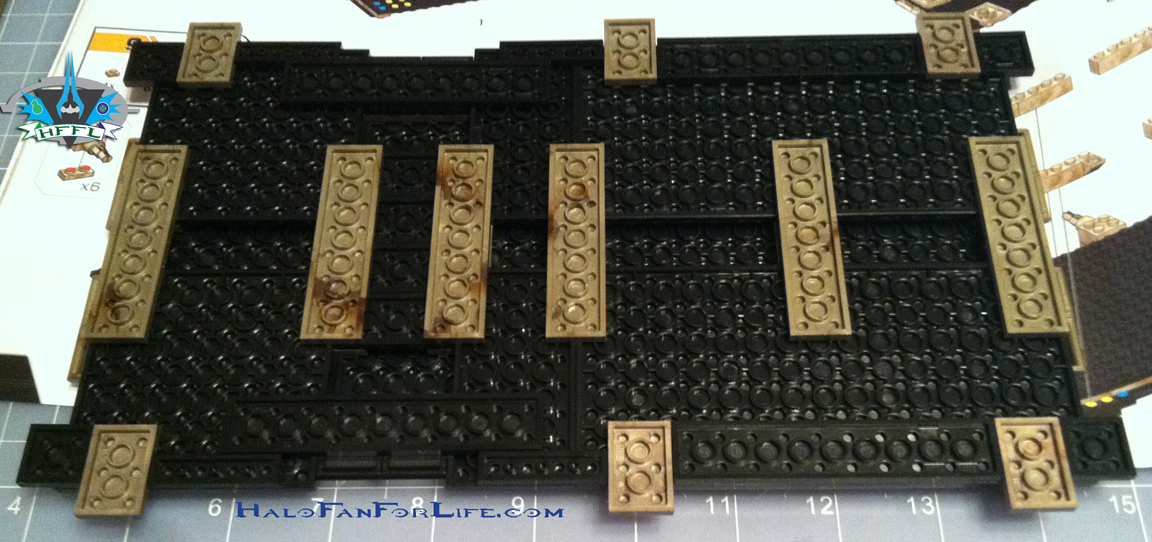
Next are all of the walls of the rear roof panel along with the base part of that roof itself.
As you can see by the above pic, we now have the spot where the Mini-Mac is going to be placed.
 One of the sides of the rear roof starting construction.
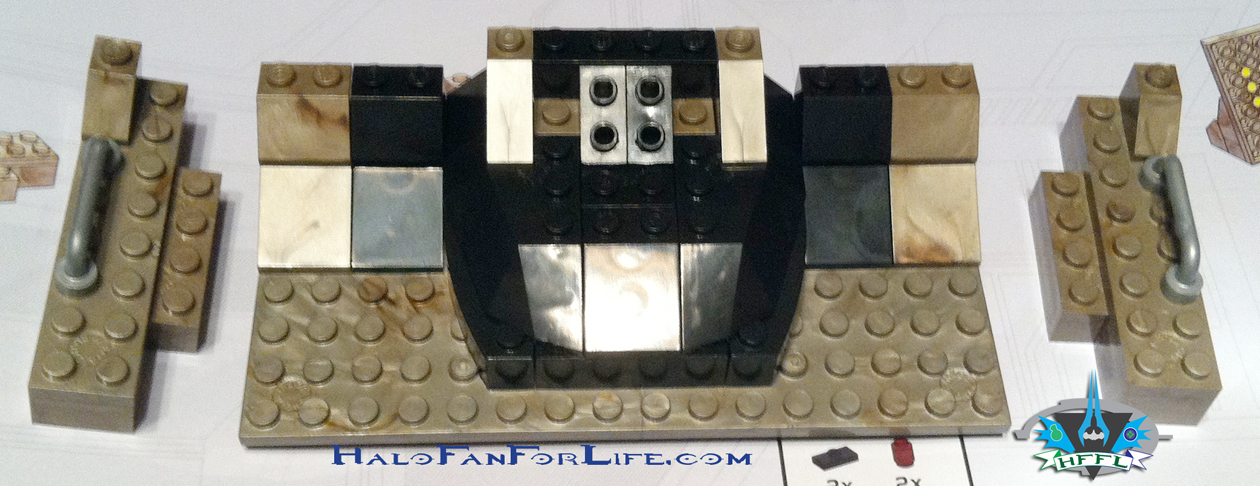
Here are both sides ready to be attached.
Now we’re ready for the rear flap to be attached!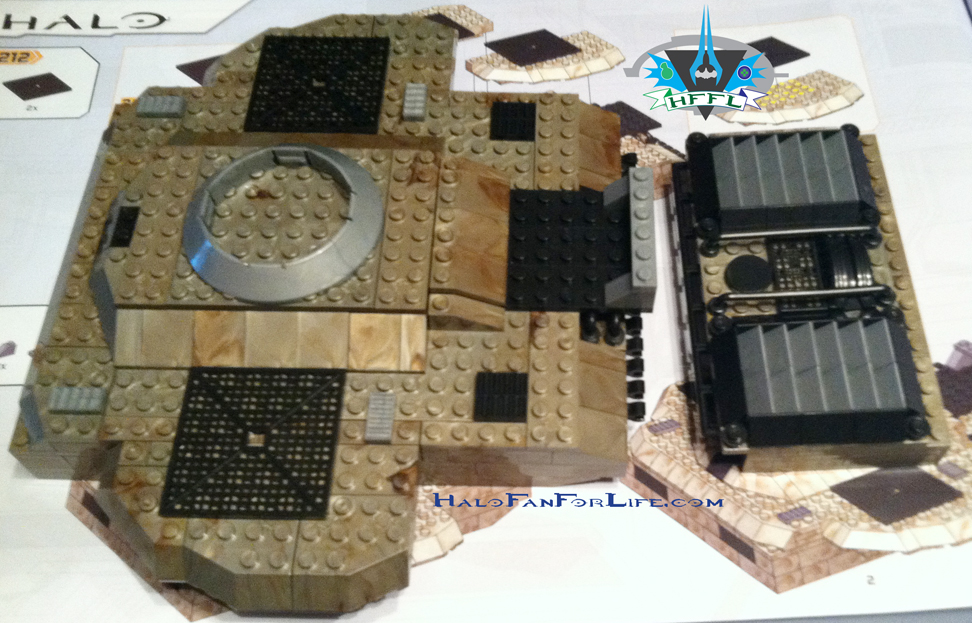
 Above shows a close-up of the hinges clamped together. With exception to the very edges, they hide the gap nicely from the roof to the flap.
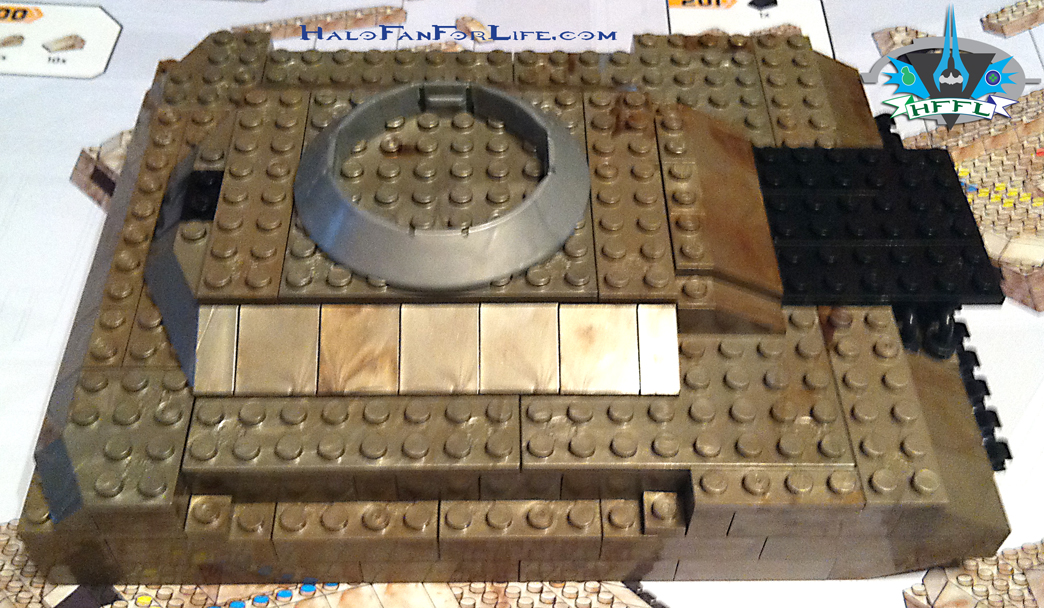
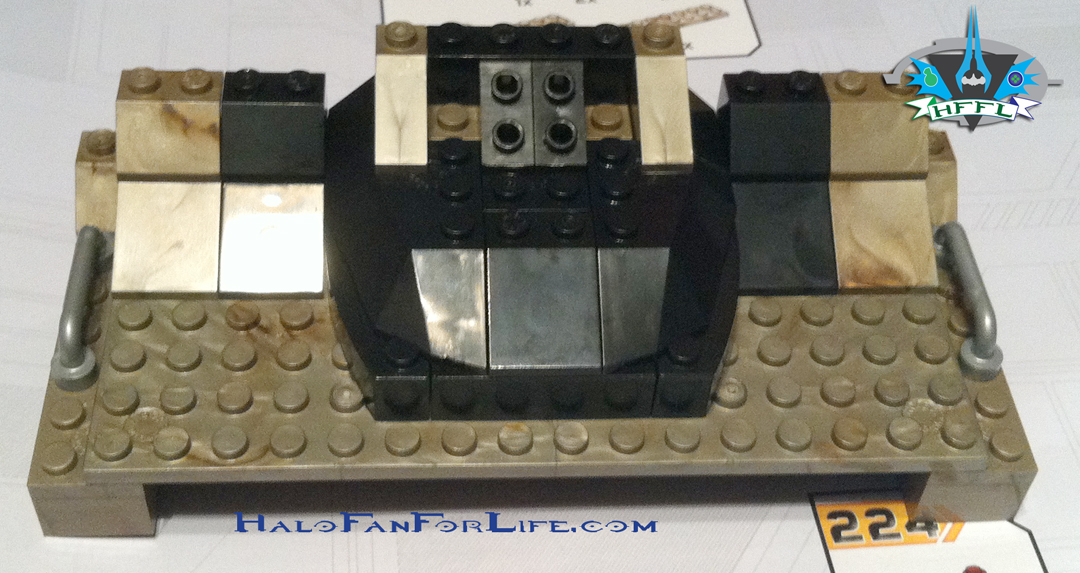
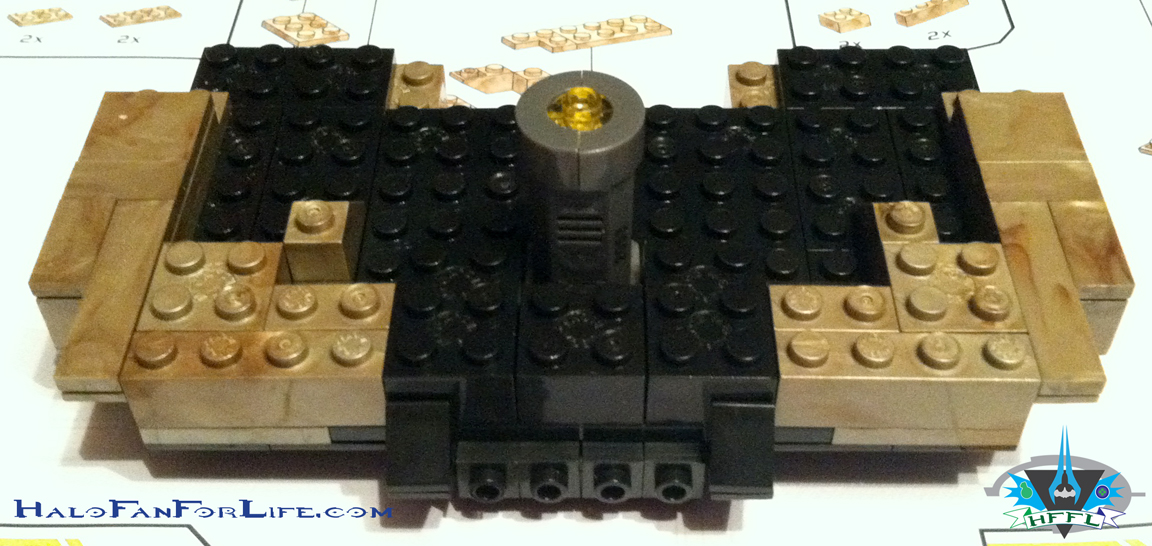
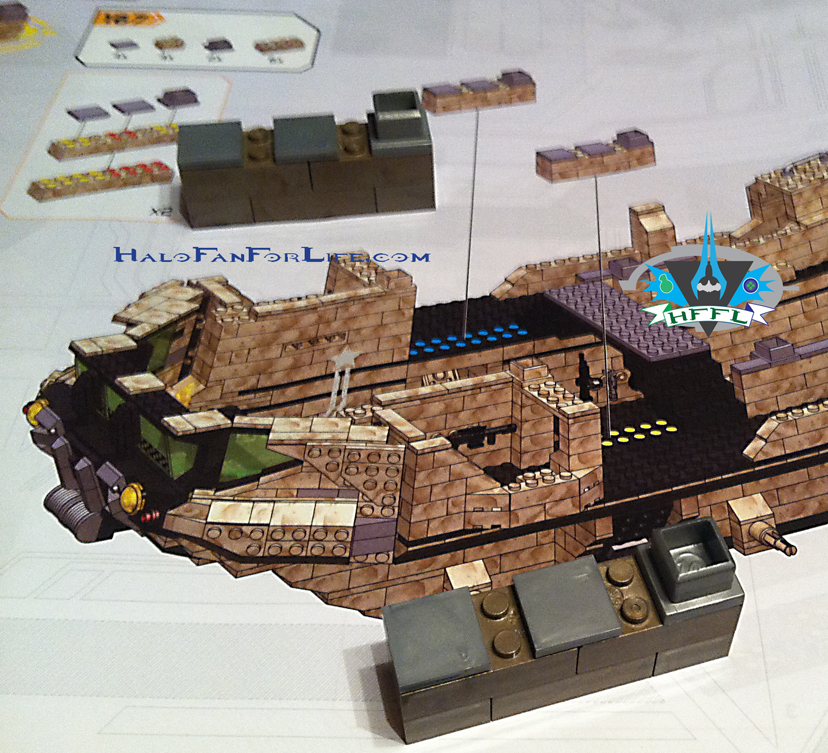
 The above pic shows where the rear roof panel is connected to. It rests nicely upon two hollow square grey pieces that keep it in place. As well the sides of the body keep it snugly fit. This is similar to how the Forward Unto Dawn set was done, with regards to it’s removable panels as well.
 Shown in position. There should be NO gaps underneath. If there are, you haven’t quite fit it in properly. Believe me, it fits tight and right.
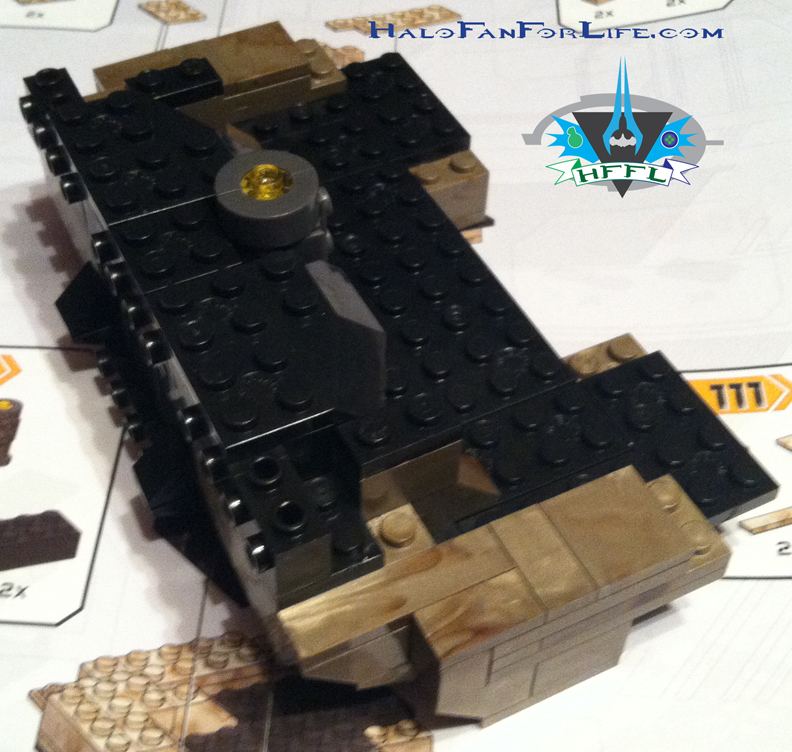
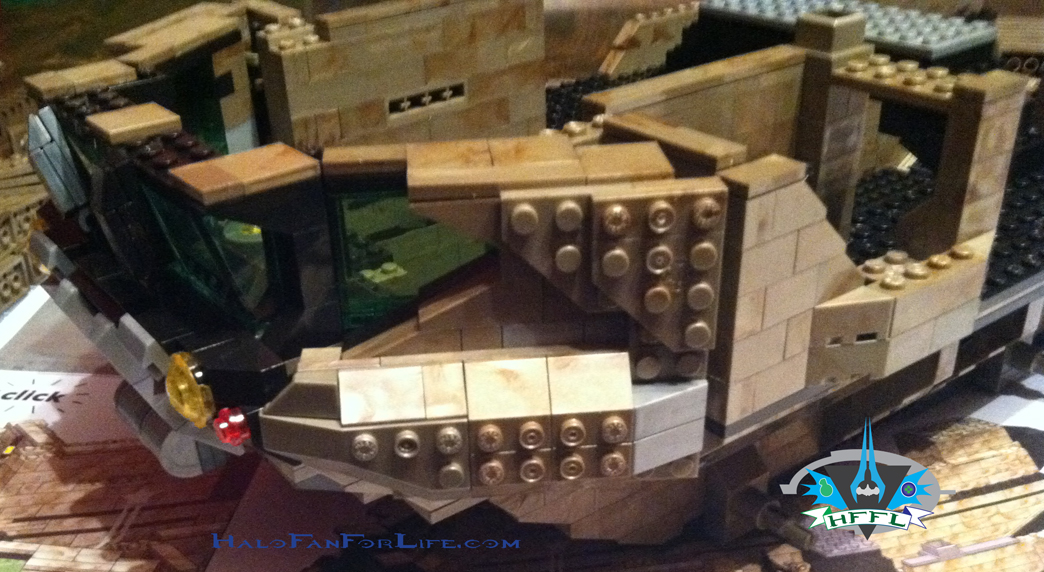
 A look at the rear flap and rear ramp opening into the body of the Mammoth itself.
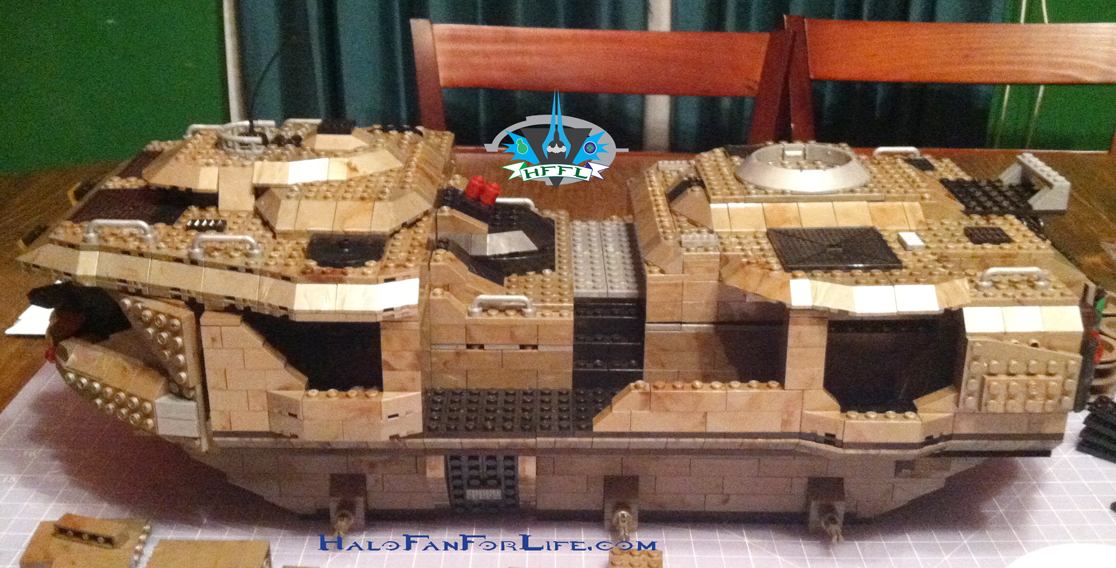
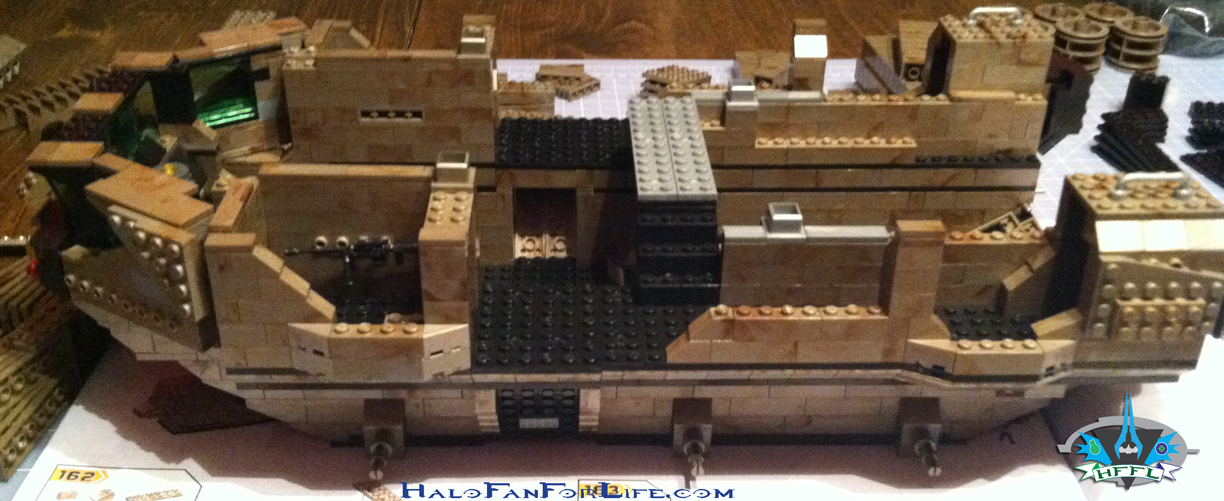
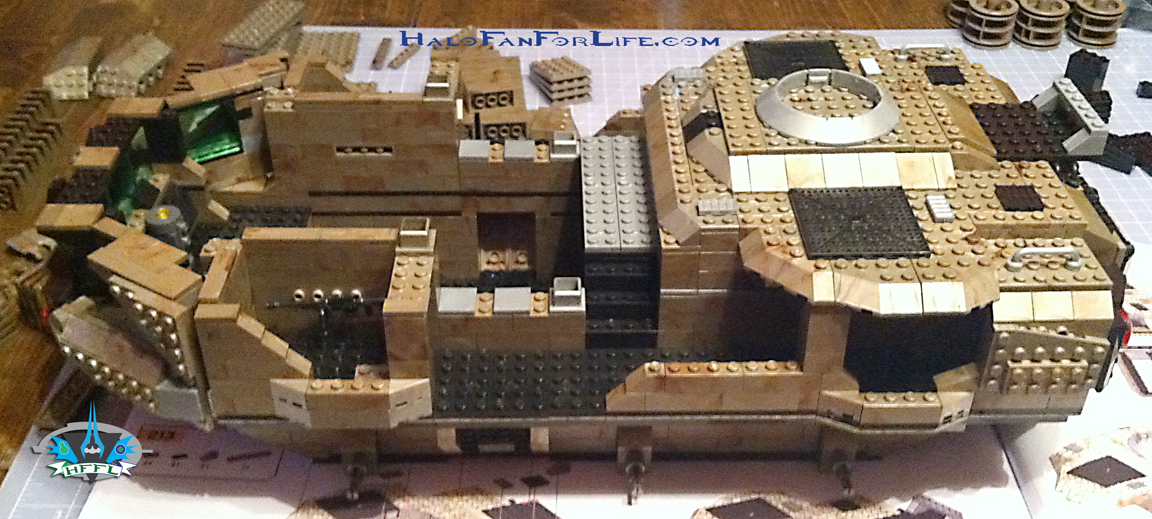 Here’s a full side view with the rear roof panel in place. Wow, is the Mammoth looking great or what?
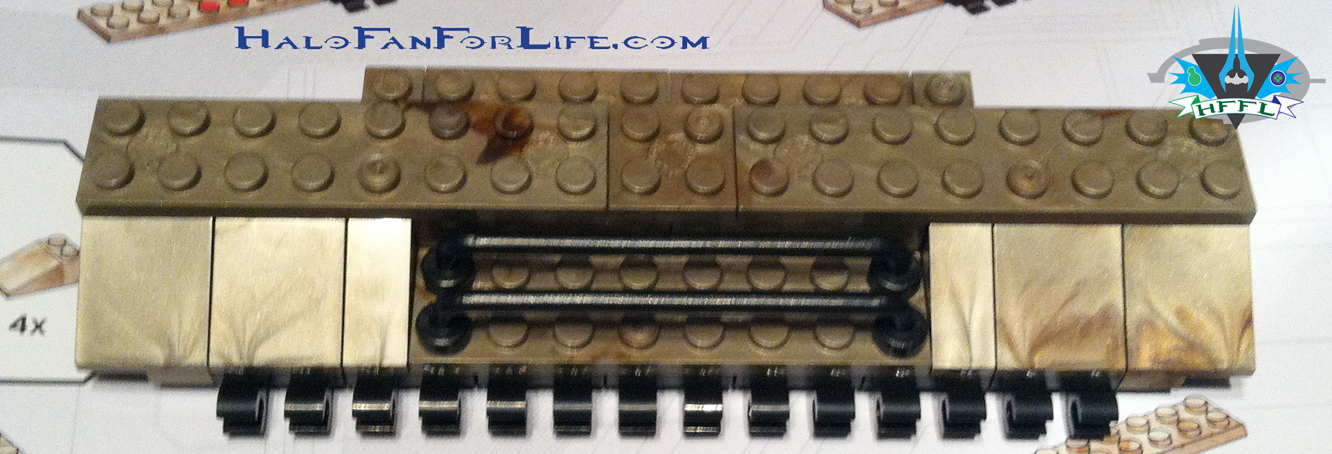
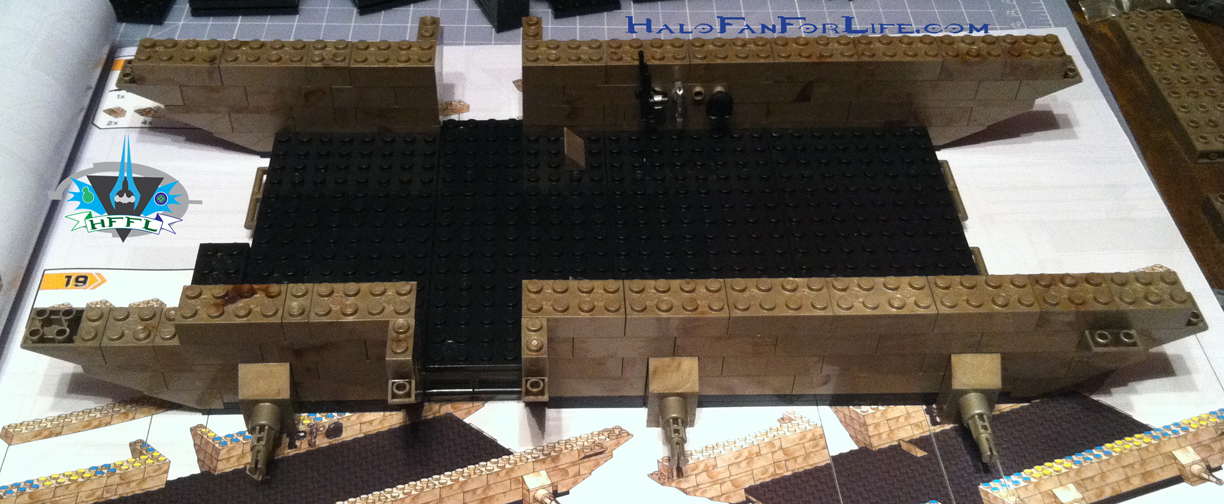
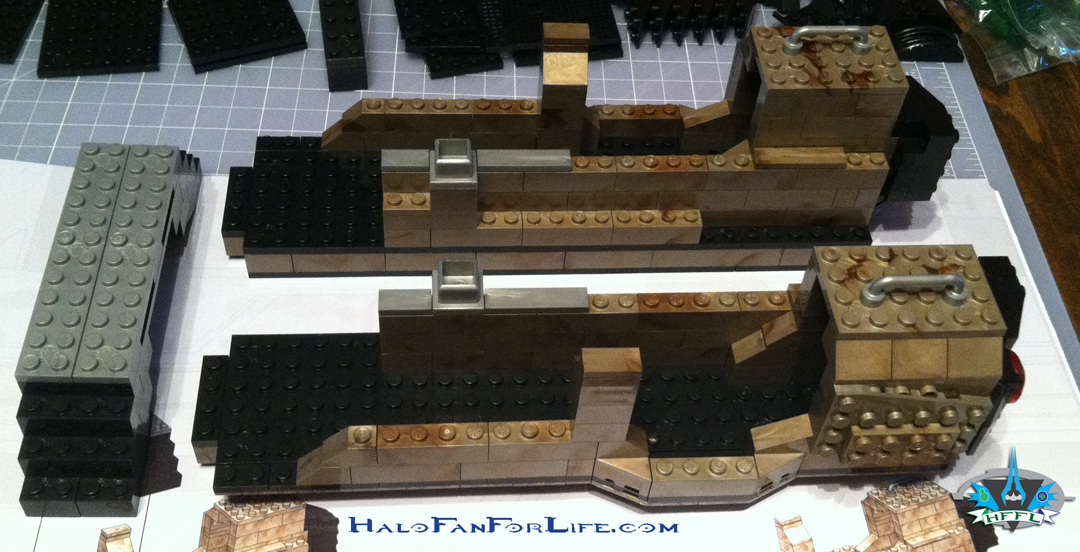
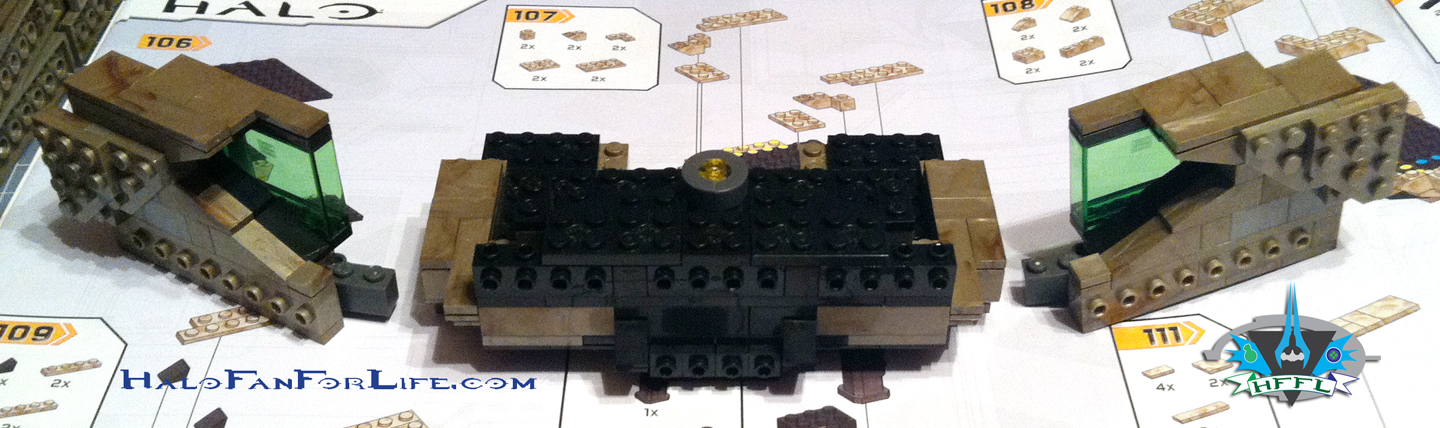
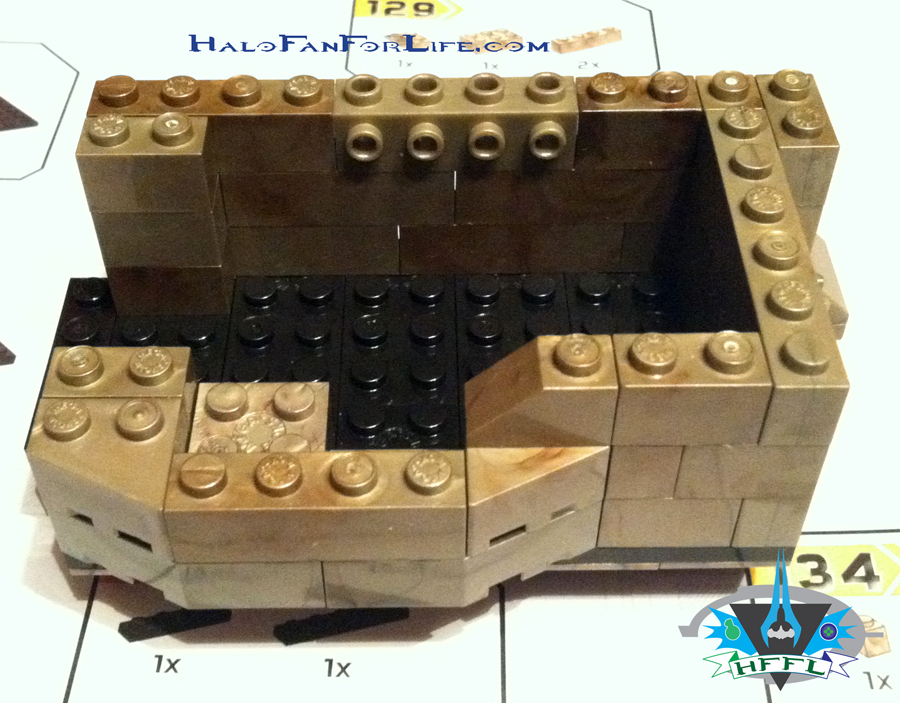
The next eight pics show the construction of the mid roof removable panel.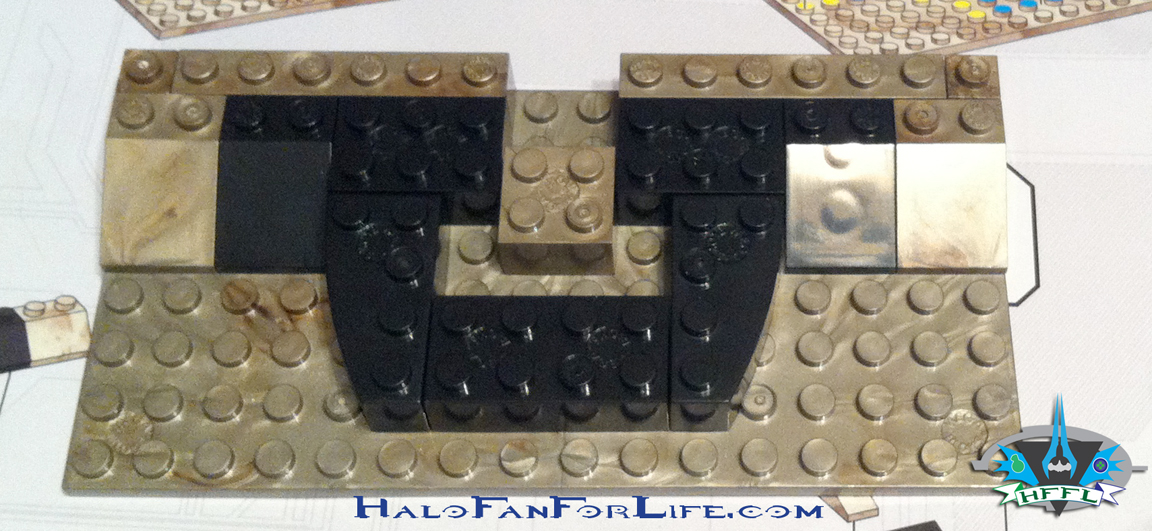
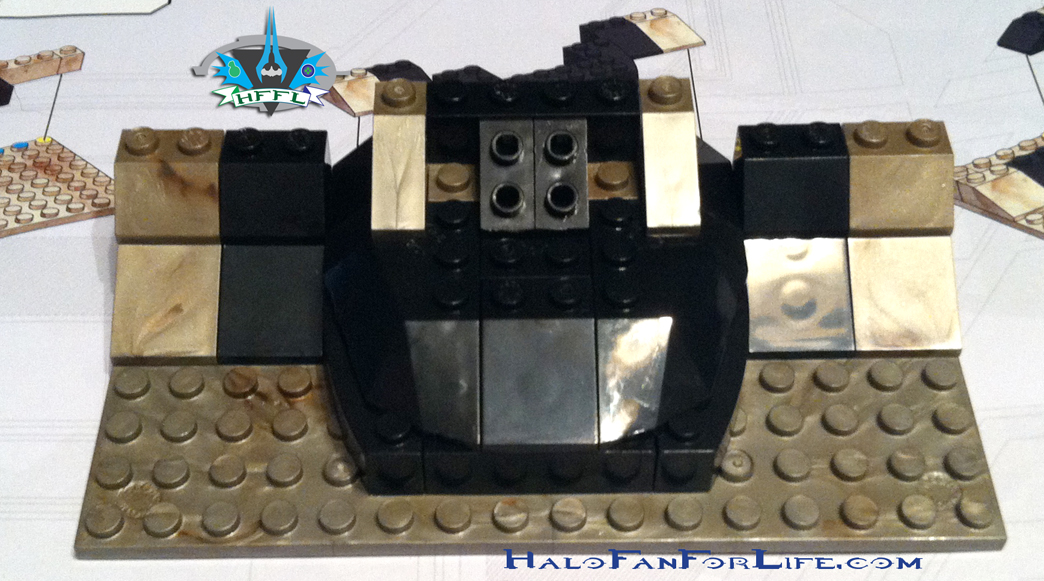
 Here is the attachment point for the mid roof panel. Just as with the back, it too fits snugly onto a hollow grey square piece.
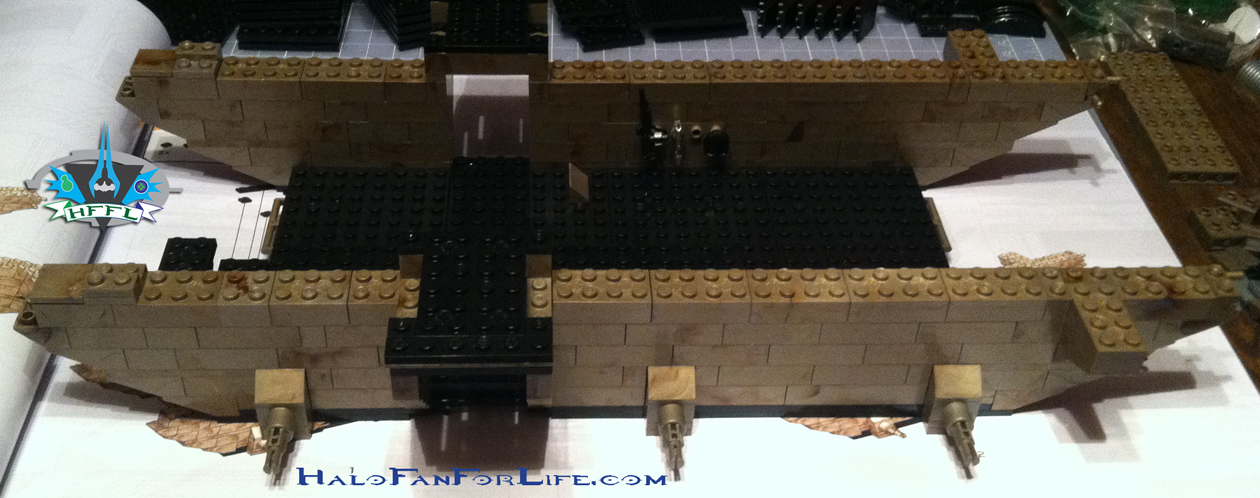
And here it is attached. Apologies for the blurriness of the shot. At this point I was excited to get the front roof panel done that I didn’t go back and retake this shot as I should have.
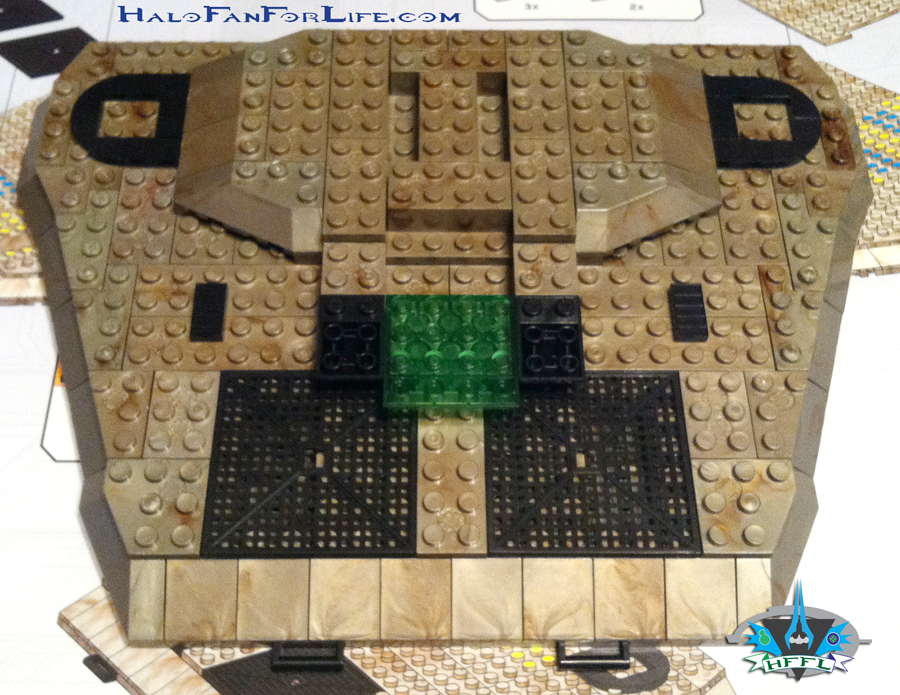
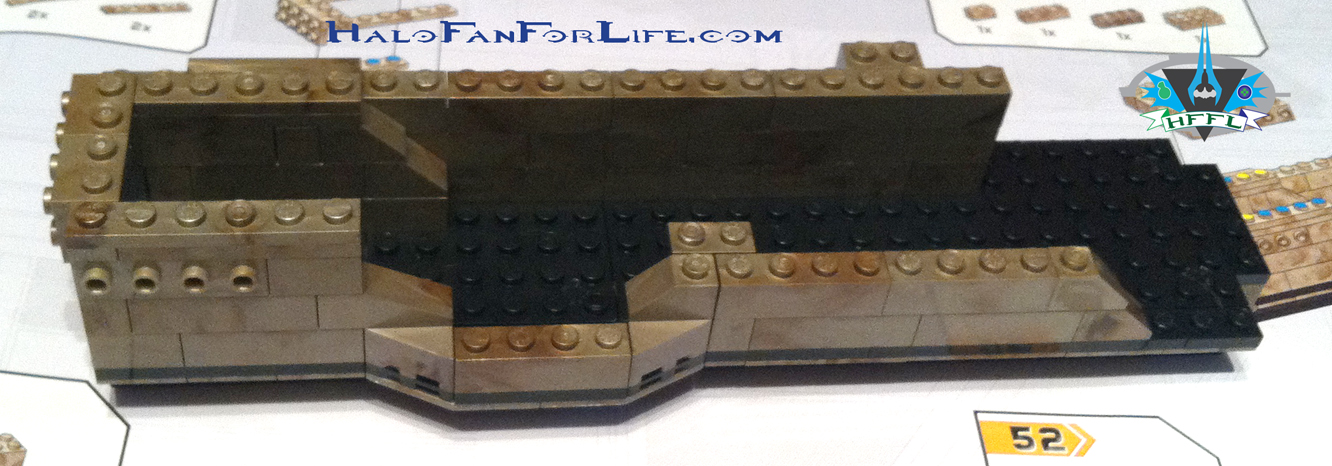
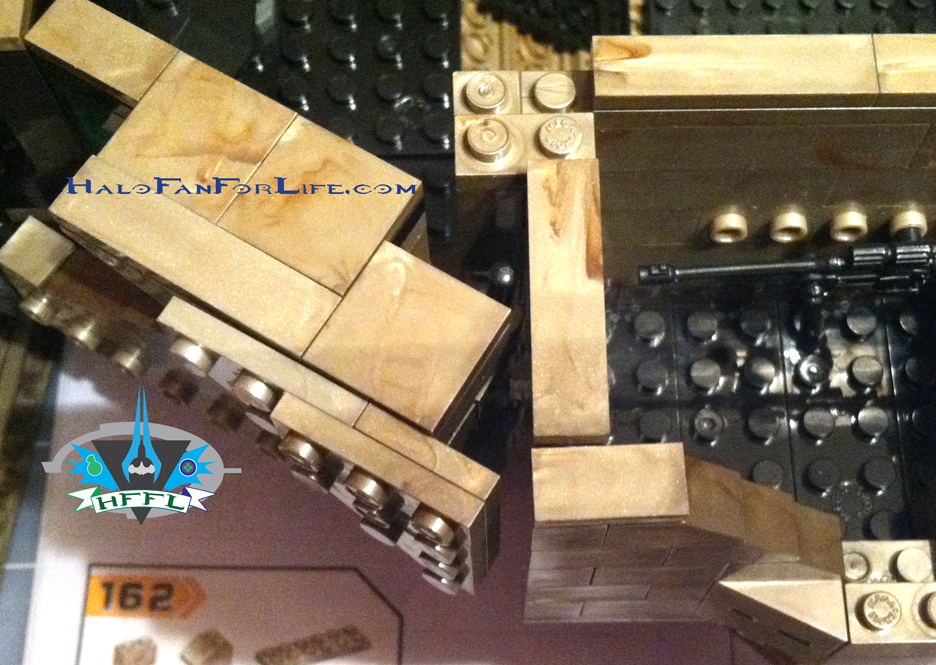
The final roof panel now starts being built!
Not much to start, but it QUICKLY comes together.

Heh, don’t you think this section looks like some kind of “Space Invader”? Oh, I should mention that in my excitement to get this done, I accidentally skipped a couple of steps and had to go back and rebuild things correctly.
Here is a helpful tip when building large models like these: Have a coin or some other small object to place over the numbered step on the directions to remind you of where you are in the build process. ONLY move it to the next step when you are ready to continue to build.
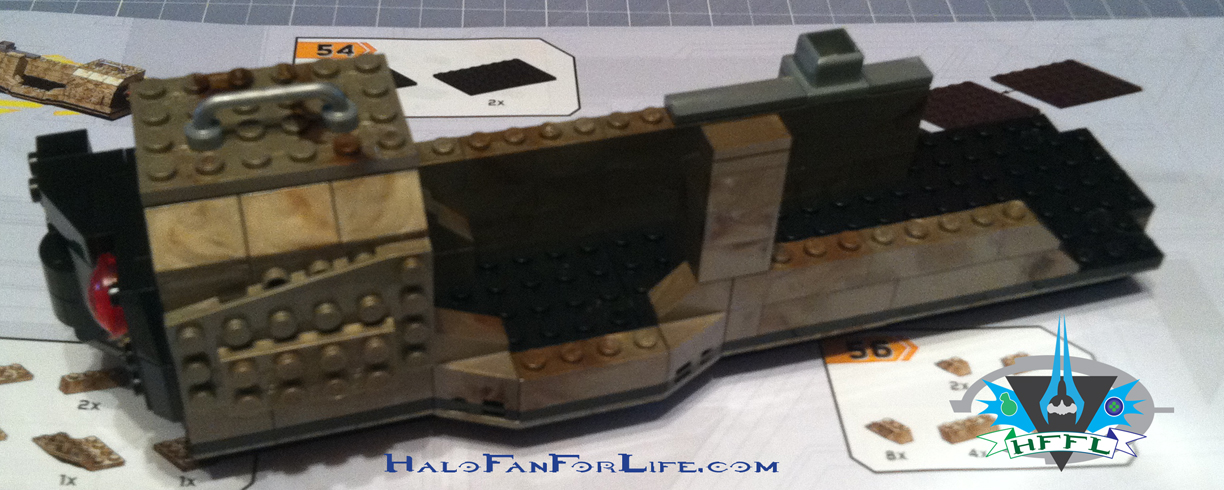
 Now at this point in the build of the front roof panel, I think it looks like a snake head. Copperhead??? LOL
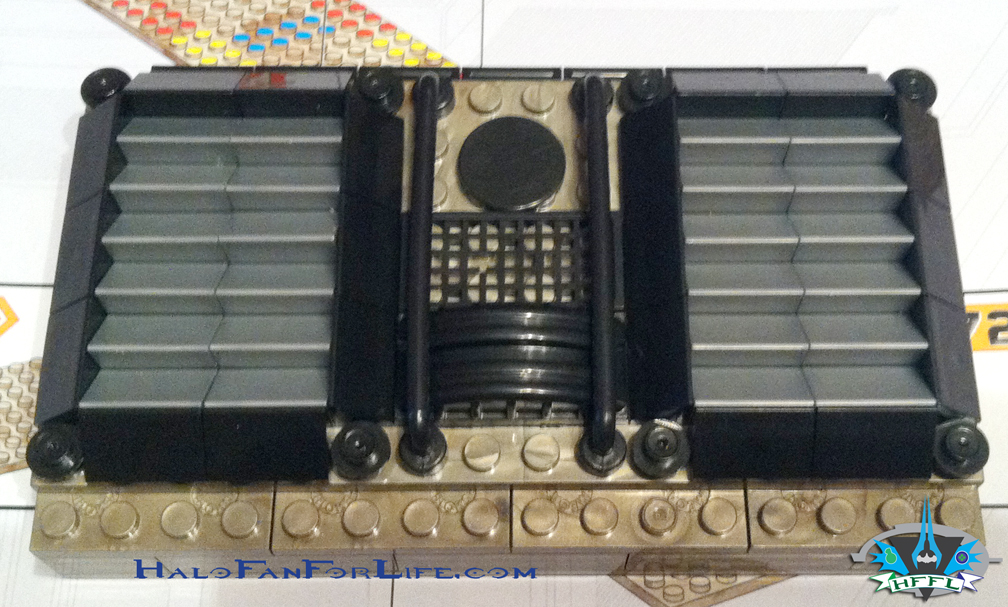
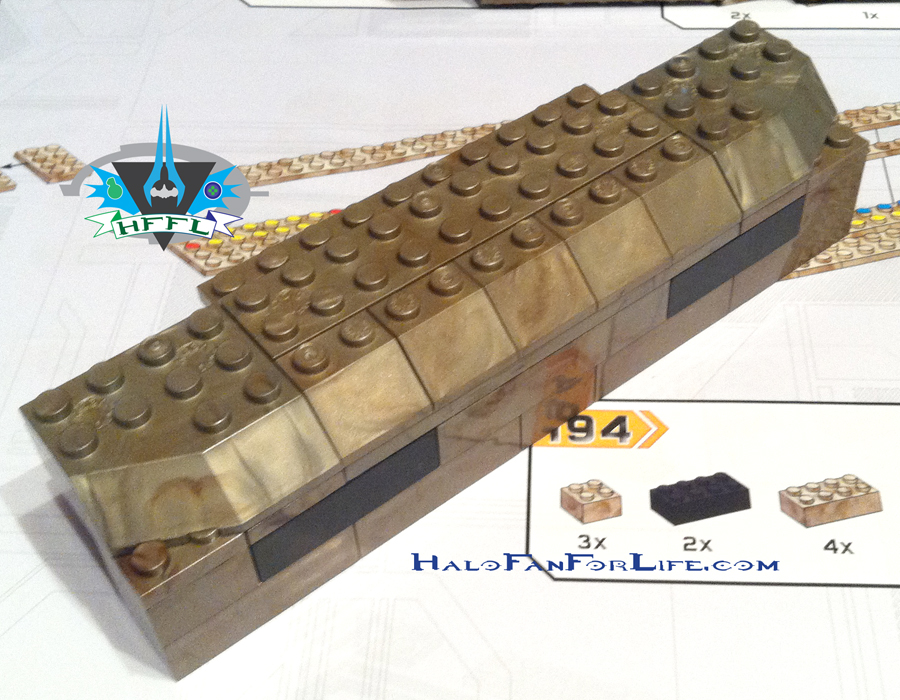
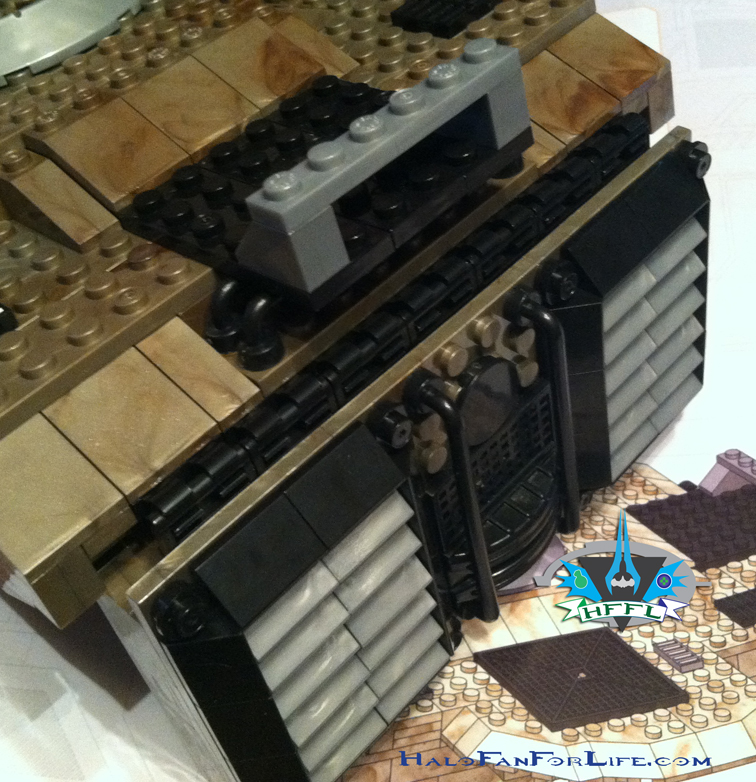
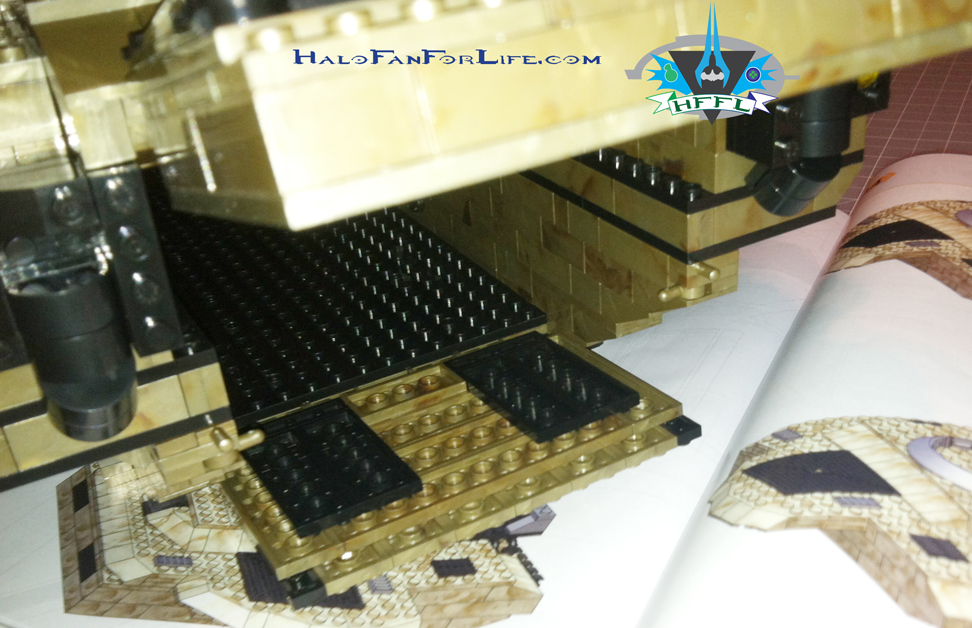
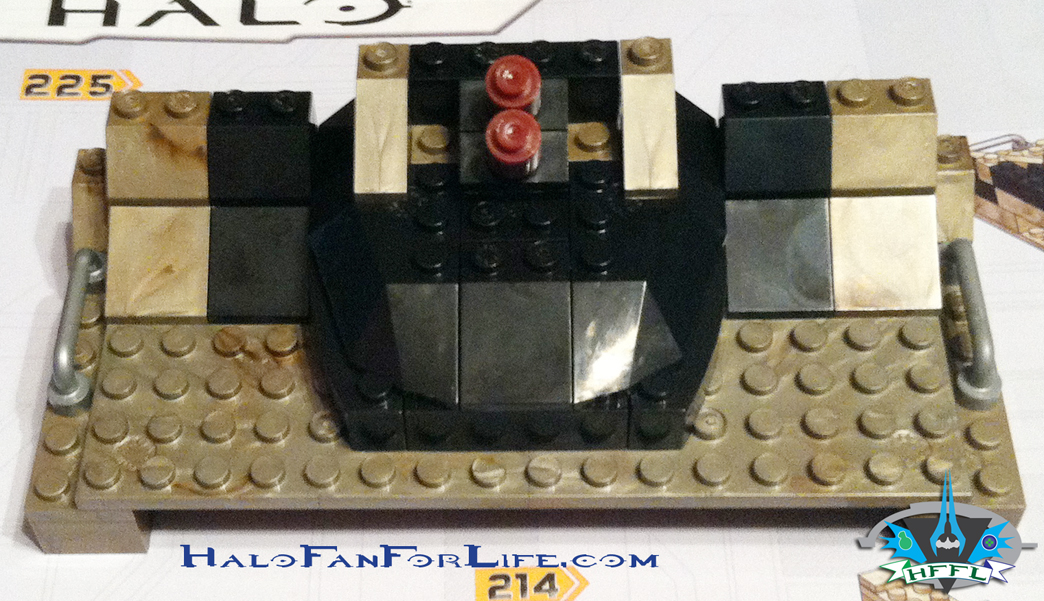
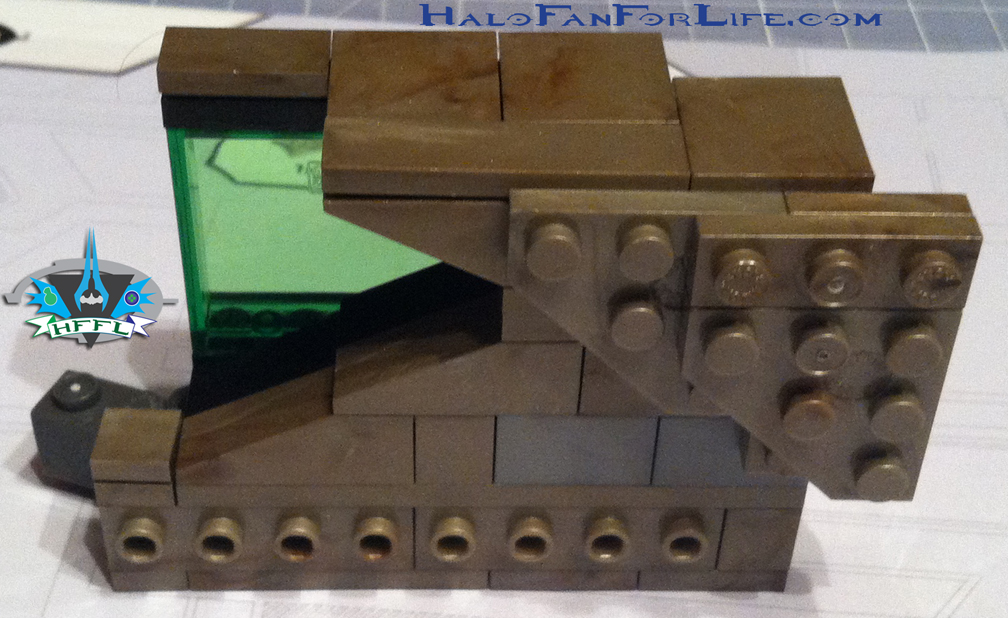
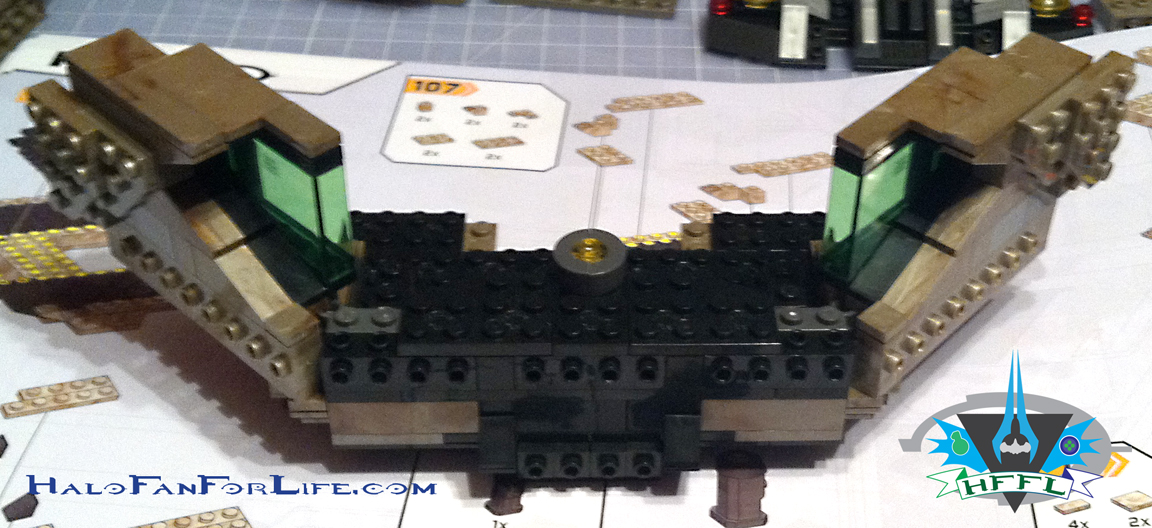
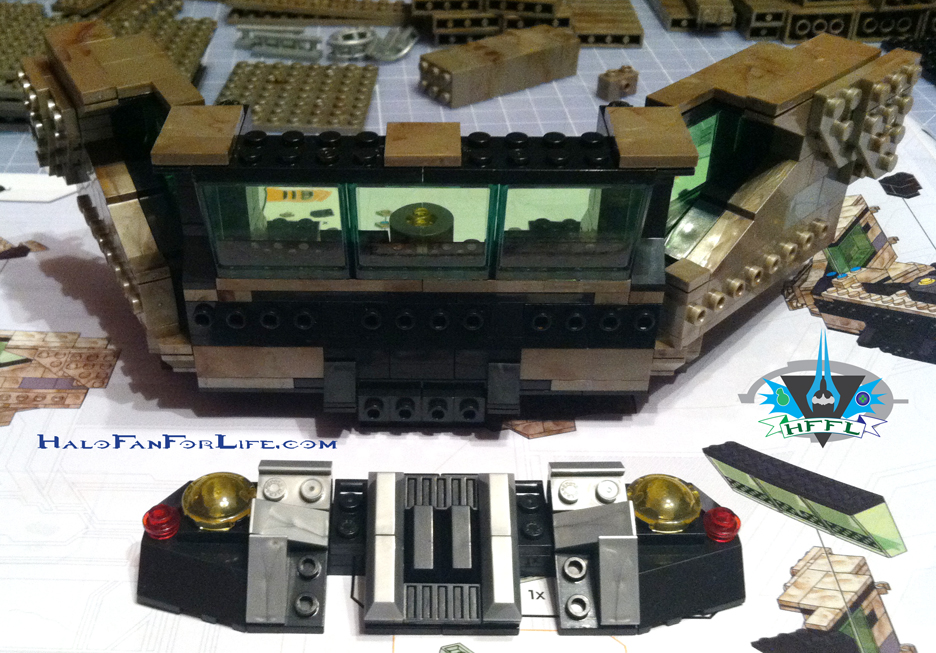
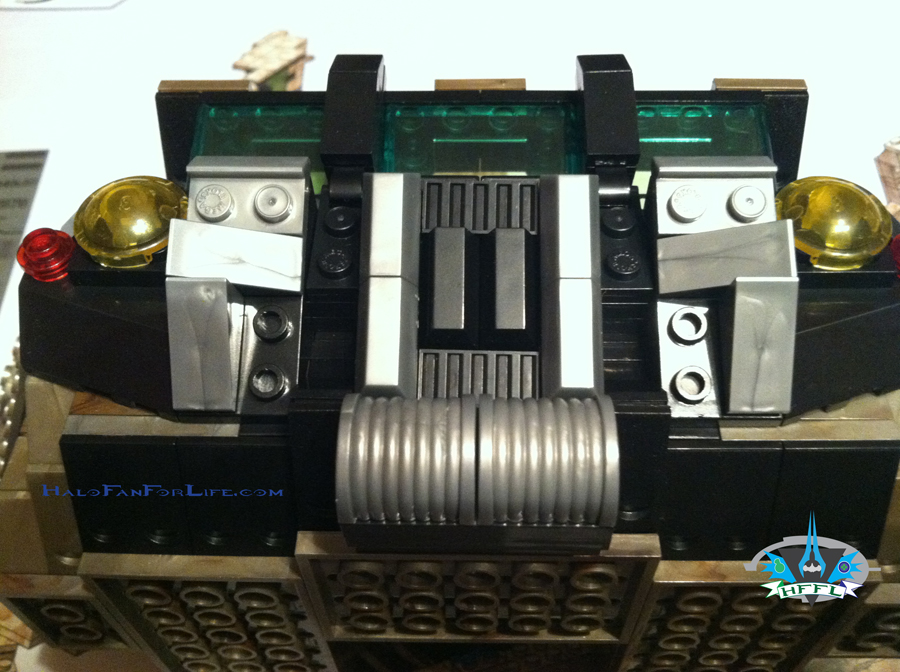
Oh yeah! We’re getting to the “meat” of the roof panel’s build by adding in the green translucent part! (You all know I love transparent toys. That goes for parts too!)
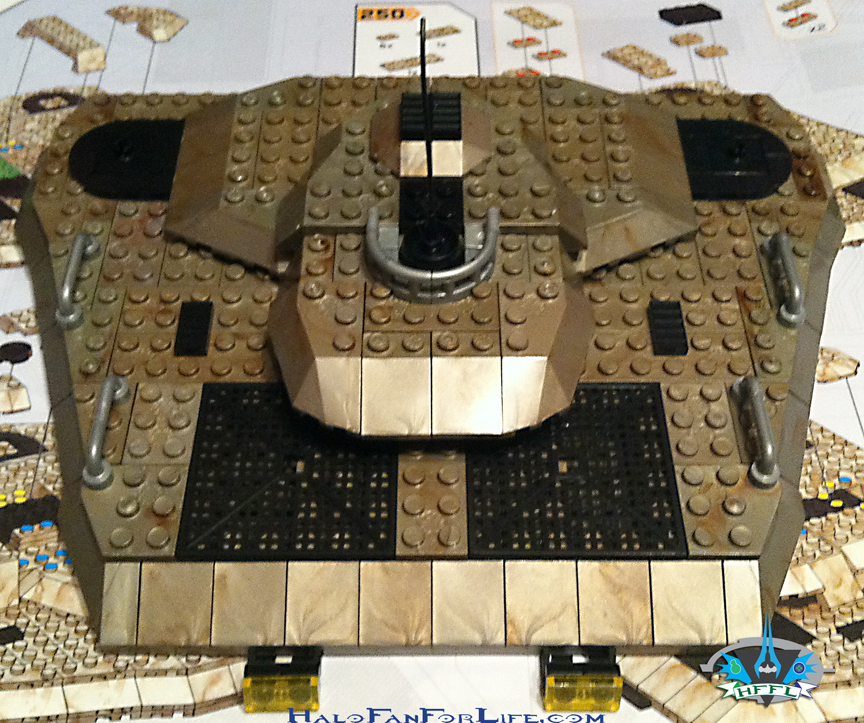 Dang…it’s mostly hidden now. LOL. Ah well, the in-game vehicle calls for this as well.
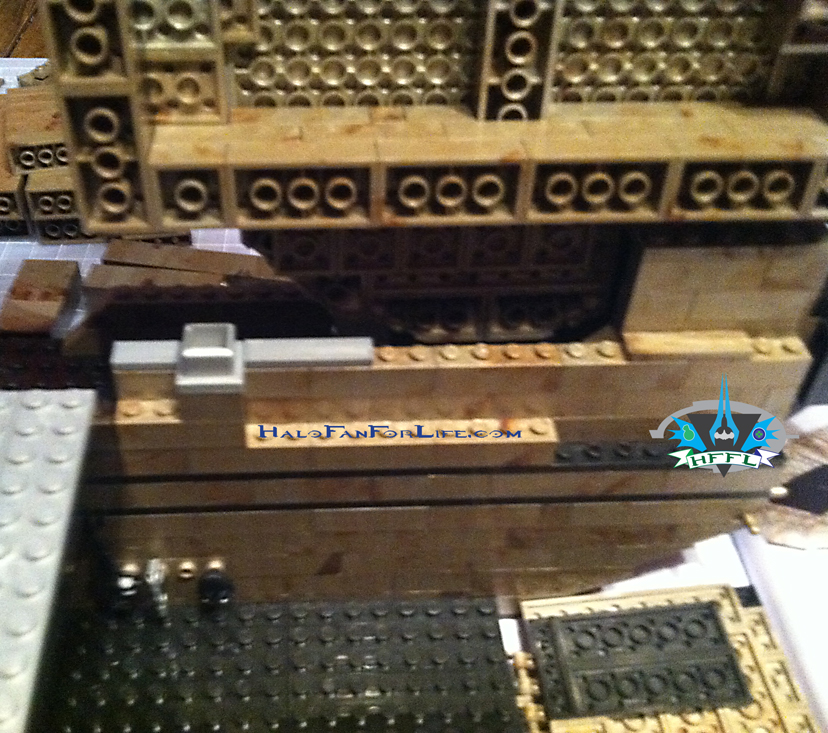
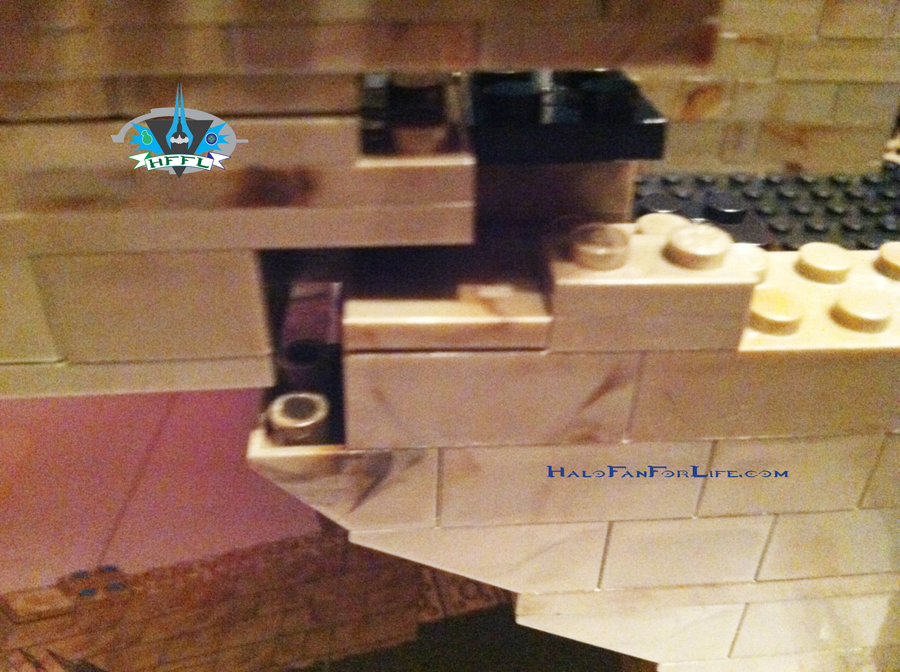
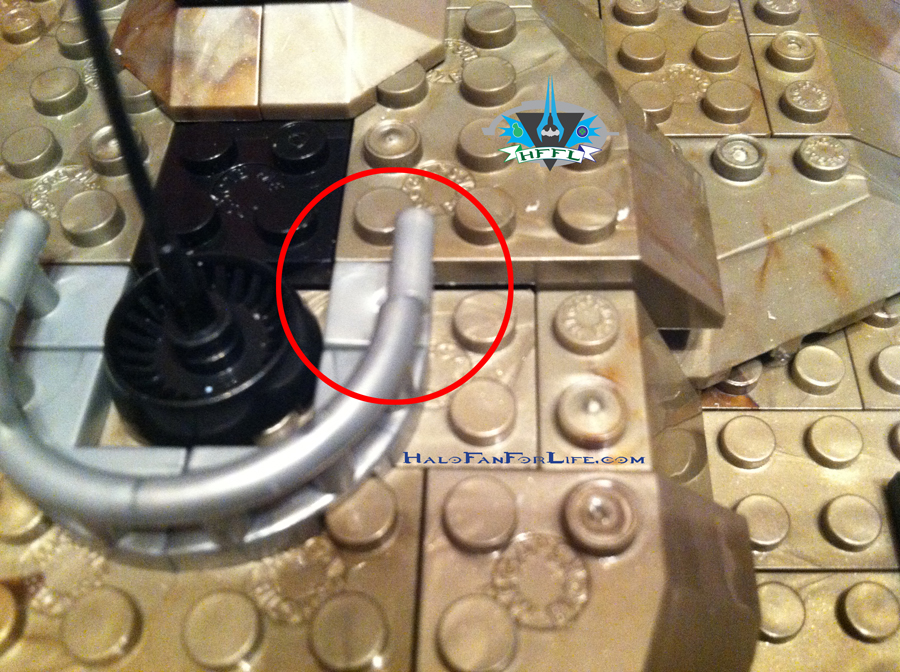 At this point, I did come across a deformed part. The one circled did not fit properly. I did try to gently carve out some of the underside plastic to make it fit. After a bit I stopped. I figured it better to just call MEGA for a replacement part. (More on that in the fourth part of the review.)
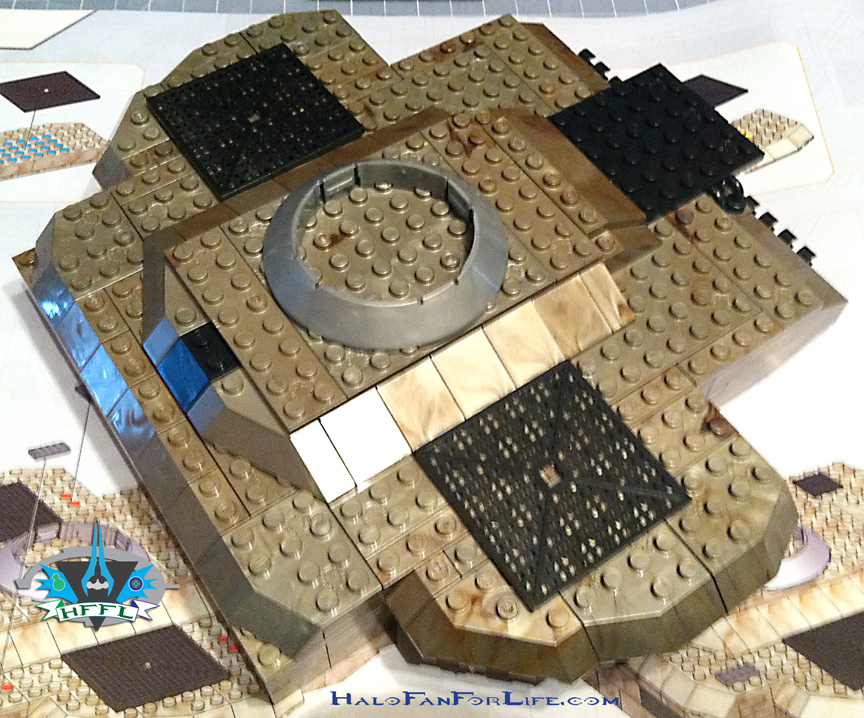
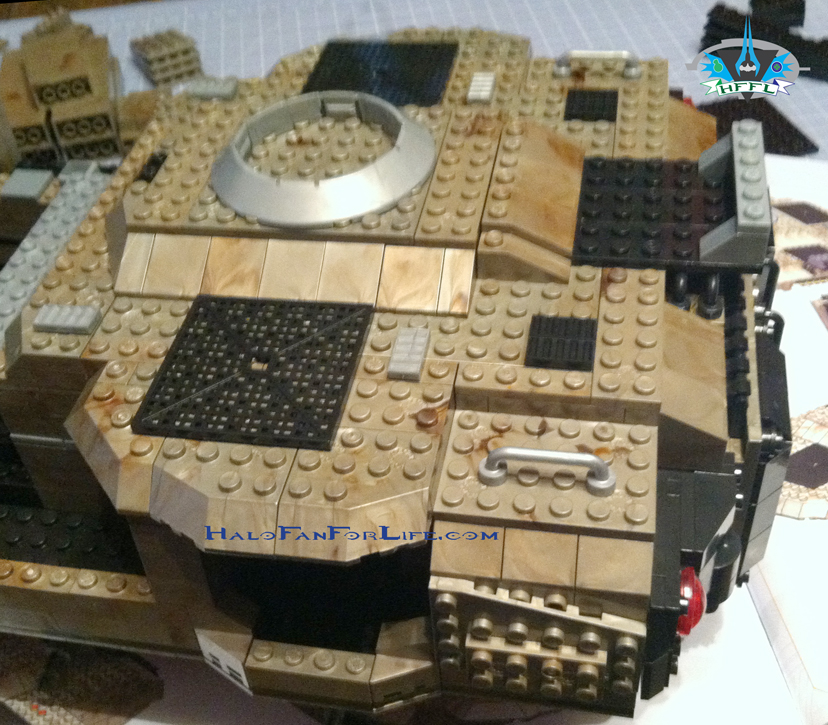
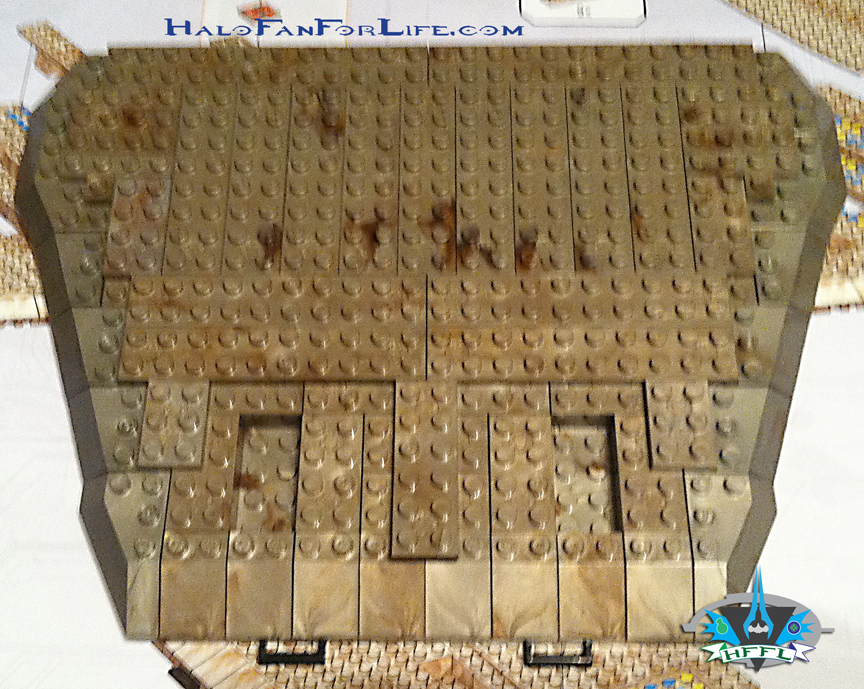
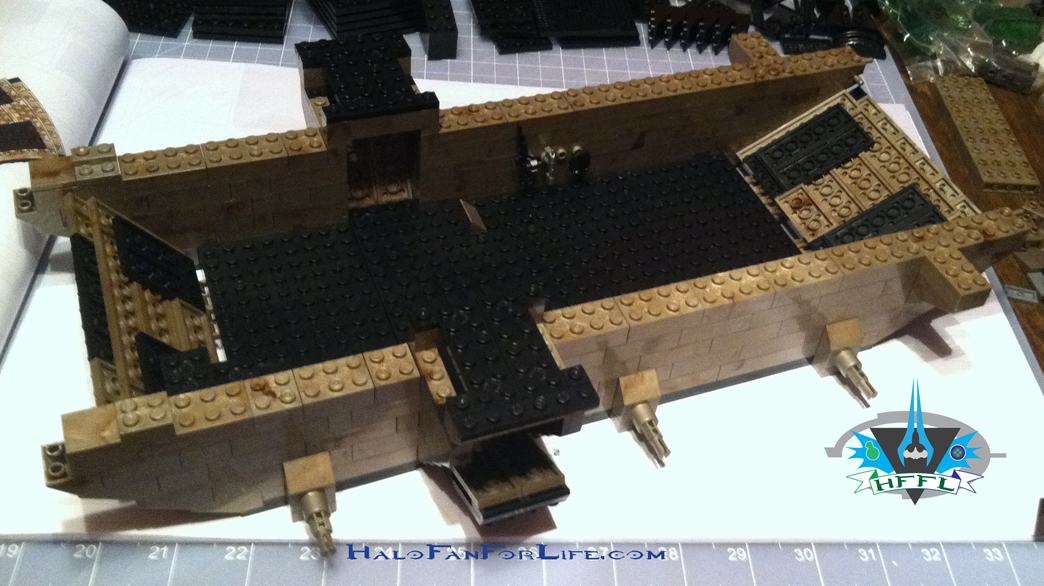
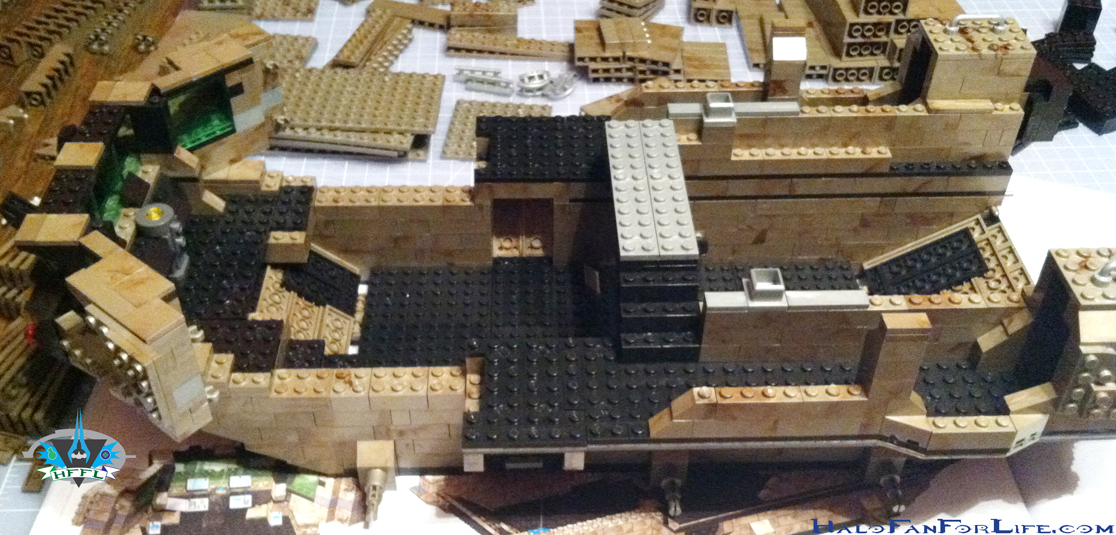
 And here we are at the last pic for this part of the review. The Mammoth is almost done! It’s looking VERY buff and built to last!
I was so excited at being so close to being done with the build that I did complete it then. However, you’ll have to come back tomorrow to see the Mammoth finished. Along with that, I’ll show the minifigs that come with the vehicle.
I hope you are finding this multi-part review helpful and/or entertaining. Please let me know by commenting below. If you haven’t yet registered for HaloFanForLife.com, it’s FREE and easy to do so. Just send me an e-mail at: sal@halofanforlife.com asking to be registered. As well, include what you want your screen name and password to be. I’ll get you set up shortly there after.
-Sal
We’ve not had a podcast in a month. Truthfully, there wasn’t much exciting news to report and repeating the Halo bulletin every week when I already do a synopsis of it on the blog is redundant. Anyone can reread the bulletin, so I’ve decided I won’t do that and only focus are the real news worthy topics.
In the episode Martin and I talk about Spartan Assault being released for the One and the 360, but at different times. We briefly talk about the One’s graphics, some of our favorite types of covenant, the new Dark Horse Halo comic book and more.
This is a short podcast for us at just about 45 minutes.
SoF 12-9-13
Right click above to download and listen at your leisure.
-Sal
This is the second of a four part toy review for the Mega Bloks UNSC Mammoth. In this part, you’ll see how the lower and second levels come together.
There’s more than 40 pics in this part of the review, so let’s get started.
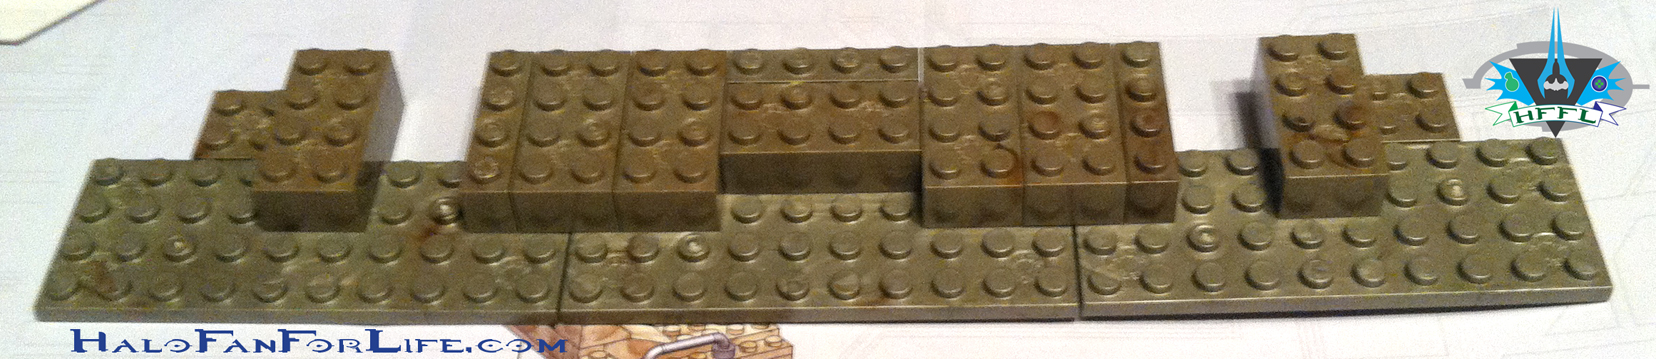
 This is first couple of steps to build the base of Mammoth. All of the weight of this model is going to be supported by the base so it has to be sturdy and strong.
 These next few steps to building the base of the Mammoth show just how many more plates are added to strengthen it.
 The base ends up being 4 plates thick. Believe it or not, that’s quite enough to keep the Mammoth propped up.
 The first few steps of the lower level (garage) walls go up.
 The next few steps. By this point the build has felt similar to the UNSC Elephant’s build at the beginning. But that quickly changes after this.
 Here are the ramps and side doors.
 And here they are attached. This is looking more like a World War II landing craft at this point, LOL.
The next few pics will show the stages of build for the side command deck windows.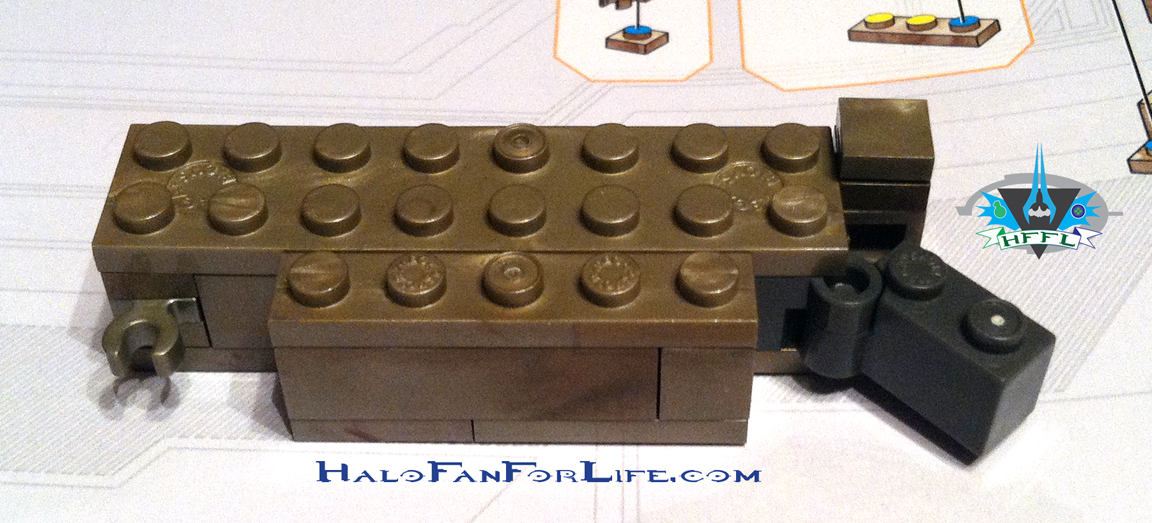

 This last pic of the side command deck window shows it turn around as that is the outside of the window.
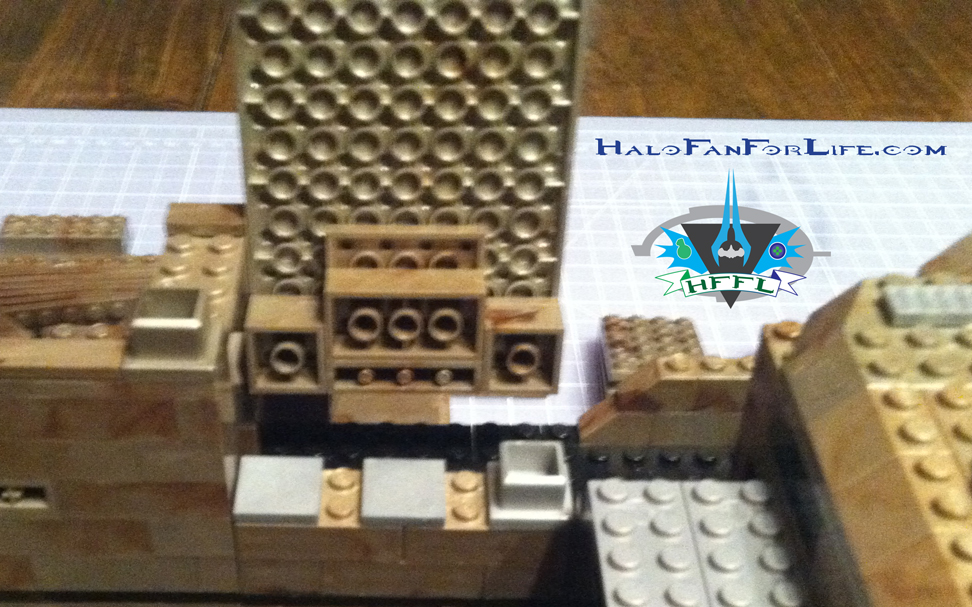
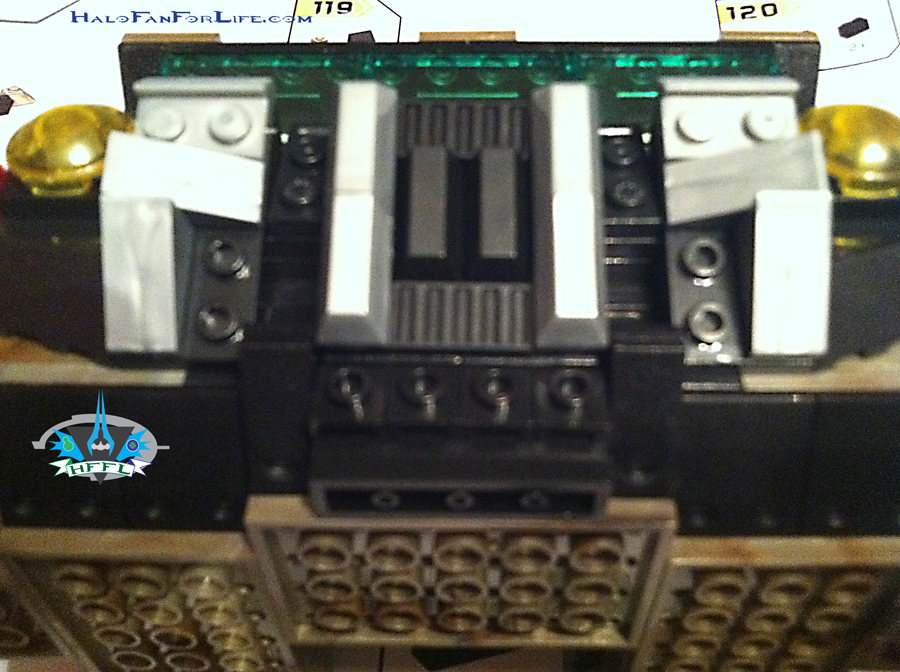
The front grill takes shape in the next two pics.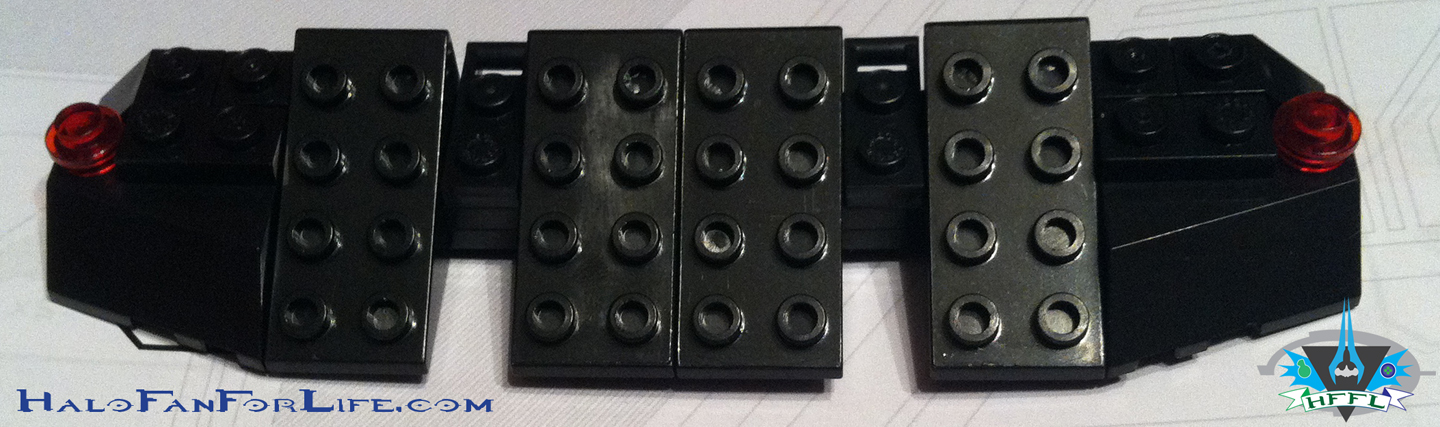
 There are a lot of “greeblies” on the grill. I love it!
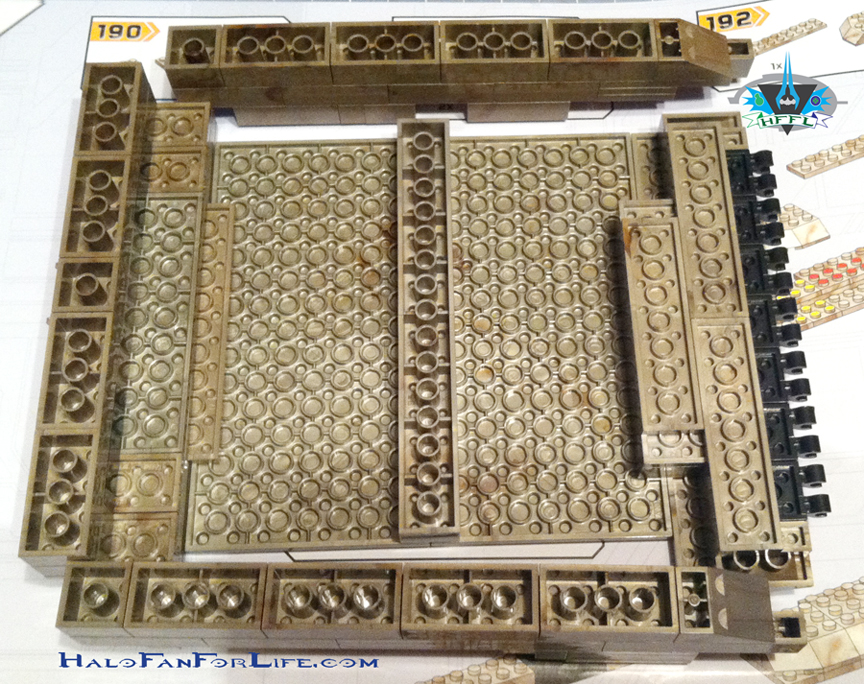
The next several pics show how the rear second level walls are build. Since both sides are the same (but flipped) I only show one of the walls being built.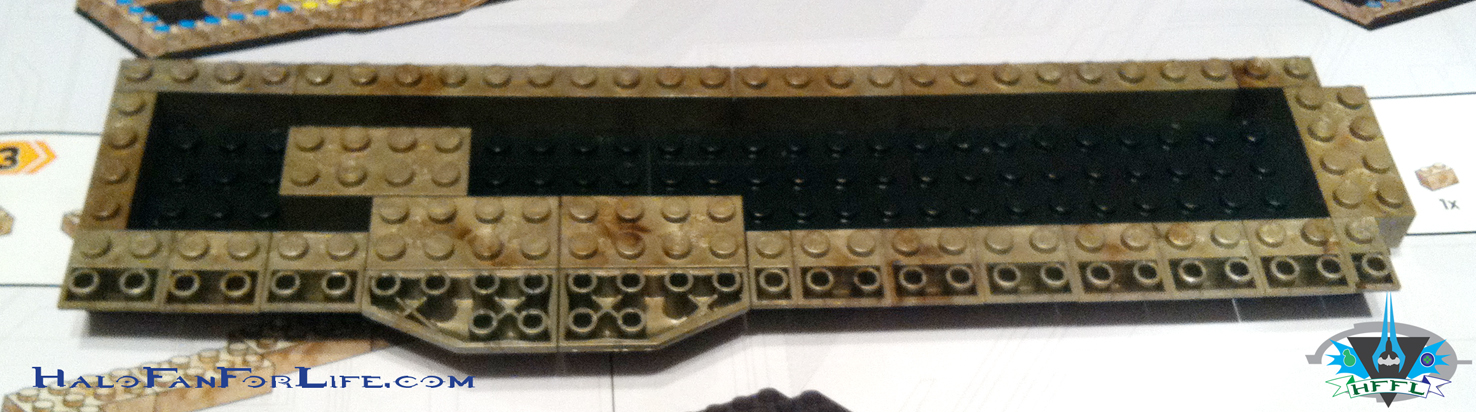
 Here are both rear walls built, plus the bridge that crosses the middle of the second level. There are small alcoves in the rear walls at the back that can fit a figure or weapons if you so desire.
And here they are attached. The Mammoth is really starting to build up at this point.
These next several pics show the construction of the bridge deck and connecting windows.

This is Roland’s “Dias”. Mine wasn’t working. I even replaced the batteries to make sure. Thankfully, Mega is great for replacing parts. More on that later.
Here are the side windows from earlier.
The grill is about to be attached.
The next pic shows the attachment point for the bridge deck on one side.
Now the Mammoth is REALLY taking shape. Adding the bridge immediately adds a lot of character to the vehicle.
The next several pics show the construction of the mid walls on the second level. Again they are the same for both sides, just flipped. Only exception is the weapons placed in each of these walls.

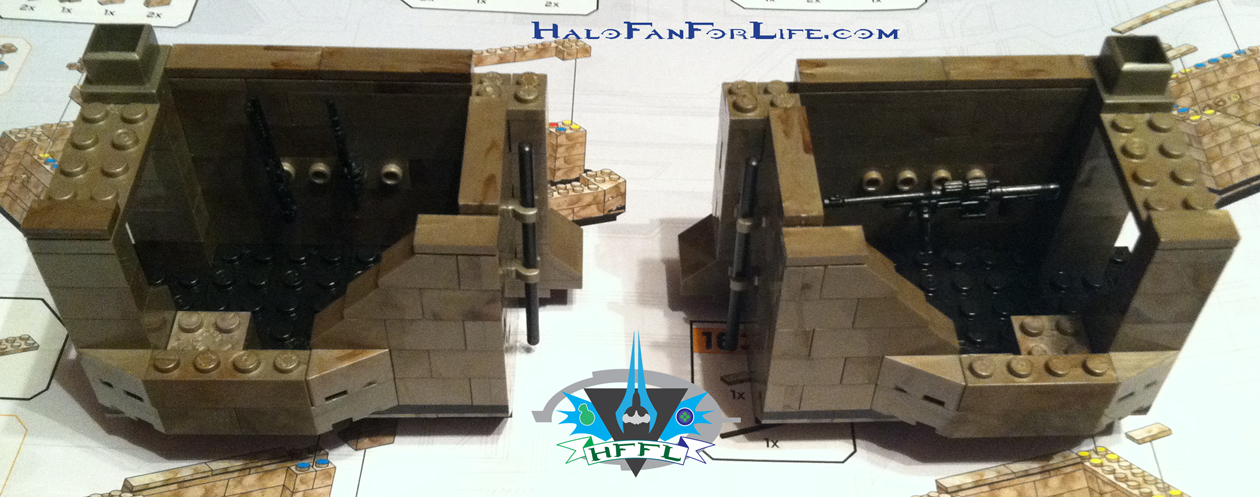 Both side mid walls. You can switch weapons as you like. That’s not a critical step.
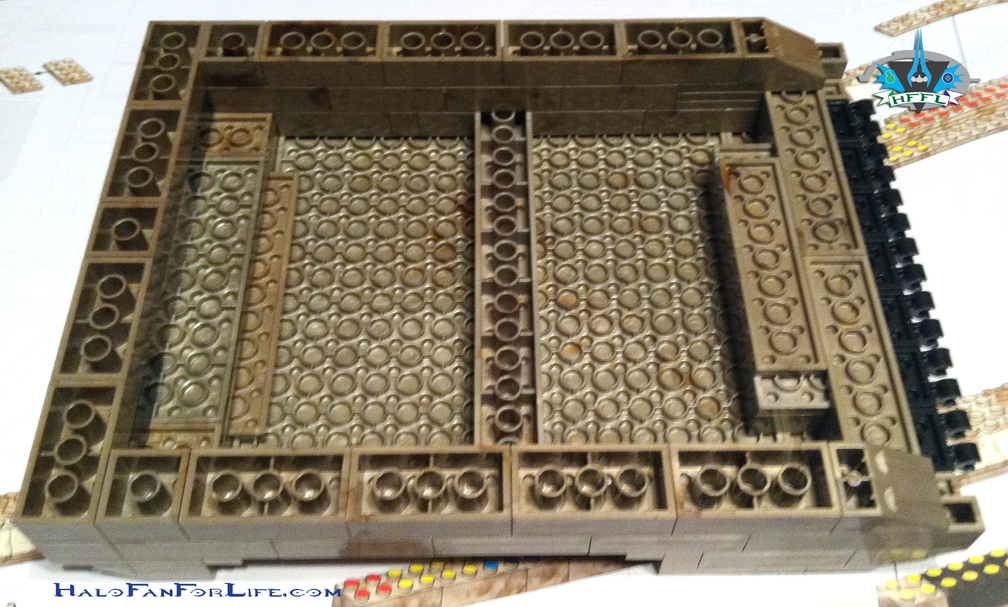
The next steps show how these walls connect with the model.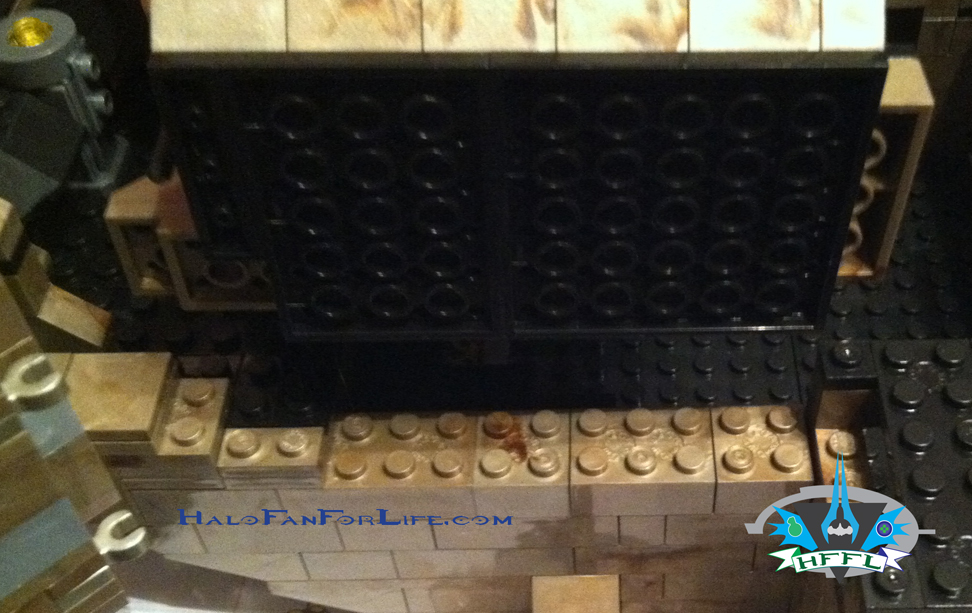
In the above pic, note just to the left of the sniper wall, there is a rod that connects with two “c” clamps on both the wall AND the side bridge. This helps to secure the bridge in places as the side walls are actually on a hinge so that they can make that angle. Great design here.
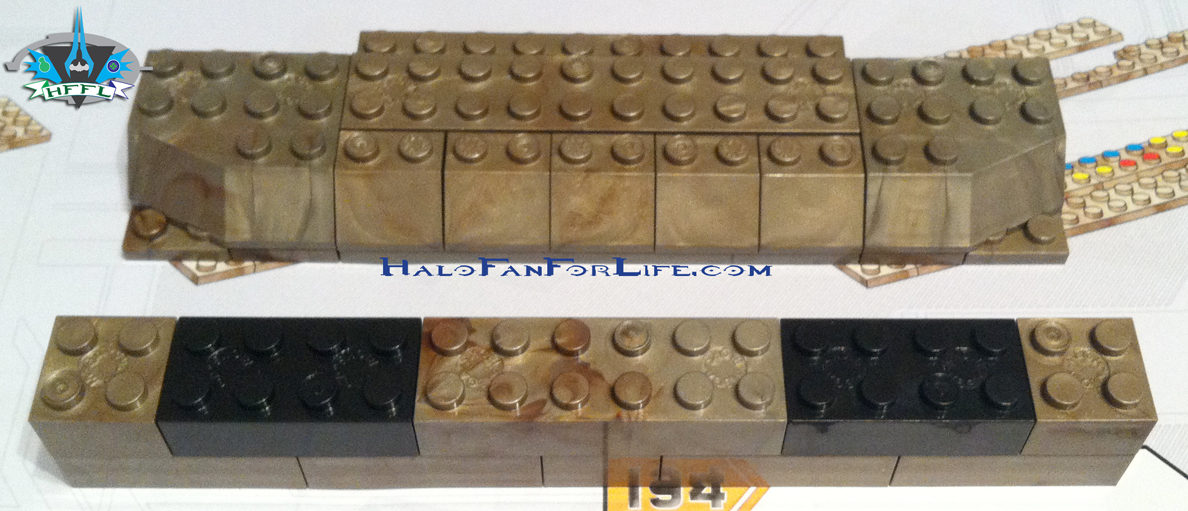
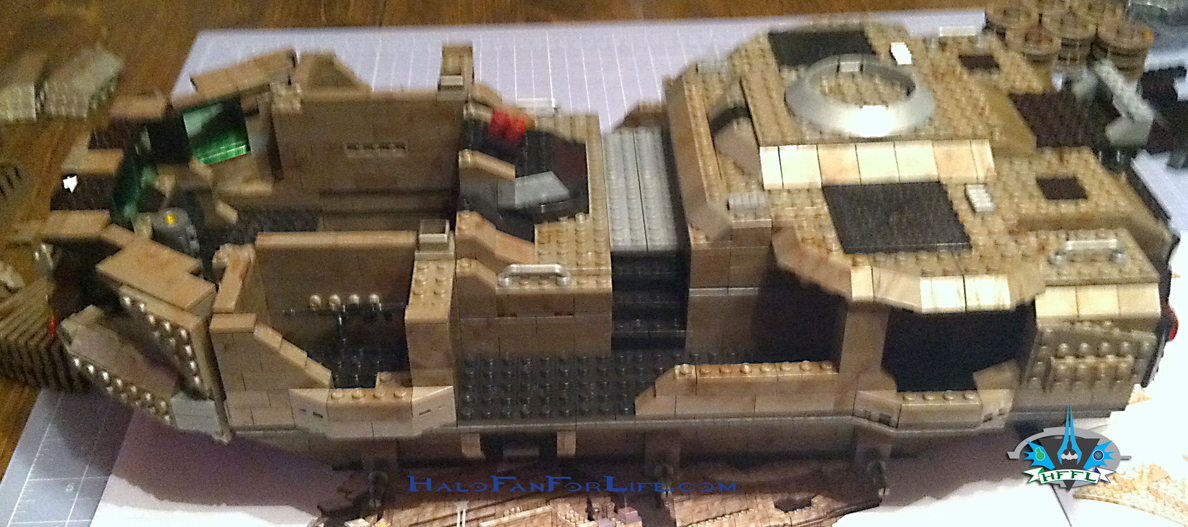
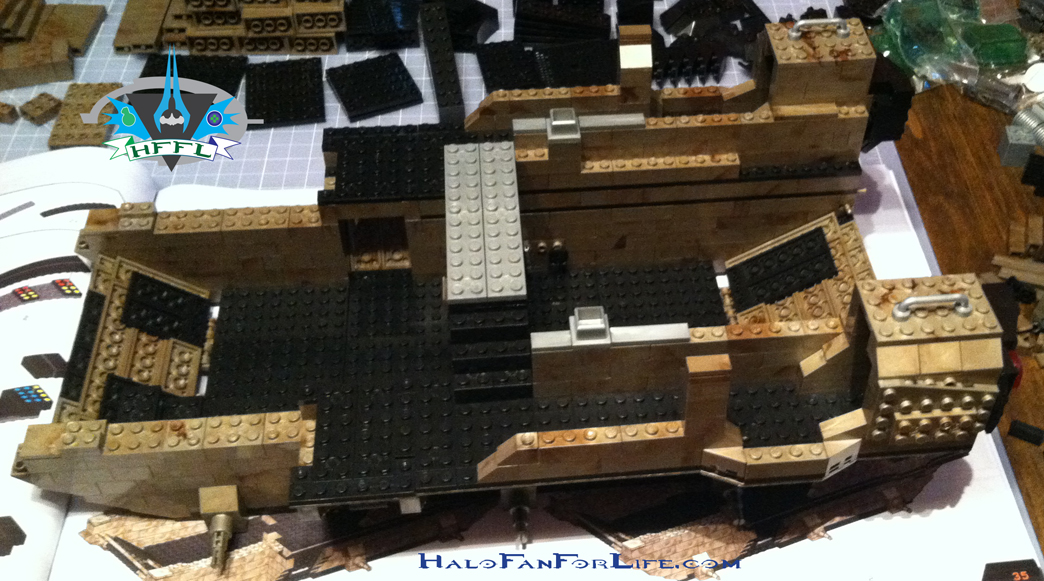
The model so far. Wow, is it really coming together or what? It’s HUGE!
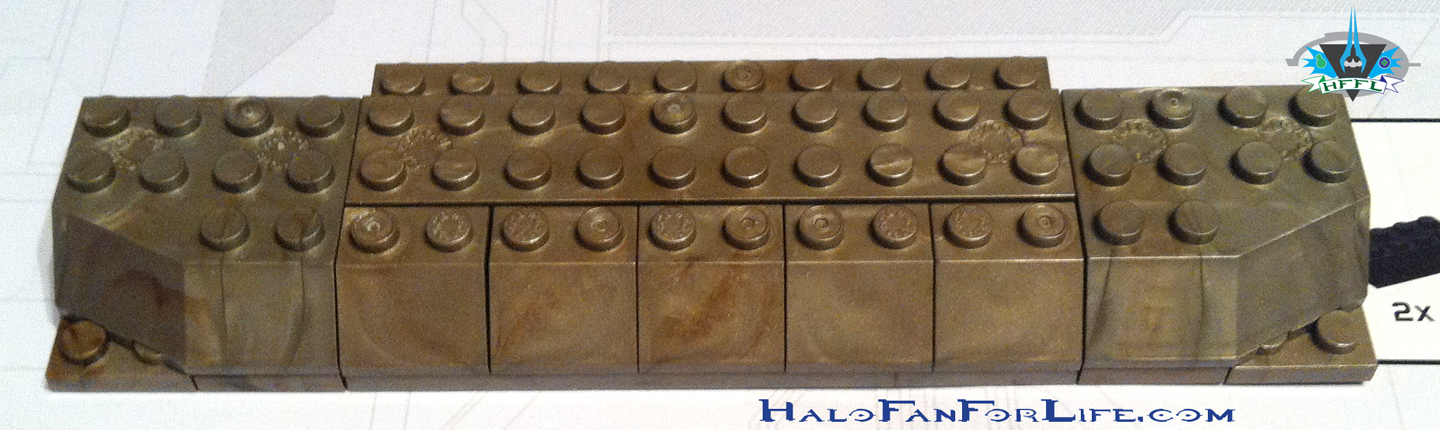
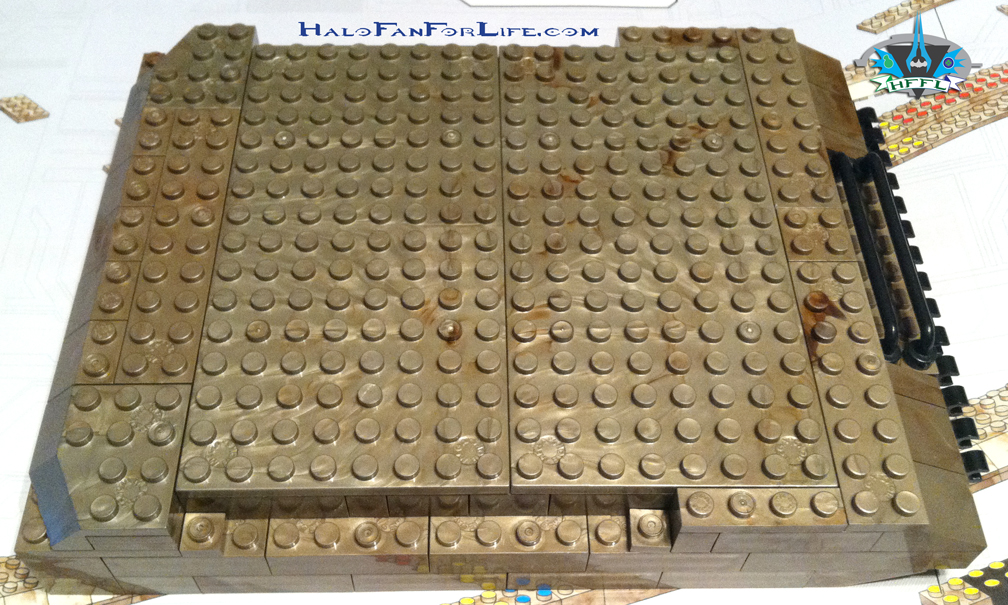
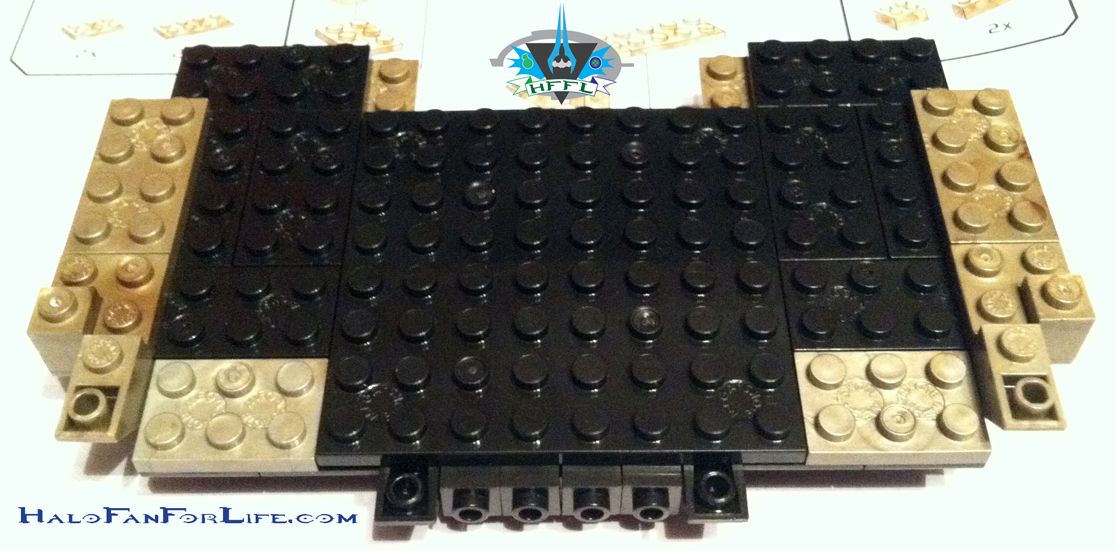
These are two side panels that are added to the side bridge walls.
And finally below, there are two small walls that will actually hold one of the roof panels.
At this point, I need a bit of a break from building as I had been building for a few hours already. Tomorrow I’ll show you how the roof panels are assembled and attached. So stayed tuned for HFFL for the continuing toy review of the Mega Bloks UNSC Mammoth!
And please reply below with what you think of the review thus far.
-Sal
![]()
It was announced on 343’s twitch stream today that Spartan Assault will be available for the XBOX One on Dec 24. For those curious about when for the 360, it was only stated, sometime in January.
As someone who will not be able to afford an XBOX One for at least 6 more months, this is disappointing. Yes, I’m glad it will come to the 360, but I’m disappointed that it’s not coming out at the same time as the One.
Marketing strategy or not, it would have been a nice gesture by 343 to release it for both console at the same time. Sigh….
I can only hope that someone out there who is getting this for the 360 will play co-op with me. Those of my friends who are getting this that I know of, are getting it for the One.
-Sal
Hello friends.
On Tuesday this past week, I was surprised and awed when this set was delivered to me. I wasn’t expecting and and found out that it came from a family member (not my wife this time). I’ve been asked to not divulge whom it is (though a few of you do know).
Anyway, this is first part of a FOUR part review of the Mammoth. Like the Mega Bloks Foward Unto Dawn set, it’s HUGE. So to try and get the review done in one article would being a disservice to the set.
Starting today and for the next three days thereafter, I’ll post up the following part to this review. Specs for the set will be in the fourth part.
So let’s begin with Part 1: Packaging and Sorting. (Click on each pic bigger)
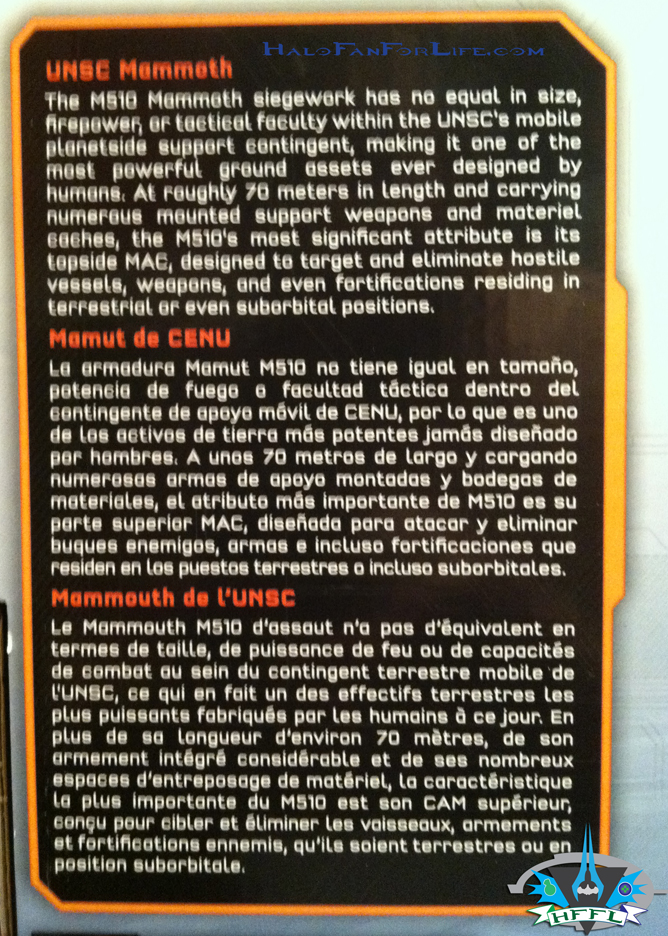
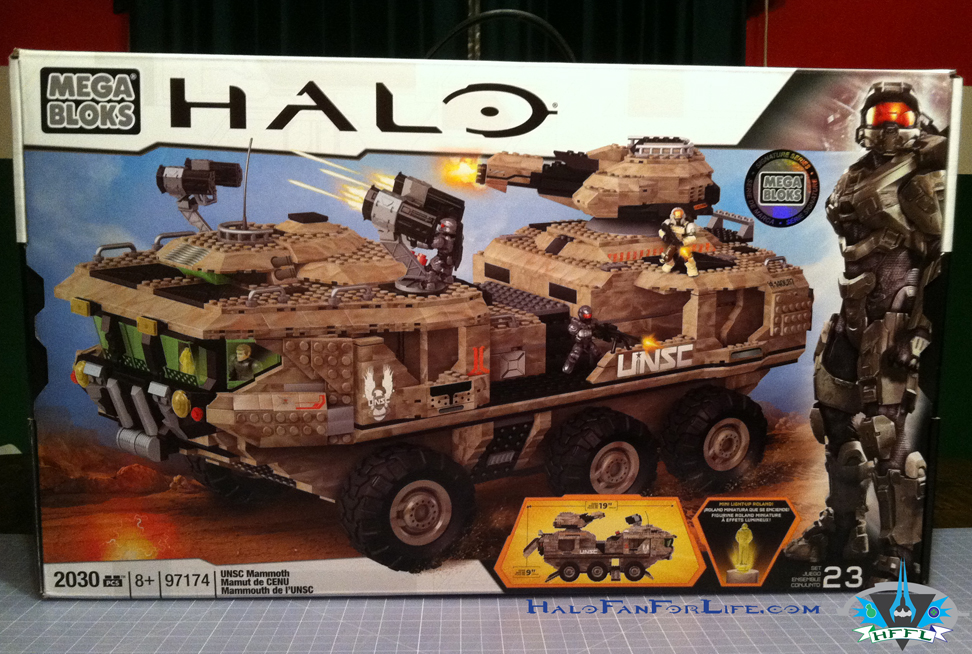 Here’s the box front. Folks, this box is HUGE and has a handle on the top to prove it. With more than 2,000 pieces it really is a “mammoth” set. The front of the box highlights the ramps and doors that open, as well as a Micro Roland that is included in the set.
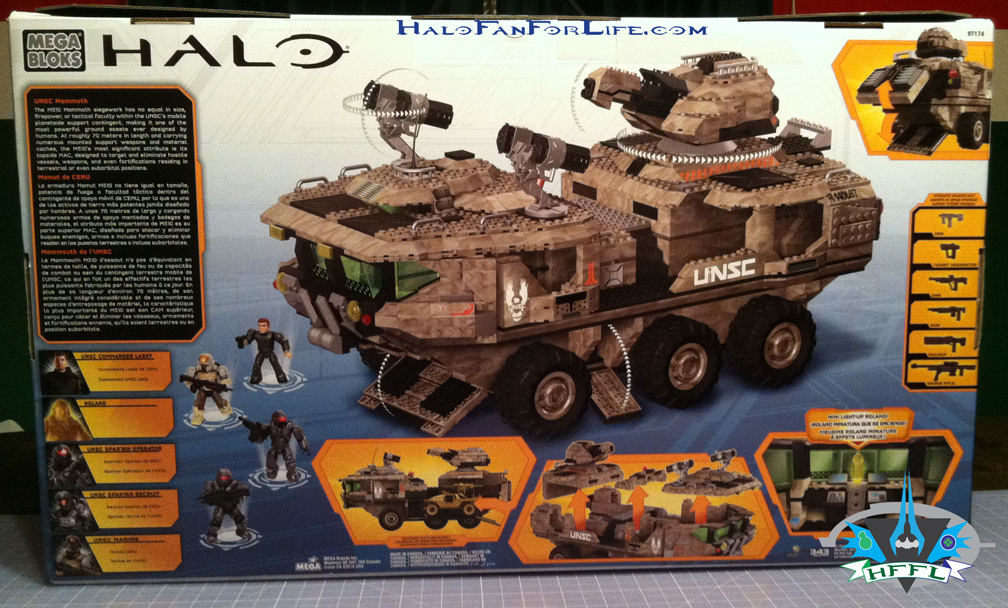
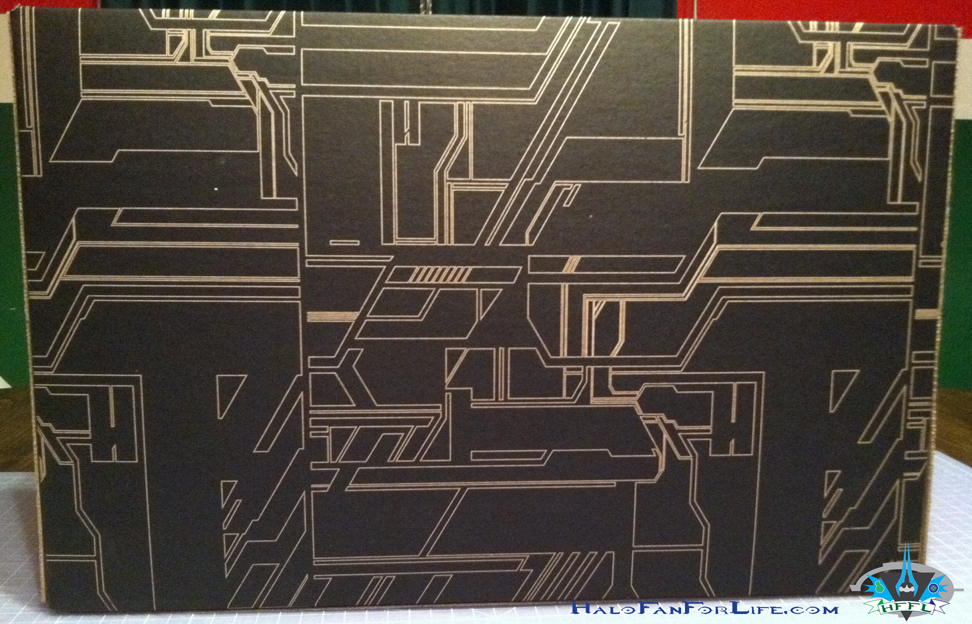
The back of the box gives us plenty of details. The main focus being the Mammoth itself, showing again some of the ramps as well as the rotating rocket launchers and Mini-Mac canon on top.
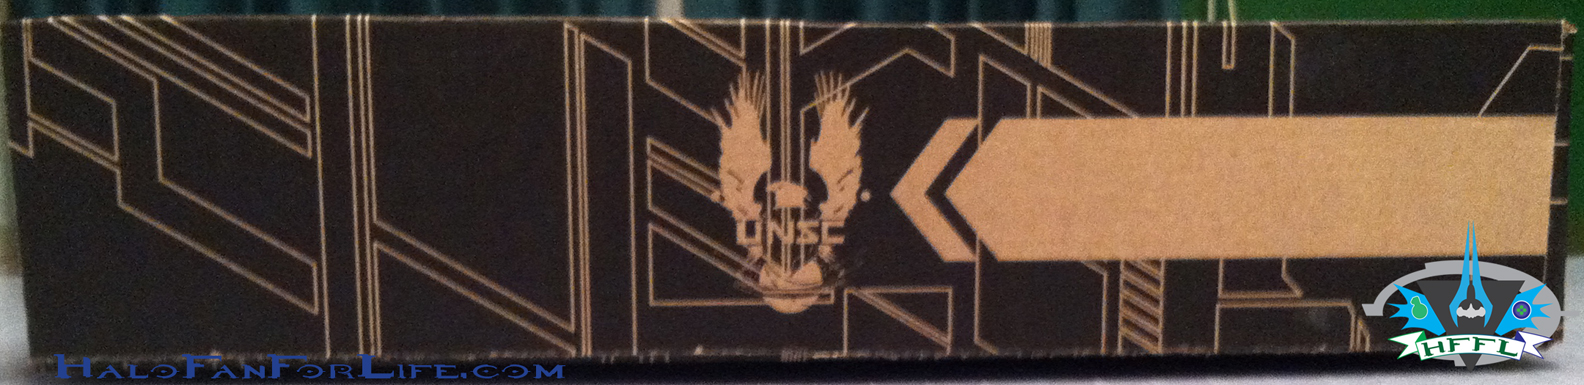
The side of the box.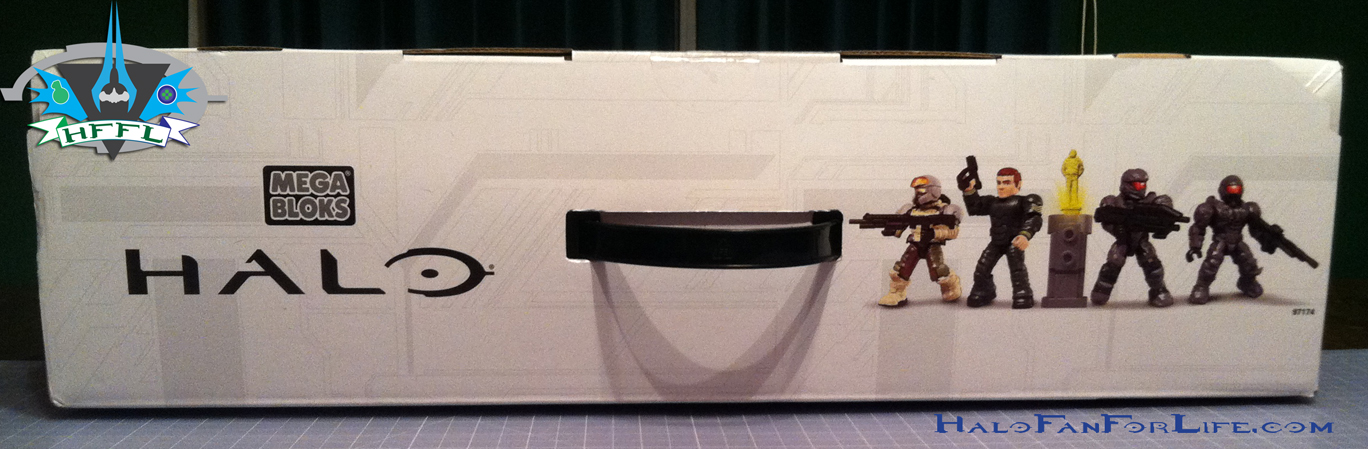 The top of the box. As stated, it has a handle to carry it.
Part of the details that describes the vehicle in-game. (Apologies for the fuzzy pic)
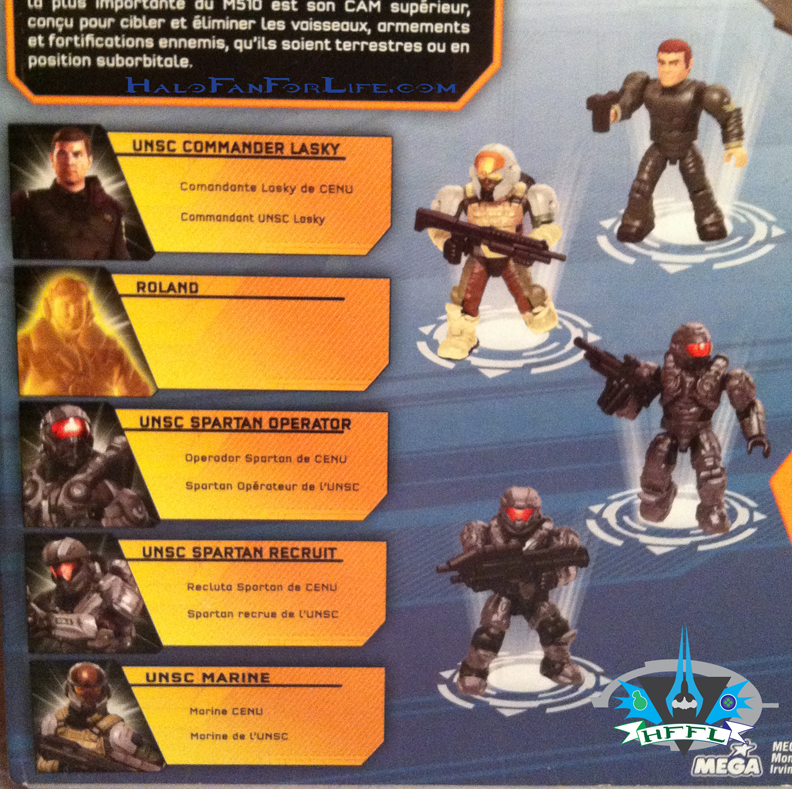 Just below that the minifigs are shown. For the first time a UNSC Officer is named and it’s Lasky. As shown there is also a UNSC Marine, this time with brown skin. Two spartans are included. One in Recruit armor, the other in Operator armor. I’ll have more to talk about the minifigs in the fourth part of this review.
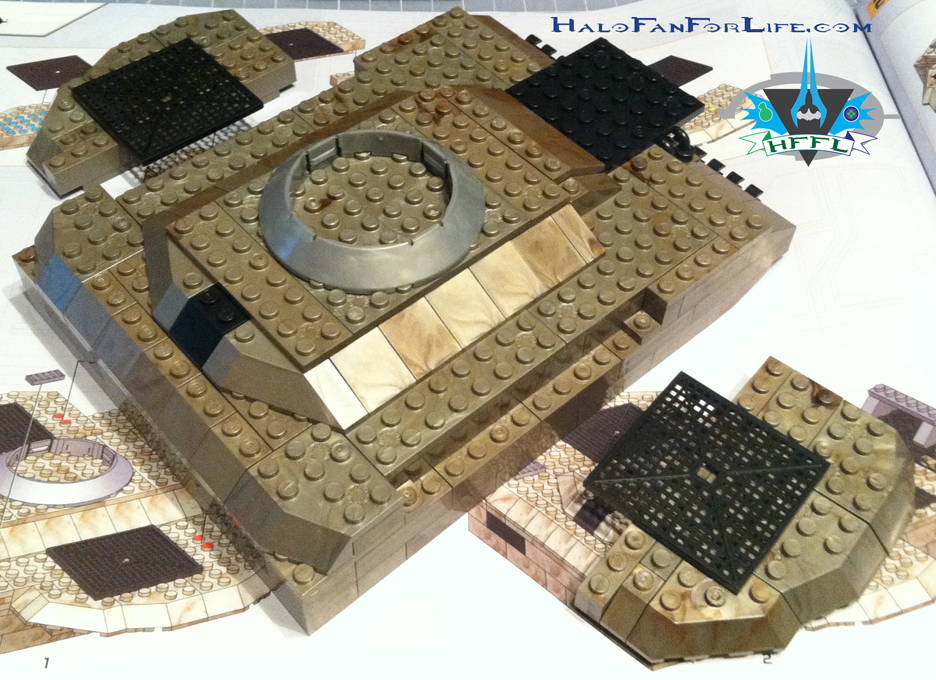
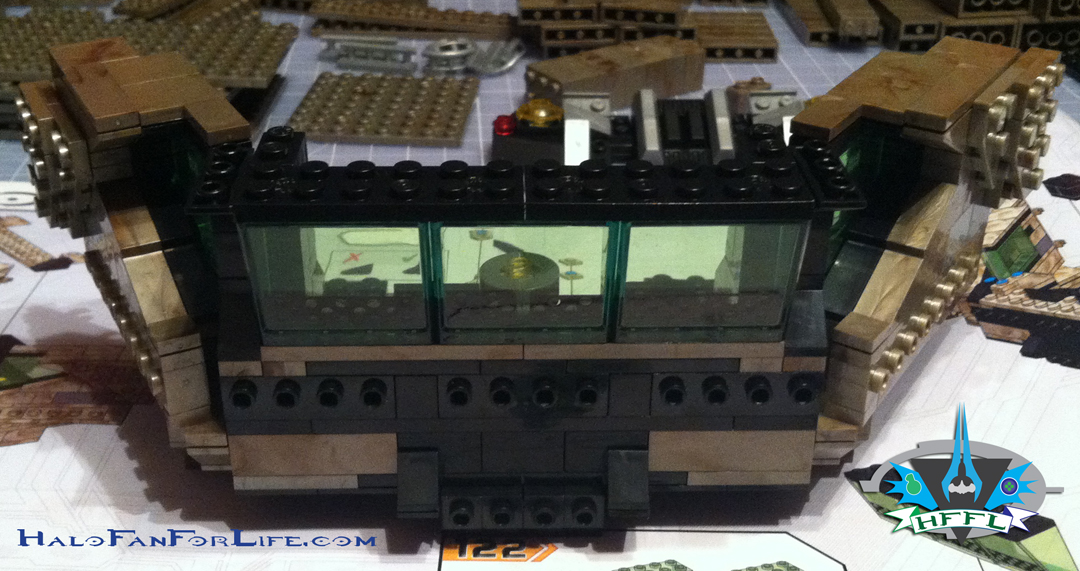
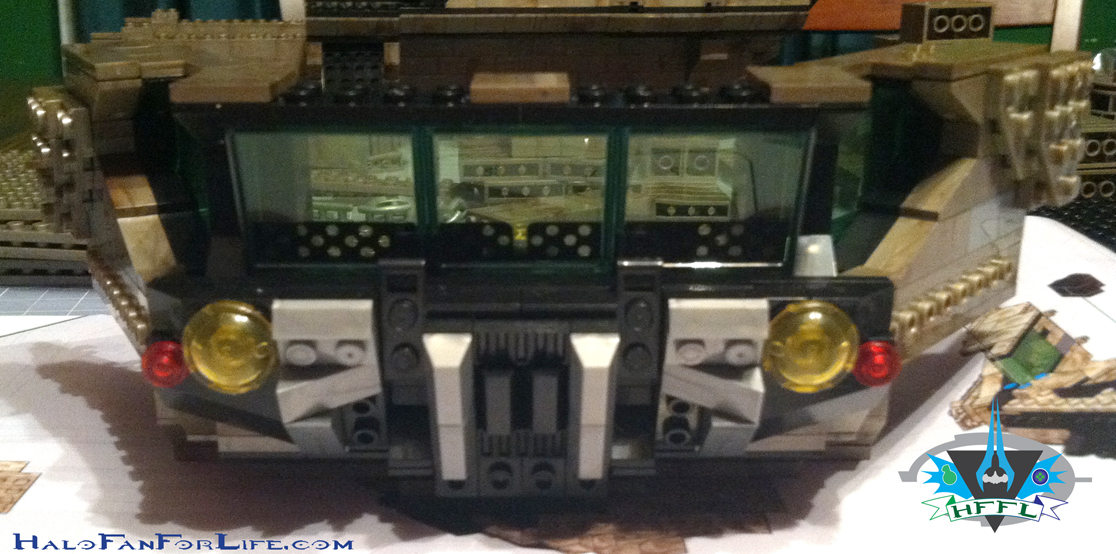
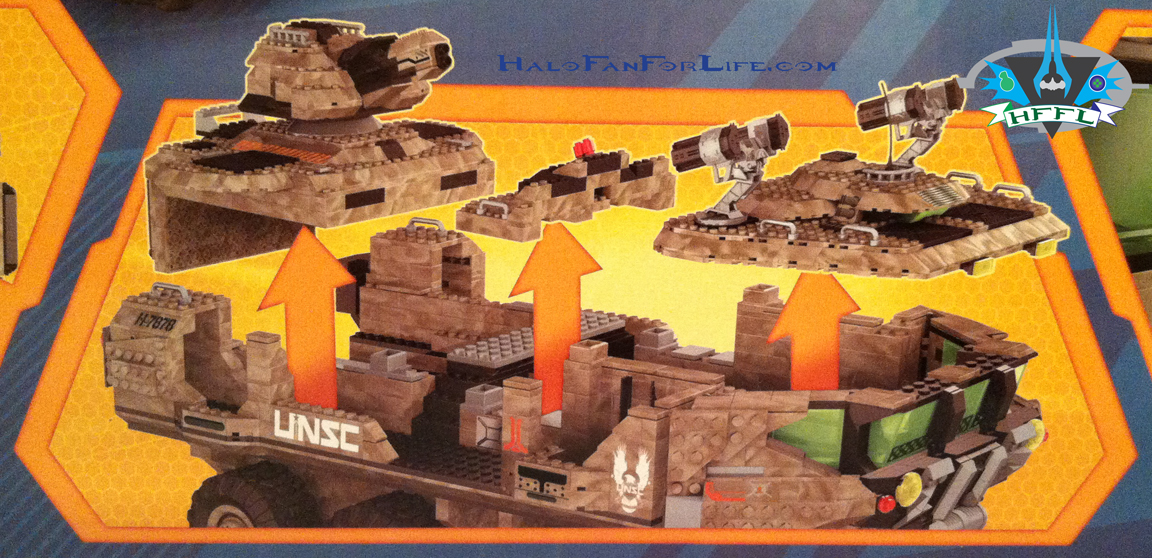 The above pic shows nicely how the top sections come off to allow access to the interior of the Mammoth.
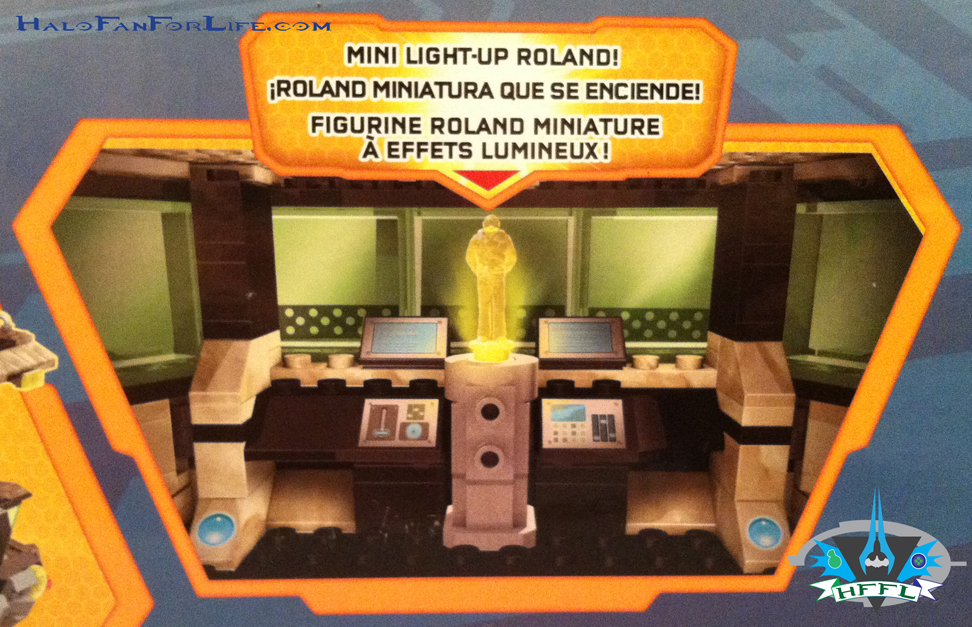 The bridge of the Mammoth with Roland in place.
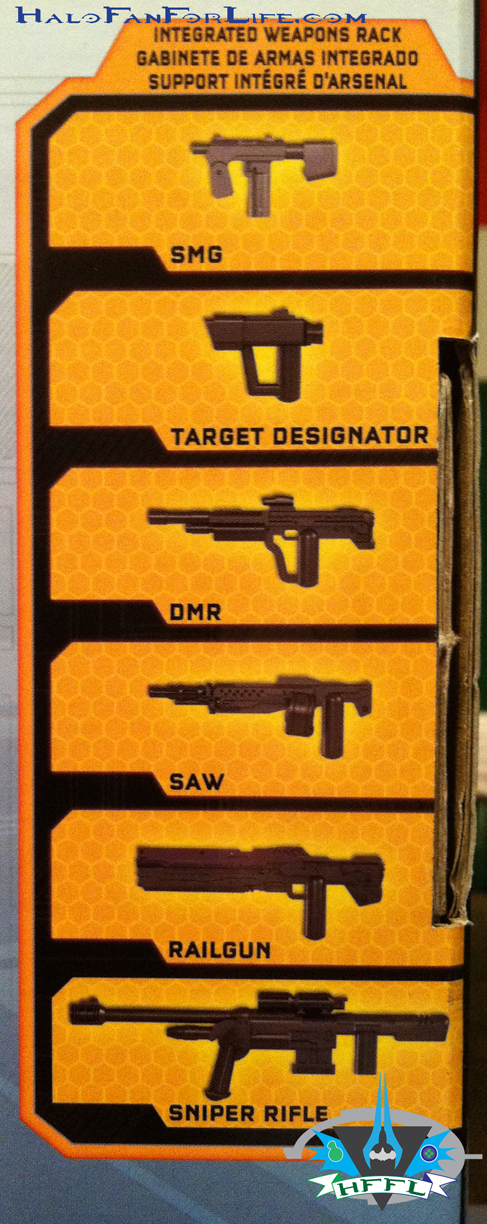
The last of the detail shots shows the weapons included. Absent is the target locator. Though technically that’s not a weapon, but an accessory in this set.
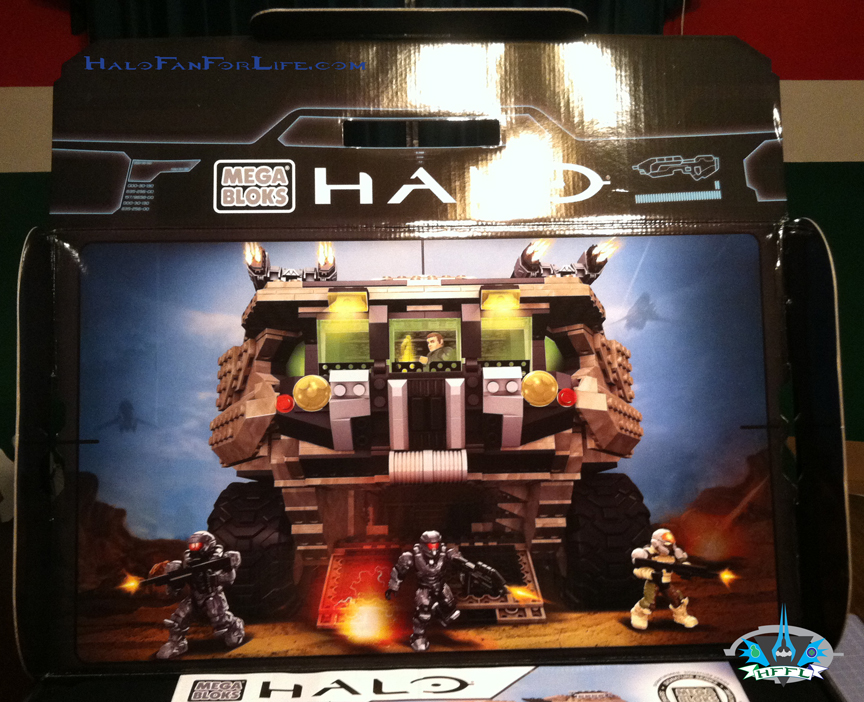
When you first open the box you’re greeted to this awesome graphic that is on the reverse side of the front of the box.
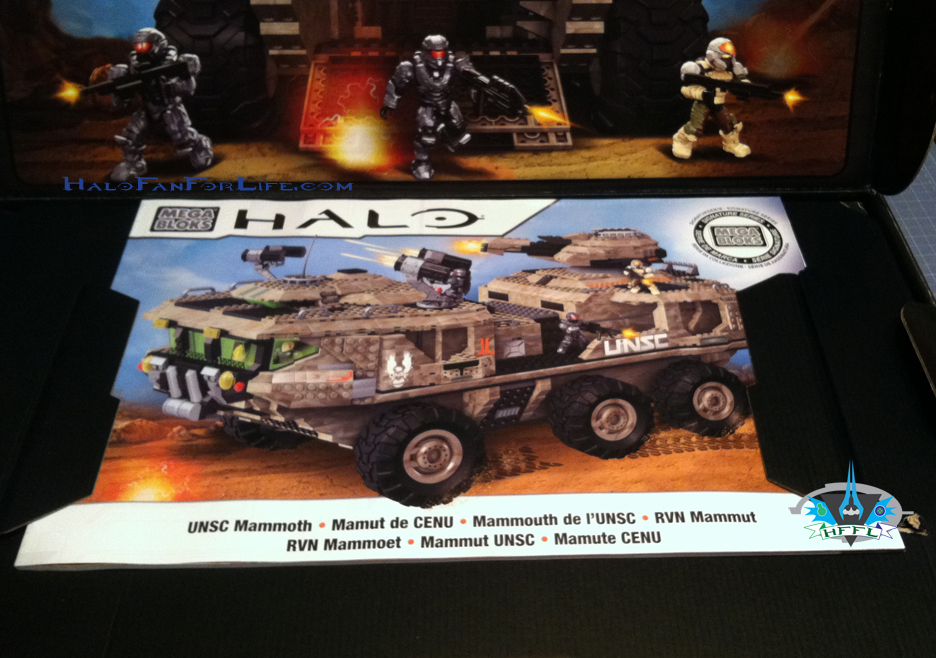
Usually I cut my packaging apart and save just a few pieces of it for reference. In this case though, this box is going to stay whole. Though I’d LOVE to have a poster of this. Hmm, maybe I’ll take another photo of this without the flash and fix it up in photoshop.
 Here is what you see in the box. The THICK instruction booklet is within a cardboard section kept apart from the pieces. Very nicely displayed, I must say.
Below that you get two of the following boxes.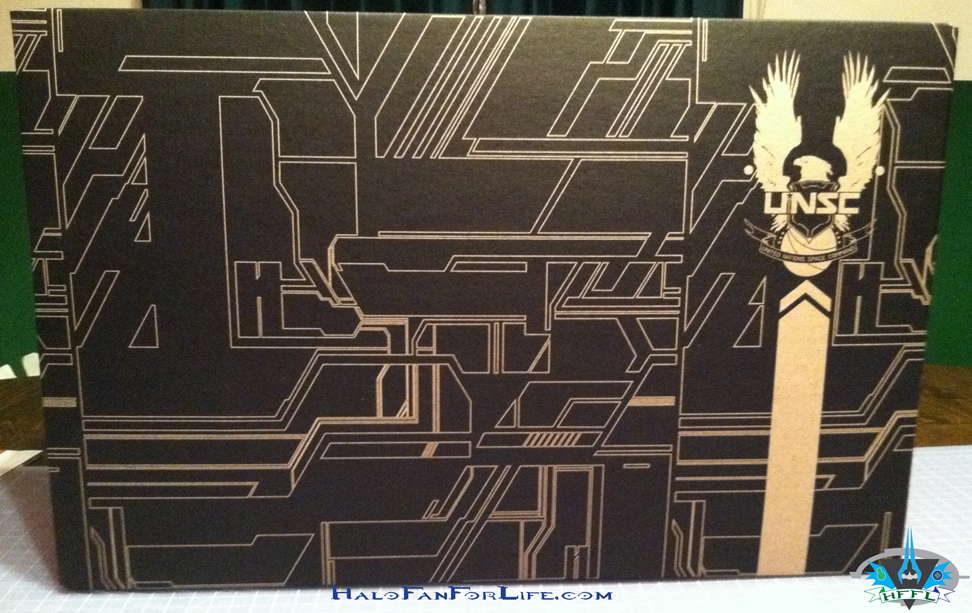 The inner box front. I really like the line work on this and the UNSC logo is featured prominently. If I recall, this is the same inner box design as the Forward Unto Dawn inner boxes.
 The back of the inner box.
One of the sides of the inner box.
Now we finally get to the bloks themselves.
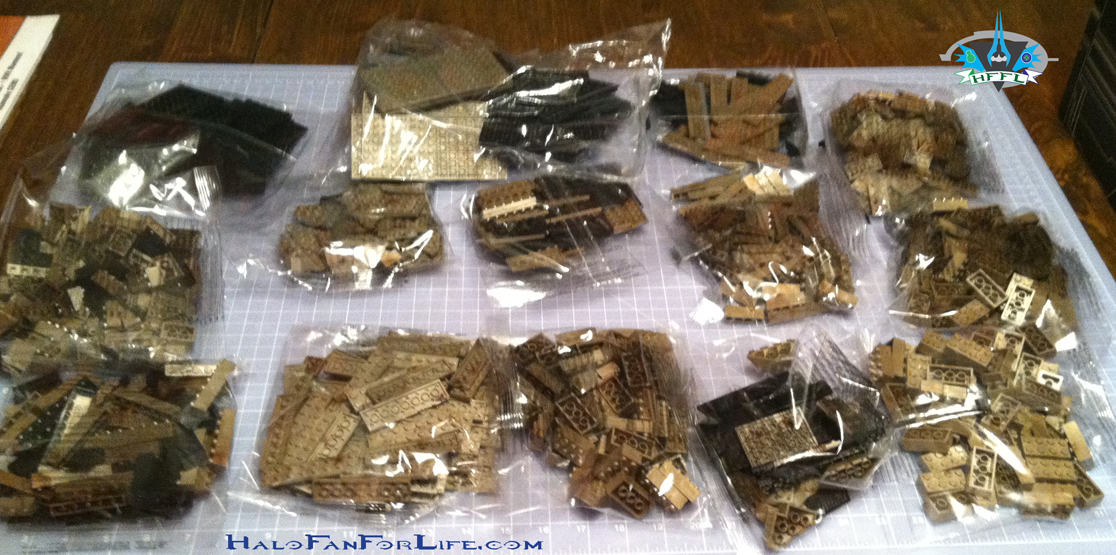
Here are the contents of one of the boxes. PLENTY of large bloks and plates.
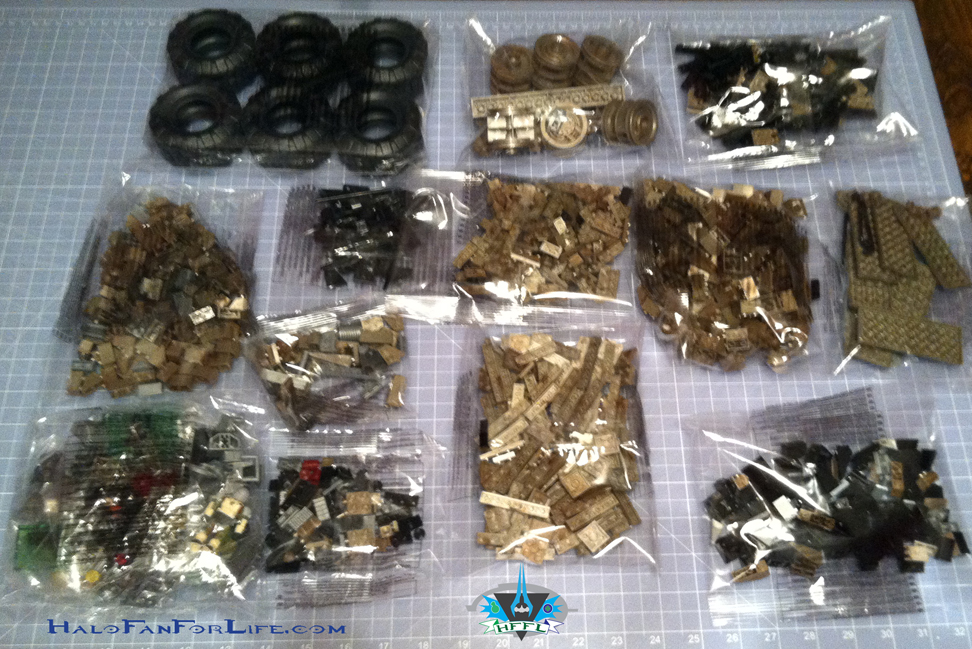 The contents of the second box contain the smaller pieces as well as the wheels.
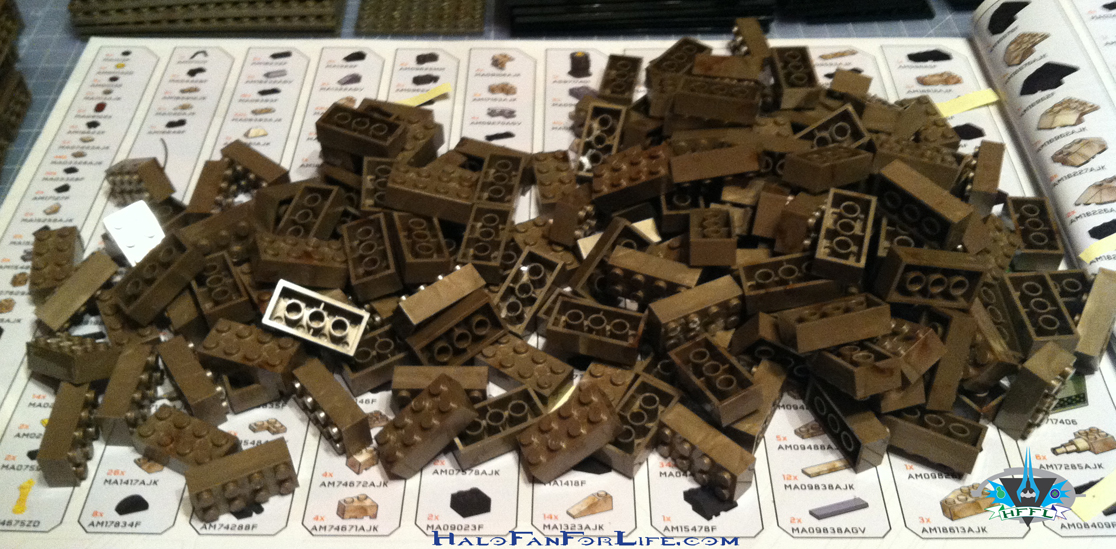 I’m showing this shot to give an example of what just one type of blok looks like in a pile. I like to stack my pieces before hand so as to save room on the table when building. It makes it easy for me to reach the pieces then. Otherwise, I’d be getting up from my seat after every step to put huge sets like this together.
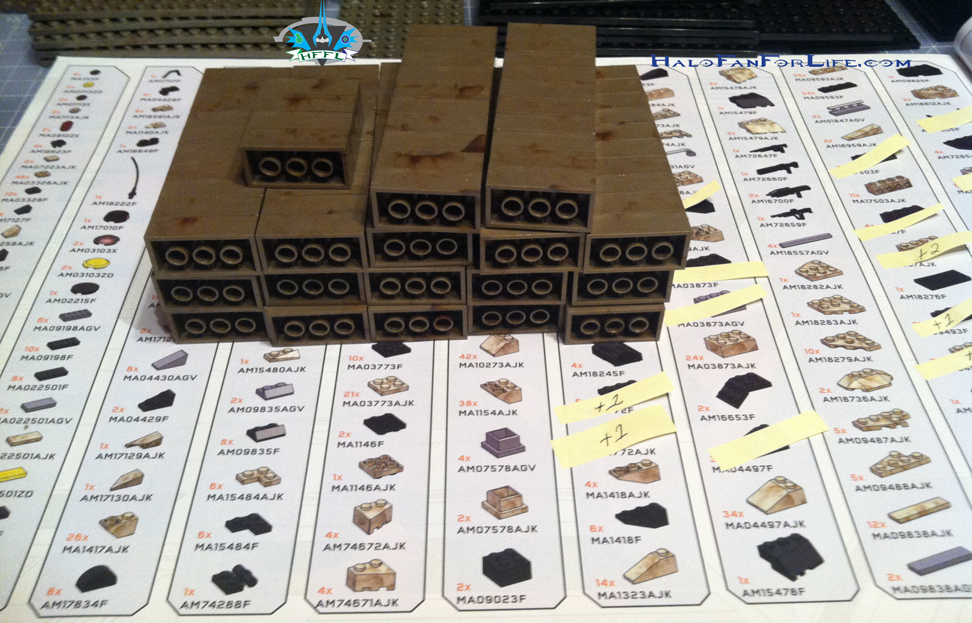 Here are those same bloks stacked. I stack bloks typically in sets of 10. That also makes it easier when a step in the directions calls for a large number. I know immediately that one of my stacks is 10 and can pick them up and count them off with ease. Sure the initial set-up takes longer, but it’s worked for me this long and I like organization.
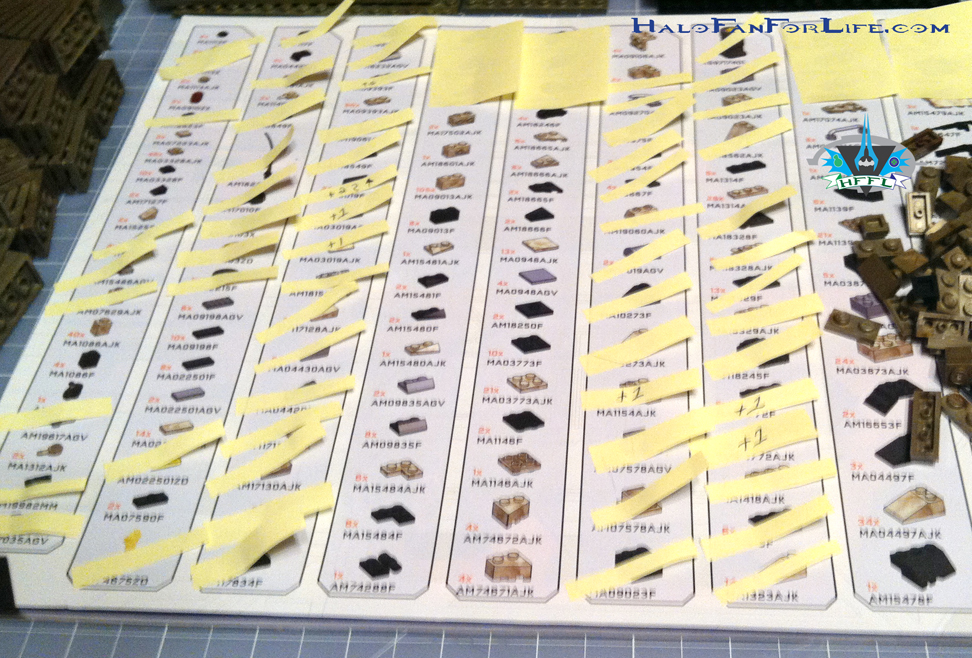 To further illustrate the organization, as I find pieces, I place a small sticky sliver on it. That helps me keep track of what pieces I’ve already found. In the case of some there are extra pieces that MEGA has included. That’s good to know as well so I’m not thinking at the end if I missed a step or a specific part somewhere during the build. The columns above that have a full sticky mean that I’ve found all the parts in that column. In the case of the extra pieces, I’ve put them aside so they are not mixed in with the other parts.
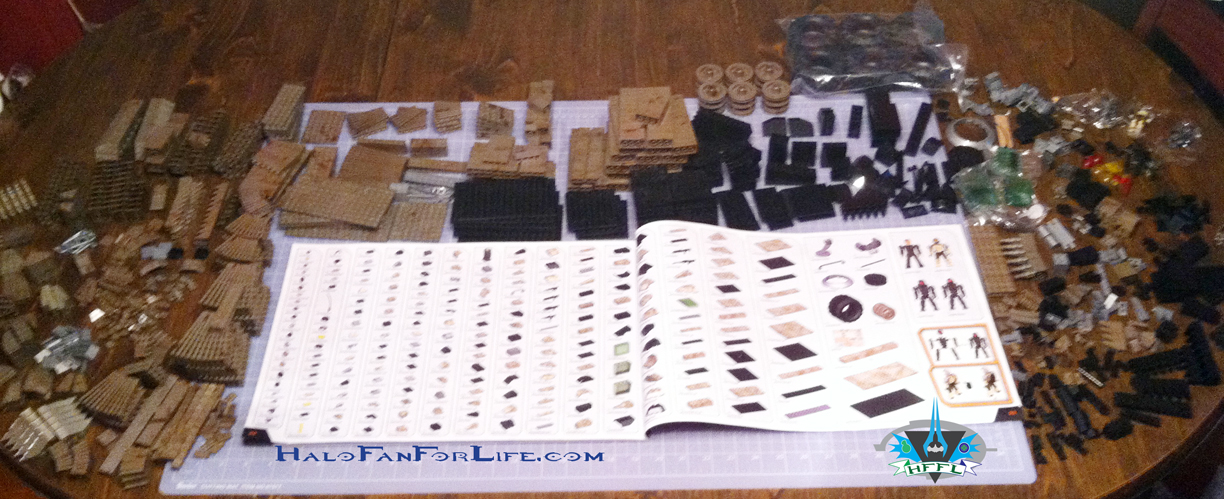 And the last shot for part one of this review shows all the pieces sorted out. As you can see, I’ve kept the left to mostly the golden tan bloks, then the larger black pieces, then all of the really small pieces. The wheels, minifigs and rocket launcher parts are in the upper right of this photo.
Tommorrow, part two will be the two main levels of the Mammoth.
-Sal
Josh Holmes is no longer Creative Director. He’s been switched to being an executive producer. We can only wonder why? Perhaps his misstep during the Halo 4 Post Mordem earlier this year.
In the meantime, we have a NEW Creative Director. His name is Tim Longo. He formally was the Creative Director for the Tomb Raider reboot and Lucas Arts “Republic Commando”. I have to say being a HUGE Star Wars fan, this is AWESOME news. Republic Commando was one of my all time favorite Star Wars video games. Think Spartan Team Noble, but with Clone Troopers instead. Trust me it’s bad arse!

So if we the Halo community get an infusion of that into Halo, I have to say we are in for a much better game than Halo 4!!!
I’ve already started following him on twitter. If you want to follow him and welcome him as well to the Halo community, go HERE.
-Sal
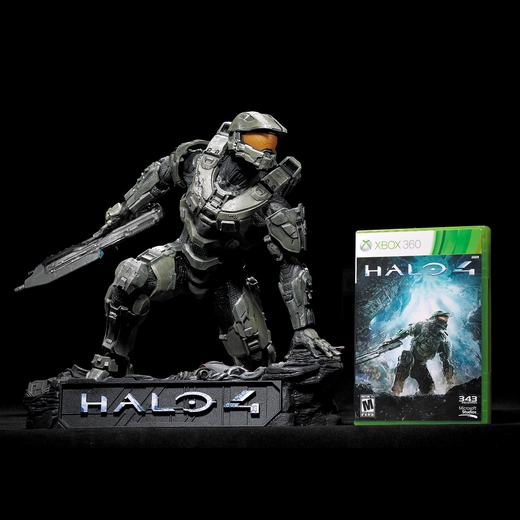
If you’ve been waiting to buy this, the wait is OVER.
Hurry on over to McFarlane’s website to buy this beautiful statue that is sure to become a prized halo possession.
If you do get one, PLEASE takes some pics for me and I’ll feature your statue on the blog. (I unfortunately won’t be able to get one of these for myself.)
-Sal
Flickr user larabair created a fantastic plush Huragok. It’s very detailed, especially for being made out of yarn.


Here’s a pic of an in-game Huragok for reference.
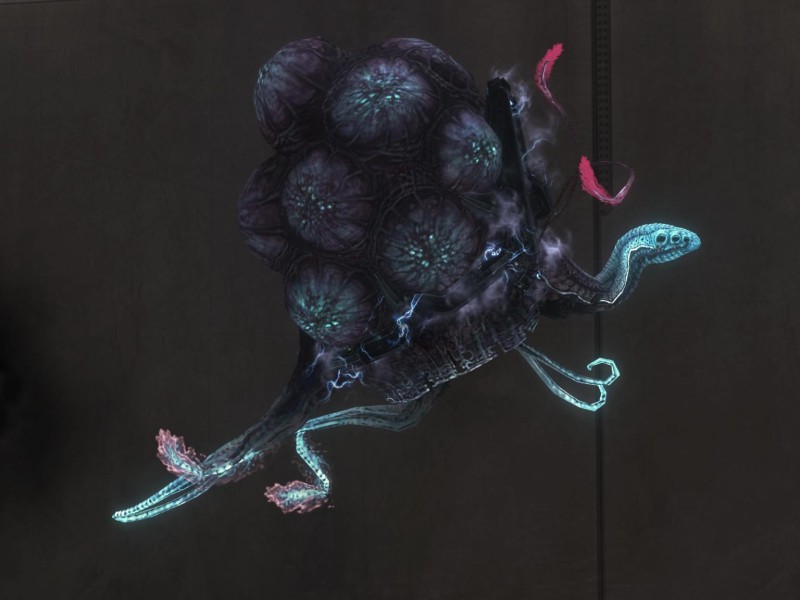
Considering the lack of official Huragok as well as merchandise, this would be a great way to bring it to light for fans. I have to say this is highly desirable. Would you buy into Halo plushies? I know I would.
-Sal
 This week’s Halo bulletin is a GREAT one! LOADS of upcoming Halo gameplay news and MORE!
After Bravo has a paragraph about what he did for Thanksgiving, we get into the good stuff that is Halo!
First up, 343 day (Dec. 9)
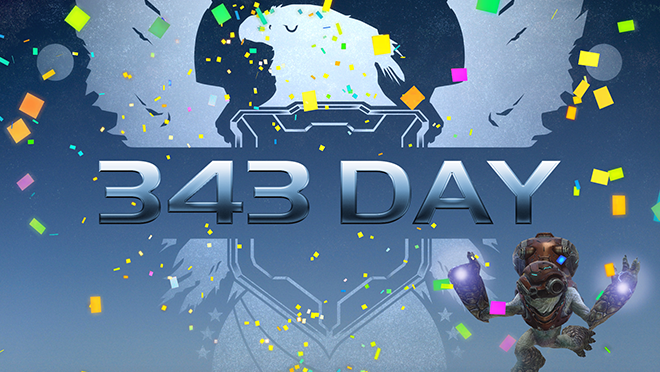 To celebrate the 343rd day of the year, 343 will be having a couple of special unlocks as well as it’s own playlist. Before we get to that though, note that they will be live streaming that day from 1-4pm PST. There will be interviews with Kiki Wolfkill, Kevin Gracce, Brain Reed, as well as gameplay with 343ers and community members. News of Spartan Assault, what might be coming to XBOX One and more…
The first unlock that day if you COMPLETE just one matchmaking game or Spartan ops matchmaking mission you will get the Commando Helmet.

This can normally only be unlocked if you have the Dominion mastery (which I already do). Note that you will only get the helmet, not to full armor set. You still have until Sunday late night to master that commendation to unlock the armor set.
Resistor Unlock
Next up is the Resistor unlock. Finally 343 is making good on it’s promise to unlock this for everyone. It’s coming this Monday. No need to play, though you may need to download a small update.
Lastly for the 343rd day of the year is 343 Day Slayer.

This will be a speed slayer playlist. The settings for this are as follows:
• 6 vs. 6 Team Slayer
• Score to win: 800
• 130% player speed
• Preset Loadouts, each equipped with Resistor and Mobility
• Initial Ordnance enabled, Random and Personal Ordnance disabled
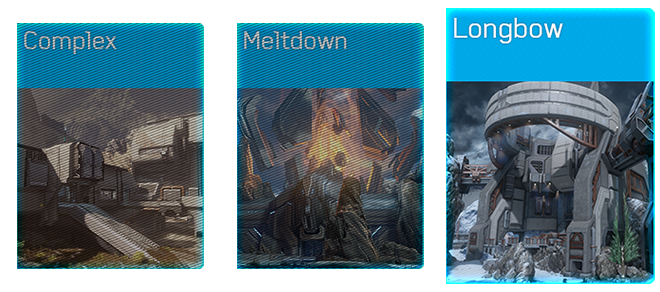
The game type will be featured on the following maps:
• Longbow
• Complex
• Daybreak
• Exile
• Outcast
• Meltdown
• Harvest
• Wreckage
• Vortex
• Vertigo
• Perdition
• Ragnarok
• Shatter
Matchmaking Playlist Update
Race will finally be coming to Halo 4 officially. Get ready to rev those engines come Monday.
The community choice poll has concluded for what multiplayer map to include in this and Longbow won! (Yes, that was my pick too!!!)
The Team Slayer Top 200 list is LIVE and you can check it out HERE.
Some fun news!
Halo: Escalation
This is a new comic book mini-series that follows the events AFTER Halo 4 (so of course spoilers will be present). The first issue comes out Dec 11 (next Wednesday). The basic premise of the story is that the UNSC Infinity has been tasked with escorting the Arbiter to meet with a Brute Chieftan in hopes of a truce or some other kind of diplomatic goodness.
To celebrate this, Waypoint has posted several versions of the two alternate first issue covers of Halo: Escaltaion #1 for your smart phone. (Check the link at the end for the full bulletin to get those pics).
If you’re lucky enough to be in Seattle on December 11, you can join in a special Halo: Escalation Launch Party. (Dang, I would LOVE to be there for this…)’

And finally BS Angel has a Screenshot Spotlight that focuses on Snow.
To read the full bulletin, download those smart phone pics and see the Snow shots, go HERE.
-Sal