In my ongoing series of custom Halo block built sets, I came across this one on AliExpress. It’s a small set at “midi” scale. Affordablility was very good. the build had a couple of issues, that I’ll talk about later in the article.
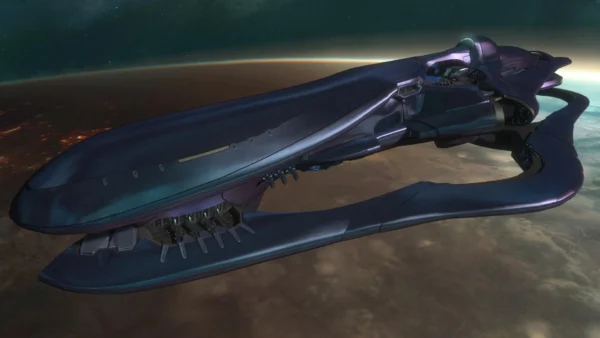
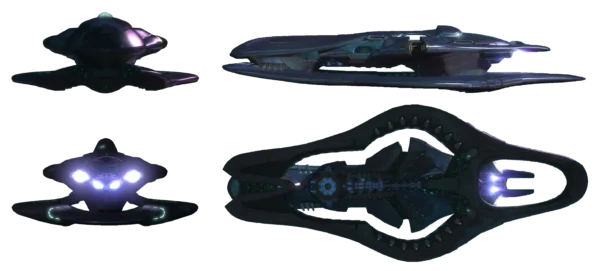
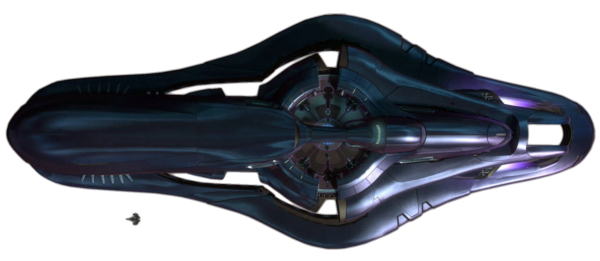
First, let’s look at the in-game model.
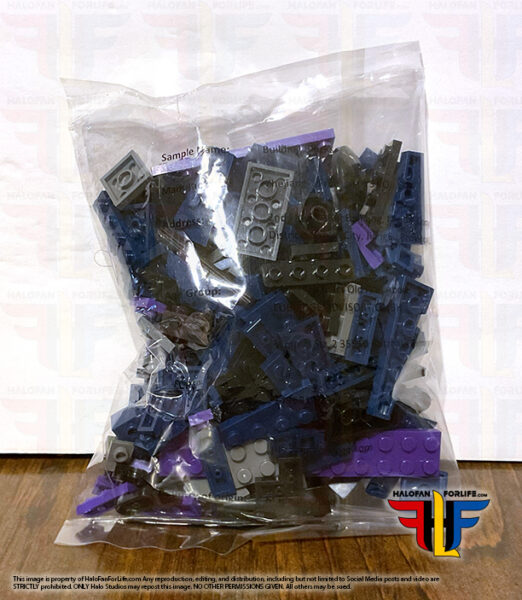
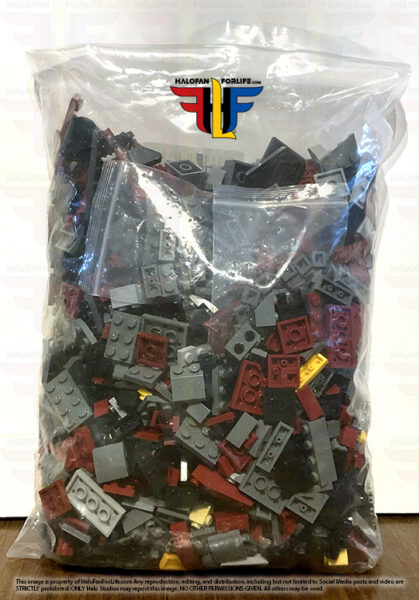
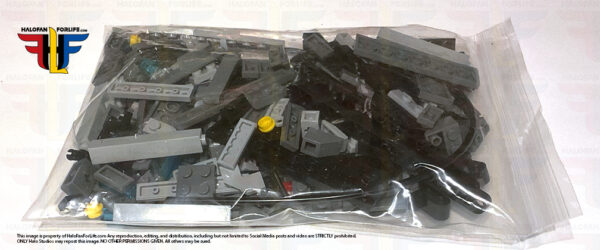
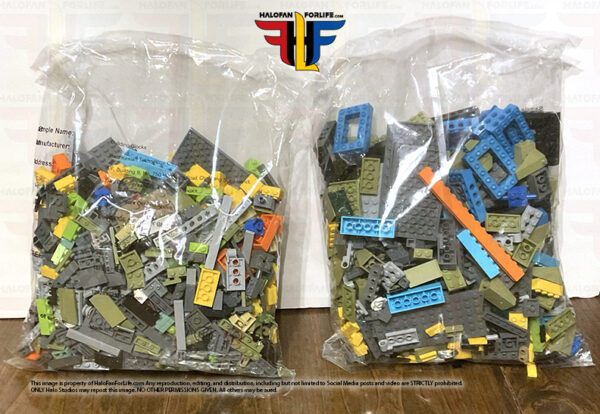
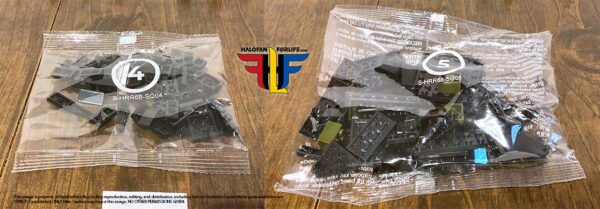
Okay, now let’s get into the build. This set comes in just one bag. You must sort them all out. No smaller bags for sectional building. Alas, such is the way with custom builds. They are not Brand name blocks.
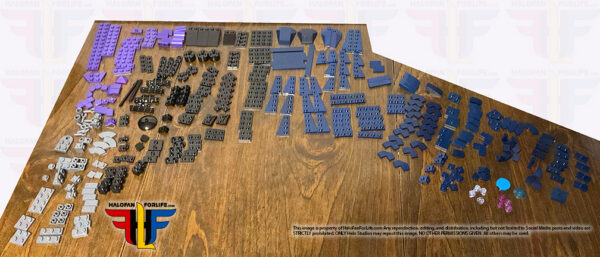
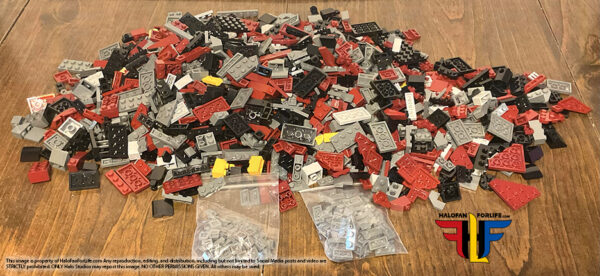
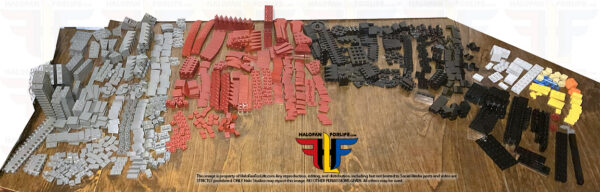
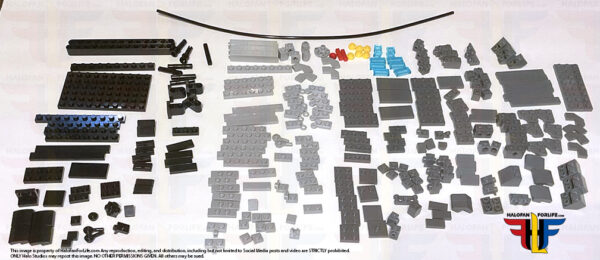
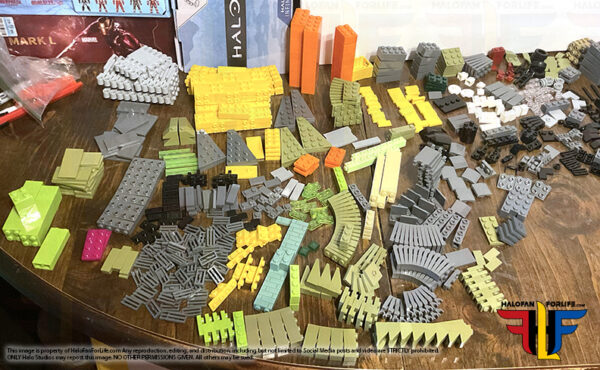
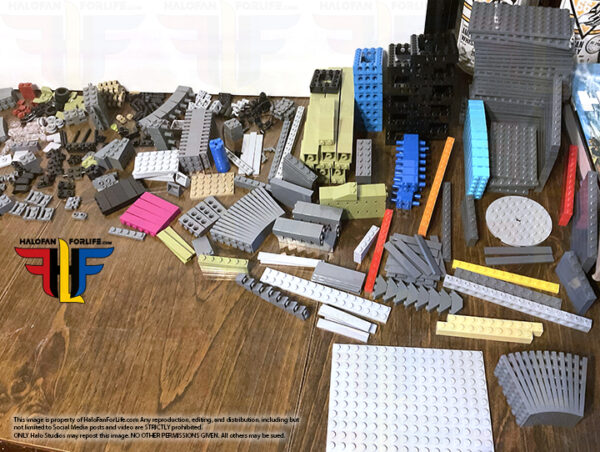
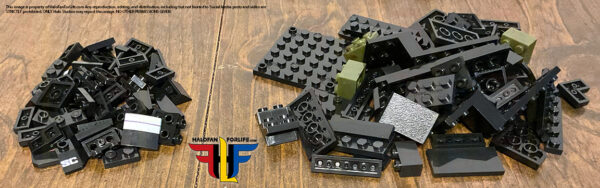
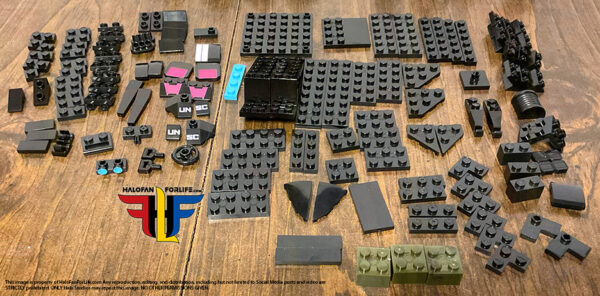
And here are the pieces sorted out. Yes, I blocked off that portion of my dining table that had other stuff on it that did not pertain to the build.
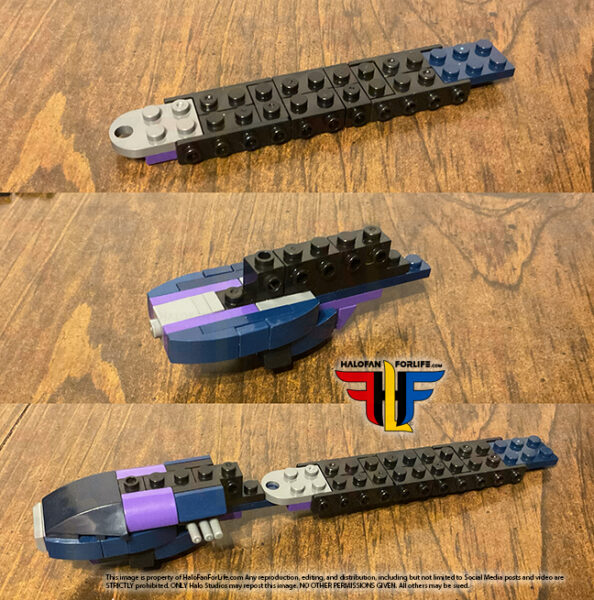
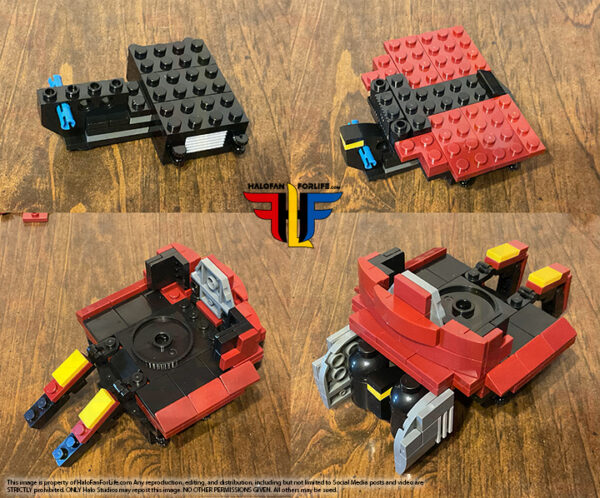
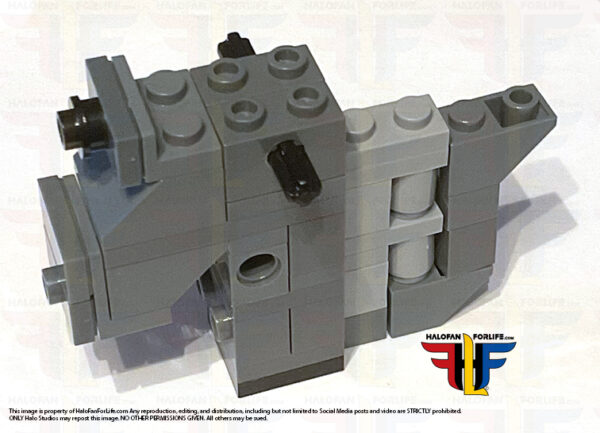
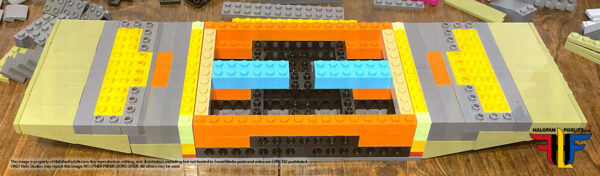
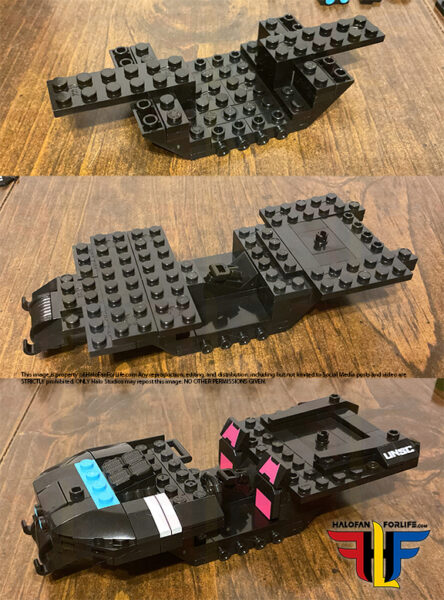
Now we get to building. In this first set of pieces, we start to build the spine of the SDV Corvette, See below is the mid, then, bottom front portion, then forward sections and middle spine.
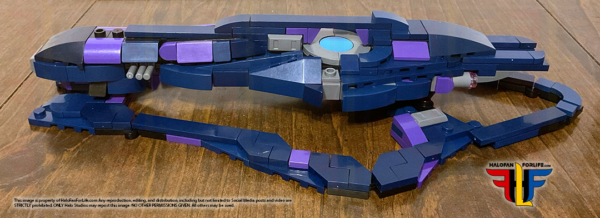
The main body is built, as are the side sections, the are the attached to the body. Oh, I should make note that I’m NOT a fan of those light purple parts. I will look to replace those with as close as I can to that dark blue, in parts. If I do, I’ll try to remember to post an update at the end of this post at a later date.
Next a small section of the underbelly Is built and added.
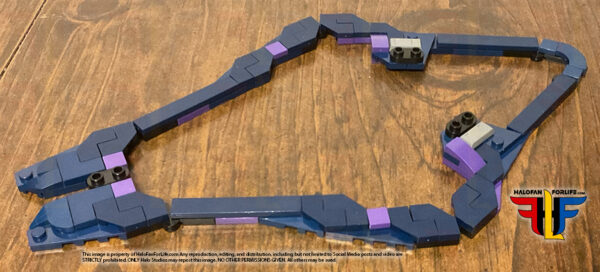
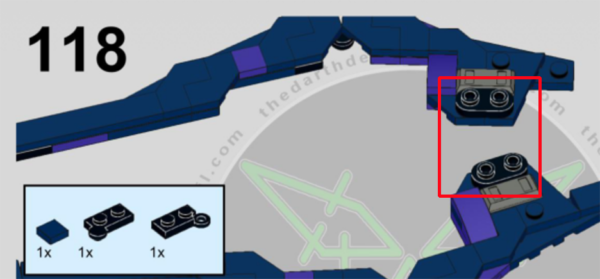
The thin bottom “ring” for lack of better wording, is built. There were issues with this, that I address next.
The instructions themselves call for a different way of building that what shows from the designer’s page of this section. It works fine as designed but, I think I’d rather have had it as is shown in the graphic above.
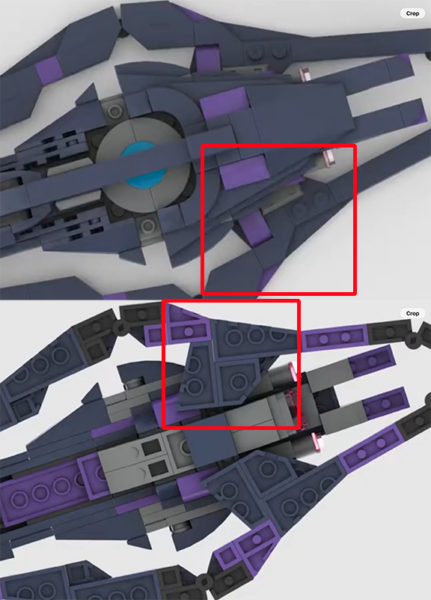
The real issue comes with those black pieces that are highlighted. Due to the shape of the angles pieces in the above picture, these black pieces are not able to stay in that position. Instead, I had to point them 90 degrees inward and attach the ring to just the inner most studs, instead of both studs. This makes that portion of the build weak in connection. I used super glue here to make it a stronger connection.
Another issue that can come from getting custom parts is that they are not the same as big brand name parts. In the case of the pic below, the “T” part of the underside of the black piece had to be shaved away, in order to allow for a stud to be attached at the middle. This was not a flaw of the designer but, rather the manufacturer, for not seeing how this part was going to be utilized.
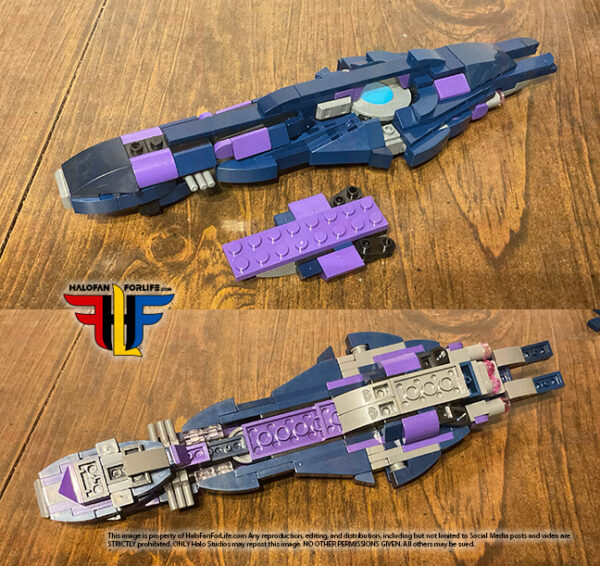
So…once I got those issue sorted out, I was able to add the bottom “ring” section to the body of the model.
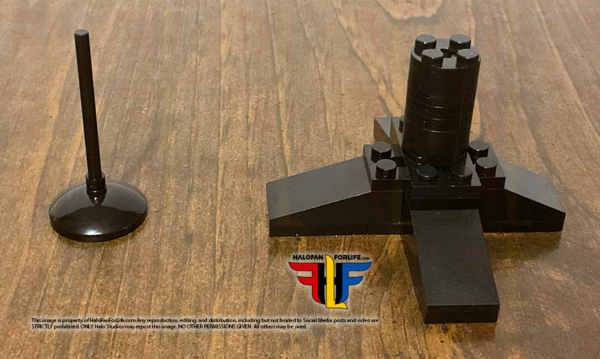
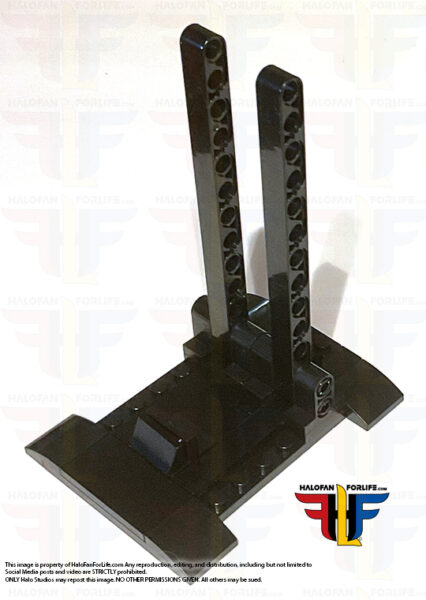
Thankfully, this model comes with two small buildable stands,
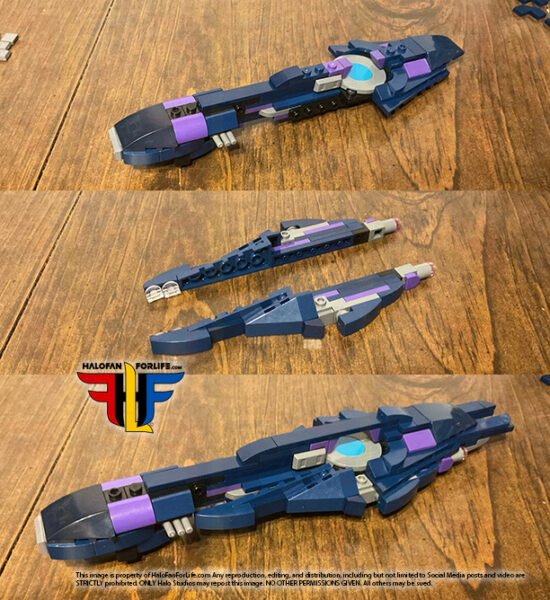
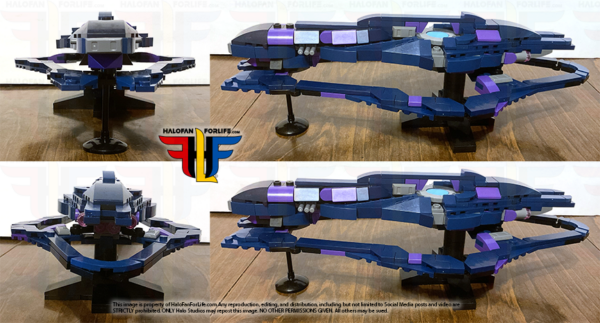
As per usual, here are my orthogonal views of the completed model, on it’s stand.
Here are ortho view of the in-game model to compare.
Note the Sabre at scale in the above pic.
And below, the comp letter model in 3/4 view. It’s very nice, but for those light purple parts that really stand out, in a bad way, IMHO.
Overall, I’m fairly happy with this set. The final look is great, though again, I will look to change out those light purple parts..
At 325 pieces, and a cost of $21.71, the cost per pieces was fantastic. So the set is affordable. This makes the light purple parts palatable. Hopefully those will be cheap to buy and replace.
So then, do I recommend the set? Yes. My only complaint is with the light purple piece and the slight reworking of the underbelly. I really wish Mattel/Mega/Mattel Brick Shop, were making these sets. But, in their absence, I need to fill my desire to build Halo sets. Unfortunately, I do not see Mattel making sets for awhile, until the next main game.
If this review gives you an informed decision on whether to purchase the toy or not, please consider a small donation (50 cents) to the blog.You can donate via PayPal to jedisalpitt2002@yahoo.com. Or just click the paypal link at the right on the main page of the site. It’s much appreciated and helps ensure that HFFL stays registered/active on the internet. Thank You.
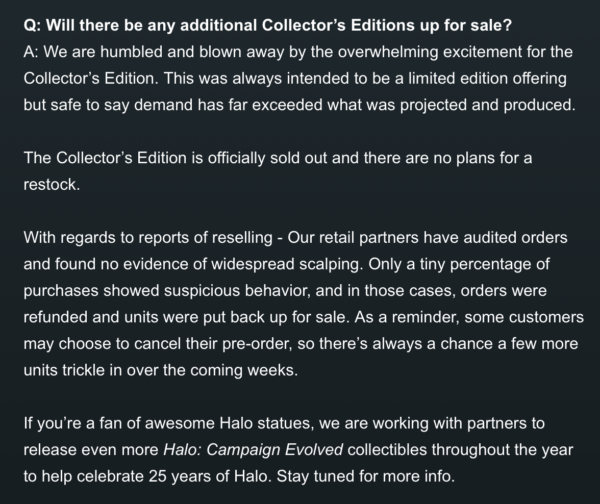
So just today (June 19, 2026), Unyshek addressed some big questions concerning Halo Campaign Evolved. I’ve commented on some of them here. If you want to read the full article on waypoint, see the link at the end of the article.
Oooof. There’s going to be lots of disappointed Halo fans with some of these reveals from the latest Halo Waypoint blog. To be fair, I didn’t expect any of these things to be different than what they are. But for some of them, I had hoped so.
No more Collector’s Edition. As stated, “This was always intended to be a limited edition”…
They do respond to scalping/reselling of these. However, they say, only a tiny percentage “showed suspicious behavior”. Um, I do not know what they consider tiny. I do know that between myself and my best friend, Mario, we got about 90 eBay listing of these taken down. And that wasn’t all of them. Sigh
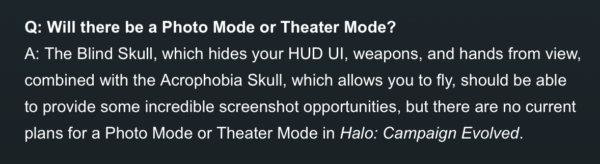
No theater mode or photo mode. Sigh again. I figured as much. However, they do not need to stay THAT close to the original. There hasn’t been a campaign mode in any 343/Halo Studio games, that wasn’t a remake. I think it’s fair to say, there may never again be a campaign theater mode. This is disheartening. Many people, including myself spent hours/days getting epic screenshots in Halo 3 and Reach.
Mark IV is only available in the 3 prequel missions. Meh. Would have been cool in the main campaign.
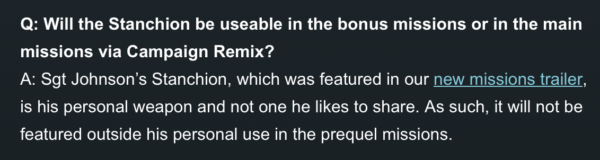
Same as the stanchion only being Johnson’s weapon and not useable in the game.
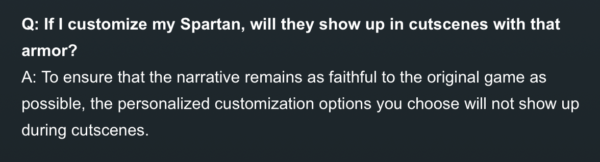
Also as expected, cut scenes are pre-rendered. So no custom armor in cut scenes. That’s a small bummer.
Wth regards to LASO, thankfully not all 42 skulls need to be on. This is a positive for me. Though, they do promise it will be challenging.
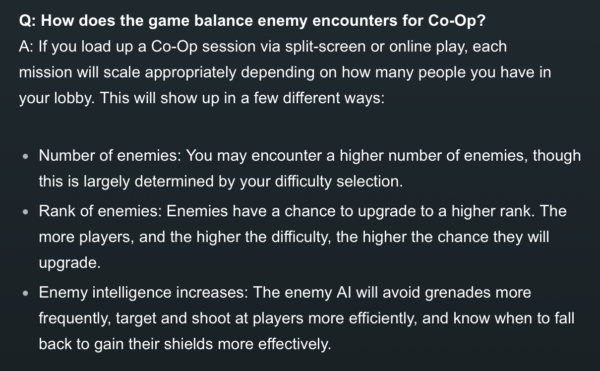
Another key positive is enemy balancing per how many players you have as well as difficulty level.
To coincide with that…
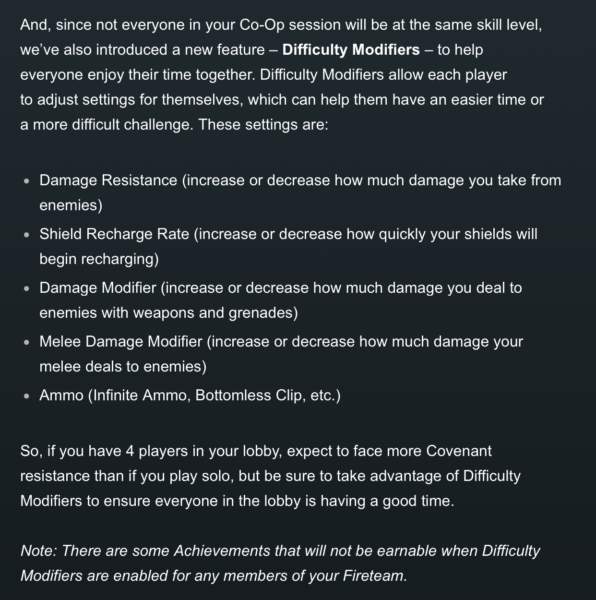
There will be difficulty modifiers! YES! Now those who are not as skill can play right along with others who are. This seems to be similar to how Borderlands plays. Your character/weapons level doesn’t matter. You all compete and play together in the same manner.
Only catch to this is that some achievements will not be able to be unlocked with these modifiers on.
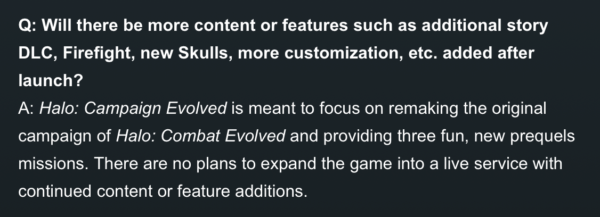
No additional content will be made for the game. So no firefight, no campaign DLC, and no multiplayer.
Well, they pretty much said as much. So, while slightly disappointing, it’s not unexpected.
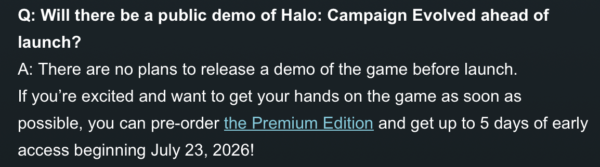
No demo. Boooooo! Seriously though, I hope in the future, especially for the next main game, there is a demo. Also, I hope other community members get a chance at early gameplay and not the same few folks. There’s a lot more to the community than just those few.
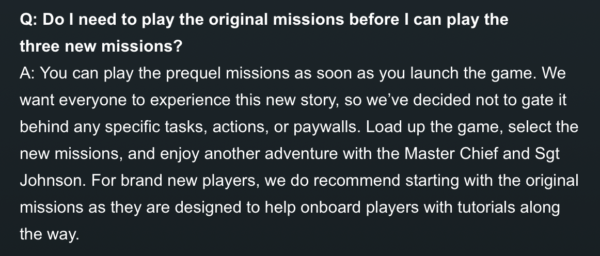
Another positive. Thankfully, we can play the 3 prequel missions right from the get-go, without having to play the main campaign.
So, there we have it. Some positives. Unfortunately, I expect the community to hang on the negatives. Again, to be fair, most of those things were either not expected or were outright said by Halo Studios, previously, that they would not be in-game.
So take all of this info while breathing normally. And yet still expect a very fun game!
In my ongoing series of custom Halo block built sets, I came across this one on AliExpress. It’s a big set. Bigger than mining scale. Affordablility was great. the build had some issues, that I’ll talk about later in the article.
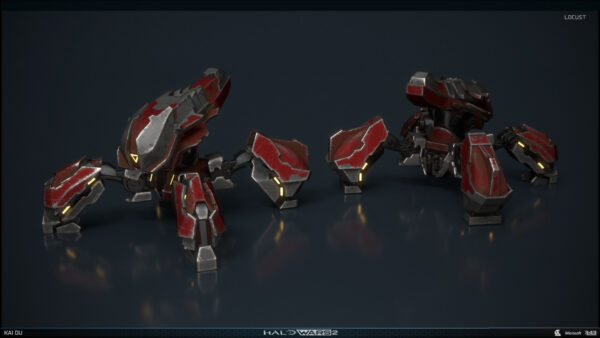
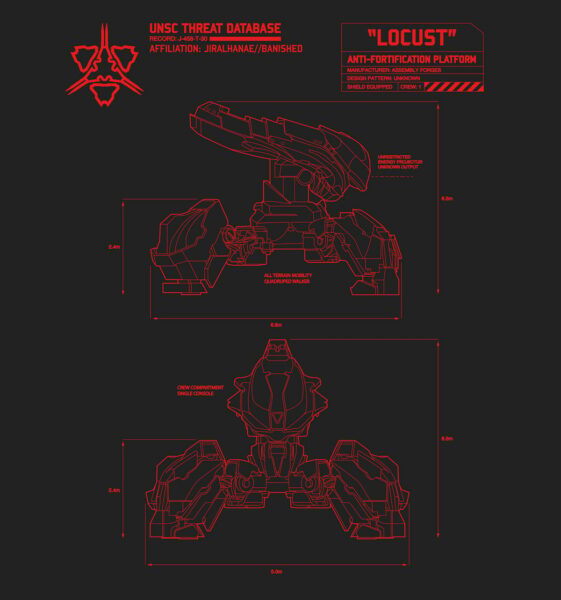
Let’s first look at the in-game Banished Locust.
As you can see a lot of angles and detail to the armor. This would seem hard to recreate in block form. But let’s just see how this model played out. Then you decide for yourself, how the outcome was.
As mention, I got this from AliExpress.com. This is where I’ve been getting the custom builds. Though many of them are based off of designs from rebrickable.com.
Ok, let’s start the build! You get one bag of parts. All of them in one bag. No neat little bags for sectional building. This isn’t main brand stuff here folks. So expect this kind of treatment, when you buy custom block sets.
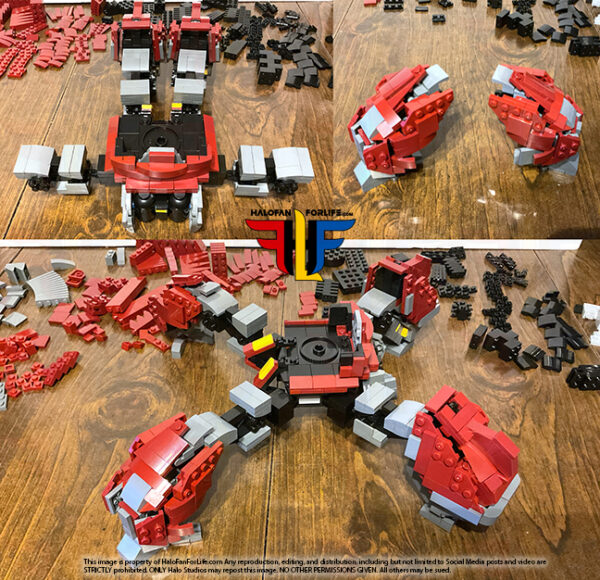
Here are the pieces dumped out onto my dining table. There were two small bags of pieces. Each containing a specific type of part. Thank goodness…. Those small parts can be a hassle and easy to lose.
Here are all the parts sorted out. This took a little while. Thankfully, most of the parts are three colors, with a small smattering of other color parts. And yes, I blocked off other parts of my dining table in the edit in photoshop. It’s not messy, just not related to the build.
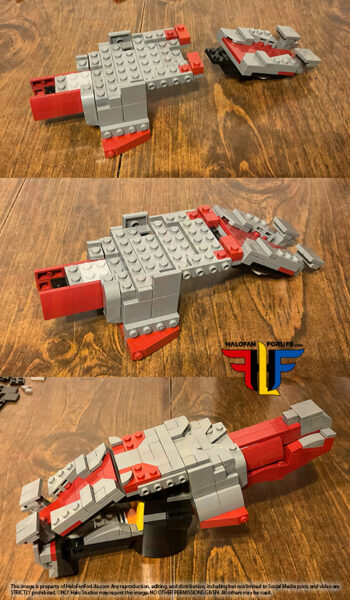
So we start with building the body. Pretty standard. Not the (fuel?) tanks at the back, at bottom right of this pic. Also, those little jutting black pieces in the top left are for the legs. Ugh….big issue there. Again, I’ll talk about this later.
Next come the back legs and pincers. The side armor on the legs is not held well onto the legs. Frequently during the build, these would pop off. So where needed, I began glueing. It’s NOT something, I like to do. But with the custom builds, it often becomes a necessity.
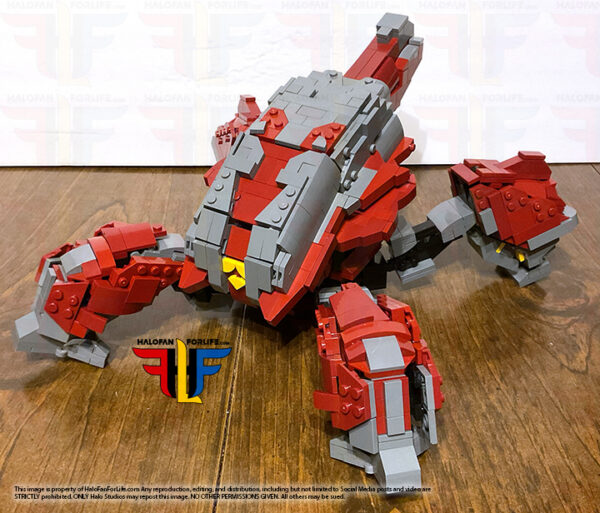
Now the front legs. As with the other set of legs, side armor becomes an issue with staying on. And again, I had to glue it in place. At top left, the model looks more like a mech, than a Halo Locust.
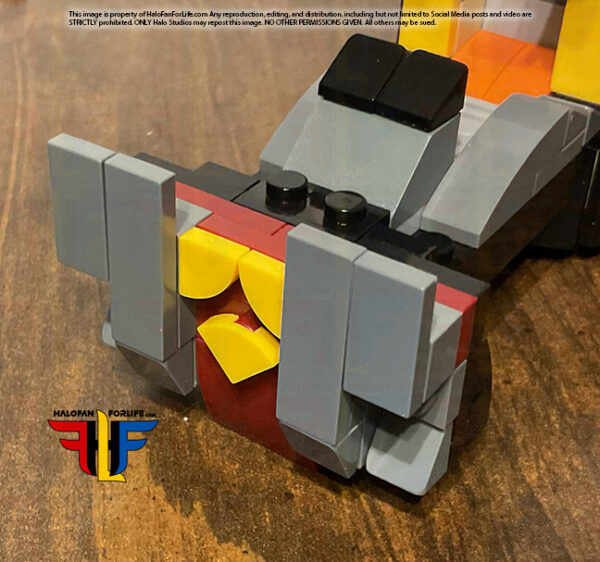
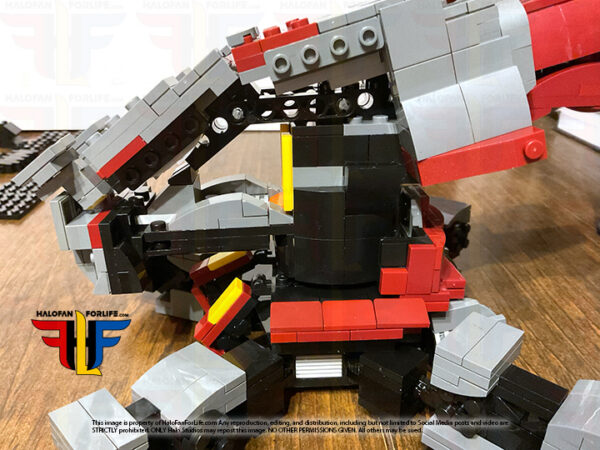
Now starts the “Head” of the locust. This section was fun to build.
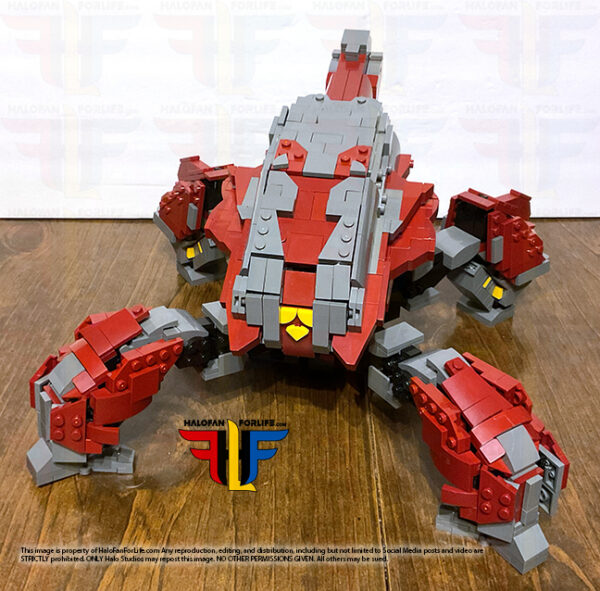
Instead of a clean triangle of yellow, the designer opted for these 1×1 curved tiles. Not accurate, but kinda neat.
The top of the head is built with a hinge joint, so it follows the shape of the head, without having to use a lot of heavier blocks to make the shape.
The main part of the head is done and ready to be attache to the body. NOTE: At this point, I deviated from the build. The leg joints were so weak that trying to build side armor onto the head would have the legs popping off and random pieces coming off too So, I fixed those and then built the rest of the head separate from the body until it was done. THEN added it to the body. Trust me, this will save you a LOT of frustration, should you decide to get this for yourself.
Now, there IS room for a figure. The “cockpit” seems to be designed for this. Though I did not add a figure at this time. I know… I should have, just to show it.
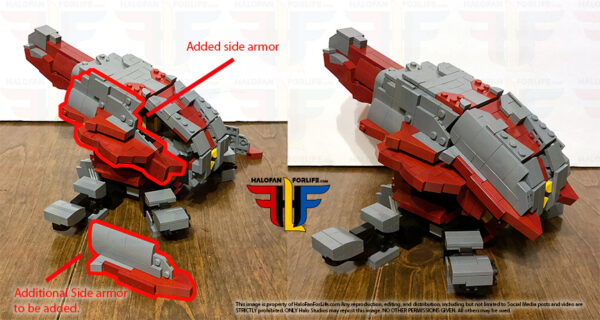
There are two sets of side head armor sections added. (Highlighted in red) These also do not stay well in place. Especially the one marked “Additional Side armor to be added”. So once again, GLUE.
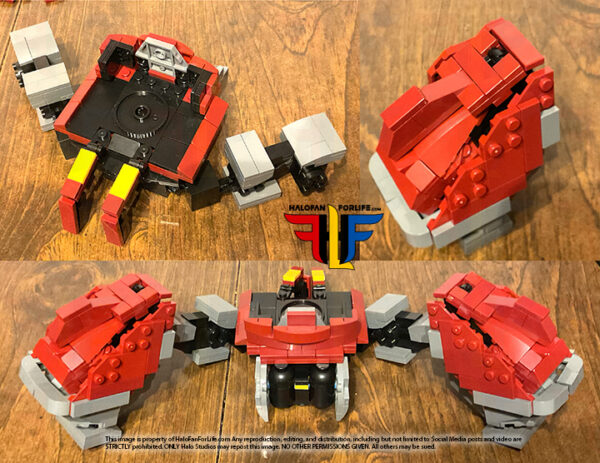
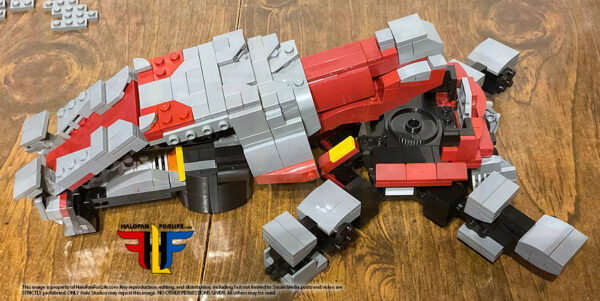
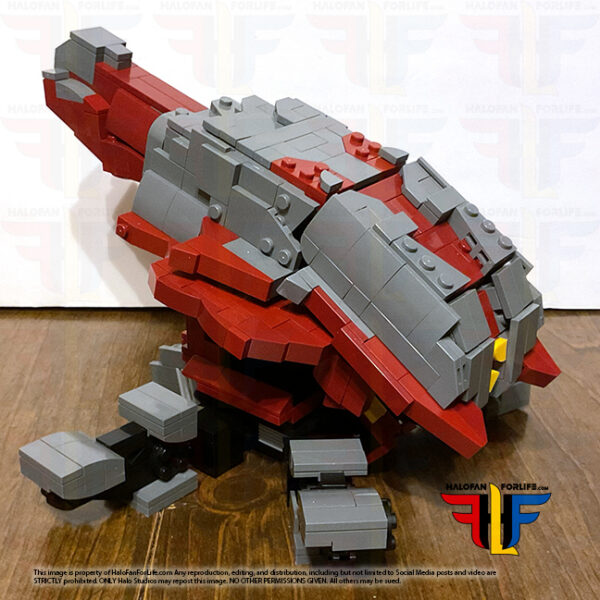
The head is now complete and ready for the rest of the legs to be added to the model. I very much like how this part of the model looks.
So, as you can see, when the legs are added, the whole model sinks at the middle, due to weight as well as very weak joints. THIS is my biggest issue with this model. It should be able to stand on its own. Especially without pieces falling off. This became my biggest frustration with this set.
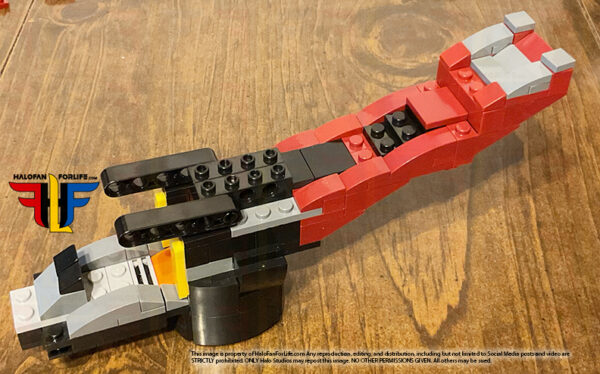
So, I built a small stand with the leftover parts to prop up, underneath the main body and keep the legs in correct position.
Below is a graphic I found on one of the Halo wiki sites, related to the Locust. I figured, I show it here as well.
Overall, I’m not so happy with the leg joints of this set. The final look is great, if oversized for figures. But again, without it being able to stand on it’s own, that’s a big detractor for me.
Again at 1413 pieces, and a cost of $58.70, the cost per pieces was fantastic. So the set is very much affordable. This makes the leg joint issue slightly more tolerable. Because of the way this is built, I’m not sure if I’ll be able to redesign the legs to have better joints.
So then, do I recommend the set? No. The frustration I had at sections falling off and the leg joints jut being way to weak to hold of the model, without support from a stand underneath, just killed my enthusiasm for the set. I really wish Mattel/Mega/Mattel Brick Shop, were making these sets. But, in their absence, I need to fill my desire to build Halo sets. Unfortunately, I do not see Mattel making sets for awhile, until the next main game.
If this review gives you an informed decision on whether to purchase the toy or not, please consider a small donation (50 cents) to the blog.You can donate via PayPal to jedisalpitt2002@yahoo.com. Or just click the paypal link at the right on the main page of the site. It’s much appreciated and helps ensure that HFFL stays registered/active on the internet. Thank You.
When the Gauntlet mode came out last month (May 2026], I was excited. A new and challenging Firefight type mode, with a twist. immediately, my best from Poppin Cheevies and I dug in and played the heck out of it. Challenging indeed!
But we started to find some cool spots on the maps an decided to make a project out of find more or even breaking the maps, if possible.
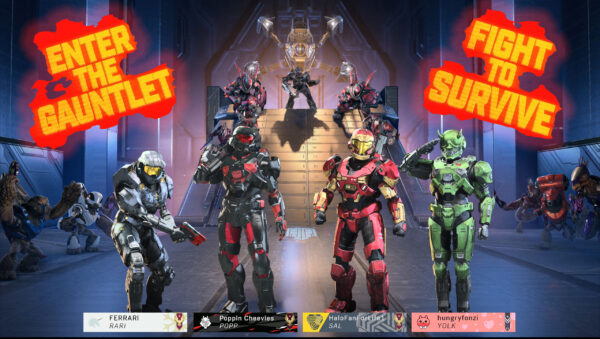
The video below is the result of two weeks worth of gaming and a week of Poppin making the vid, while I helped with editing choices and made the thumbnail for it.
Here’s the thumbnail. I took the Gauntlet Key Art in Photoshop, deleted the existing Spartans and replaced them with Me, Poppin, and two of our friends, that also helped, as well as added our Gamertag banners. I also grabbed the text from the Gauntlet reveal video and added them to the thumbnail for continuity sake.
A great deal of work went into this whole project. I hope you enjoy it and use the video as a sort of tutorial for yourselves to play Halo Infinite’s Gauntlet in a new way!
Also, if you find areas, we didn’t discover, please feel free to message me on Twitter/X @HaloFanForLife!
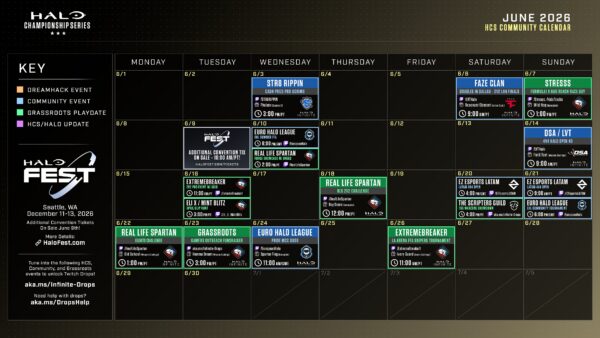
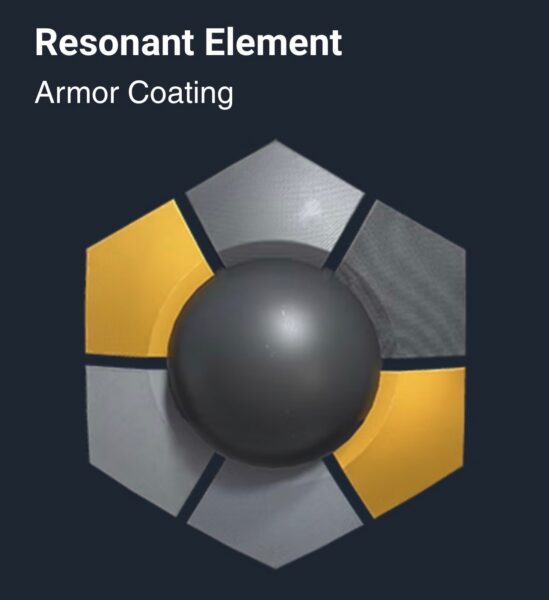
This Saturday 6/6/2026, as seen in this month’s Halo Twitch activity calendar, the Resonant Element armor coating in Halo Infinite drops! You can see some of the other drops in the calendar below,
My bud, Poppin Cheevies, saw it and posted a pic of the coating hex from haloinfinitenews.com site to our group chat.
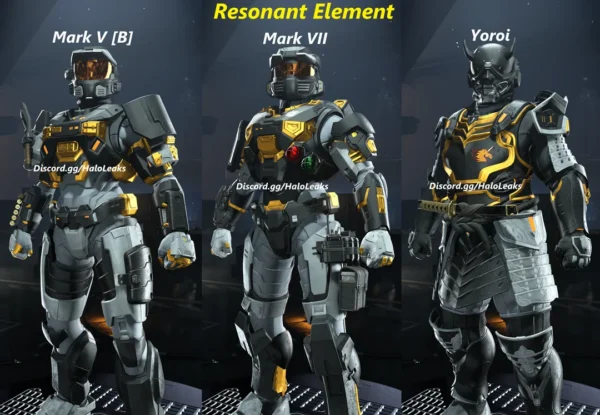
I then searched on the net and found the coating applied to a few armor cores.
Gives me Pittsburgh Sports teams vibes! As a native and resident of the ‘Burgh, this pleases me.
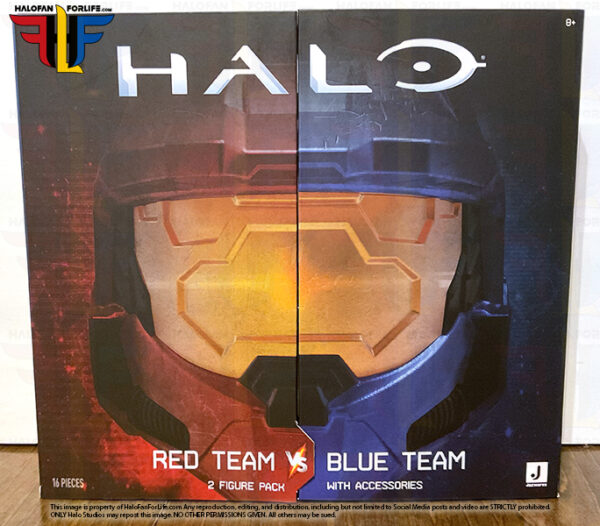
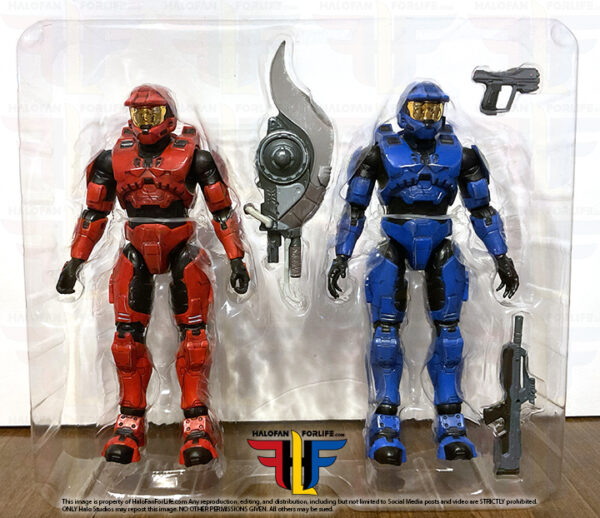
This newly released GameStop exclusive set from Jazwares is awesome! It’s been quite awhile since we last got figures from Jazwares. This set is very welcome and has nice packaging.
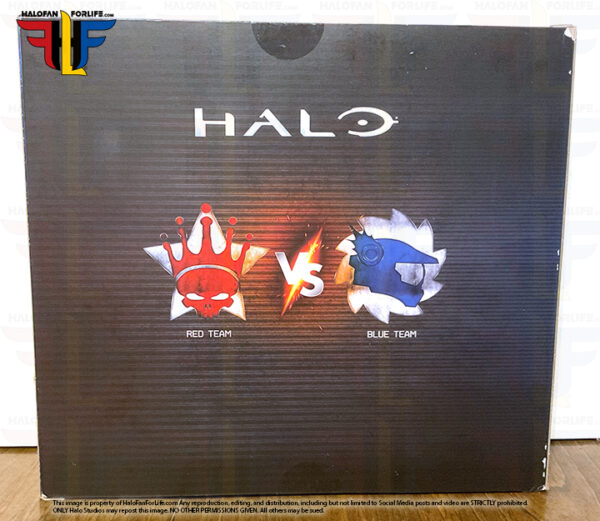
The back of the box has some nice graphics as well.
The front of the box has two flip open panels, that show off the figures nicely as well as have graphics on the inside of the flip panels.
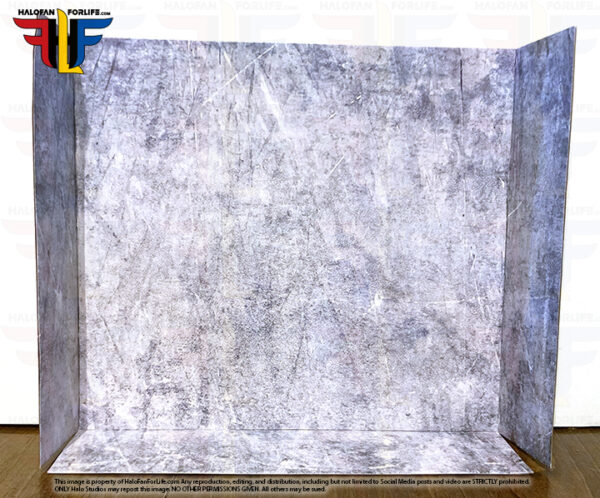
There is an insert background included. I would call this frost covered metal. But you can call it what you want. It’s a nice little addition to the set.
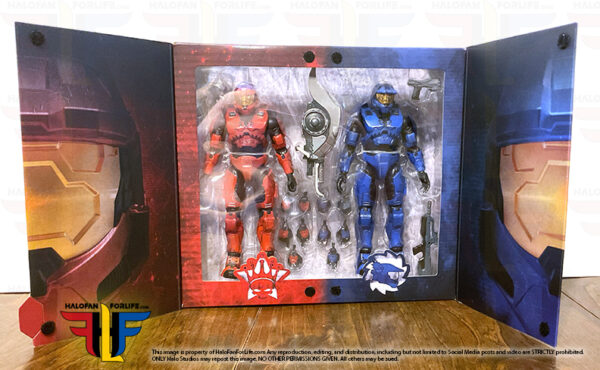
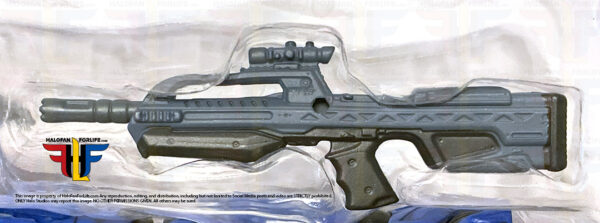
The figures come in a plastic tray as usual. Each figure is held in place by just one plastic strand. I’m thankful for that as other toy brands used to have too many of those and they were tight and often warped the figures. That is NOT the case here. As you can also see, this tray includes three weapons. A Brute Shot in the middle, magnum at the top right, and Battle Rifle at bottom right.
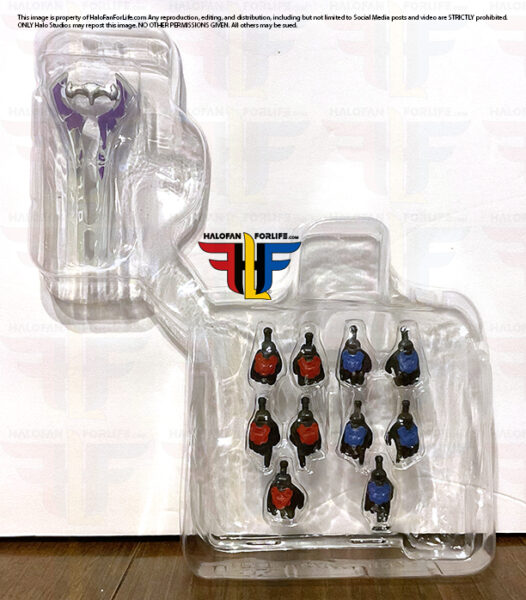
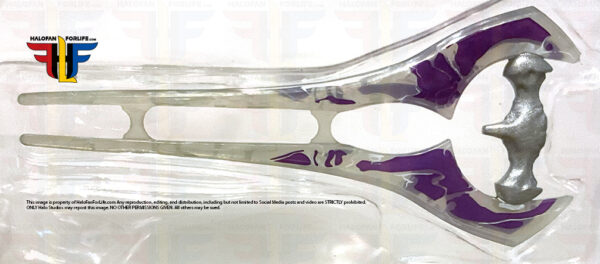
There is a second tray behind the figures that includes an Energy Sword and several hands for each Spartan.
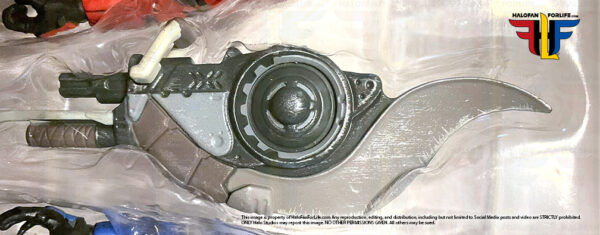
Let’s take a closer look at weapons and extra hands. The Brute Shot has some great detail to it.Maybe a little blacki wash to bring out the details would have made it better. But then, that’s hard to replicate exactly. So it’s understandable why Jazwares didn’t do that.
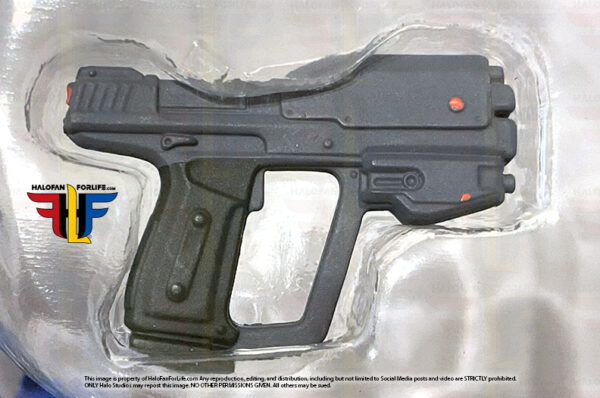
The Magnum is nice. Two-toned with added red highlights.
The battle rifle is also two-toned. One thing about this weapon. You can see the hole in the middle. Normally that’s to add a pin to and attach to the back of the figures. However, there were no added pins in this set.
Now, I must be honest here, I’m NOT a fan of the deco on this energy sword. I’d rather it be all light blue. no energy sparks, just light blue. This clear version with purple marks just doesn’t do it for me. It’s only one of two critiques I have of this set though and since the set comes with other weapons, I can easily choose to display the figures otherwise.
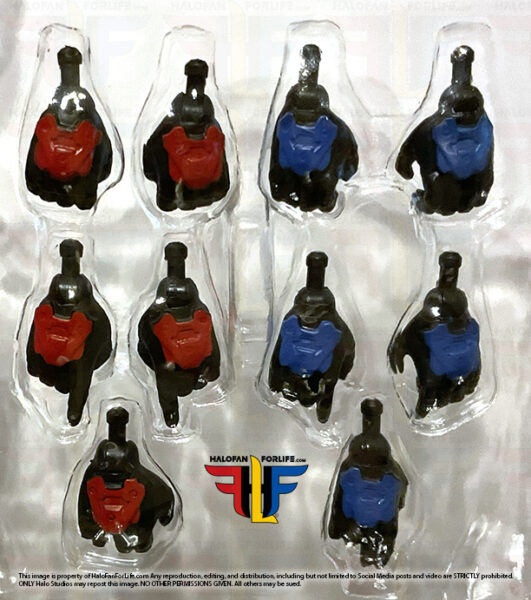
Now, when it comes to the hands, I found it strange that not the same hand pairings were with each figure. For the Red Spartan you get: * Left and Right Closed Fists * Left and Right Pointing Hands * Right Energy Sword clasping hand. * And on the figure itself, Left and Right Gripping hands for weapons
For the Blue Spartan you get: * Left and Right Gripping Hands for Weapons * Left and Right Pointing Hands * Right two-fingered pointing hand * And on the figure itself Left and Right Flat-ish hands for palming weapons. (I use the right one for palming the battle rifle. You’ll see that later.)
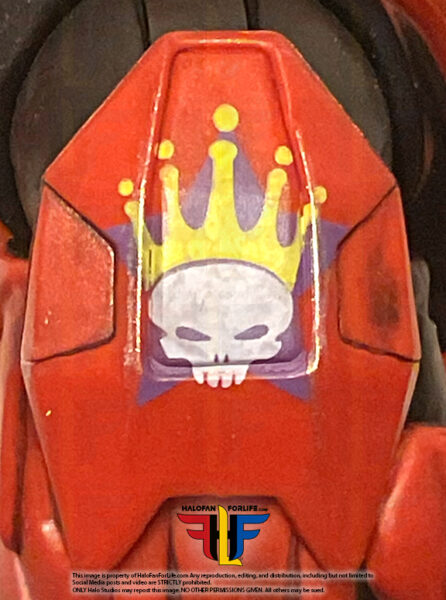
The emblem on the right shoulder of the Red Spartan is very cool! If I recall, it’s the Skull King emblem with the Star background.
Likewise, the Blue Spartan has a great emblem also. This being the Helmet Stick emblem with Saw background.
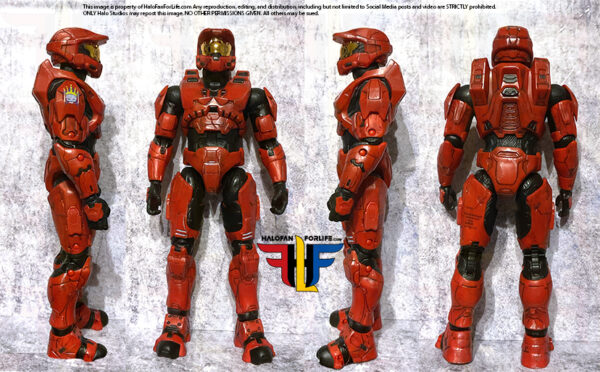
As usual, here is my orthogonal views of one of the figures. The Blue Spartan’s sculpt is the same. Only the color of the armor and emblem are different.
Each figure features the same articulation. My only minor complaint here is that I wish the torso swiveled more. Otherwise, STELLAR articulation!
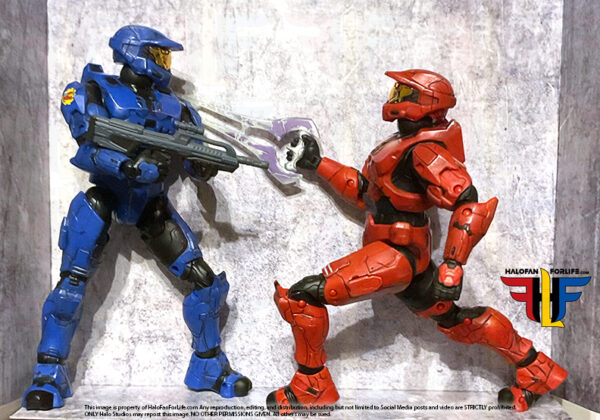
And a final action pose to round out the pics!
This set retails for $49.99 and again is exclusive to Gamestop. If you buy it in store, you’ll pay about $55 for it with tax. If you have a power up membership, you may be able to get a discount or if you have the monthly $5 coupon, you can use it for that. Same goes for if you buy it online and used codes. I didn’t have any, so I ended up paying $60 for the set, shipped to me. I tried to find this locally but, my local Gamestops didn’t have it in stock.
Is this a worthy purchase? Absolutely. I would have preferred to have paid less. However, this is an instant classic with the Red and Blue colors. The packaging having flip doors adds to the pieces. Although I opened my set for this review, I put everything carefully back in the trays, then box. And that is where they will stay.
This is one of those few items I think is better left in the box.
If this review gives you an informed decision on whether to purchase the toy or not, please consider a small donation (50 cents) to the blog.You can donate via PayPal to jedisalpitt2002@yahoo.com. Or just click the paypal link at the right on the main page of the site. It’s much appreciated and helps ensure that HFFL stays registered/active on the internet. Thank You.
In my ongoing series of custom Halo block built sets, I came across this one on AliExpress. It’s a small set at Micro scale. Pretty affordable too. So, I know I had to buy it and build it, to show you all.
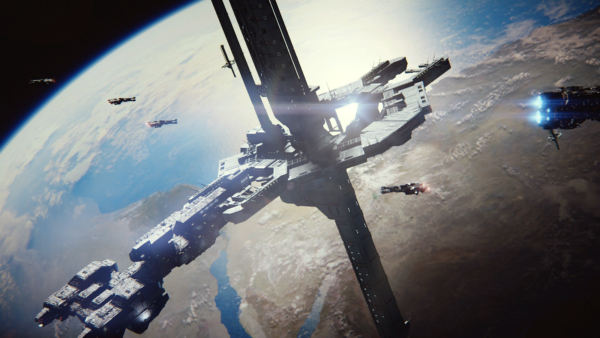
First, let’s take a look at Cairo Station, one of, if not the most famous Orbital platform! As you can see, it has a Frigate docked with it. this is from Halo 2.
Alright, let’s start with the build! This set is small, with 273 pieces that come in only one bag.
Here are all the pieces sorted out. Take note of that long tube piece at the top. I’ll go over that more during this review.
We first start with the center core of the station. It’s a fairly complex build with side builds, holes and pins. This makes the center structure pretty strong.
The lower spire is built up. This kind of looks like a gun at this point, don’t you think? The build is pretty easy at this point.
Normally during these builds, the stand comes last. However, in this case, the stand is needed. Can you build it later? Yes. However, I recommend following the instructions as given.
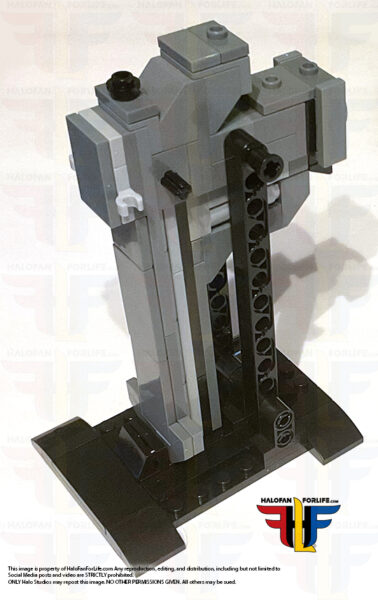
Once the stand is built, you attach the lower spire. Now, I will say, I’m not fond of the holes showing and would have preferred them being covered up. But that’s a minor thing.
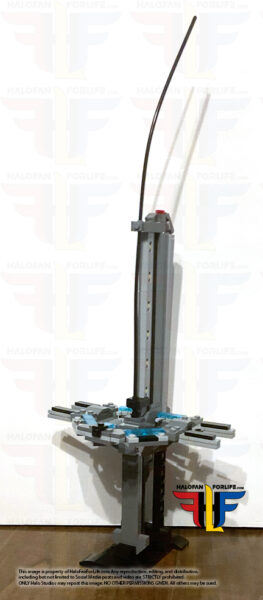
The upper spire is built. NOTE, here is where that long tube is inserted into the build. It’s way too long. However, that’s fine as it will be cut to the right size later. In the immediate pic below, only a portion of that tube is shown.
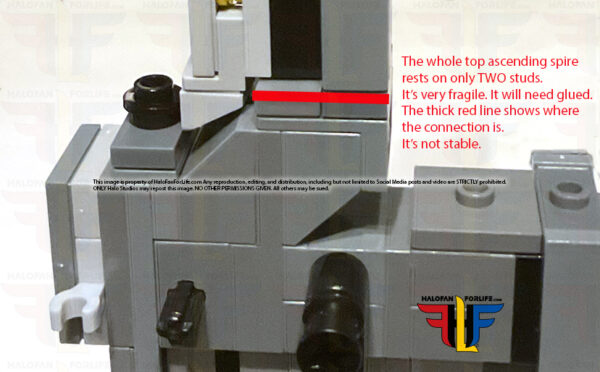
As you can see by the next graphic, the top spire barely sits on the build. And yes, I’m going to glue it down, to stay in place. I use krazy glue to keep parts in place. Be EXTRA CAREFUL if you do this too, to not stick your fingers together OR use too much glue and it shows on the outside of the pieces. You do not need much, so use it sparingly. It will hold tight fast!
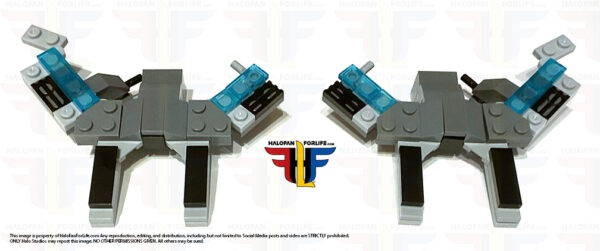
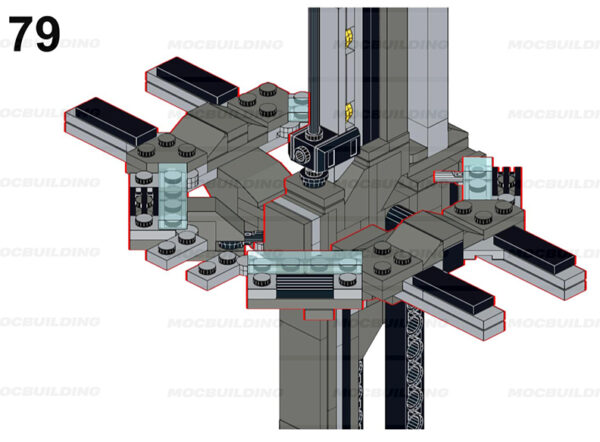
Next up is the middle docking sections. They are built in mirror of each other and connect around the middle core section. I think I’m going to see if the mini frigate from the Anchor 9 set fits in here. That would be pretty cool.
As per usual, there is always a step that is a real pain in the butt to add on. THIS is that step. The docking ring is fragile. And the way the directions call for attaching them can be frustrating. It took me no less than 10 minutes to get this right because the dock sections kept coming apart. Yes… I will be glueing those together too.
Screenshot
So here is the completed set, with the tube not yet cut. It’s pretty tall.
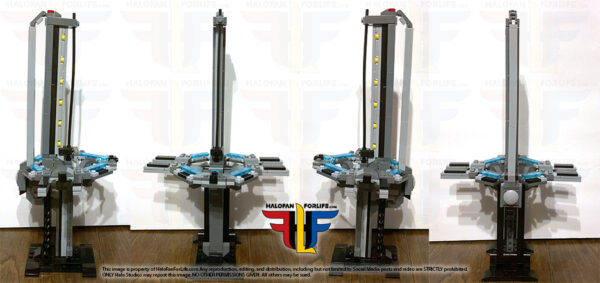
So, I cut the tube to size and as usual, show the model in orthogonal views.
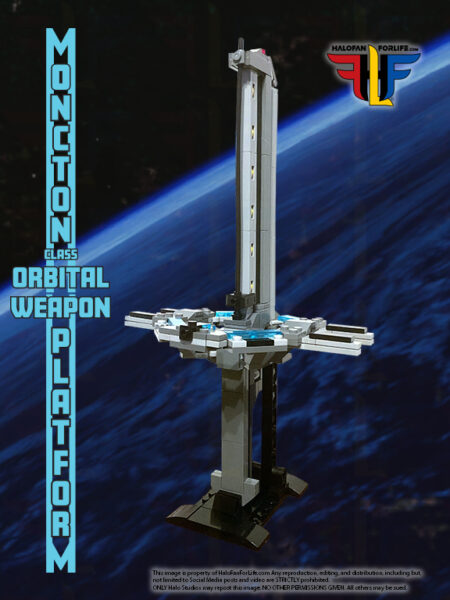
And finally, the set in 3/4 view. I’m choosing to do these last shots as the “hero” shot. Good background and additional graphics. As I was thinking about how to show the set of the model, the idea came to me to emulate the build itself. I think it adds a nice touch.
Overall, I’m pretty happy with this set. It’s simple, yes. But it’s effective as a background piece. that one step aside, the build comes together easily.
Again at 273 pieces, it comes together quickly. I can’t recall how long it took me. I do know, it was under an hour.
The set cost $25 on Aliexpress. Shipping was very quick.
So then, do I recommend the set? Heck yeah! Again, I really wish Mattel/Mega/Mattel Brick Shop, were making these sets. But, in their absence, I need to fill my desire to build Halo sets. Unfortunately, I do not see Mattel making sets for awhile, until the next main game.
If this review gives you an informed decision on whether to purchase the toy or not, please consider a small donation (50 cents) to the blog.You can donate via PayPal to jedisalpitt2002@yahoo.com. Or just click the paypal link at the right on the main page of the site. It’s much appreciated and helps ensure that HFFL stays registered/active on the internet. Thank You.
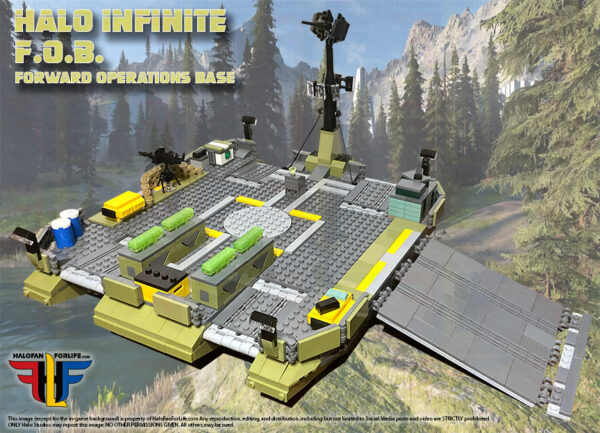
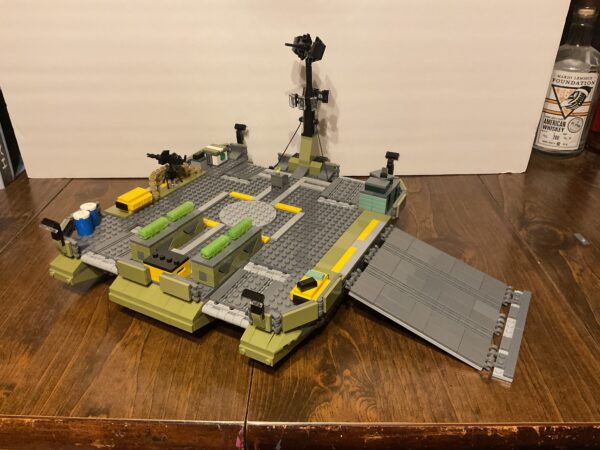
One of my most desired block built sets that I had hope Mega would make is the FOB from Halo Infinite. With Mattel/Mega not making sets currently, I’ve been looking elsewhere for sets I’ve wanted.
Thankfully, I found such a set on Rebrickable. However, that’s only for instructions. Purchasing the parts needed would be costly through either Lego or Bricklink. But, I did find the same set on AliExpress. When I found it originally, it was about $120. I wasn’t willing to pay that. SO I waited… And the sale came! I was able to get the set for just under $90. For me, that was a very good price.
During this review, I’ll explain the differences between the in-game asset and this custom set.
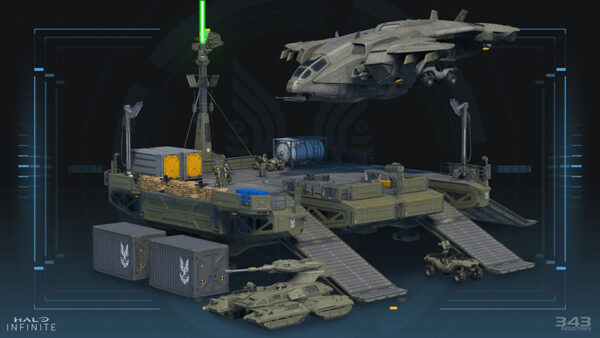
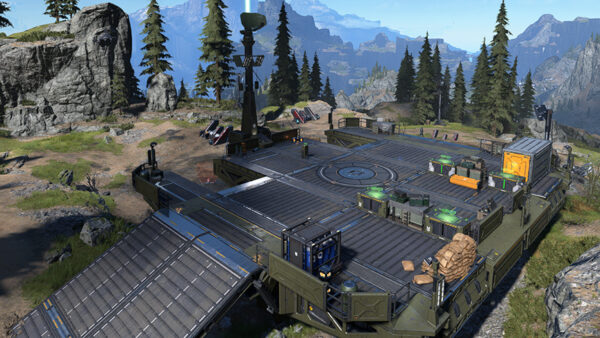
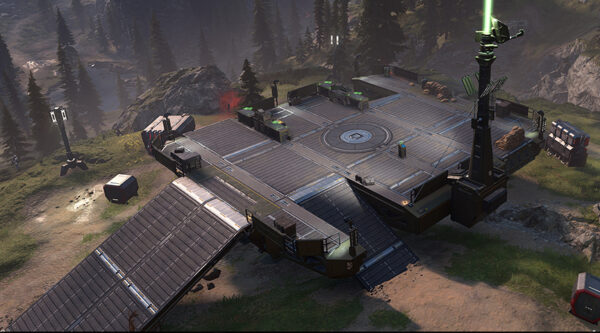
To start off, here’s a look at the official FOB from 343:
Of course, a block built set wouldn’t come with the Pelican, Scorpion and maybe not the Warthog either. that would exponentially makes the set more expensive. But I would think it would include the crates and a few marine figures.
So what did I receive? Well, the set came in a big bag that included two bags of parts. Unlike official sets, these do not have smaller bags so you can just open those up and build along the way. Instead, with these off-brand sets, you need to open and sort ALL the pieces out.
So…sort I did! The set includes 1,398 pieces. So it took up a lot of my dining room table.
I HIGHLY recommend sorting the pieces. It makes building go much quicker.
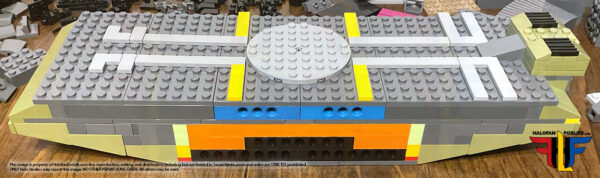
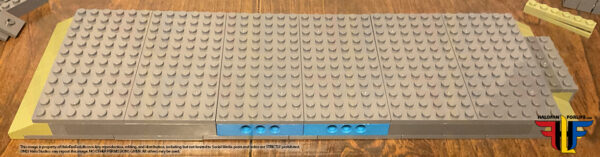
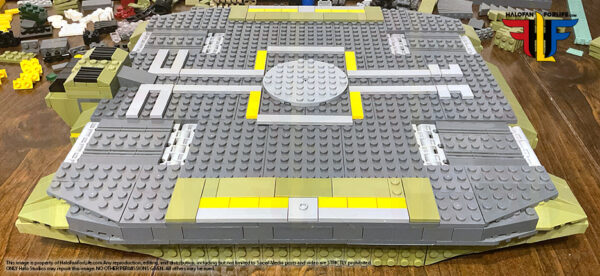
So now we begin the build. It starts off building the middle section of the FOB platform. On the left is the middle section of the middle platform. On the right is one of the wings of the middle platform.
Next, we build the second wing and insert both wings into the middle section. This is pretty much as long as the FOB will be, front to back. With just a little exception. So you get to see the size shelf you may need, to place it on.
After this, we build on top the deck. To the right is the back where the tower will be placed later in the build.
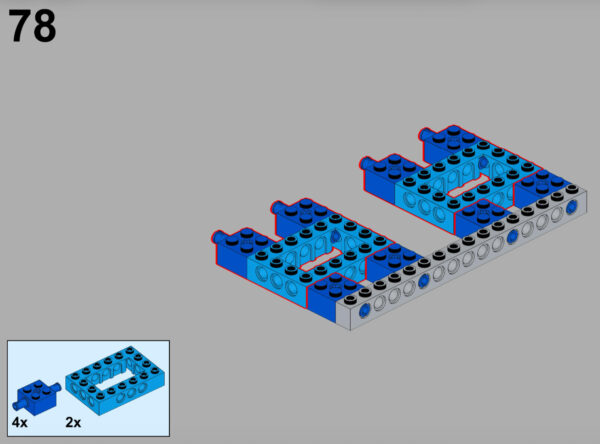
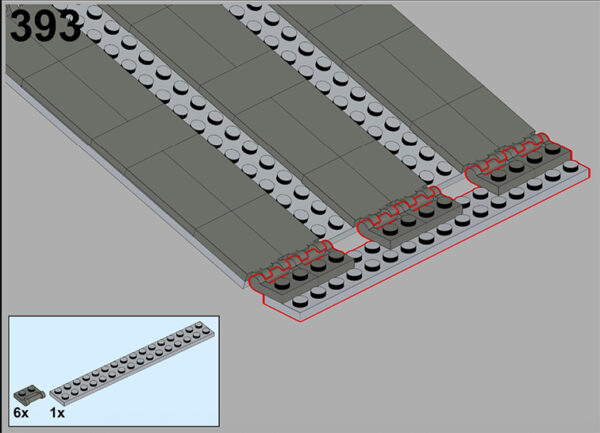
Now…there is almost always ONE step that’s a pain in the butt with these custom builds. This set is no exception. Below, at step 78, the light blue parts are supposed to have FIVE holes on the side. But they only come with three. So this step is wrong either in the instruction or the part. the seller does not have these parts, nor does bricklink.com. So…this is a big error.
Screenshot
However! I was able to adjust where the light blue pieces were placed by moving them 2 studs towards the middle. It was either that or cut off the insert pegs on the dryer blue pieces. I’m not keen on modifying parts. Especially if I do not have to. NOTE, I did look ahead in the directions to see if moving the parts as I did would destabilize the build in this section. Thankfully, it wouldn’t. So I went ahead with this minor alteration.
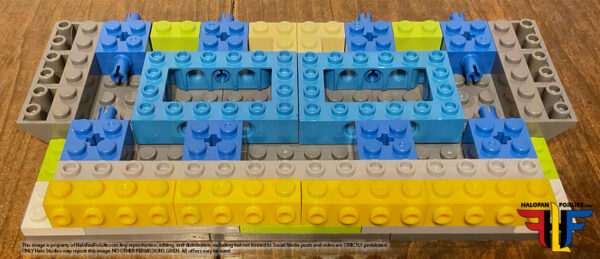
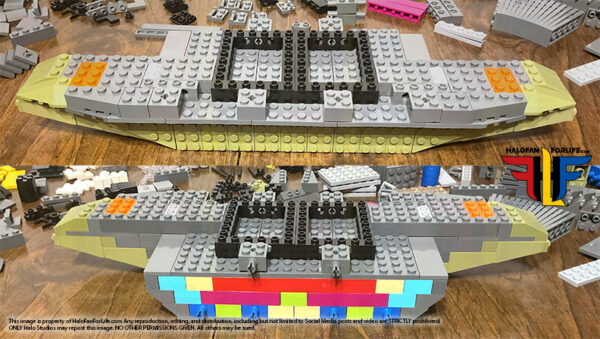
Here is one of the side sections. First with it’s own wings off, then assembled.
Next, the deck portion of the side section starts to come together.
More of the deck assembly is completed. As you can see on the bottom section of this graphic, pegs will be used to attach to the middle section.
This side section is complete, with just a couple of missing parts. I’ll get to that in a moment.
The side section is locked in place. the second pic shows the other side section as well, in place. NOTE, the first side section will take a little bit of effort to lock in place. However, the second side section will take considerably more effort as the FOB at this point will be at an angle if, you try to lock it in on its side. Do be EXTRA careful on this step!
So here is where those hinge pieces should have been. The set calls for 12 of them, I only got 5.
Screenshot
I once again, made due for the time being. I placed three at the top and two below. You can se the glaring gaps though….ugh. I wish this would have been complete. But, at least they aren’t essential parts and are cheap to buy, if the seller doesn’t send them to me.
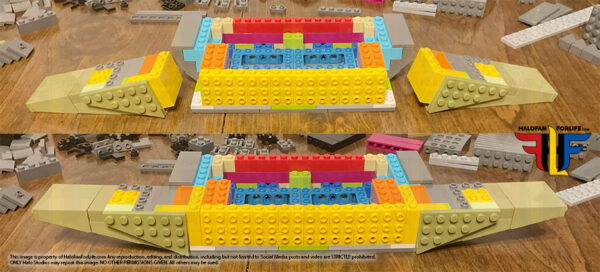
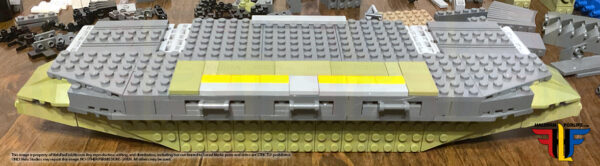
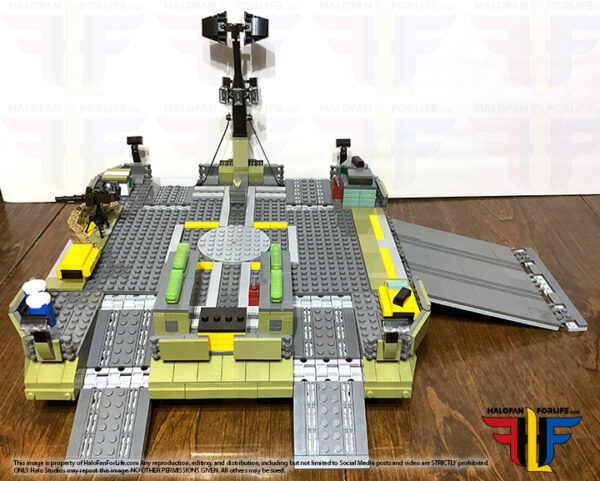
Now we add all the crates and tower. Most of these crates will be replaced with Mega Construx ones as those are more accurate. But I wanted to present this model exactly as it is, if you build it, without any modifications.
Here’s a shot from the back.
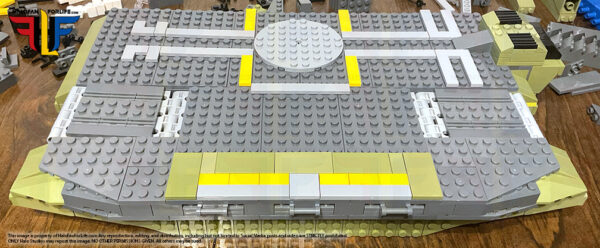
And here’s the final set, showing in 3/4 view.
Now, is this set perfect? No. Will it make do, until Mattel makes one? Yes. If Mattel never makes one, then this is quite good. With some modifications, this can be an even better set.
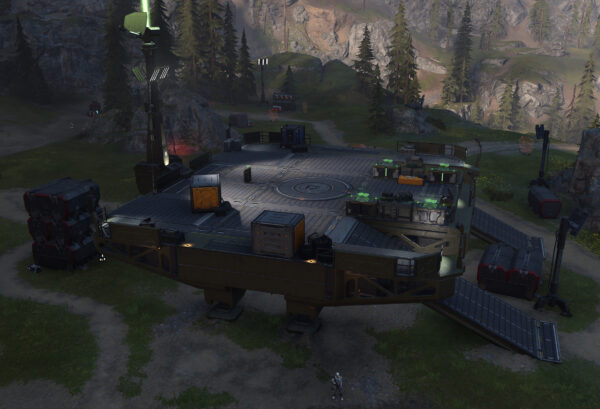
Of note, this set does NOT include the four legs that the in-game model has. The detail isn’t great on the underside either. So I’ll look to modify that to.
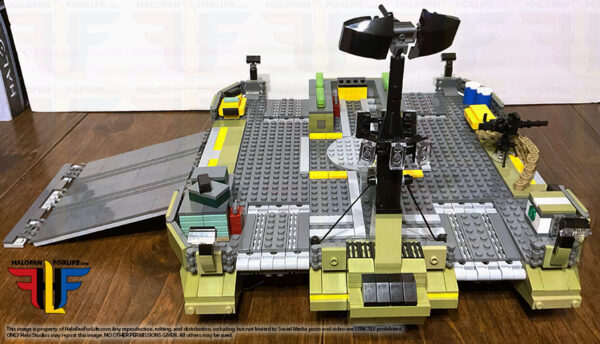
This is ultimately what is SHOULD look like. Size wise, the set is not long enough front to back. I can’t really fix that without a MAJOR upgrade. But, I’m okay with the set size as is.
You can see by this shot with the crates mostly cleared that the block built set doesn’t quite match up in width from large ramp to the other side.
Again though, I’m quite happy with the set and will add in as many reasonable modifications as possible. Once I do that, I’ll put a Warthog on it as well as plenty of Marines and then post that at a later date as an updated article for this set.
This set took about 5 hours to build. At 1398 pieces, it’s pretty hefty. As mentioned, I got this on sale for just under $90 on AliExpress.com. It’s currently anywhere from $120-150. So search for the best price or wait for a sale.
Was this worth it to me? Absolutely. Do I recommend it? You bet! Again though, buyer beware as it may be missing parts and you may have to either contact the seller or buy missing parts elsewhere. And again, for that I recommend bricklink.com.
Oh…and for anyone who thinks that last built image was taken from somewhere else? Here is the unedited pic I took of it! A bit of work went into sprucing it up!! LOL
Oh, how I wish Mega would have made this set though! I can’t state enough how much I wanted this set. It would have been a fantastic Signature series model for Halo Infinite.
I (we) can only hope that they will continue to make sets at a later date, though now under the “Mattel Brick Shop” branding. I just hope though that they do NOT go the route of static pose figures, like they did with their Master of the Universe line. Block built sets MUST have articulated figures!!
So, what do you folks think of the set? Would you be more apt to buying it, now that you’ve seen one built?
If this review gives you an informed decision on whether to purchase the toy or not, please consider a small donation (50 cents) to the blog.You can donate via PayPal to jedisalpitt2002@yahoo.com. Or just click the paypal link at the right on the main page of the site. It’s much appreciated and helps ensure that HFFL stays registered/active on the internet. Thank You.
Lately, I’ve been finding and buying custom Halo block kits. Why you may ask? Well, unfortunately, it seems Mattel is no longer making Halo, or (and hopefully this is the case), they are on a break until the next main game comes out.
Regardless, my desire to build Halo sets has never wavered. So I went searching. And… I found MANY out there. One site that I go to for directions is rebrickable.com. There are LOADS of Halo custom sets there. They do not have the bricks themselves, that you have to buy through bricklink.com.
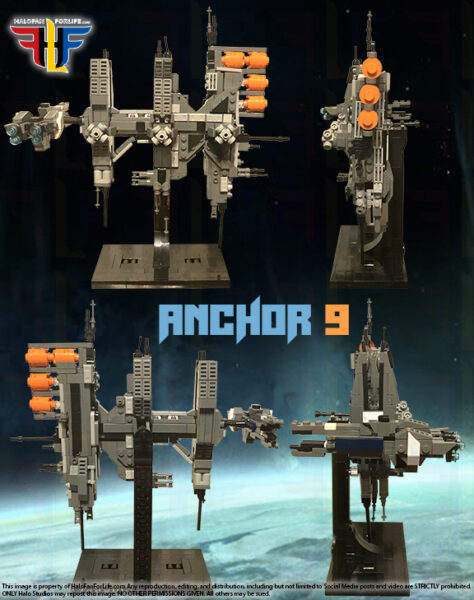
So, there I found this Anchor 9 set. However, I also found it online at AliExpress.com. They have the bricks and will send you the instructions via a QR code in an email, after you’ve received the set. The set was VERY affordable given the number of pieces in it. There are 626 pieces in all, including the model, the base, and the mini UNSC frigate. I paid just under $40 for this set. Normally as set with over 600 pieces would be between $65-70.
Fair warning, if you buy from AliExpress, expect a long time in shipping. Sometimes they are quick, other times, not so. This was one of those not so quick times. I ended up waiting almost 2 months for the set to finally arrive. I think in part, it depends on who they ship the items with. As the buyer, you do not have that choice. But then, it’s like that most everywhere anyway. And AE didn’t have an express order for this.
Anyway, enough of me talking, let’s take a look at the model. No progression pics this time folks, apologies.
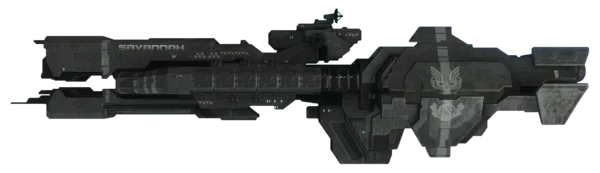
This is a wonderful set! Given the scale size (consider a mini), it’s pretty consistent with the in-game Halo Reach model. As you can see, there is a black base to put the space station on. To the left in the pic above, is the UNSC Savannah.
Now, I will say, the directions to this are a little wonky. I found I had to rebuild parts a couple of times. As well, there were a couple of times where the build was temporarily flimsy due to not much piece connection. Those were the most frustrating parts of the build. However, by the end of it, everything came together and locks in nicely.
Here are my usual orthogonal views of the whole model:
The frigate is MUCH bigger than the official Mega one that came with the blind bags some time ago. This one is awesome save for one thing. I’m not fond of the big dark blue piece in the middle and may swap that out later.
The one in-game does NOT have that blue strip.
Other than that, again, given scale size, the frigate is accurate enough.
The build took me slightly under 6 hours to build. Mostly because I was building it late at night and was tired but wanted to get it done.
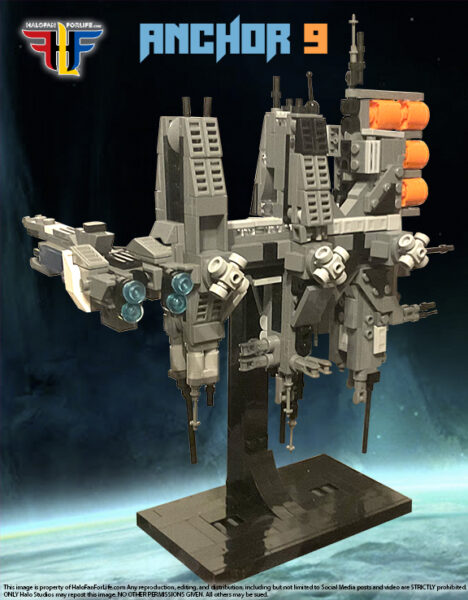
Here’s another 3/4 view from a different angle, showing the frigate better.
And yes, I spruced up the graphic with a Reach background and custom text.
As you can see, I now have to put disclaimers in my pics as people have been stealing them and using them for themselves, and especially on social media and YouTube. Folks, it’s NOT nice to steal, let alone not even ask or give credit. So I’m done with sharing these without watermarks and the disclaimer. It’s not something I wanted to do, but had to, especially after a person within the Halo Mega community wanted to “scrub” my site of pics for their own use, YT channel and financial enrichment. Most of you know who it is, without me saying…
Anyway, I hope you like this model. Again, you can find it either on AE or Rebrickable. Just search for them. I can’t link to the seller because they no longer have it in stock, but others do on AE.
If you get this, shoot me an email with pics of your model. I always like to see other people enjoying these things! sal@halofanforlife.com
Also, soon I’ll be posting two other custom Halo block sets. One from Halo Infinite that is mining scale and one from Halo 2 that is micro scale but on the same size as Anchor 9.
Final note, before anyone gives me grief about “Brand Loyalty”. Folks, I didn’t leave Mega, they left us. Had they still been making sets, I’d still be buying them and reviewing them.
If they do so in the future, I of course will be getting them. For now though, these custom kits scratch that itch. It’s money Mattel/Mega could be getting instead. But without the merch to buy, well…
Well, it’s been a long time since I’ve posted a toy review. So, I figured I’d start back up. Obviously with Mega/Mattel not coming out with new sets for about the past two years, any new reviews I post will be of sets that old or older. SO I guess you could call these retro reviews???
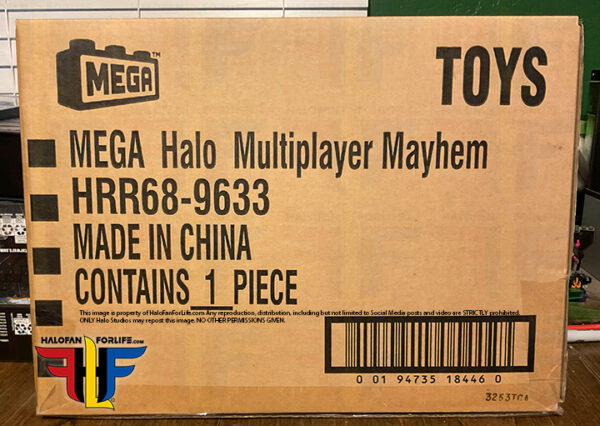
At any rate, I’ve been wanting to build this set for a long time. I’ve had it in the shipping box, direct from Mega, since I received it in the mail, however long ago that was. Speaking of, here’ that box. Oh, and before I go further, I need to make this crystal clear (unfortunately), no images are to be used in any form, nor edited and reposted in any way. All images are watermark, have my website mark as well as text stating not to use. There is a certain someone in the community that wants to “scrub” (his word not mine) my site of Halo Mega data, to use in HIS repository. I’ve had no less than two arguments with him about this, stating these are MY images alone. He does not have any permission to use them. Because of his actions, I’ve had to make this for everyone. Yes, one person spoiled it for everyone else. Now again, here is the shipping box that I got. It’s the same on the other side.
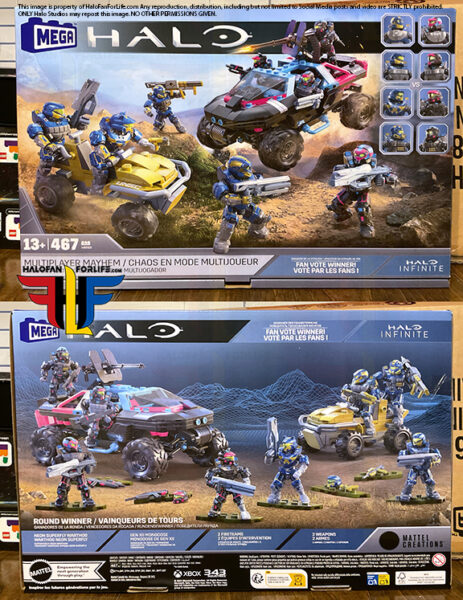
The actual product box is quite nice. I like that it shows each of the EIGHT Spartans included in individual boxes on the front. Each side shows the whole set in an action scene.
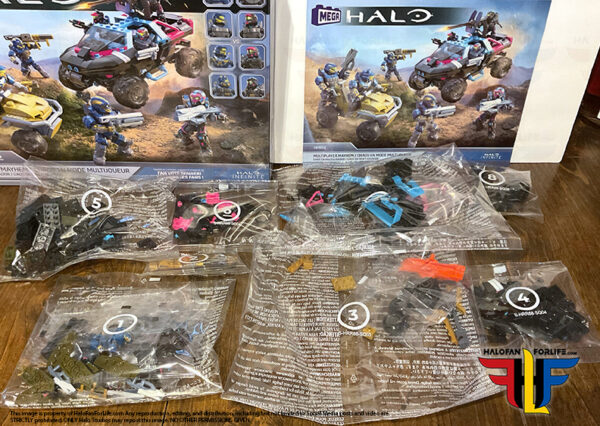
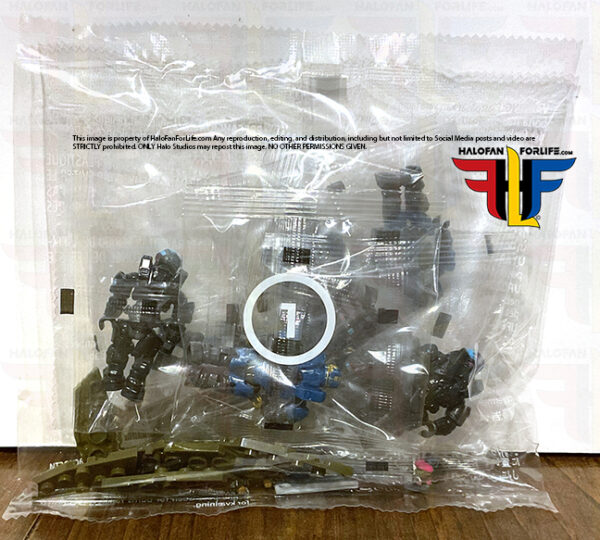
When you open the box, you are greeted by several numbered bags. There are eight total as well as an instruction manual..
Here are those bags and manual laid out, as well as the box to the upper left side. thankfully, the days of having to open all the bags are long gone. So you just open the ones the instructions call for.
Bag 1!
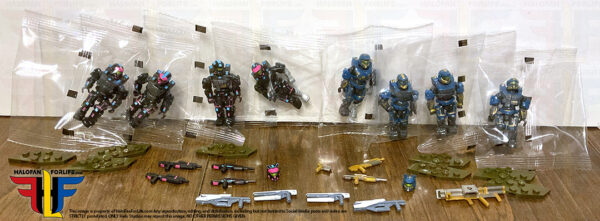
Inside this bag are eight bags consisting of one Spartan each, preassembled. Loose are all the weapons, two extra helmets, and eight figure stands,
After opening the bag, we find that each Spartan has its own color themed weapon as well as 2 each of the campaign style Heatwave and Cindershot. (Seen in middle of pic below)
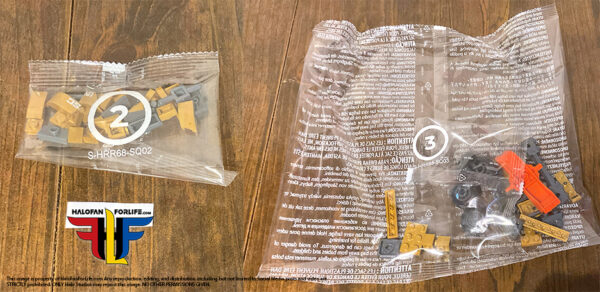
Bags 2 and 3!
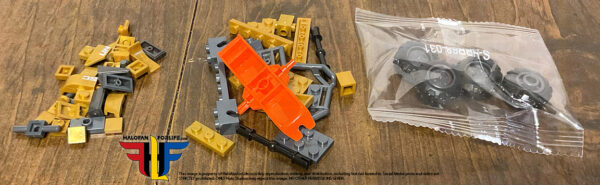
Bags 2 and 3 contain the pieces for the Estate Gold Mongoose. To the left, that small pile is bag 2. To the right, the large pile and bag pf parts are what comes in bag 3.
Here are all those parts sorted out. The gold color is nice. Though, as with most metallic bricks, a few have that slight swirling pattern on them. Nearly all brick brands have this issue, so it doesn’t bother me that much.
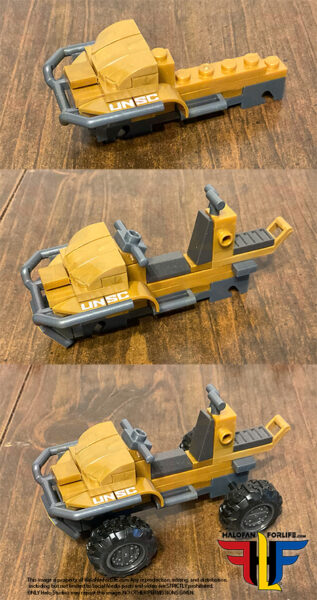
Now we begin with the build! This is now a standard build for the mongoose. Though it wasn’t always that way. I do wish this were a Gungoose, instead of a Mongoose though. At least give the Gold guys some firepower! LOL
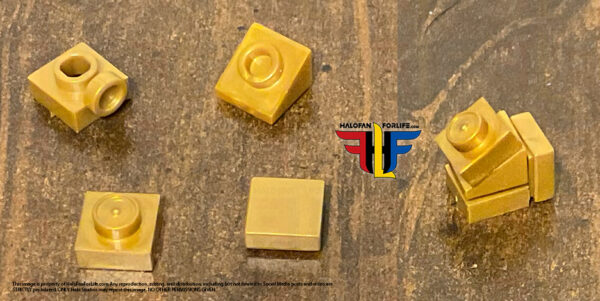
Here are the parts left over from those two bags and what little I could make of them. Hmm, maybe that’s a mini gas can for the Mongoose???
Bags 4 and 5!
And their contents… Again, bag 4 on the left and bag 5 on the right.
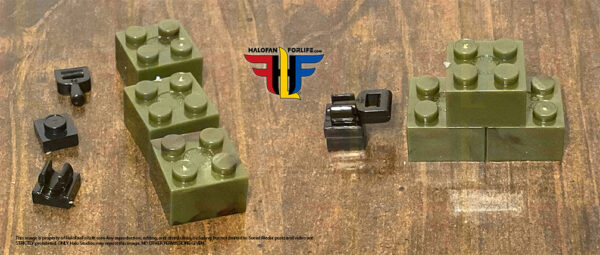
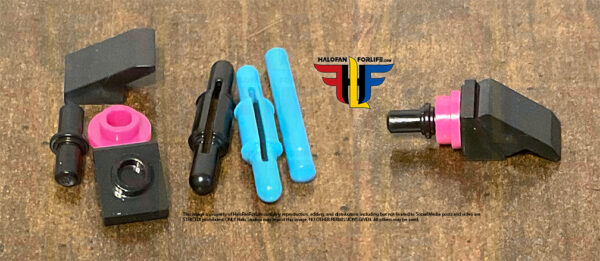
Here are all of those parts sorted. As you can see they are mostly black. IN fact, the Warthog itself is nearly all black, but for some bigger colorful pieces later on. In this pic, you can see one cyan piece, as well as a few with magenta on them. The magenta is printed on. NO stickers! YEAH! There are also a few with UNSC lettering and one that has two cyan studs. You’ll see momentarily what that one is used for, if you haven’t already guessed.
This is where the real fun begins with the build. The chassis is fairly standard. Though it feels like to me that the hood is thinner than in previous warthog builds. Is that just me??
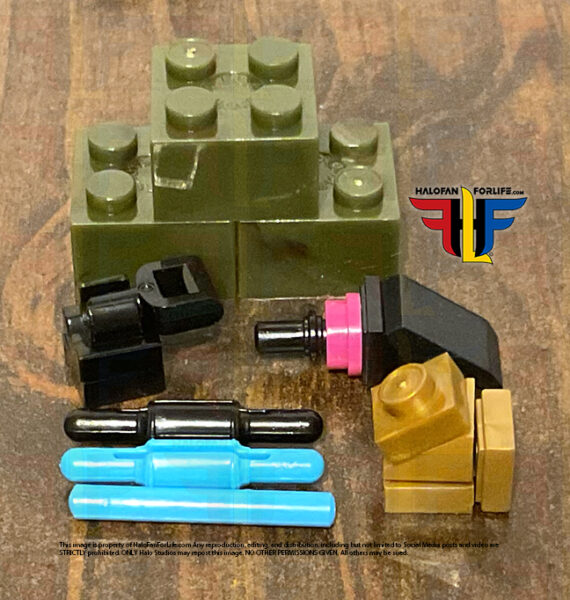
Here are the leftovers from those two bags and again, what little I could make of them. I should point out that the green bloks are meant to be used to stabilize the build as you add pieces to it. I didn’t use them. What can I say, I’m a maverick! LOL
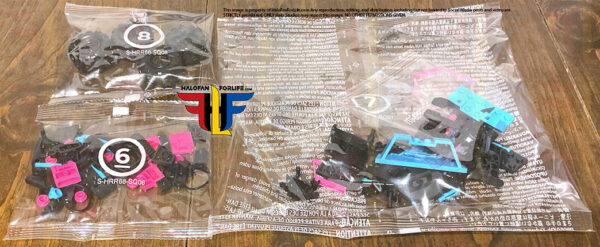
Bags 6, 7, and 8. Wow, already?!
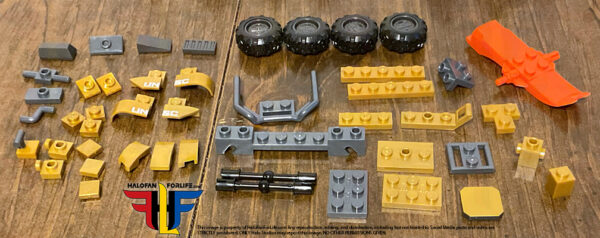
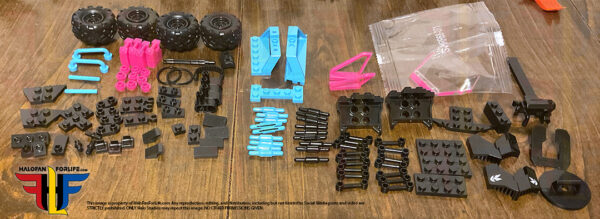
And those pieces sorted out. Upper left is bag 8 pieces. Just the tires, preassembled. To the left of the crack in the table are bag 6’s pieces and to the right, bag 8. The windshield comes in a protective bag. As you can see, this is where the color finally comes into the build!
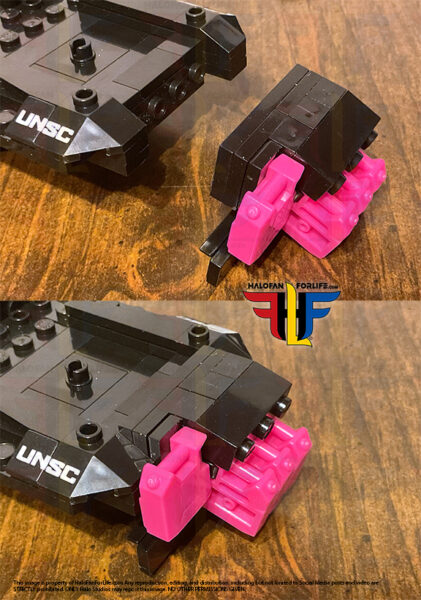
We start of this portion of the build with the gas cans and attachment. That’s a really bright magenta.
And that assembly added to the warthog’s rear.
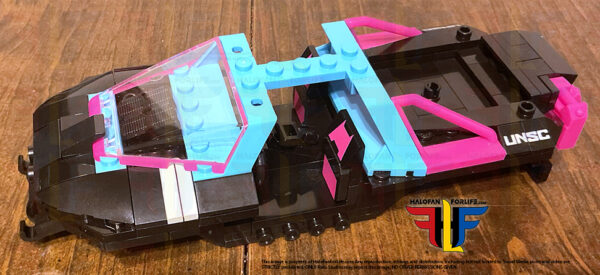
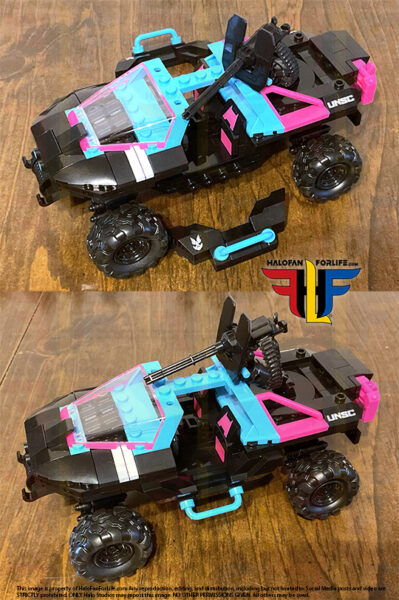
In the next steps, we added the majority of the bright color pieces. These really make it look like the Neon Superfly coating! For those of us old enough, these colors are what we grew up with in the 1980s. Yeah, I’m an old fart….LOL
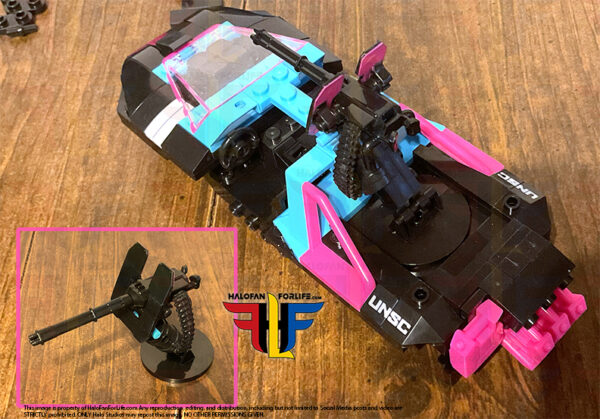
Next we build the turret and add it to the back top rear of the warthog. Take note that the protective guard is black outward facing and magenta on the inside. I dig it!
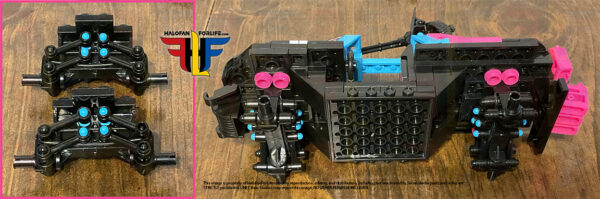
The next steps are my least favorite of the build. These shocks are not so easy to put together, even for a seasoned pro, like me. Since they include a small rubber band, you have to stretch over pins, you have to be careful or either the band will slip out of place or the outer parts will go flying out of your hands. While they are amazing once built and work quite well, this is the most and only frustrating step of the build….Yikes.
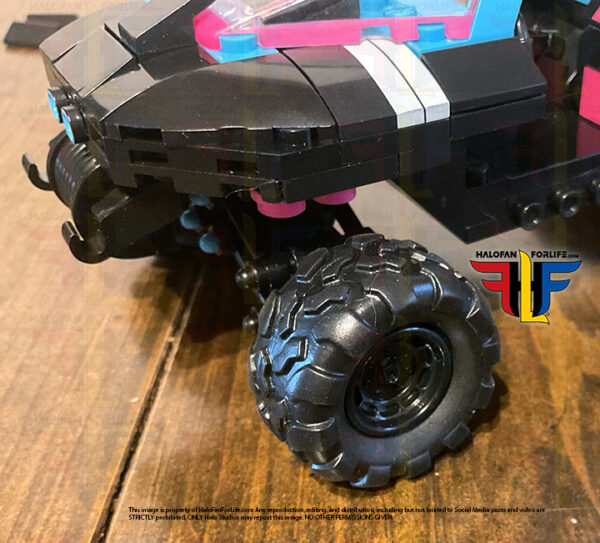
With regards to the tire treads, they are preassembled facing certain ways. Take note of which way they are facing, so that when all four tires are on, they all face the same direction. For me, this is an important step.
The last few steps are building the side panels. I do very much like how this part of the build is constructed and attached. You can see in the bottom pic, the completed hog. Isn’t she a beaut!
The leftovers from 6,7, and 8. On the right, not much could be built from those.
Here are ALL of the leftover pieces I had from the set. These will get put into parts bins. Who knows when they be called upon for a build? I know for sure the green 2×2 books will be used VERY soon…Stay Tuned.
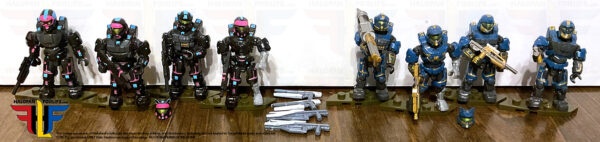
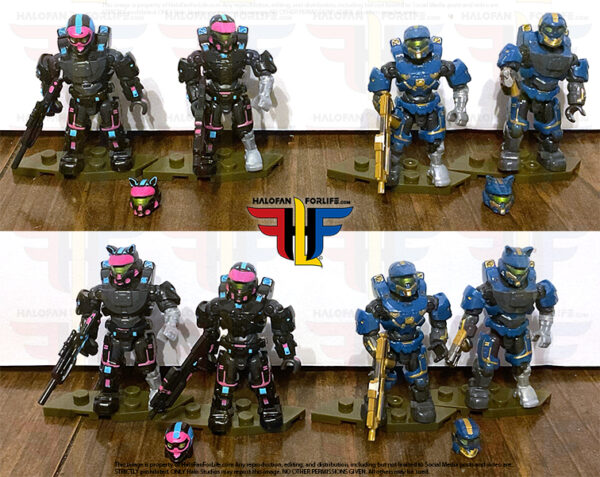
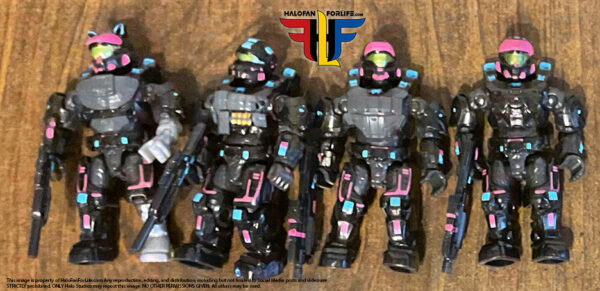
Now, with regards to the figures, I am slightly disappointed that we didn’t get extra standard parts for the left arms and legs, to replace the robotic parts. So, I decided to pop and swap those. I”m not a big fan of that one helmet. So, I swapped it out for the Cat Ears one. As well, I gave the robotic limbs to that spartan as well, since all of the limbs are the same for each respective squad. Again, I’d have preferred to have all regular Spartans AND the option to add robotic limbs, if we wanted to. Below, you can see the before and after pop and swaps.
Neon Superfly Squad! This coating is STILL my favorite in all of Halo! And wow, does it look great on these mini figures.
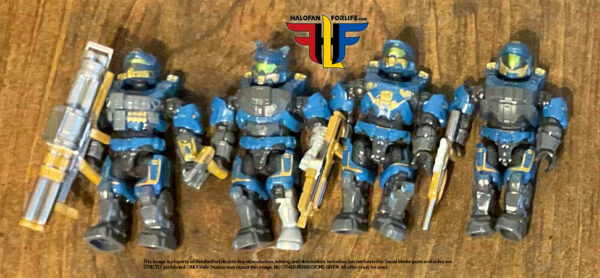
And the Estate Gold Squad. I’m happy that the community picked these two coatings as the make for a good contrast. These also happened to be the same ones I picked in the vote, all that time ago!
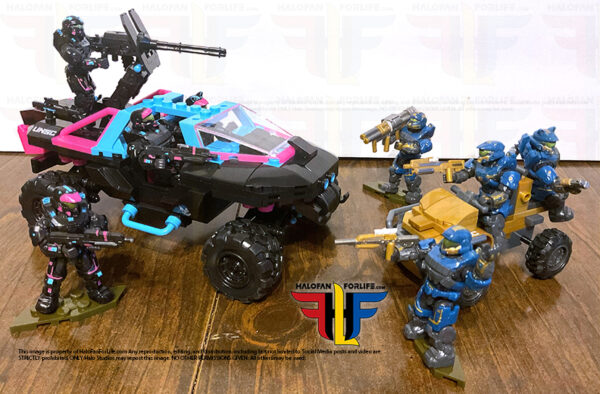
And lastly, the whole set party shot! This set was a pleasure to build (other than the shocks). I”m glad I finally got around to building it. The Neon Superfly Warthog is simply stunning!
Summary: This set was an exclusive to Mattel’s website. It was on there a long time before selling out. Great colors for each team, excellent weapon selections and two cool vehicles make this a set to own!
Overall Rating: I give this set 9 out of 10 medals. Why did I give it a 9 out of 10? • One issue is the lack of the fourth left arm and leg for each team in the regular molds. Again, I would rather have Spartans without robotic parts. (Anyone want to trade my robotic parts for you regular parts…LOL) half point off. • The only other thing was that darn shock assembly. I used some not so family friendly words when putting that together. half point off.
Here’s my opinion on the break down of the value of this set. (In US dollars) • Each figure with a weapon and a stand is worth $5, given their extra detailed paint application. Total $40 • Each extra helmet (4) I value at 50 cents for a total of $1 • Extra Campaign Weapons I put at 50 cents each for a total of $2 • The warthog is the real gem here. I put that value at $25 • The Mongoose I’d say is $3 TOTAL: $71 (before tax and in U.S. dollars)
Given that the set costs $65 US before tax, I find this set slightly above value.
Do I recommend it?HECK YES! The sheer amount of figures, weapons and a great color Warthog just make this set absolutely worth it!
If you have any questions about this set that I didn’t cover in the review, please do not hesitate to ask me. E-mail me at sal@halofanforlife.com.
If this review gives you an informed decision on whether to purchase the toy or not, please consider a small donation (50 cents) to the blog.You can donate via PayPal to jedisalpitt2002@yahoo.com. Or just click the paypal link at the right on the main page of the site. It’s much appreciated and helps ensure that HFFL stays registered/active on the internet. Thank You.