Forge ideas for Halo 4.

I just posted this over on HaloWaypoint.com. It’s in response to another person’s thread about ideas for forge in Halo 4:

Personally, I’d love two main things. A PLAIN ground map. No raised or depressed areas, just plain FLAT! This would make placing buildings SO much easier. No more would we have some buildings IN the ground. Within this map have the abiulity to place hills, mountains, etc. MORE natural stuff please! Not to mention trees! (Not those gawd awful rocks we’ve already been given in Forge, though they can be included too.)

A SPACE map. Again, can be completely devoid of ANYTHING. Have a few markers in place while in forge so you know/see the clear boundaries as well have a marker for exact center of the map. From there would could make epic space maps for Banshee Vs Broadsword or Sabre fighting (I mean come on the Sabre was freakin’ awesome in Reach…and Halo 4 is only about 5 years later. Makes sense Sabres would still be in action…) Beyond this, we could build our own capital ships and have teams fighting within, around, inside, and outside of them.

These two maps could EASILY be done for Halo 4. Add some special items only for those maps. Again, LARGE Hills, and trees for the plain ground map. Make it an island if you want so we have clear boundaries, but make it BIG!

How hard would it be to make a space map? Really? Nothing in it at all. Mind you I LOVE Impact. But I’d really like a clean slate blank map to start.

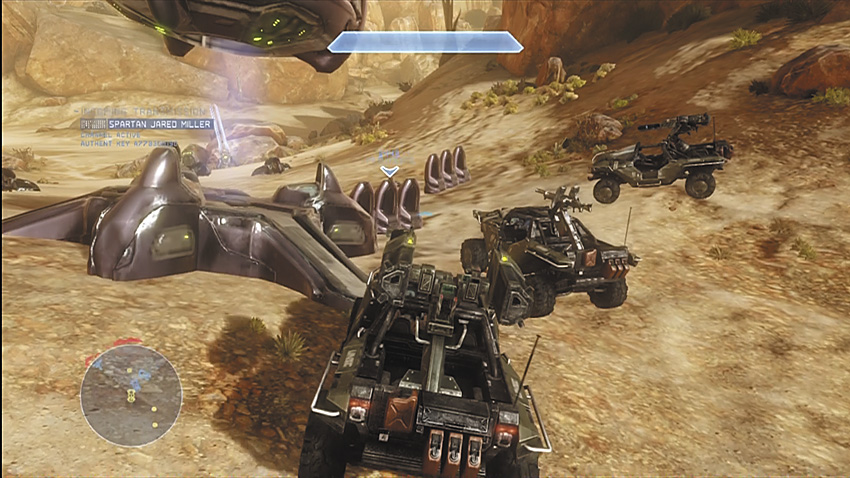
Having a Pelican in forge would be awesome. Even if it’s not pilotable. Just a prop piece. Maybe something for Extraction or Dominion.

Same with a Scarab. Make it stationary. Still have turrets on it. Can’t blow it up. But would be great for Extraction and Dominion. The Scarab is such an Iconic vehicle in Halo.

As for Elephants and Mammoths. I’m VERY surprised these aren’t in any maps. Okay, so the Elephant is Bungie/old. Fine. How about the Mammoth though? You (343) made it for campaign. Make it like the Scarab idea I have above. Not moveable, but as a base.

Hell, how about a map with both a Scarab AND a Mammoth on it. Each are a base. How freakin’ awesome would that be? Man, I’d play the hell out of that map! Not to mention take TONS of screenshots!

Whew, okay, I need to settle down….Getting the ol’ Forge juices flowing…LOL

-Sal

Spartan Ops, Mission by Mission: Episode 1 “Departure”, Mission 2 “Sniper Alley” (or SpOps 1-2)

Episode 1: Departure; Chapter/Mission 2: Sniper Alley

Map: Sniper Alley
Objective: Disrupt Covenant energy supply

Walkthrough:

Recommended Loadout: I go with jet pack and the DMR/BR combo. At the least be sure to have one of them, preferably the DMR. Carbine would be ok,but not as good as the DMR here. Besides, with plenty of UNSC ammo crates, going with UNSC weapons is a great choice.

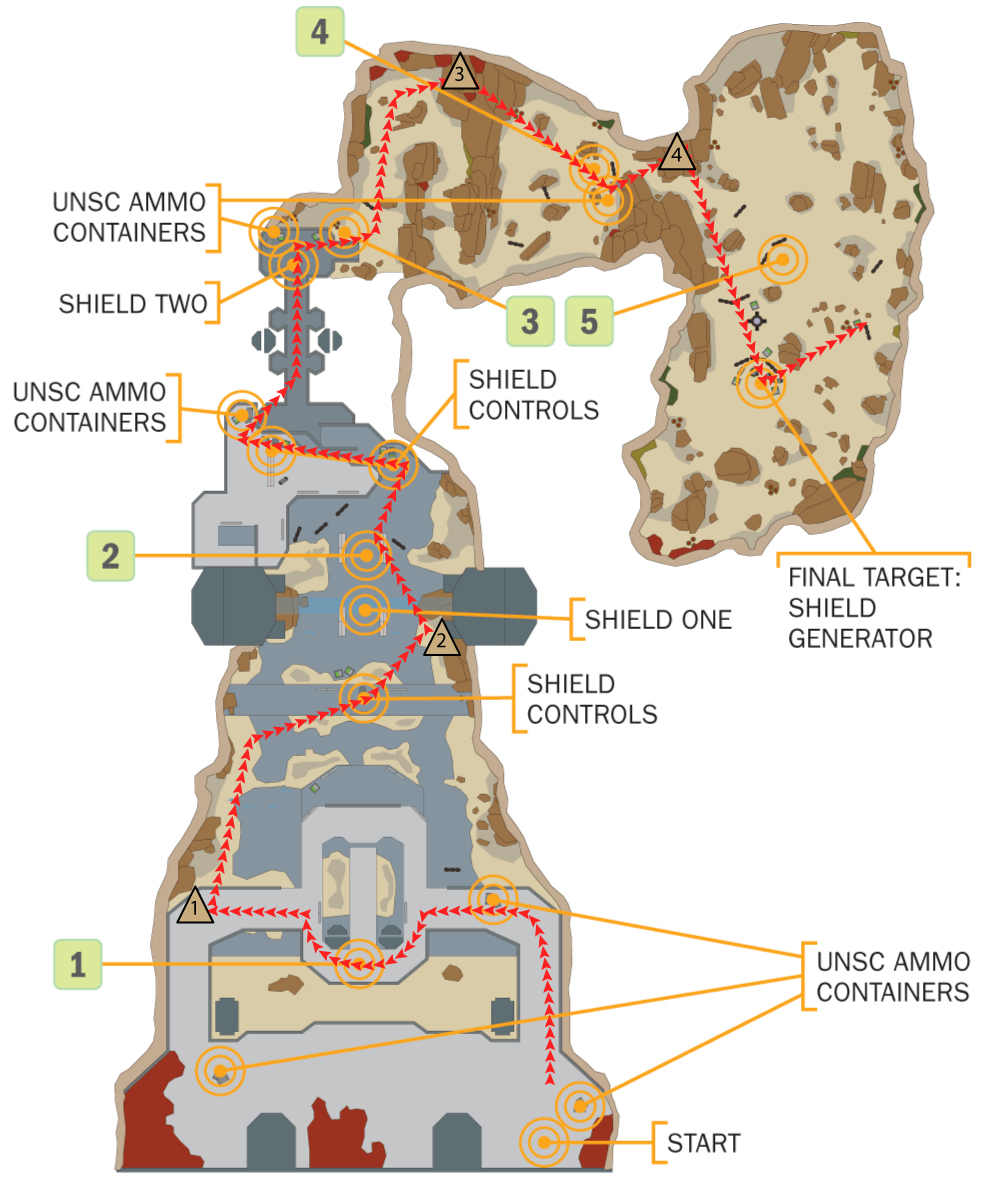
At the start of the mission, you face a few grunts. They’re easy to take out (point 1-green box). Move along the path I’ve shown and get ready to camp a little (camp spot 1-as noted by the triangle-as in camping tent…). Pick off the jackals, grunts, and elites before moving to the first objective, shutting down the first shield.

Now I highly suggest once you’ve lowered the shield to go to camp spot two. There is a DMR there if you didn’t choose that in your loadout, so pick it up now. You’re going to need it! Stay right there and pick off the Jackal Snipers first as they are deadly. Next you can tag the grunts and the few elites here, point 2.

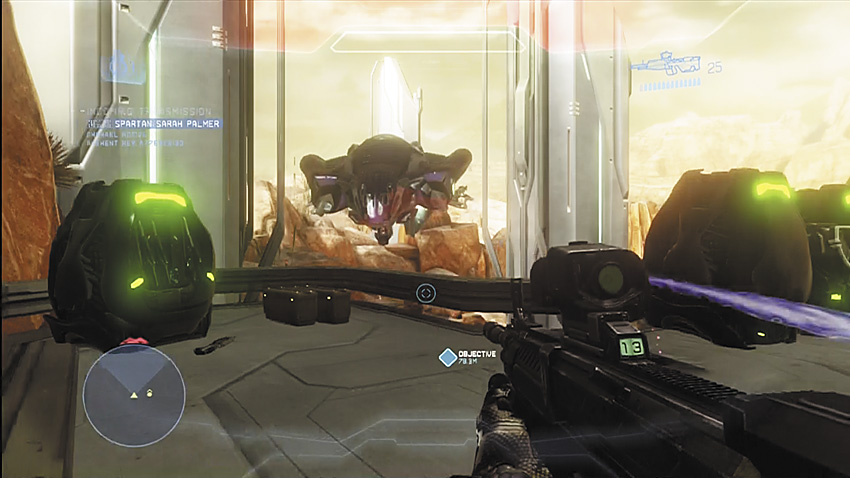
Moving up and to the right a bit, BEFORE taking down the second shield, move the the lower shield control and through the gap in the shield, take out more jackals. This REALLY helps as most of the time they don’t shoot back, especially if you stay far enough back. It also makes it a lot easier to get through the mission after you’ve taken down the second shield. Click the lower shield control first, then move to the upper shield control. Before clicking it, reload your weapons and pick up more ammo at the crates located close to the control seen below:

From here you can pick off most of the current enemies. Move across the bridge, pick up more ammo at the crates and wait a little bit for some elites, point 3. Take them out then move to camp spot 3. This spot is on a rock ledge. Just below you (on the path you were just on) is an ammo crate. So it’s good to stay around here for a bit, being able to get more ammo as needed. Here you’ll face many grunts, elites, jackals, and over that rock on the ground below are some sniper jackals. From your camping perch it’s easy to pick them off.

At point 4 there is another ammo crate. Get yourself resupplied. Move close enough to the checkpoint to trigger it the move to camp spot 4 (you’ll need jet pack for this spot). It’s higher up on the rocks and gives you a great vantage point. Beware the Sniper Jackals in the distance at a Covie sniping tower. Take them out and any other snipers. There might be one by the cliff wall Shade turret. You’ll get an ordnance drop around this time. You DO NOT need it. The DMR is more than enough to handle the enemies. Trying to get the ordnance drop may get you killed. On easier levels fine. But on Legendary…no way. Stick with the DMR, it’s your friend.

Once you’ve eliminated all the remaining Covies, you’ll be given a checkpoint. Go to it, click the button and haul ass. Really, you don’t need to get too far away. I usually make it a game of getting to the shade turret and blowing away the sniper tower before the area is bombed. No extra points there, just something fun to try.

When the bomb decimates the area the mission is done and a Pelican comes to pick you up.

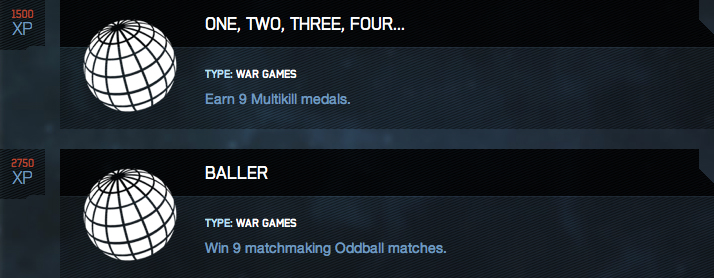
Commendations you can work on with this mission: Jackals! Especially Sniper Jackals. There are also a few Zealot Elites that you can get here to.

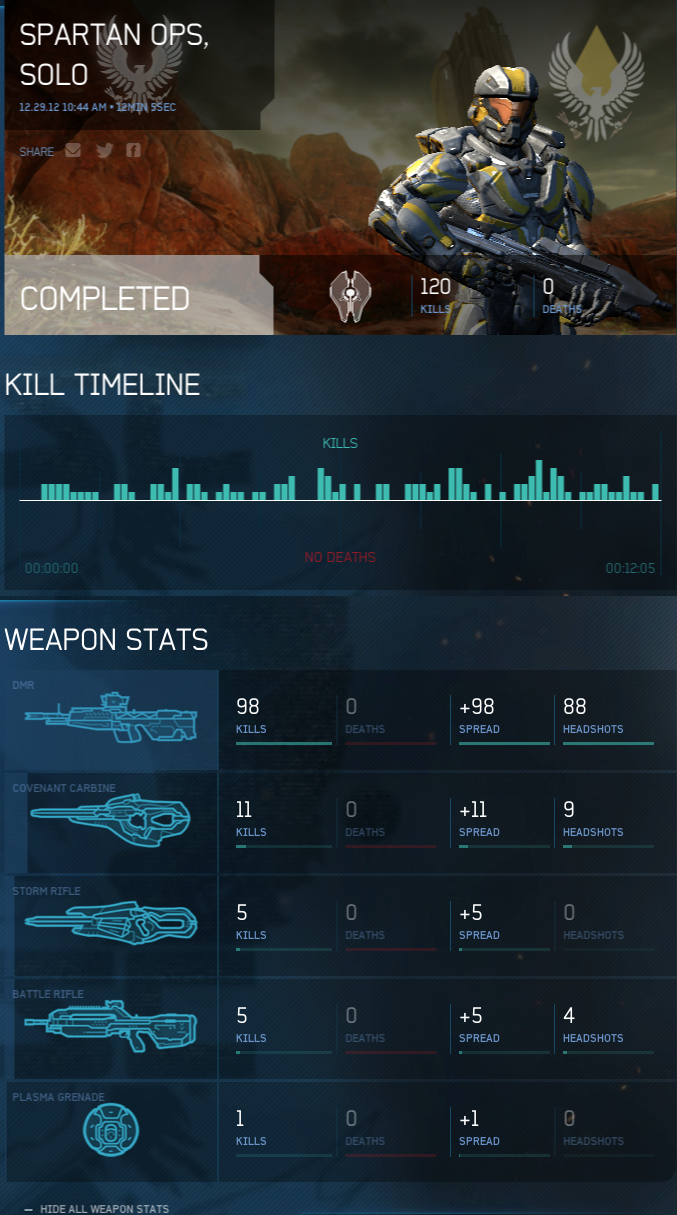
Here are my weapons stats for the mission (I’d have included the enemy stats as well, but for some reason they weren’t saved on Waypoint… weird. Though as you can see I had 120 kills):

As you can see, I made judicious use of the DMR. Yes, I did this on easy. It’s just to show weapons used and enemies (had they been recorded…).

And yes, I’ve done all the missions on Legendary. I’m just doing them again on easy for the mission by mission articles.

-Sal

Spartan Ops, Mission by Mission: Episode 1 “Departure”, Mission 1 “Land Grab” (or SpOps 1-1)

Episode 1: Departure; Chapter/Mission 1: Land Grab

Map: Quarry
Objective:  Neutralize Covenant forces

Walkthrough:

Recommended Loadout: Mid to Long Range weapons. Though since you should be using vehicles for this mission most of the time, weapons choice isn’t as important.

This mission starts you out at a small UNSC camp. There are several Warthogs available, as well as ghosts. I highly recommend taking the gauss hog.

If you are playing alone, make sure a marine gets in the gunner position and you drive. (TIP: You will get credit for every kills the marine gunner gets!) If you choose to gun, a marine will pop into the driver’s seat. Be forewarned, they aren’t great drivers and will likely take you places you don’t want to go.

If you’re playing co-op either by chapter or matchmaking, if you are the driver you’ll get wheelmen for every kill another player spartan gets as your gunner. (TIP: This mission is GREAT for wheelmen and you can rack up that commendation QUICKLY here.)

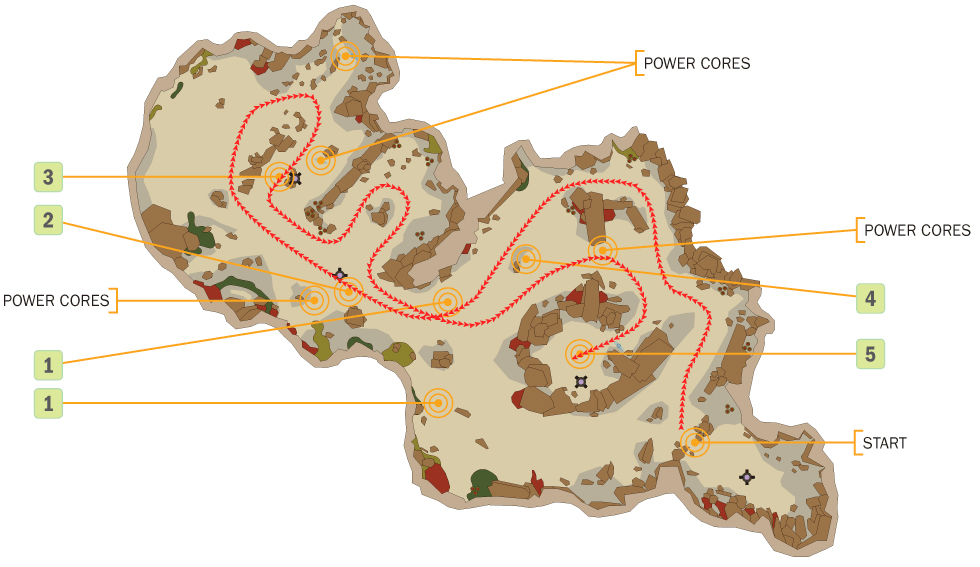
Now usually I see other players go to the left first. Easy enough to get that power core and snag a wraith. However, as you can see by the graphic above, I choose to go to the right. If you’re running a gauss hog it’s EASY to mop up the ghosts you encounter then move on to the power core that is protected by the Elite. He has a Fuel Rod though, so keep your distance. It’s not necessary to kill him, though it makes the mission just that much easier.

At point 1 you will engage various Covies. There is a wraith you can use. Your choice if you want to switch off to that from the gauss hog. I still prefer the hog as you can aim your shots much better and the hog is swifter in combat.

At point 2 you’ll come upon another power core, shade turrets and some sniper towers. Take out the turrets, then towers, then hit the core. Be sure you got the grunt in the tower as he can be pesky.

Phantoms drop some ghosts along the way so be sure and take them out before advancing on to the next power core. Kill off any Covies you find, hit the other power cores (point 3) and start making your way back to the LZ.

If you took the right path from the start you won’t have to deal with that Elite with the fuel rod (point 4) near the end of the mission. (This is one reason why I suggest taking this route instead of going left first.)

At the LZ (point 5) a Phantom drops a bunch of Covies including Hunters and some Elites. Take your time with this and shoot from afar. No need to rush into the mix and die. Kill all the remaining Covies and the Pelican will come pick you up.

Mission End.

Commendations you can work on with this mission: This mission is good for the Wheelmen commendation and covenant kill commendations in general.

Thanks to PrimaGames for the map graphic. I added the arrowed line.

Oh on that note about Prima, I have to say a HUGE Kudos to them for an AWESOME Halo 4 guide book. I HIGHLY recommend it! I got mine for $19.99 at Amazon.com. Normally it’s around twice that much. Getting the book will also give you a code to get the book digitally, which is FANTASTIC!

-Sal

Spartan Ops mission by mission articles start TODAY!

I’ve been working on these for sometime now and am still continuing to finish writing the articles. For the past several weeks I’ve also been working together with POD Dust Storm of Podtacular for a collaborative effort to bring you SPartan Ops Podacst. Those will be coming soon.

In the meantime, starting today and running until Episode 5, mission 5, I’ll be posting a breakdown of each mission, it’s objectives, tips on how to get through the mission, enemies engaged, achievements you can unlock, commendations you can work on, and maybe even those RvB easter eggs, LOL.

So stay tuned today for “Spartan Ops, Mission by Mission: Episode 1, Mission 1”

-Sal