Custom block built Covenant SDV Corvette

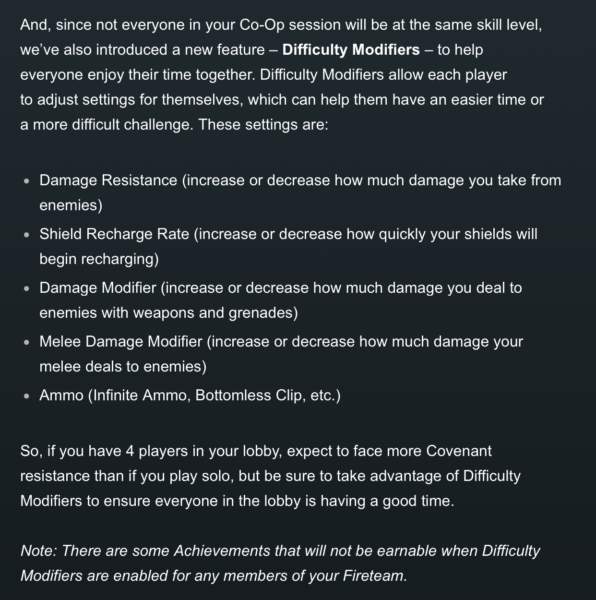
In my ongoing series of custom Halo block built sets, I came across this one on AliExpress. It’s a small set at “midi” scale. Affordablility was very good. the build had a couple of issues, that I’ll talk about later in the article.

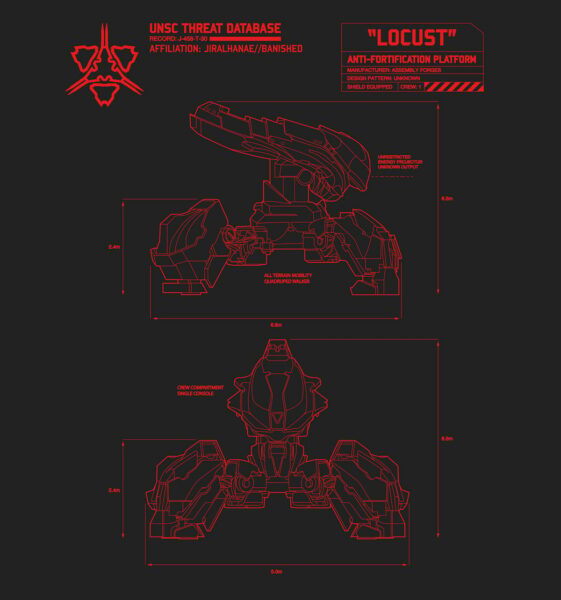
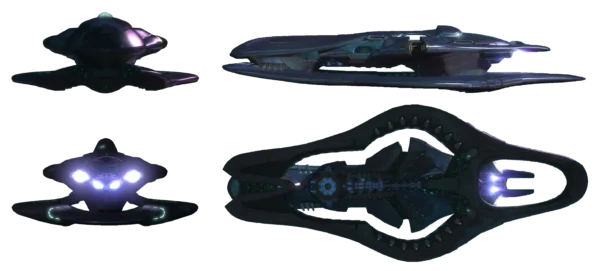
First, let’s look at the in-game model.

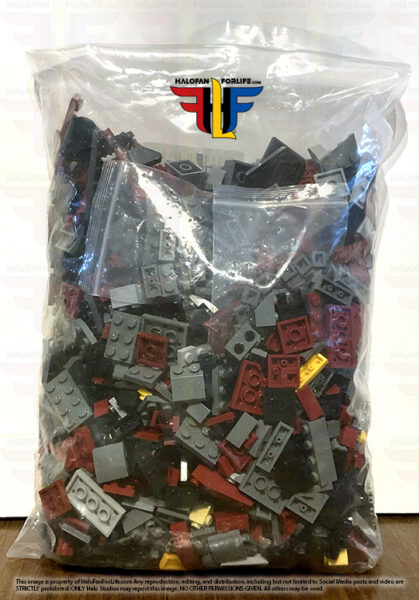
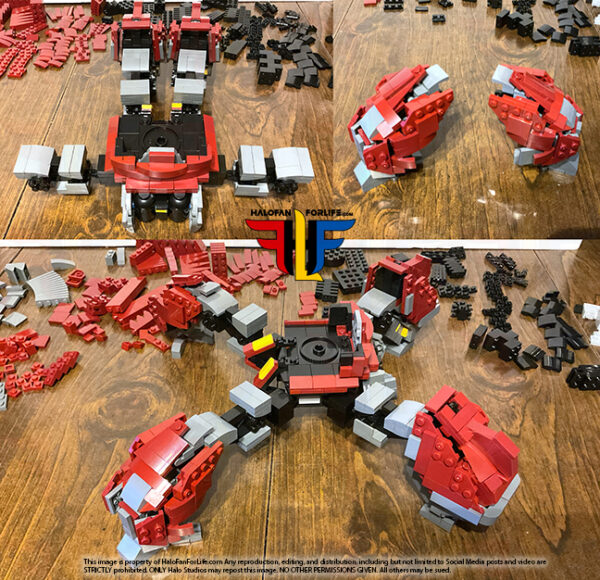
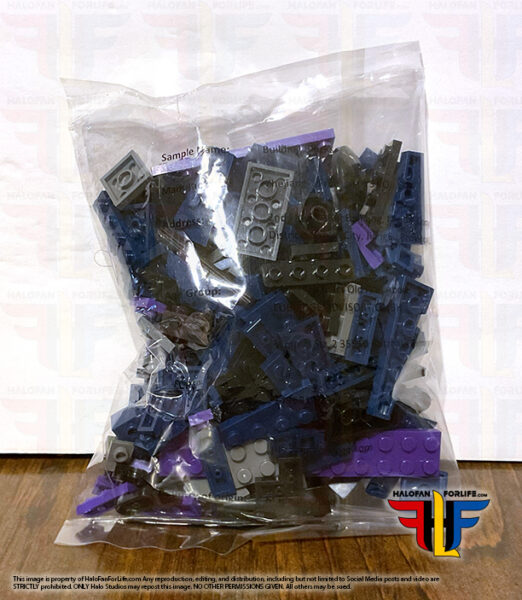
Okay, now let’s get into the build. This set comes in just one bag. You must sort them all out. No smaller bags for sectional building. Alas, such is the way with custom builds. They are not Brand name blocks.

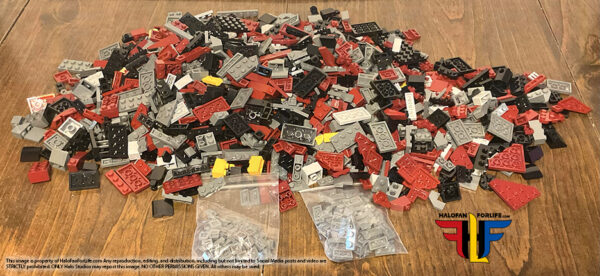
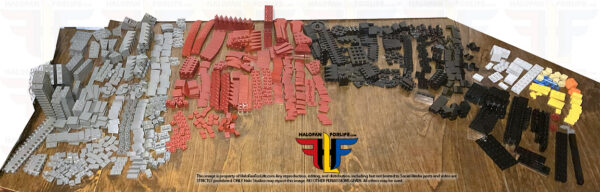
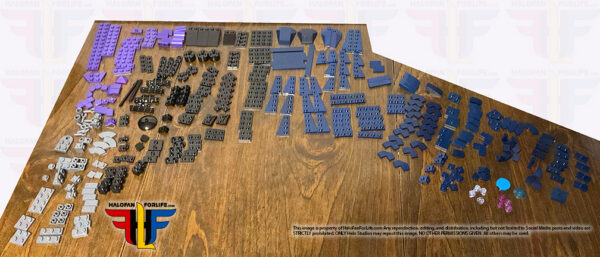
And here are the pieces sorted out. Yes, I blocked off that portion of my dining table that had other stuff on it that did not pertain to the build.

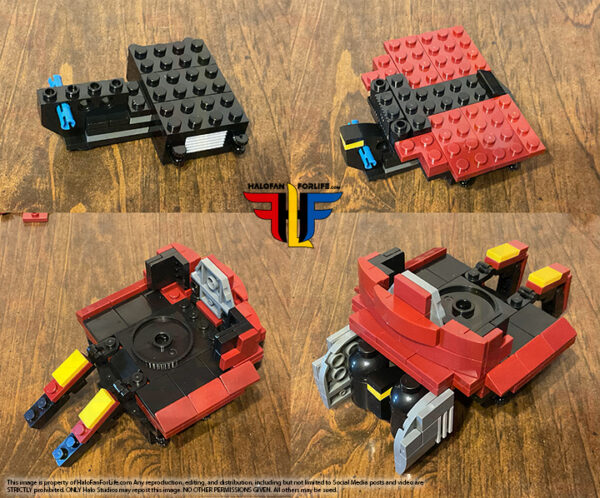
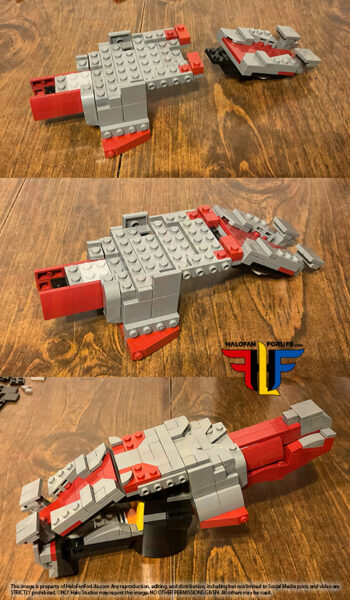
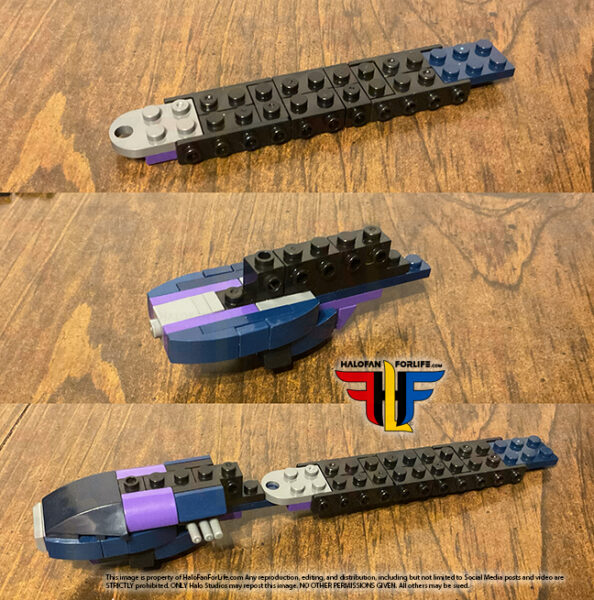
Now we get to building. In this first set of pieces, we start to build the spine of the SDV Corvette, See below is the mid, then, bottom front portion, then forward sections and middle spine.

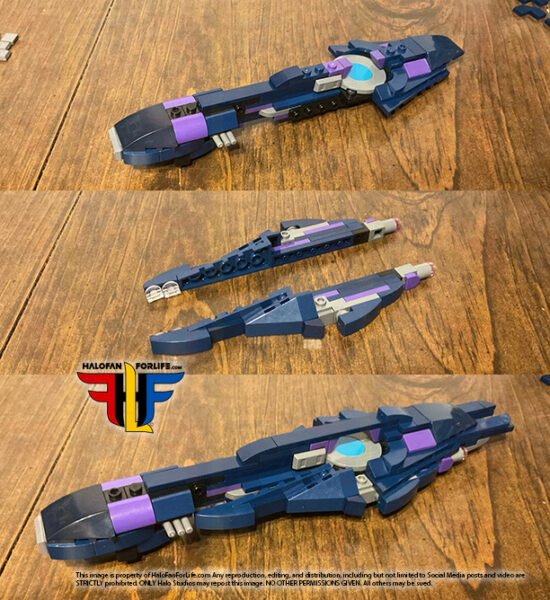
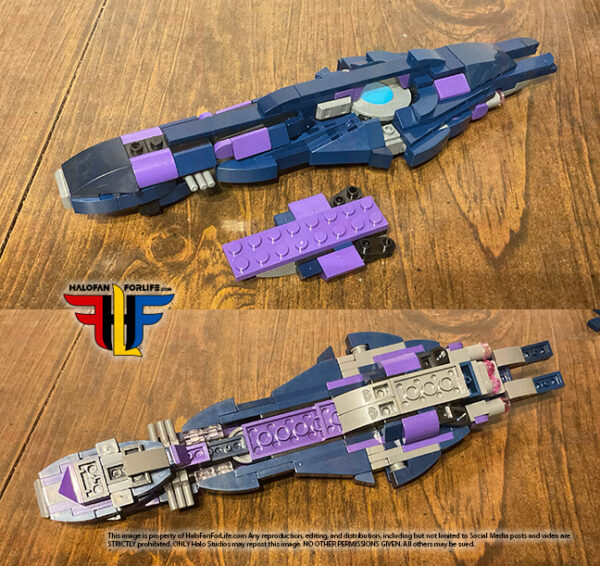
The main body is built, as are the side sections, the are the attached to the body.
Oh, I should make note that I’m NOT a fan of those light purple parts. I will look to replace those with as close as I can to that dark blue, in parts. If I do, I’ll try to remember to post an update at the end of this post at a later date.

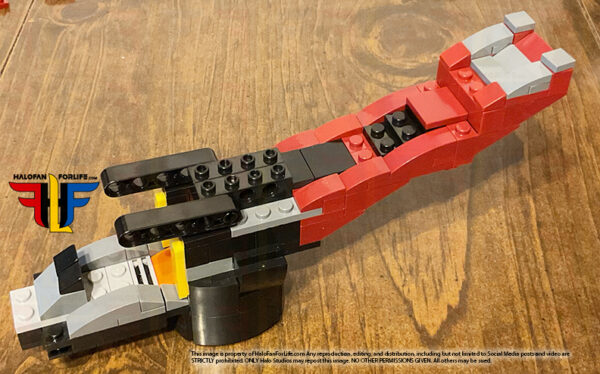
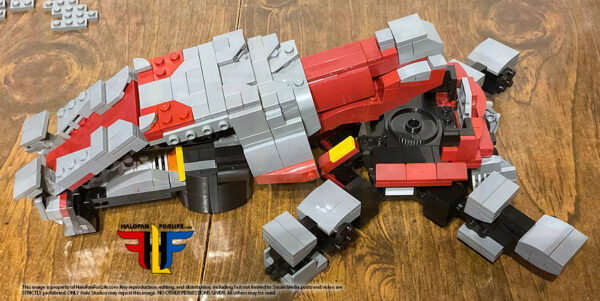
Next a small section of the underbelly Is built and added.

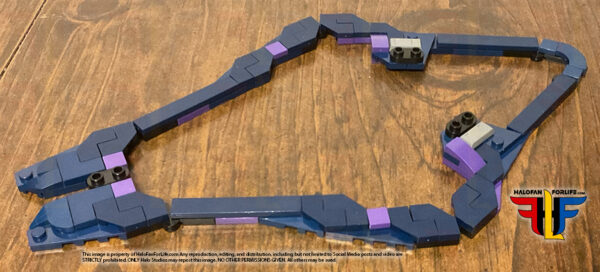
The thin bottom “ring” for lack of better wording, is built. There were issues with this, that I address next.

The instructions themselves call for a different way of building that what shows from the designer’s page of this section. It works fine as designed but, I think I’d rather have had it as is shown in the graphic above.

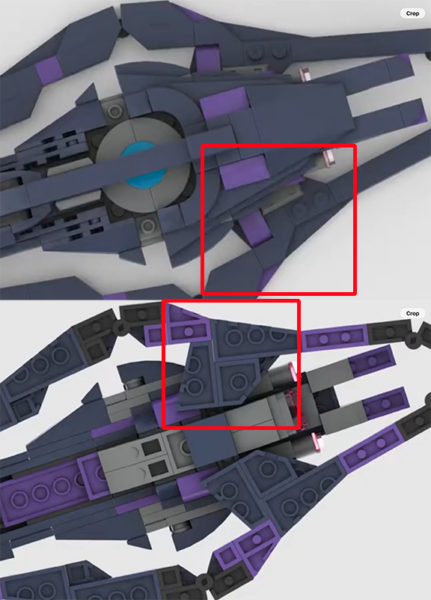
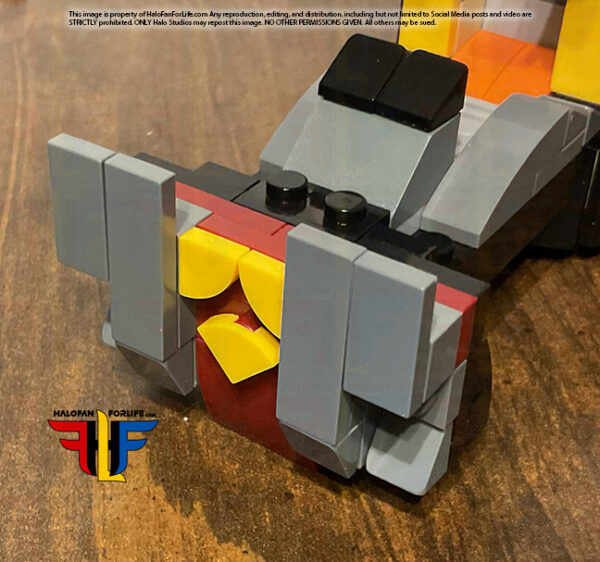
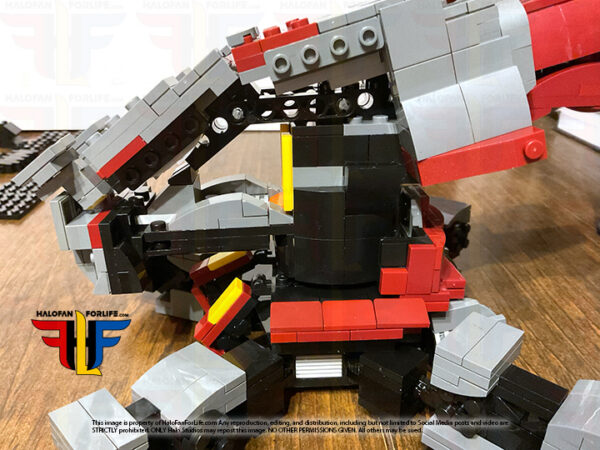
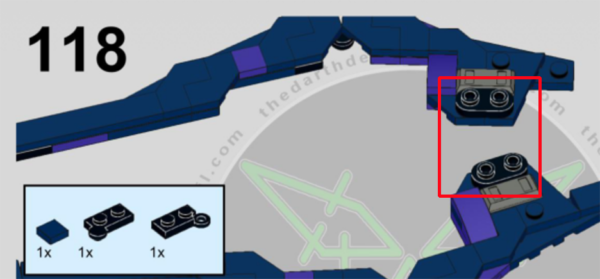
The real issue comes with those black pieces that are highlighted. Due to the shape of the angles pieces in the above picture, these black pieces are not able to stay in that position.
Instead, I had to point them 90 degrees inward and attach the ring to just the inner most studs, instead of both studs. This makes that portion of the build weak in connection. I used super glue here to make it a stronger connection.

Another issue that can come from getting custom parts is that they are not the same as big brand name parts. In the case of the pic below, the “T” part of the underside of the black piece had to be shaved away, in order to allow for a stud to be attached at the middle.
This was not a flaw of the designer but, rather the manufacturer, for not seeing how this part was going to be utilized.

So…once I got those issue sorted out, I was able to add the bottom “ring” section to the body of the model.

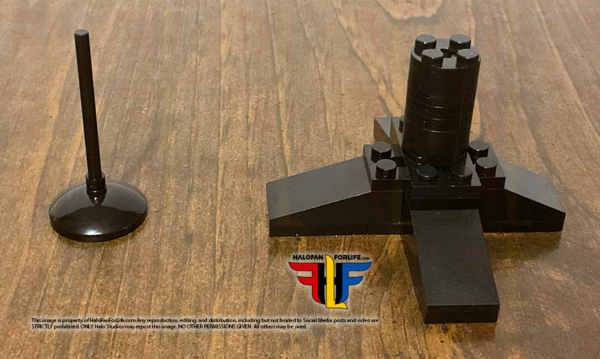
Thankfully, this model comes with two small buildable stands,

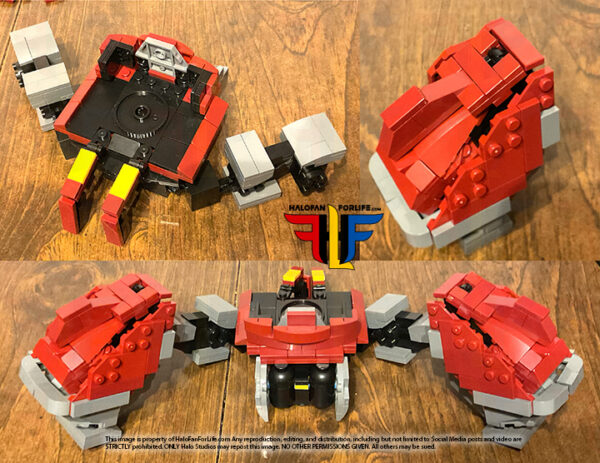
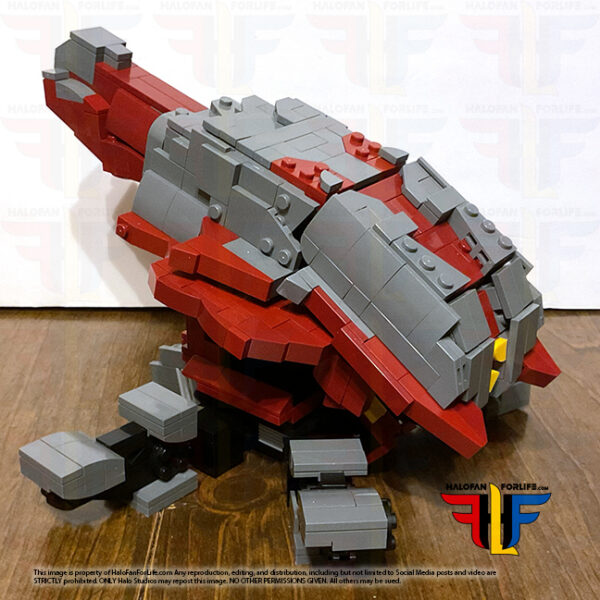
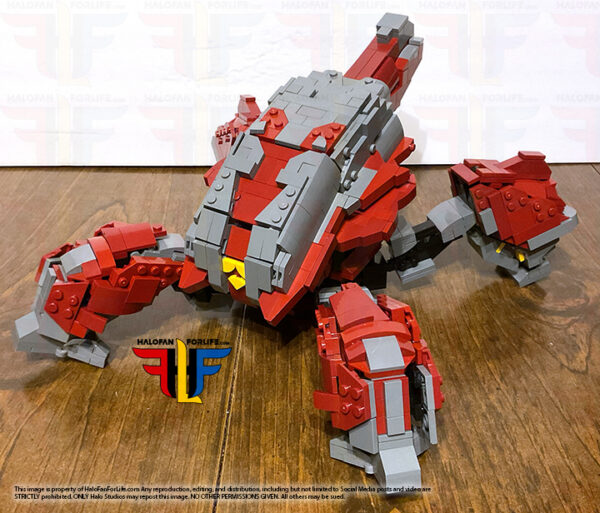
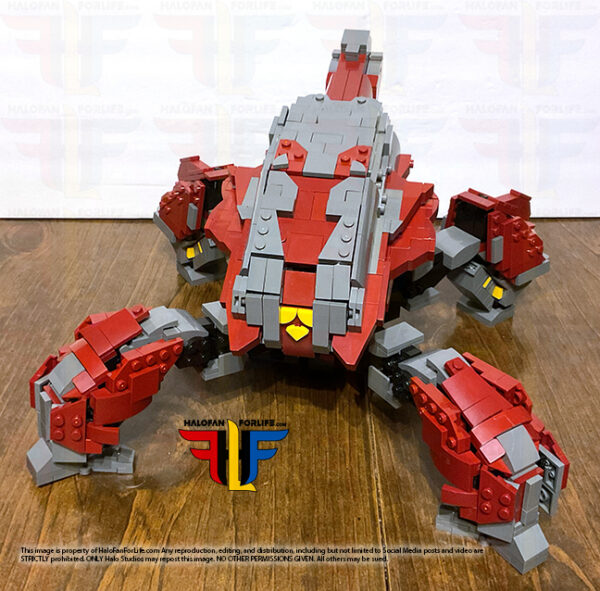
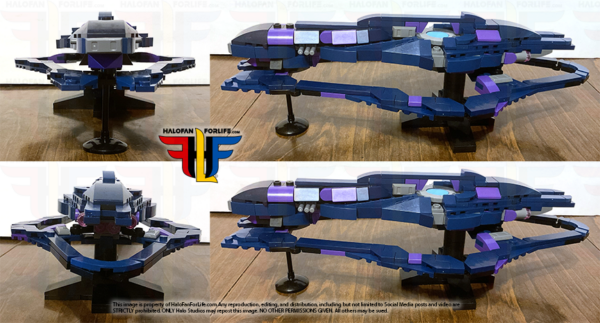
As per usual, here are my orthogonal views of the completed model, on it’s stand.

Here are ortho view of the in-game model to compare.

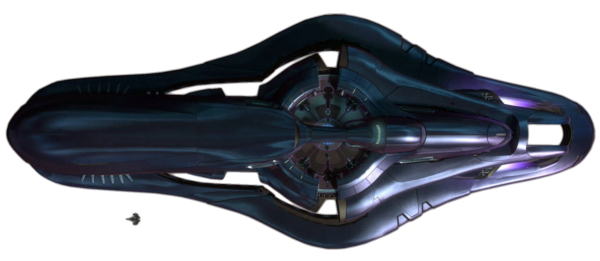
Note the Sabre at scale in the above pic.

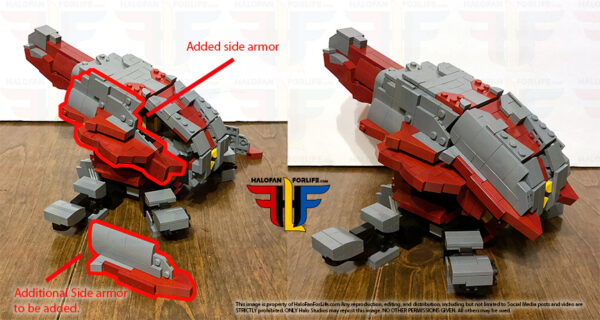
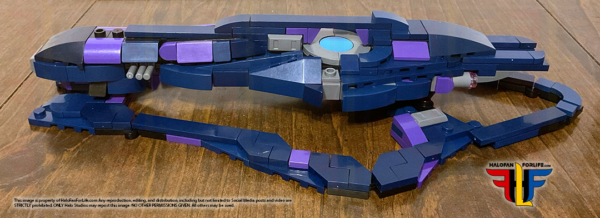
And below, the comp letter model in 3/4 view. It’s very nice, but for those light purple parts that really stand out, in a bad way, IMHO.

Overall, I’m fairly happy with this set. The final look is great, though again, I will look to change out those light purple parts..

At 325 pieces, and a cost of $21.71, the cost per pieces was fantastic. So the set is affordable. This makes the light purple parts palatable. Hopefully those will be cheap to buy and replace.

So then, do I recommend the set? Yes. My only complaint is with the light purple piece and the slight reworking of the underbelly. I really wish Mattel/Mega/Mattel Brick Shop, were making these sets. But, in their absence, I need to fill my desire to build Halo sets. Unfortunately, I do not see Mattel making sets for awhile, until the next main game.

If this review gives you an informed decision on whether to purchase the toy or not, please consider a small donation (50 cents) to the blog.You can donate via PayPal to jedisalpitt2002@yahoo.com. Or just click the paypal link at the right on the main page of the site.  It’s much appreciated and helps ensure that HFFL stays registered/active on the internet. Thank You.

-Sal

Halo Campaign Evolved Q&A (via HaloWaypoint)

So just today (June 19, 2026), Unyshek addressed some big questions concerning Halo Campaign Evolved. I’ve commented on some of them here. If you want to read the full article on waypoint, see the link at the end of the article.

Oooof. There’s going to be lots of disappointed Halo fans with some of these reveals from the latest Halo Waypoint blog.
To be fair, I didn’t expect any of these things to be different than what they are. But for some of them, I had hoped so.

No more Collector’s Edition. As stated, “This was always intended to be a limited edition”…

They do respond to scalping/reselling of these. However, they say, only a tiny percentage “showed suspicious behavior”. Um, I do not know what they consider tiny. I do know that between myself and my best friend, Mario, we got about 90 eBay listing of these taken down. And that wasn’t all of them. Sigh

No theater mode or photo mode. Sigh again. I figured as much. However, they do not need to stay THAT close to the original. There hasn’t been a campaign mode in any 343/Halo Studio games, that wasn’t a remake. I think it’s fair to say, there may never again be a campaign theater mode. This is disheartening. Many people, including myself spent hours/days getting epic screenshots in Halo 3 and Reach.

Mark IV is only available in the 3 prequel missions. Meh. Would have been cool in the main campaign.

Same as the stanchion only being Johnson’s weapon and not useable in the game.

Also as expected, cut scenes are pre-rendered. So no custom armor in cut scenes. That’s a small bummer.

Wth regards to LASO, thankfully not all 42 skulls need to be on. This is a positive for me. Though, they do promise it will be challenging.

Another key positive is enemy balancing per how many players you have as well as difficulty level.

To coincide with that…

There will be difficulty modifiers! YES! Now those who are not as skill can play right along with others who are. This seems to be similar to how Borderlands plays. Your character/weapons level doesn’t matter. You all compete and play together in the same manner.

Only catch to this is that some achievements will not be able to be unlocked with these modifiers on.

No additional content will be made for the game. So no firefight, no campaign DLC, and no multiplayer.

Well, they pretty much said as much. So, while slightly disappointing, it’s not unexpected.

No demo. Boooooo! Seriously though, I hope in the future, especially for the next main game, there is a demo. Also, I hope other community members get a chance at early gameplay and not the same few folks. There’s a lot more to the community than just those few.

Another positive. Thankfully, we can play the 3 prequel missions right from the get-go, without having to play the main campaign.

So, there we have it. Some positives. Unfortunately, I expect the community to hang on the negatives.
Again, to be fair, most of those things were either not expected or were outright said by Halo Studios, previously, that they would not be in-game.

So take all of this info while breathing normally. And yet still expect a very fun game!

Here’s the link to the full article on Waypoint. https://www.halowaypoint.com/news/june-community-qa-halo-campaign-evolved

-Sal

Custom block built Banished Locust

In my ongoing series of custom Halo block built sets, I came across this one on AliExpress. It’s a big set. Bigger than mining scale. Affordablility was great. the build had some issues, that I’ll talk about later in the article.

Let’s first look at the in-game Banished Locust.

As you can see a lot of angles and detail to the armor. This would seem hard to recreate in block form. But let’s just see how this model played out. Then you decide for yourself, how the outcome was.

As mention, I got this from AliExpress.com. This is where I’ve been getting the custom builds. Though many of them are based off of designs from rebrickable.com.

Ok, let’s start the build!
You get one bag of parts. All of them in one bag. No neat little bags for sectional building. This isn’t main brand stuff here folks. So expect this kind of treatment, when you buy custom block sets.

Here are the pieces dumped out onto my dining table. There were two small bags of pieces. Each containing a specific type of part. Thank goodness…. Those small parts can be a hassle and easy to lose.

Here are all the parts sorted out. This took a little while. Thankfully, most of the parts are three colors, with a small smattering of other color parts. And yes, I blocked off other parts of my dining table in the edit in photoshop. It’s not messy, just not related to the build.

So we start with building the body. Pretty standard. Not the (fuel?) tanks at the back, at bottom right of this pic. Also, those little jutting black pieces in the top left are for the legs. Ugh….big issue there. Again, I’ll talk about this later.

Next come the back legs and pincers. The side armor on the legs is not held well onto the legs. Frequently during the build, these would pop off. So where needed, I began glueing. It’s NOT something, I like to do. But with the custom builds, it often becomes a necessity.

Now the front legs. As with the other set of legs, side armor becomes an issue with staying on. And again, I had to glue it in place. At top left, the model looks more like a mech, than a Halo Locust.

Now starts the “Head” of the locust. This section was fun to build.

Instead of a clean triangle of yellow, the designer opted for these 1×1 curved tiles. Not accurate, but kinda neat.

The top of the head is built with a hinge joint, so it follows the shape of the head, without having to use a lot of heavier blocks to make the shape.

The main part of the head is done and ready to be attache to the body.
NOTE: At this point, I deviated from the build. The leg joints were so weak that trying to build side armor onto the head would have the legs popping off and random pieces coming off too So, I fixed those and then built the rest of the head separate from the body until it was done. THEN added it to the body. Trust me, this will save you a LOT of frustration, should you decide to get this for yourself.

Now, there IS room for a figure. The “cockpit” seems to be designed for this. Though I did not add a figure at this time. I know… I should have, just to show it.

There are two sets of side head armor sections added. (Highlighted in red) These also do not stay well in place. Especially the one marked “Additional Side armor to be added”. So once again, GLUE.

The head is now complete and ready for the rest of the legs to be added to the model. I very much like how this part of the model looks.

So, as you can see, when the legs are added, the whole model sinks at the middle, due to weight as well as very weak joints. THIS is my biggest issue with this model. It should be able to stand on its own. Especially without pieces falling off. This became my biggest frustration with this set.

So, I built a small stand with the leftover parts to prop up, underneath the main body and keep the legs in correct position.

Below is a graphic I found on one of the Halo wiki sites, related to the Locust. I figured, I show it here as well.

Overall, I’m not so happy with the leg joints of this set. The final look is great, if oversized for figures. But again, without it being able to stand on it’s own, that’s a big detractor for me.

Again at 1413 pieces, and a cost of $58.70, the cost per pieces was fantastic. So the set is very much affordable. This makes the leg joint issue slightly more tolerable. Because of the way this is built, I’m not sure if I’ll be able to redesign the legs to have better joints.

So then, do I recommend the set? No. The frustration I had at sections falling off and the leg joints jut being way to weak to hold of the model, without support from a stand underneath, just killed my enthusiasm for the set. I really wish Mattel/Mega/Mattel Brick Shop, were making these sets. But, in their absence, I need to fill my desire to build Halo sets. Unfortunately, I do not see Mattel making sets for awhile, until the next main game.

If this review gives you an informed decision on whether to purchase the toy or not, please consider a small donation (50 cents) to the blog.You can donate via PayPal to jedisalpitt2002@yahoo.com. Or just click the paypal link at the right on the main page of the site.  It’s much appreciated and helps ensure that HFFL stays registered/active on the internet. Thank You.

-Sal